
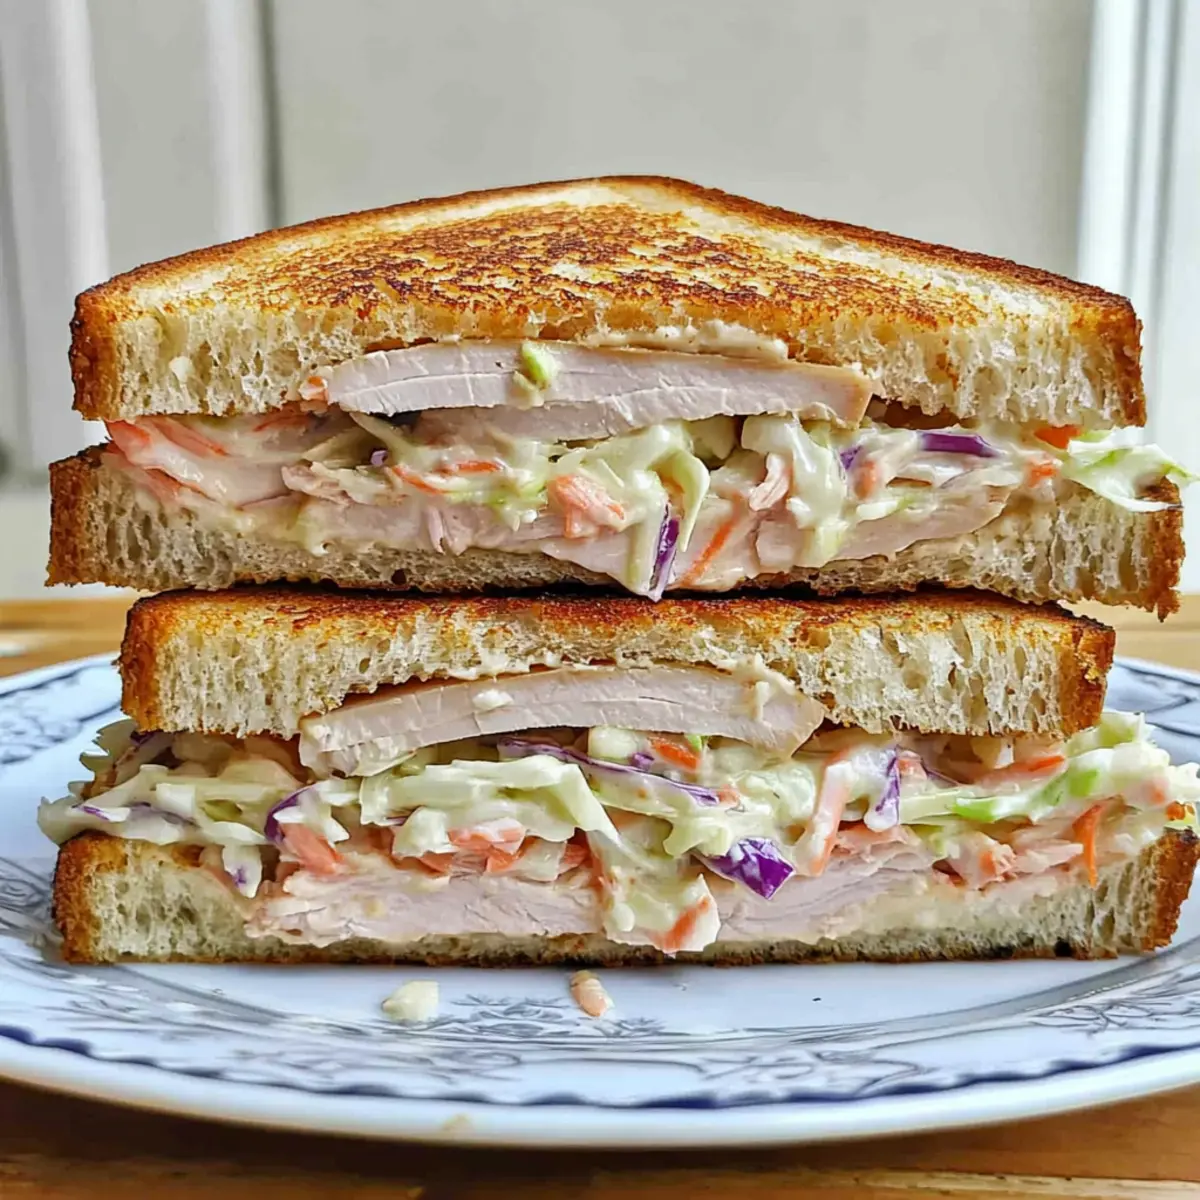
As a warm breeze carries the scent of summer, nothing beats a fresh and satisfying sandwich to savor those lazy afternoons. Enter the Rachel Sandwich, a delightful twist on the classic that brings sliced turkey, creamy Swiss cheese, and crunchy homemade coleslaw together for a mouthwatering treat. This recipe is not only super quick to prepare—taking just 5 minutes—but also allows you to customize it with whole grain, whole wheat, or sourdough bread, ensuring every bite is packed with quality ingredients. Ideal for lunch or a light dinner, this sandwich is perfect for those looking to elevate their meal game without sacrificing ease and taste. What twist will you add to make it your own?
Why Is the Rachel Sandwich a Must-Try?
Fresh and Flavorful: This Rachel Sandwich combines savory turkey with creamy Swiss cheese, all enriched by a vibrant homemade coleslaw. It’s a delightful and satisfying mix!
Quick to Make: With just 5 minutes of prep time, this sandwich is perfect for busy days—or when you want a delightful meal in a flash.
Versatility at Its Best: Customize your experience by using whole grain, whole wheat, or sourdough bread to suit your taste!
Crowd-Pleasing Dish: Serve it at gatherings, or enjoy it solo; this sandwich never fails to impress, whether you’re pairing it with a light salad or a savory soup.
Elevate your lunch game with this classic twist, and don’t forget to check out our Cheesy Chicken Sandwich for more delicious options!
The Rachel Sandwich Ingredients
For the Bread
• Thick Bread – This sturdy base supports all the delicious fillings; opt for whole grain, whole wheat, or sourdough for added flavor.
For the Filling
• Sliced Turkey – This juicy main protein adds savory goodness; aim for about 1/4 pound for a satisfying bite.
• Swiss Cheese – Melts beautifully and brings creaminess; four slices will give you that ultimate texture.
• Homemade Coleslaw – Crunchy and refreshing, it enhances this sandwich’s character; feel free to use a pre-shredded mix for convenience!
For the Dressing
• Thousand Island Dressing (optional) – This tangy dressing elevates flavors; a classic addition that complements the Rachel Sandwich beautifully.
For Toasting
• Butter – A must for that golden, crispy exterior; it turns your sandwich into a warm, comforting delight.
Step‑by‑Step Instructions for The Rachel Sandwich
Step 1: Melt the Butter
Begin by melting 1 tablespoon of butter in a skillet over medium heat. Look for small bubbles to form around the edges, indicating it’s ready. This will create a rich, golden sheen on your bread, so keep an eye on it as it melts and avoids burning the butter.
Step 2: Toast the Bread
Add two slices of your chosen thick bread to the skillet, placing them side by side without overlapping. Allow them to toast for roughly 2-3 minutes, or until the undersides are a beautiful golden brown. You’ll be able to smell the enticing aroma as they toast and brown perfectly.
Step 3: Layer the Cheese
Flip each slice to face upward, then place two slices of Swiss cheese on each piece of bread. Cover the skillet with a lid to help the cheese melt, cooking for about 2 minutes until it turns gooey and delicious. The bread should be crispy while the cheese is perfectly melted.
Step 4: Assemble the Sandwich
Carefully remove the toasted bread from the skillet. On one slice, layer the sliced turkey evenly, followed by a generous scoop of your homemade coleslaw. If desired, drizzle with Thousand Island dressing for added layers of flavor and texture, completing the filling for your Rachel Sandwich.
Step 5: Complete and Enjoy
Top your sandwich with the second slice of bread, cheese side down, to close it up. For a final touch, press down slightly before slicing it in half, revealing the gooey goodness inside. Serve immediately while the cheese is still warm—your delicious Rachel Sandwich is now ready to be enjoyed!
How to Store and Freeze The Rachel Sandwich
Fridge: Store the assembled sandwich in an airtight container for up to 3 days. Keep the coleslaw separate if possible to maintain its crunch.
Freezer: Wrap the sandwich tightly in plastic wrap and then aluminum foil to prevent freezer burn. It can be frozen for up to 1 month—perfect for meal prep!
Reheating: To enjoy the sandwich again, thaw in the fridge overnight, then reheat in a skillet over medium heat until the bread is crispy and the cheese is melted—no sogginess here!
Make-Ahead Tip: Prepare the coleslaw in advance and store it in the refrigerator, adding it just before serving the sandwich for fresh texture.
Expert Tips for Making The Rachel Sandwich
-
Choose Quality Bread: Opt for fresh, high-quality whole grain, whole wheat, or sourdough for a sturdier base that enhances the flavor.
-
Melt Cheese Perfectly: Cover the skillet while toasting to ensure Swiss cheese melts evenly. This prevents burning the bread while achieving gooey perfection.
-
Layer Smartly: For a well-balanced sandwich, ensure even distribution of turkey and coleslaw, preventing sogginess and keeping every bite delightful.
-
Don’t Skip the Butter: Butter not only toasts the bread to a golden brown but also adds rich flavor. Don’t rush this step; it’s crucial for texture!
-
Customize Your Filling: Feel free to experiment with variations like avocado or bacon. Just remember to keep the ratios in check, keeping The Rachel Sandwich hearty yet delightful!
-
Serve Immediately: For the best taste and texture, enjoy this sandwich fresh off the skillet while the cheese is melted and flavors are vibrant.
What to Serve with the Ultimate Rachel Sandwich?
Nothing complements a delightful Rachel Sandwich quite like a selection of sides that enhance its fresh flavors and satisfying texture.
-
Creamy Tomato Soup: The rich, tangy flavor of tomato soup perfectly balances the savory turkey and melted Swiss cheese, making for a comforting and cozy meal.
-
Crunchy Side Salad: A light, fresh salad with crisp greens and vibrant veggies adds a delightful crispness, elevating the overall meal experience and heartiness of the sandwich.
-
Crispy Potato Chips: The satisfying crunch of potato chips brings a fun, nostalgic twist to your meal, creating a delightful contrast with the sandwich’s creamy and soft textures.
-
Pickle Spear: A zesty pickle is the perfect palate cleanser between bites—a tangy addition that cuts through the sandwich’s richness, elevating your tasting experience.
-
Coleslaw on the Side: Pairing your sandwich with a small bowl of extra coleslaw amplifies that beloved crunchy element, ensuring each bite of your Rachel Sandwich is as vibrant as the first.
-
Craft Beer or Iced Tea: Wash it down with a refreshing craft beer or iced tea; both options provide a crisp, thirst-quenching finish that pairs harmoniously with your flavorful sandwich.
-
Homemade Fries: Crispy, seasoned fries are an ideal sidekick to your Rachel Sandwich. With a sprinkle of sea salt, they will have you reaching for more after every bite.
-
Fruit Salad: A bowl of seasonal fruit adds a touch of sweetness and bright flavors that beautifully balance the savory elements of the sandwich, offering a refreshing palette to enjoy.
Serve these delightful accompaniments to create a memorable meal that highlights your stunning Rachel Sandwich and satisfies hungry hearts.
Make Ahead Options
These Rachel Sandwiches are perfect for meal prep enthusiasts! You can prepare the homemade coleslaw up to 3 days in advance, ensuring your ingredients remain fresh. To do this, simply mix together your coleslaw ingredients and store them in an airtight container in the refrigerator. As for the sandwich itself, you can slice the bread and layer the turkey and cheese (without toasting) up to 24 hours ahead; however, it’s best to wait until right before serving to assemble the entire sandwich to maintain that crispy, toasted exterior. When you’re ready to enjoy, toast the bread and assemble your sandwich, and you’ll have a delightful meal with minimal effort—just as delicious, yet ready when you need it most!
The Rachel Sandwich Variations
Feel free to get creative with your Rachel Sandwich and make it uniquely yours with these delicious options!
- Whole Grain: Swap regular bread for whole grain for added fiber and a nutty flavor twist!
- Sourdough Delight: Use sourdough bread for a tangy flavor that complements the fillings beautifully.
- Creamy Avocado: Add slices of avocado for a luscious creaminess that enhances texture and taste.
- Crispy Bacon: For an indulgent touch, include crispy bacon for a smoky crunch in every bite.
- Spicy Kick: Spread some sriracha or your favorite hot sauce for a delightful heat boost!
- Herbed Coleslaw: Mix fresh herbs like dill or cilantro into your coleslaw for a flavor upgrade that sings summer.
- Cheddar Switch: Swap Swiss cheese for sharp cheddar for a bold, robust flavor that will take you by surprise.
- Turkey Alternative: Try using roast beef or smoked chicken as a flavorful protein alternative.
And if you’re looking for more tasty sandwich variations, check out our delicious Chicken Caesar Sandwich or discover another twist in our Cheesy Chicken Sandwich!

The Rachel Sandwich Recipe FAQs
What type of bread should I use for the Rachel Sandwich?
Opt for thick, sturdy bread to hold all the delicious fillings. Whole grain, whole wheat, or sourdough are all excellent choices. Freshness is key—look for bread that isn’t past its expiration date, and feel free to ask your local bakery for their recommendations!
How do I store any leftovers of the Rachel Sandwich?
Store the assembled Rachel Sandwich in an airtight container in the refrigerator for up to 3 days. For best results, keep the coleslaw separate to maintain its crunchiness. When ready to enjoy, simply reheat in a skillet for that toasted perfection!
Can I freeze the Rachel Sandwich?
Absolutely! To freeze, wrap the sandwich tightly in plastic wrap and then in aluminum foil, helping to prevent freezer burn. It can be stored in the freezer for up to 1 month. Thaw it in the refrigerator overnight, and then reheat in a skillet until the bread is crispy and cheese is gooey—delicious!
What if my coleslaw gets too soggy?
To prevent sogginess, always add coleslaw just before serving. If it does become soggy, you can try placing it in a clean dish towel and gently squeezing excess moisture. For a bit of extra crunch, add a handful of nuts or seeds to your coleslaw for texture.
Is the Rachel Sandwich suitable for dietary restrictions?
Yes! This sandwich can easily cater to various dietary needs. For gluten-free options, use gluten-free bread. If you have allergies or specific dietary preferences, choose the appropriate dressing and cheese alternatives. Always check ingredient labels to avoid allergens, ensuring a safe and enjoyable meal.
Deliciously Fresh The Rachel Sandwich with Creamy Coleslaw
Ingredients
Equipment
Method
- Melt the butter in a skillet over medium heat, watching for small bubbles before adding bread.
- Toast two slices of bread in the skillet for 2-3 minutes until golden brown.
- Flip the bread, add Swiss cheese, cover with a lid, and cook for 2 minutes until melted.
- Assemble the sandwich by layering turkey, coleslaw, and optional dressing on one slice.
- Close the sandwich with the second slice, press down, and slice in half to serve warm.
Leave a Reply