
As a soft breeze rustles the leaves and a hint of chill settles in the air, it’s time to welcome the spookiest season with open arms and an equally excited kitchen. These Skeleton Cupcakes aren’t just your average dessert; they’re whimsical, chocolatey delights that seamlessly blend creativity and flavor. Perfect for kids and adults alike, these cupcakes add a festive twist to any Halloween gathering with their playful skeleton decorations made from marshmallows. Plus, they are incredibly easy to whip up, making them a go-to treat for busy home chefs. Whether you’re hosting a spirited party or simply satisfying your sweet tooth, these Skeleton Cupcakes are sure to impress and delight. What fun decorations will you come up with to make them your own?
Why Are Skeleton Cupcakes So Appealing?
Delightful Creativity: These fun cupcakes combine a classic chocolate flavor with whimsical skeleton designs, sparking joy for everyone.
Kid-Friendly Fun: Perfect for Halloween festivities, they engage children in creative decoration while being deliciously satisfying.
Customizable Treat: With options like gluten-free batter or alternate toppings, you can tailor these cupcakes to suit any taste or dietary need.
Quick and Easy: Designed for busy home cooks, this recipe requires minimal time without sacrificing flavor, making it a no-fuss dessert choice.
Crowd-Pleasing Appeal: Impress your guests with these playful treats at parties or family gatherings, ensuring smiles all around. Pair them with Skeleton Cupcakes Spooky for more festive fun!
Skeleton Cupcake Ingredients
• Here’s everything you need for these spooky delights!
For the Cupcakes
- Gluten-Free Chocolate Cake Mix – Use this for a hassle-free, gluten-free option that maintains delicious flavor.
- Eggs – Fresh eggs add moisture and enhance the structure of your cupcakes.
- Water – Helps to blend the dry ingredients and achieve the right batter consistency.
- Vegetable Oil – Adds richness and keeps the cupcakes moist.
For the Frosting
- Chocolate Frosting – This sweet layer enhances the chocolate flavor of the cupcakes and offers a creamy texture.
- Cream Cheese Frosting – Swap for a tangy contrast if you prefer a different flavor profile.
For Decoration
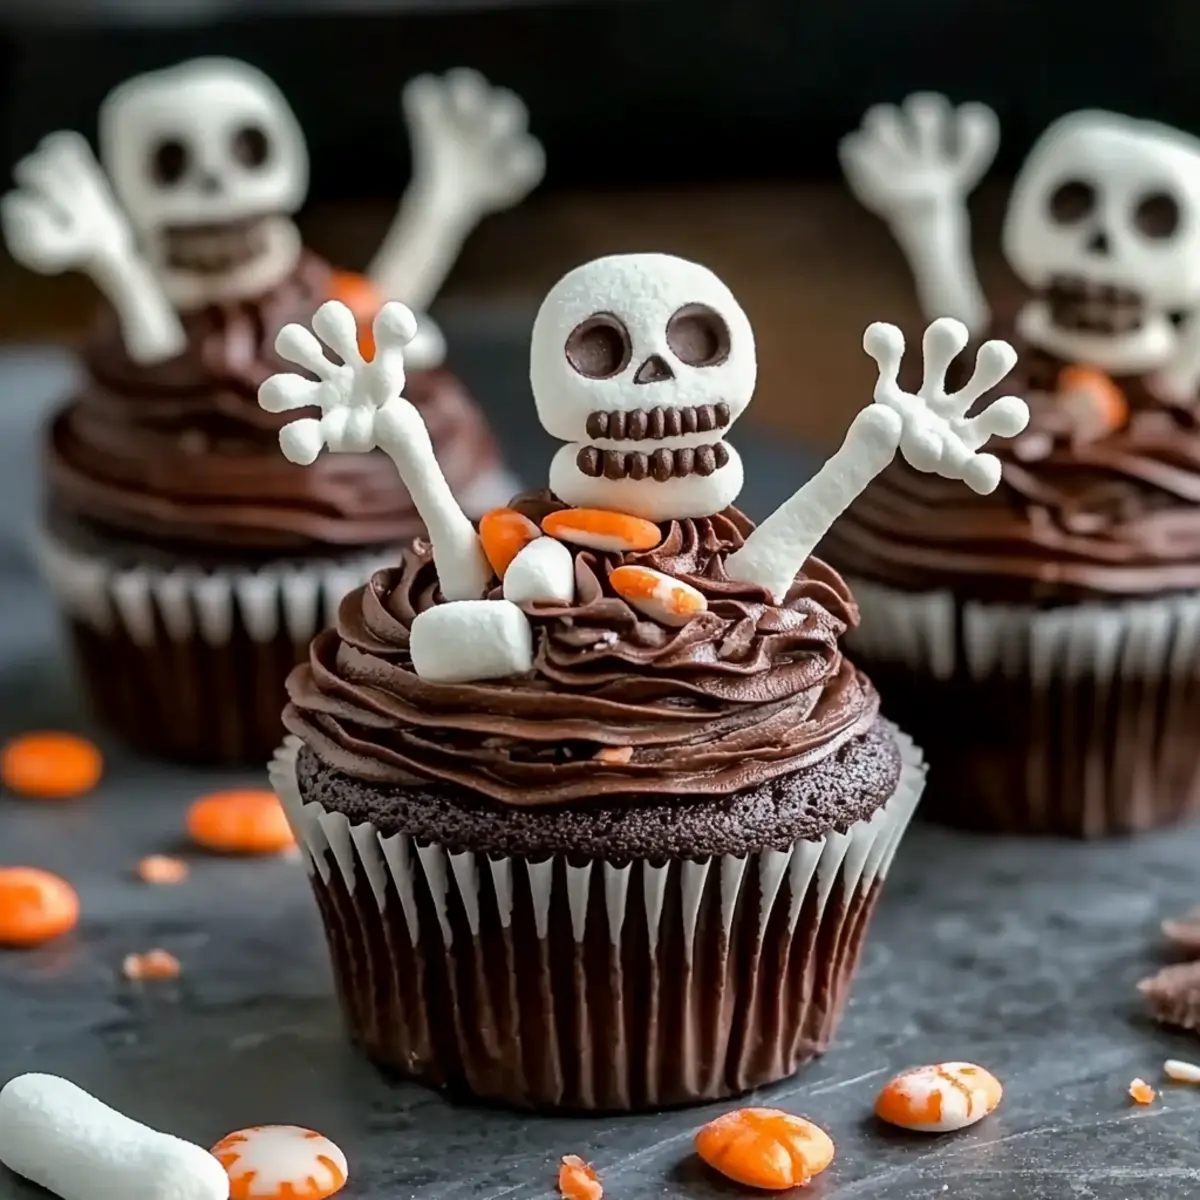
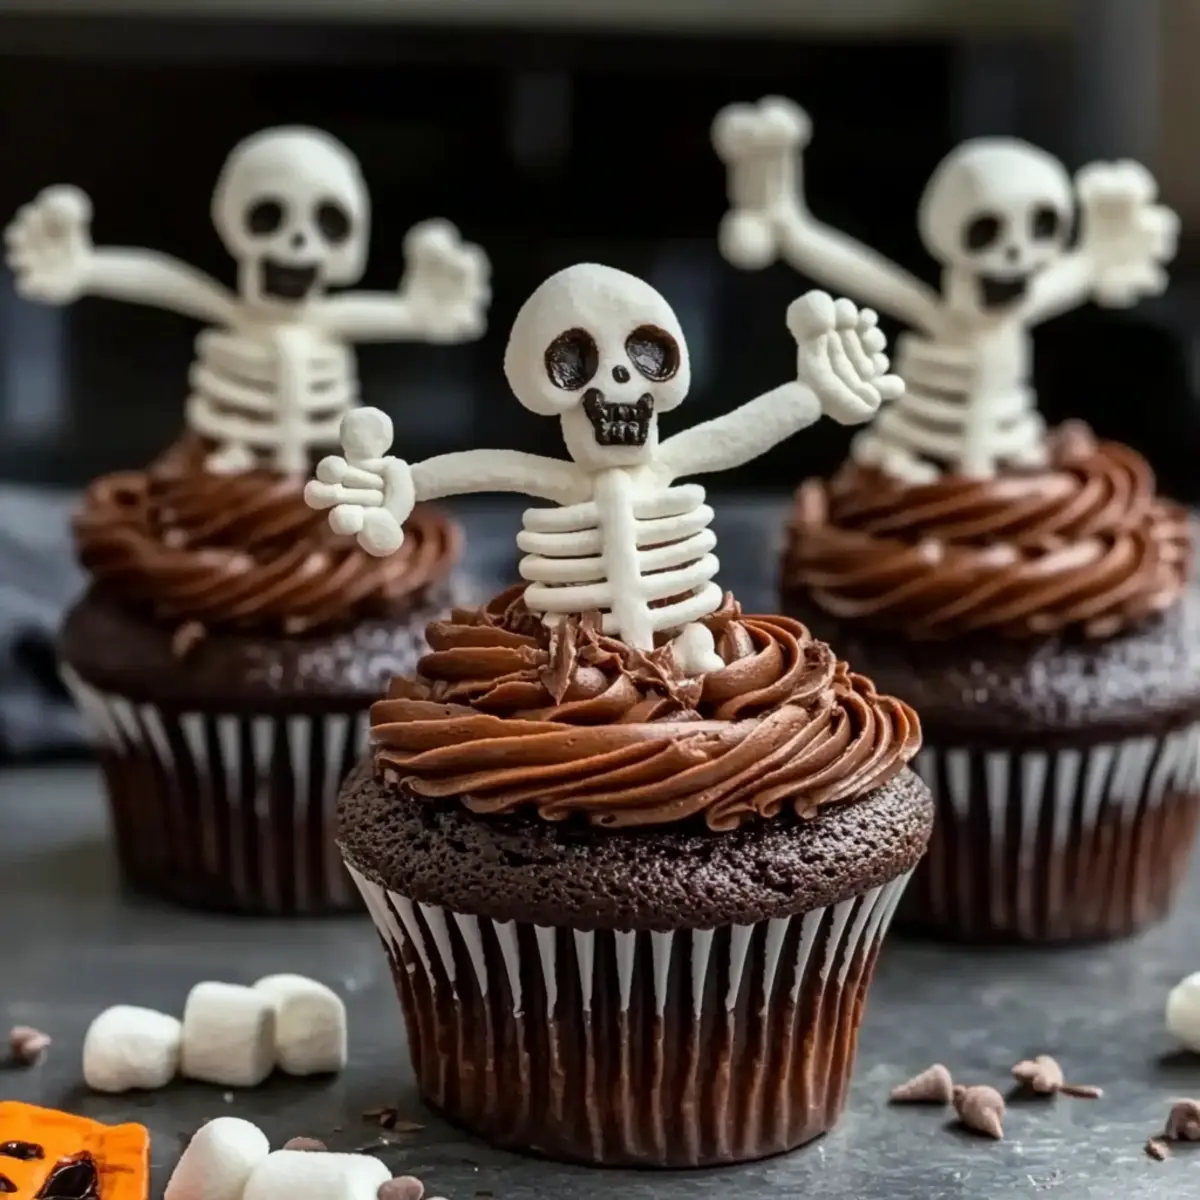
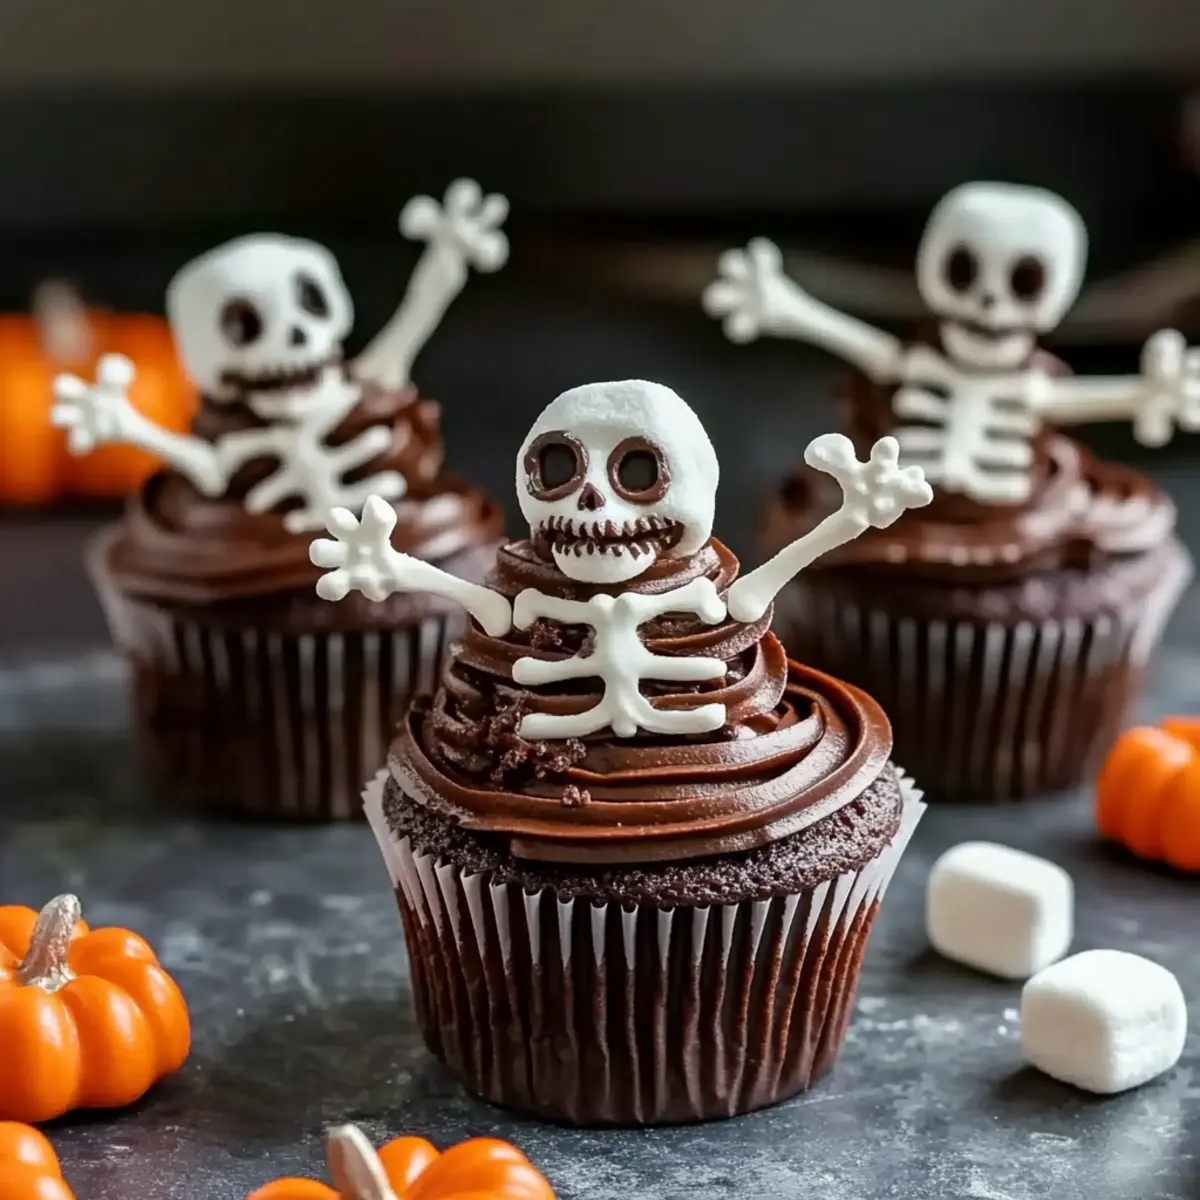
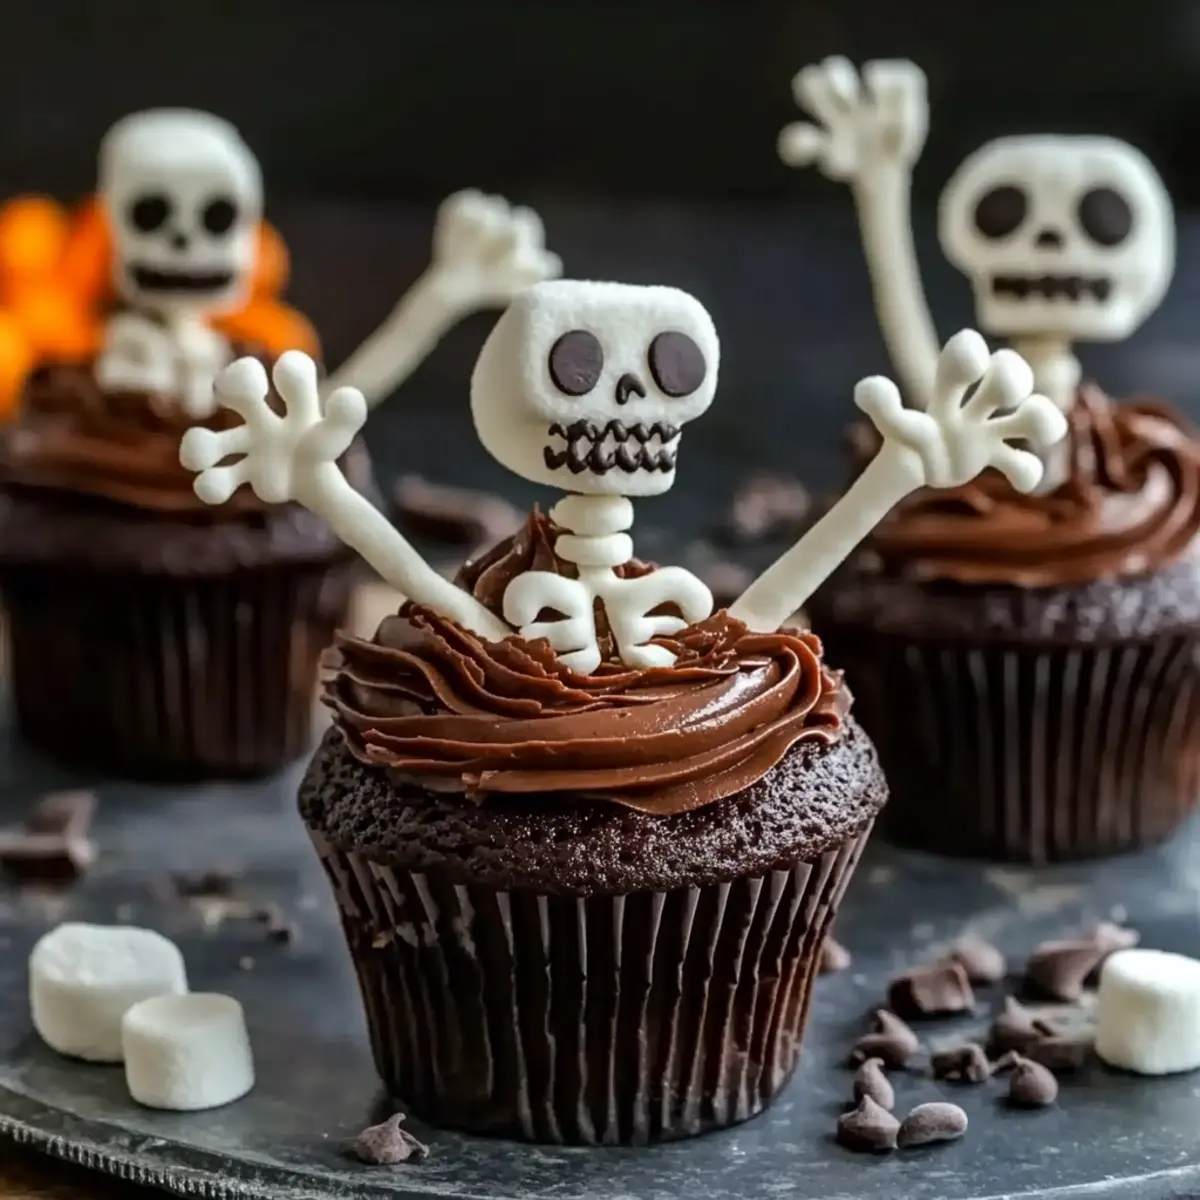
- Marshmallows – Shaped like skeletons, these add a fun and chewy topping to each cupcake.
- Edible Glitter – Sprinkle on for a festive sparkle that elevates the visual appeal.
- Gummy Candies – Use these to add personality and character to your cupcakes, creating more customization options.
These Skeleton Cupcakes are not only a treat for the taste buds but also a delightful way to celebrate Halloween!
Step‑by‑Step Instructions for Skeleton Cupcakes
Step 1: Prep Oven & Ingredients
Preheat your oven to 350°F (175°C). While it’s warming up, gather all your ingredients—gluten-free chocolate cake mix, eggs, water, and vegetable oil. Line a cupcake tin with cupcake liners for easy removal. Make sure your workspace is tidy, as this helps create a more enjoyable baking experience with your Skeleton Cupcakes.
Step 2: Mix Batter
In a large mixing bowl, combine the chocolate cake mix, eggs, water, and vegetable oil. Use a whisk or electric mixer to blend the ingredients until the mixture is smooth, about 2-3 minutes. Be cautious not to over-mix; you want your batter light and airy. This step is crucial for the fluffy texture of your Skeleton Cupcakes.
Step 3: Fill and Bake
Carefully pour the batter into the lined cupcake tin, filling each liner about two-thirds full to allow room for rising. Slide the tin into your preheated oven and bake for 18-20 minutes. They’re done when a toothpick inserted into the center comes out clean. Once baked, remove the cupcakes and let them cool completely on a wire rack.
Step 4: Frosting Application
Once the cupcakes are completely cooled, it’s time to frost! Generously spread chocolate frosting on top of each cupcake using a spatula or, for a fun twist, a piping bag. The chocolate frosting will enhance the rich flavor of your Skeleton Cupcakes, providing a deliciously sweet base for your whimsical marshmallow decorations.
Step 5: Decoration
Now comes the fun part! Take your marshmallows and shape them into skeletons, then place them on top of the frosted cupcakes. Feel free to add extra decorative elements like edible glitter or gummy candies for a festive touch. Your Skeleton Cupcakes are now ready to bring some spooky fun to your Halloween celebrations!
Storage Tips for Skeleton Cupcakes
Room Temperature: Keep cupcakes at room temperature for up to 2 days, in a covered container. This ensures they remain moist and delicious, perfect for snacking.
Fridge: Store in an airtight container in the refrigerator for up to 3 days. This helps maintain freshness while keeping the decorations intact, ready for your Halloween festivities.
Freezer: For longer storage, freeze the un-frosted cupcakes for up to 3 months. Allow them to cool completely, wrap individually in plastic wrap, and place in a freezer bag.
Reheating: To enjoy, thaw cupcakes in the fridge overnight, then bring to room temperature before frosting. You can microwave them for about 10-15 seconds if you prefer them warm!
Skeleton Cupcakes Variations & Substitutions
Feel free to play with these fun twists to make your Skeleton Cupcakes uniquely yours!
-
Gluten-Free: Use a gluten-free chocolate cake mix to ensure everyone can enjoy these spooky delights. It’s just as delicious without the gluten!
-
Colorful Frosting: Swap out the chocolate frosting for vibrant colors like orange or green to match your Halloween theme. The festive colors will bring even more joy!
-
Crunchy Topping: Replace marshmallows with chocolate-covered pretzels for an exciting crunch. This savory addition contrasts beautifully with the sweet chocolate.
-
Gummy Toppers: Use gummy candies shaped like eyes or bats for an extra fun decoration on top. They add a hauntingly delightful character that kids will love!
-
Cream Cheese Frosting: For a tangy twist, swap the chocolate frosting with cream cheese frosting. It adds a delicious flavor contrast and pairs well with the chocolate base.
-
Mini Cupcakes: Make mini versions of these cupcakes for bite-sized treats. They’re perfect for gatherings and allow guests to indulge without the guilt.
-
Flavored Cupcake Mix: Try using a different flavored cake mix, like red velvet or vanilla, to change things up. Each new flavor adds its own special twist to the traditional skeleton design!
-
Spooky Sprinkles: Top with Halloween-themed sprinkles for an extra layer of fun. Add them right before serving to ensure they stay colorful and vibrant.
Pair your creative cupcakes with Skeleton Cupcakes Spooky for more hauntingly delicious treats to share!
What to Serve with Skeleton Cupcakes?
Looking to create a spooktacular spread to complement your enchanting Skeleton Cupcakes?
- Pumpkin-Shaped Cookies: These delightful treats add a festive touch and are great for kids to enjoy while decorating their cupcakes.
- Ghostly Fruit Skewers: Combine fresh fruits on skewers for a refreshing, healthy treat that contrasts beautifully with the sweetness of the cupcakes.
- Witch’s Brew Punch: A fizzy, fruity drink can enhance the party vibe and keep everyone refreshed while indulging in sweet delights.
- Spooky Cheese Platter: Pair various cheeses with spooky-themed crackers to balance sweet and savory, visually pleasing to adults and kids alike.
- Chocolate-Dipped Pretzels: Offering a crunchy texture, these pretzels are a perfect match for the rich chocolate flavors of the cupcakes, making for a delightful combo.
- Caramel Apples: These old-fashioned treats are a classic Halloween snack, providing a chewy and crunchy contrast that everyone loves.
- Monster Munch Trail Mix: Create a fun snack mix with popcorn, nuts, and candies for a sweet crunch that all ages can enjoy.
As you plan your Halloween gathering, remember these suggestions to make your dessert table as festive and inviting as possible!
Tips for the Best Skeleton Cupcakes
-
Room Temperature Ingredients: Ensure your eggs and other ingredients are at room temperature for a smoother batter and improved texture.
-
Cooling Time: Always allow your cupcakes to cool completely before frosting; this prevents the frosting from melting and maintains a lovely appearance.
-
Avoid Over-Mixing: Gently mix the batter until just combined. Over-mixing can lead to dense cupcakes, which we definitely want to avoid for our Skeleton Cupcakes!
-
Creative Toppings: Don’t shy away from adding personalized touches or using different toppings like chocolate-covered pretzels and sprinkles to enhance the spooky theme.
-
Storage Solution: Store leftover cupcakes in an airtight container in the refrigerator for up to three days to keep them fresh and delicious for later enjoyment.
Make Ahead Options
These Skeleton Cupcakes are perfect for busy home cooks looking to save time! You can bake the cupcakes up to 24 hours in advance. Simply cool them completely, then store them in an airtight container at room temperature to maintain their moisture. For even better results, frost them on the day of your event to keep the chocolate frosting fresh and prevent it from becoming soggy. If you’re short on time, you can also prepare the skeleton decorations a day ahead; just refrigerate the shaped marshmallows in a sealed bag until you’re ready to complete your cupcakes. This way, you’ll enjoy delicious, festive treats with minimal effort and just as much flair!
Skeleton Cupcakes Recipe FAQs
How do I know if my marshmallows are fresh enough for decoration?
Absolutely! Fresh marshmallows should be soft and pliable without any hard or stale bits. If you notice they have dark spots all over or feel hard to the touch, it’s best to get a new bag. Fresh marshmallows will hold their shape well when used as skeleton decorations.
What’s the best way to store leftover Skeleton Cupcakes?
Great question! Store your cupcakes in an airtight container at room temperature for up to 2 days for optimal flavor and moisture. If you need extra longevity, move them to the refrigerator in an airtight container for up to 3 days. This way, your whimsical cupcakes will stay fresh and delicious for your next spooky snack!
Can I freeze Skeleton Cupcakes, and if so, how?
Absolutely! Freezing your Skeleton Cupcakes can be a great way to prepare ahead. Here’s how: Once your cupcakes are completely cooled, place them in an airtight container or wrap each one individually in plastic wrap. They can be frozen for up to 3 months. When you’re ready to enjoy them, simply thaw the cupcakes in the fridge overnight and bring them to room temperature before decorating and serving.
What if my cupcakes come out too dense or dry?
Very! If your skeleton cupcakes are dense, it may be due to over-mixing the batter or stray ingredients like flour. For a lighter texture, gently mix until just combined and avoid excessive stirring. If they are on the dry side, be sure to check your baking time; baking them even a minute too long can lead to dry cupcakes. If all else fails, consider adding a bit more frosting on top to enhance moisture!
Are there any common allergies I should worry about when making Skeleton Cupcakes?
Indeed! Always consider allergies when baking for others. Common allergens include eggs, dairy, and gluten. To accommodate various dietary needs, you can easily find gluten-free cake mixes and even dairy-free frosting options. Always check labels for hidden ingredients if you’re serving guests with allergies. It’s best to ask beforehand to ensure everyone can enjoy these festive treats!
Can pets eat leftover frosting or decorations?
Very! It’s important to keep in mind that certain decorative ingredients could be harmful to pets. For example, chocolate is toxic to dogs and cats. Always store your Skeleton Cupcakes safely out of reach of pets. If you have leftover marshmallows or other non-chocolate decorations, you can share them in moderation—just ensure they’re safe for your furry friends.
Skeleton Cupcakes: Fun and Spooky Treats for Halloween Joy
Ingredients
Equipment
Method
- Preheat your oven to 350°F (175°C). Gather all ingredients and line a cupcake tin with cupcake liners.
- In a large mixing bowl, combine chocolate cake mix, eggs, water, and vegetable oil. Mix until smooth, about 2-3 minutes.
- Pour batter into lined cupcake tin, filling each liner 2/3 full. Bake for 18-20 minutes until a toothpick comes out clean.
- Let the cupcakes cool completely on a wire rack.
- Frost each cupcake with chocolate frosting and decorate with marshmallow skeletons, edible glitter, and gummy candies.
Leave a Reply