
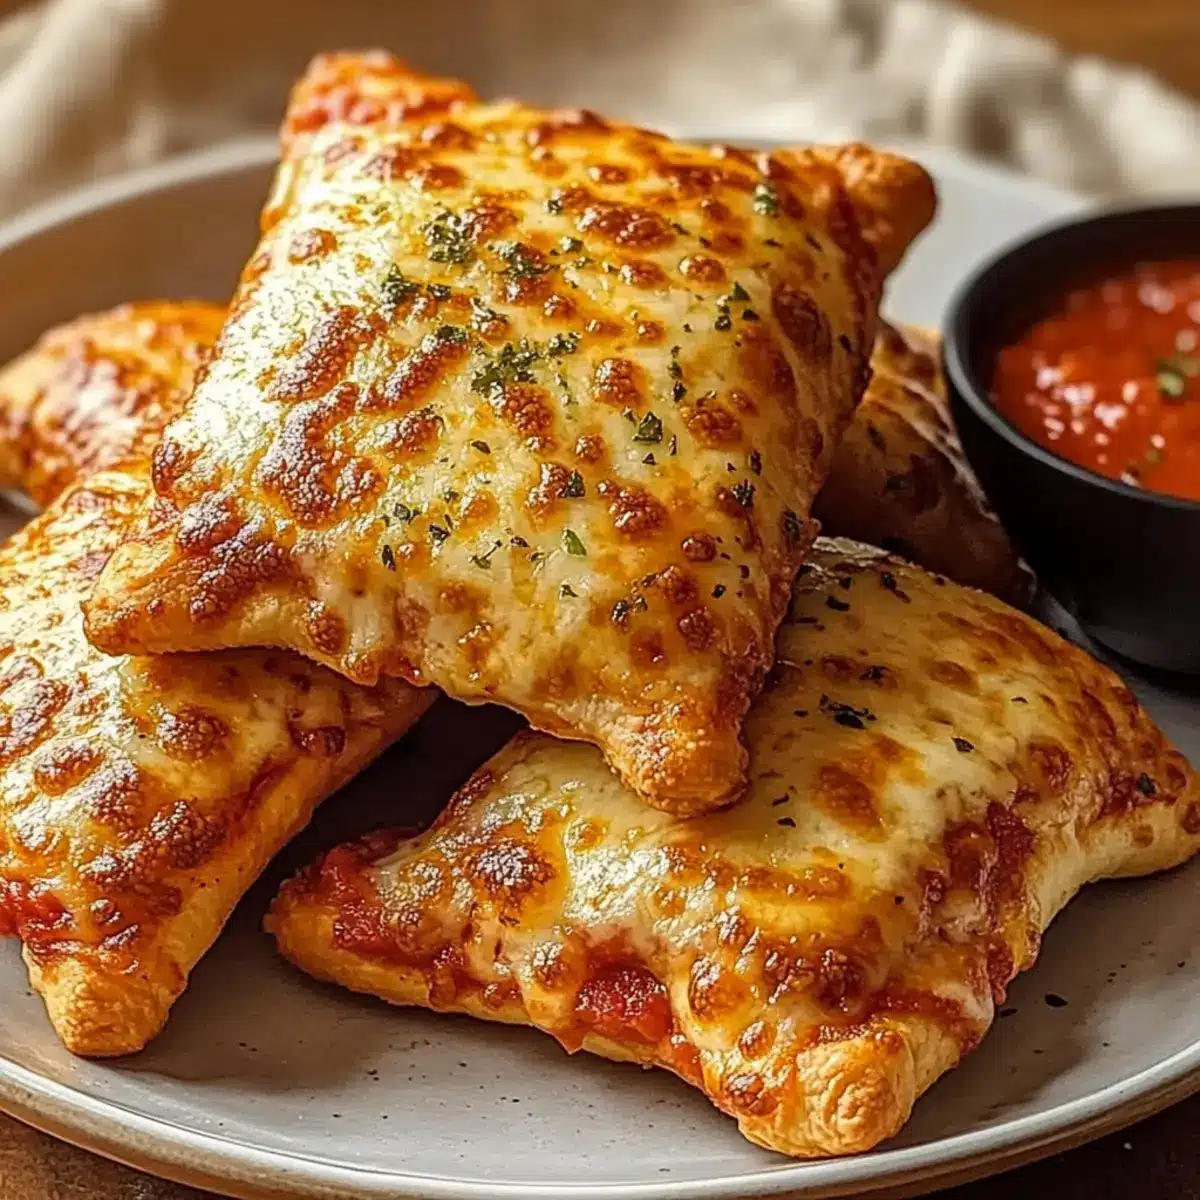
As I stood in my kitchen, the tantalizing aroma of garlic wafted through the air, reminding me of my favorite pizzeria—the one where every bite feels like a warm hug. That’s the magic of Homemade Easy Cheesy Pizza Pockets! This quick and customizable snack is the ultimate comfort food, perfect for busy weeknights or laid-back gatherings with friends. Imagine sinking your teeth into a crispy, golden pocket bursting with gooey cheese and your favorite fillings—whether it’s zesty pepperoni, fresh veggies, or even a simple marinara dip. These pizza pockets are not only a fun twist on classic pizza but also a delightful way to gather around the table and share delicious moments. Curious about how to make this scrumptious snack? Let’s dive in!
Why Make Homemade Cheesy Pizza Pockets?
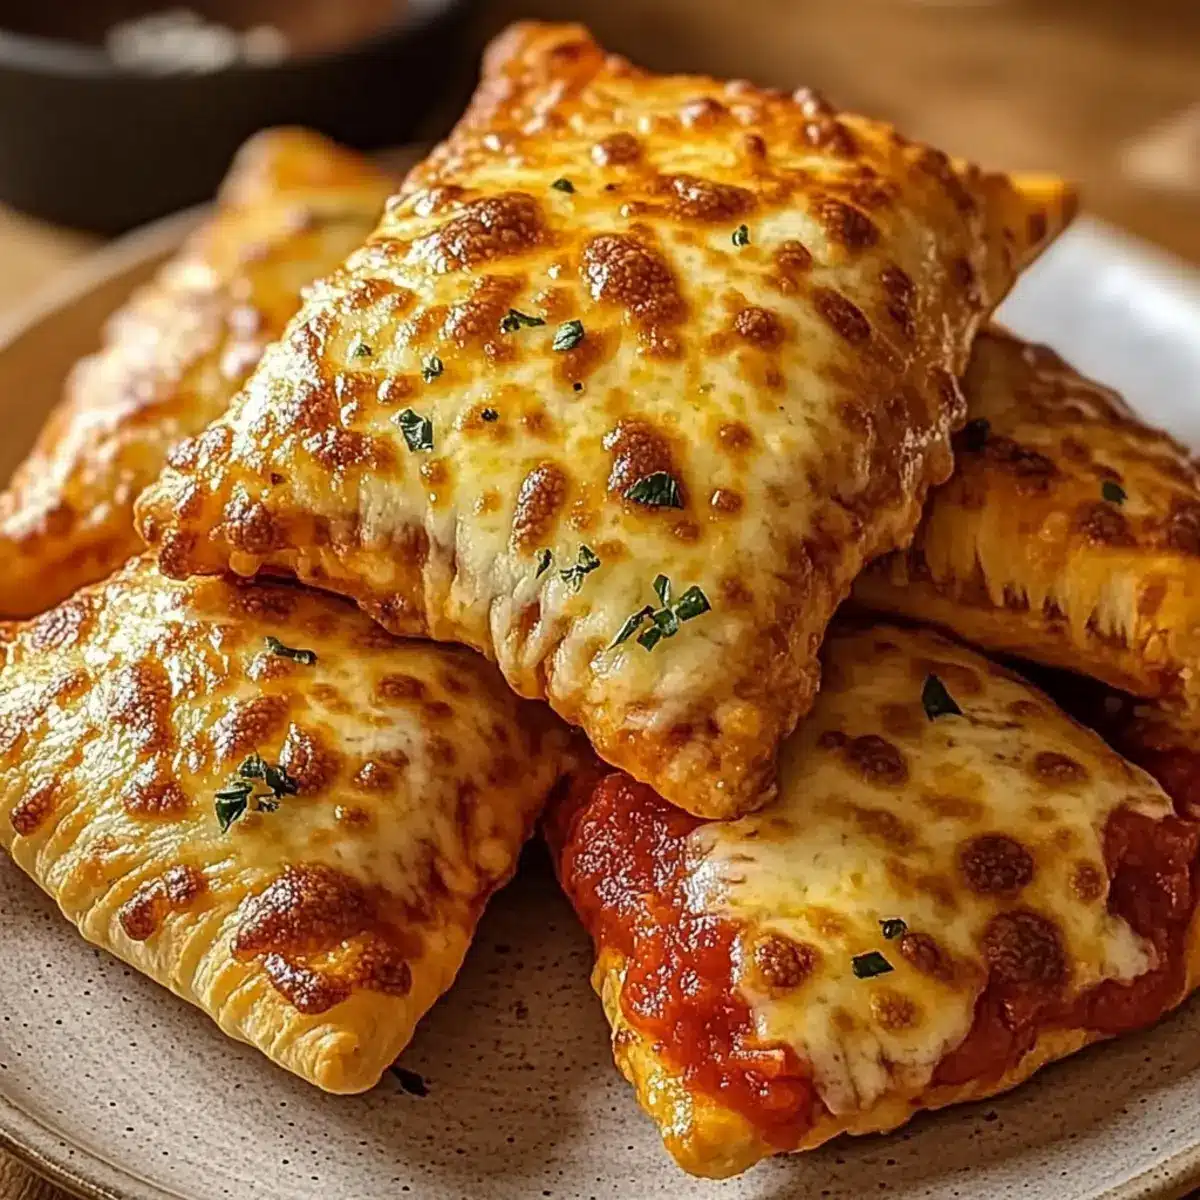
Irresistible Flavors: Each bite is a delightful explosion of melted cheese enveloped in a warm, buttery crust that transports you to your favorite pizza parlor.
Customizable Goodness: Tailor the filling to suit your cravings—from classic pepperoni to vibrant vegetables—there’s no limit to your creativity!
Quick Preparation: Get these pizza pockets on the table in just 30 minutes, making them perfect for both busy weeknights and impromptu gatherings.
Family-Friendly Fun: Involve the kids in assembling these pockets for a fun cooking experience that everyone will enjoy!
Great for Leftovers: Store any leftover pockets in the fridge, and simply reheat for a delicious snack or meal any time—better than fast food! Check out my Cheesy Chicken Garlic recipe for another quick treat!
Homemade Cheesy Pizza Pockets Ingredients
For the Dough
• Refrigerated pizza dough – Conveniently saves time on busy nights; homemade dough is delightful too!
For the Filling
• Shredded mozzarella – Provides creamy texture and great melting quality; freshly shredded works best!
• Pizza sauce – Adds flavorful richness; opt for a robust marinara for an extra kick!
• Grated Parmesan – Offers a salty, nutty finish; substitute with other hard cheeses if desired.
• Optional Fillings – Customize with ingredients like pepperoni, cooked sausage, bell peppers, mushrooms, or spinach to suit your taste!
For the Topping
• Melted butter – Enhances flavor and browning; unsalted is recommended for precise seasoning.
• Garlic powder – Infuses aromatic flavor; fresh minced garlic can elevate the taste further.
• Italian seasoning – Flavors the dough; using crushed herbs boosts fragrance for an authentic touch.
Enjoy assembling these Homemade Cheesy Pizza Pockets for a quick and comforting snack that everyone will love!
Step‑by‑Step Instructions for Homemade Cheesy Pizza Pockets
Step 1: Preheat and Prepare
Preheat your oven to 425°F (220°C) and line a baking sheet with parchment paper for easy cleanup. This step is crucial to ensure your Homemade Cheesy Pizza Pockets bake evenly and get that beautiful golden-brown crust. While the oven heats, you’ll have plenty of time to work on rolling out the dough!
Step 2: Roll Out the Dough
Unroll your refrigerated pizza dough onto a lightly floured surface. Using a rolling pin, gently stretch it out to about ¼ inch thick, then cut the dough into palm-sized rectangles. Aim for even shapes so that your Homemade Cheesy Pizza Pockets cook uniformly, creating a delightful pocket of cheesy goodness.
Step 3: Add the Filling
On each rectangle, place a spoonful of pizza sauce, followed by a generous handful of shredded mozzarella cheese. For added punch, sprinkle some grated Parmesan on top. Be sure to leave space around the edges; this will help seal your pockets and ensure that the melted cheese doesn’t spill out during baking.
Step 4: Customize Your Pockets
If desired, add your favorite optional fillings like pepperoni, bell peppers, or cooked sausage on top of the cheese. Remember not to overfill! Keeping it simple will make sealing your Homemade Cheesy Pizza Pockets much easier, and you’ll avoid any messy leaks during baking.
Step 5: Seal the Edges
Carefully fold over each rectangle to create a pocket and press the edges together with your fingers. For a secure closure, use a fork to crimp the edges, ensuring that all that cheesy goodness stays inside while baking. This step is essential for optimal texture and presentation!
Step 6: Brush and Season
Melt some butter in the microwave and brush the tops of your pizza pockets with it for added flavor and a beautiful glaze. Sprinkle them with garlic powder and Italian seasoning for that irresistible aroma and taste. This finishing touch elevates your Homemade Cheesy Pizza Pockets to the next level.
Step 7: Bake to Perfection
Place the prepared pizza pockets on the lined baking sheet and bake in the preheated oven for 12–15 minutes. Keep an eye on them; you’ll know they’re done when the tops are golden brown and the cheese inside is bubbling delightfully. This timing ensures perfect texture and flavor.
Step 8: Serve and Enjoy
Once baked, remove the Homemade Cheesy Pizza Pockets from the oven and let them cool slightly before serving. Pair with warm marinara for dipping, if desired. These delicious pockets are best enjoyed while warm, sharing smiles and satisfaction with family or friends around the table!
How to Store and Freeze Homemade Cheesy Pizza Pockets
Fridge: Store leftovers in an airtight container for up to 3 days. Reheat in the oven for 5-10 minutes for optimal crispiness.
Freezer: Freeze assembled, unbaked pockets in a single layer on a baking sheet. Once frozen solid, transfer to a freezer bag for up to 2 months.
Reheating: Bake frozen pizza pockets directly from the freezer at 425°F (220°C) for about 15-20 minutes. They’ll come out hot and delicious, just like fresh!
Make-Ahead: Prepare pizza pockets, keep them assembled in the fridge, and bake them later for a quick, satisfying snack anytime.
Homemade Cheesy Pizza Pockets Variations
Feel free to let your creativity shine and make these delightful pizza pockets your very own!
-
Cheesy Swap: Substitute mozzarella with provolone or sharp cheddar for a different flavor profile—each cheese offers its own unique melt!
-
Veggie Delight: Add a medley of fresh veggies like zucchini, olives, or sun-dried tomatoes for a refreshing twist. This not only enhances flavor but also boosts nutrition!
-
Spicy Kick: Toss in some sliced jalapeños or a dash of red pepper flakes to bring the heat. It’s a sure way to spice up your pizza pockets for those who enjoy a fiery taste!
-
Meat Lovers: Layer on cooked sausage or crispy bacon to satisfy heartier appetites. This variation takes comfort food to the next level—a true favorite in our family!
-
Dairy-Free Option: Use dairy-free cheese alternatives and skip the butter for a completely plant-based snack that everyone can enjoy. This way, even dairy sensitivities won’t miss out on the fun!
-
Garlic Butter Glaze: Brush the tops with a mixture of melted butter and minced garlic before baking. This creates an irresistible aroma that fills your kitchen, reminiscent of a pizzeria!
-
Sweet Surprise: For dessert versions, fill with Nutella or fruit preserves, then seal them up just like the savory ones. Serve with a dusting of powdered sugar for a sweet finish that’s perfect for kids.
-
Mini Versions: Create bite-sized pockets for easy snacking or party appetizers. These mini delights pair perfectly with the warm marinara you might have on hand, adding to the fun!
The world is your oyster when it comes to customizing these Homemade Cheesy Pizza Pockets. If you’re still craving that cheesy goodness, consider trying my Ooey Gooey Cheesy or Cheesy Cajun Garlic recipes for more inspiration!
Expert Tips for Homemade Cheesy Pizza Pockets
• Perfect Dough Roll: Ensure the dough is rolled evenly to about ¼ inch thickness. This helps achieve a crispy crust.
• Sealing Technique: Press edges firmly when sealing the pockets. Using a fork to crimp ensures no leaks during baking.
• Mind the Fillings: Avoid overfilling each pocket to prevent messy spills. Less is often more for even cooking!
• Baking Check: Look for golden-brown tops and bubbling cheese; this is your sign of perfectly baked Homemade Cheesy Pizza Pockets.
• Flavor Variations: Experiment with different cheeses or herbs to customize the taste; it’s a fun way to enjoy each batch!
Make Ahead Options
These Homemade Easy Cheesy Pizza Pockets are perfect for meal prep! You can assemble the pockets up to 24 hours in advance, ensuring busy weeknights are stress-free. To prepare ahead, simply follow the assembly steps and place your uncooked pockets on a baking sheet, then cover tightly with plastic wrap and refrigerate. For the best quality, make sure they are sealed properly to avoid dough drying out. When you’re ready to enjoy, bake them straight from the fridge for about 15–18 minutes until golden brown and bubbly. With these make-ahead tips, you’ll have a delicious, hassle-free meal ready to go any day of the week!
What to Serve with Homemade Easy Cheesy Pizza Pockets?
The perfect pairing can elevate your Homemade Cheesy Pizza Pockets into a delightful meal, making every bite even more satisfying.
-
Garlic Breadsticks: These warm, buttery sticks provide a lovely crunch that perfectly complements the gooey cheese in your pockets.
-
Garden Salad: A fresh mixture of greens and veggies balances the rich flavors of the pizza pockets while adding a vibrant crunch.
-
Warm Marinara Sauce: This classic dipping option enhances the pizza flavors, inviting a delightful mix of tangy and cheesy goodness with every dip.
-
Stuffed Mushrooms: Savory bites with a burst of umami can bring a delightful surprise, adding depth to your meal with their earthy flavor.
-
Creamy Ranch Dip: A cool and zesty ranch dip offers a refreshing contrast to the warm, cheesy pockets, keeping your taste buds intrigued.
-
Sophisticated Wine: A light red or sparkling wine can be an excellent accompaniment, enriching your evening with a touch of elegance.
-
Chocolate Chip Cookies: End your meal on a sweet note with these warm, gooey treats that complete the cozy comfort food experience.
-
Fruit Smoothies: A chilled, fruity smoothie can refresh your palate and add a pop of color to your table, keeping the meal delightful and fun.
Your Homemade Easy Cheesy Pizza Pockets are not just a meal—they are a gateway to creating cherished moments around the table with these enticing sides!

Homemade Cheesy Pizza Pockets Recipe FAQs
What type of pizza dough can I use for these pizza pockets?
Absolutely! You can use refrigerated pizza dough for convenience, but if you have the time, homemade dough will add a delightful freshness. Simply roll it out to about ¼ inch thick to achieve the perfect texture for your Homemade Cheesy Pizza Pockets.
How should I store leftover pizza pockets?
For best results, place any leftover pizza pockets in an airtight container and store them in the refrigerator for up to 3 days. When you’re ready to enjoy them again, reheat in the oven for about 5-10 minutes to get that crispy texture back.
Can I freeze Homemade Cheesy Pizza Pockets?
Certainly! To freeze, assemble the unbaked pizza pockets and place them in a single layer on a baking sheet. Once they’re frozen solid, transfer them to a freezer bag. They can be stored in the freezer for up to 2 months. When you’re ready to bake, pop them directly from the freezer into a preheated oven at 425°F (220°C) for about 15-20 minutes.
What’s the best way to avoid overfilling my pizza pockets?
Great question! When adding your fillings, use caution and stick to about a tablespoon of pizza sauce and a handful of cheese for each pocket. It’s best to keep a little space around the edges to ensure proper sealing. This helps avoid any messy spills and guarantees a delightful cooking experience!
Are there any dietary considerations when making these pizza pockets?
Absolutely! These Homemade Cheesy Pizza Pockets can be easily customized to accommodate various dietary needs. For a vegetarian option, simply fill them with cheese and an assortment of your favorite vegetables. If you have allergies, check each ingredient and consider using gluten-free pizza dough if necessary.
How do I know when my pizza pockets are done baking?
Very! They’re ready when their tops turn a lovely golden brown, and cheese starts bubbling inside. Keep an eye on them during the last few minutes of baking for the perfect finish!

Homemade Cheesy Pizza Pockets: A Quick, Comforting Treat
Ingredients
Equipment
Method
- Preheat your oven to 425°F (220°C) and line a baking sheet with parchment paper for easy cleanup.
- Unroll your refrigerated pizza dough onto a lightly floured surface. Using a rolling pin, gently stretch it out to about ¼ inch thick, then cut the dough into palm-sized rectangles.
- On each rectangle, place a spoonful of pizza sauce, followed by a generous handful of shredded mozzarella cheese. For added punch, sprinkle some grated Parmesan on top.
- If desired, add your favorite optional fillings like pepperoni, bell peppers, or cooked sausage on top of the cheese.
- Carefully fold over each rectangle to create a pocket and press the edges together with your fingers. Use a fork to crimp the edges.
- Melt some butter in the microwave and brush the tops of your pizza pockets with it. Sprinkle them with garlic powder and Italian seasoning.
- Place the prepared pizza pockets on the lined baking sheet and bake for 12–15 minutes until golden brown.
- Once baked, remove from the oven and let them cool slightly before serving. Pair with warm marinara for dipping, if desired.
Leave a Reply