
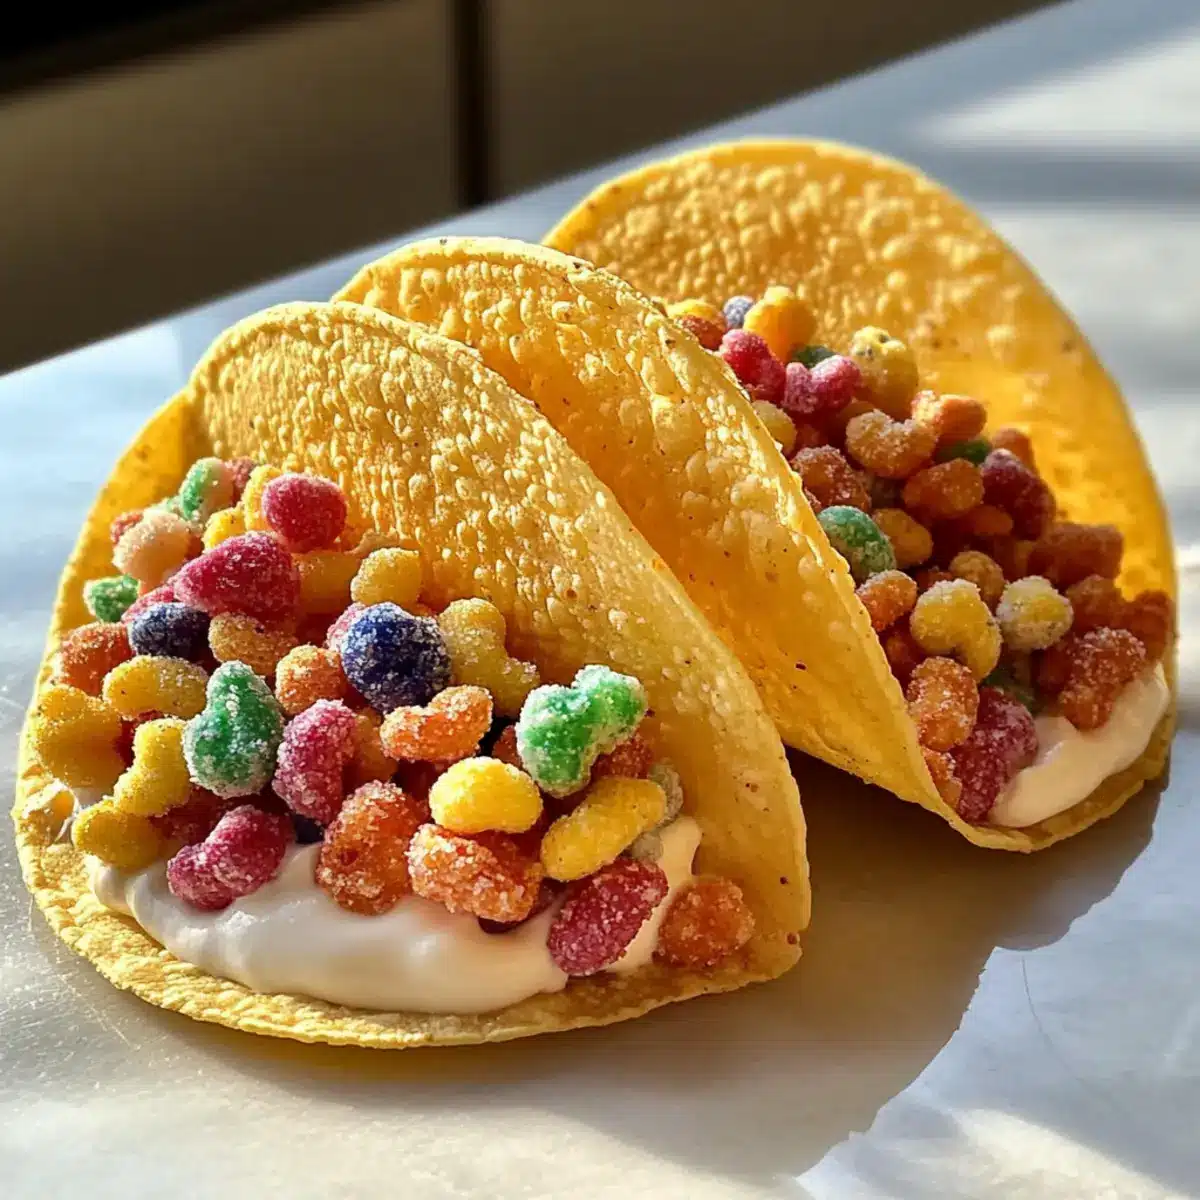
As I strolled through the colorful aisles of my local grocery store, a wild idea struck me: what if I turned my beloved dessert into a fun and delicious taco? Enter Crispy Fruity Pebbles Cheesecake Tacos—a playful twist that seamlessly marries the luxurious creaminess of cheesecake with the delightful crunch of Fruity Pebbles. This no-bake recipe is not only incredibly easy to whip up but also serves as a show-stopping dessert that impresses everyone, from kids to adults. You’ll love how quick prep makes this treat a lifesaver when entertaining guests or just craving something sweet. Whether you’re planning a party or simply indulging your sweet tooth, these tacos are a forgiving and customizable option. Curious about how to make your dessert game more fun? Let’s dive in!
Why Make Cheesecake Tacos?
Indulgent Twist: Imagine transforming your favorite cheesecake into a playful taco form—pure bliss!
Quick and Easy: This no-bake recipe saves you time, making it perfect for spontaneous dessert cravings.
Customizable Creations: Feel free to experiment with different cereals or flavor extracts to make it your own!
Kid-Friendly Fun: Kids will enjoy not only making these but also devouring their colorful creations.
Impress Your Guests: Serve these at parties, and watch your friends rave about the unique dessert! Try them alongside our Banana Pudding Cheesecake or get inspired with Cheesecake Dessert Tacos for even more awesome taco ideas.
Crispy Fruity Pebbles Cheesecake Tacos Ingredients
For the Taco Shells
• Taco Shells – Sturdy taco shells are crucial to holding all that delightful cheesecake filling without leaking.
For the Cheesecake Filling
• Cream Cheese – The star of the show! Opt for a softened cream cheese for the creamiest texture; try whipped ricotta for a lighter version.
• Sugar – Sweetens up the cheesecake; powdered sugar is best for a super smooth blend.
• Vanilla Extract – Adds a lovely depth of flavor; swap with almond extract for a new twist.
For the Crunch and Fun
• Fruity Pebbles Cereal – These little gems give that delightful crunch and vibrant colors; feel free to use any fruity cereal you adore!
This playful Crispy Fruity Pebbles Cheesecake Tacos recipe not only tantalizes your taste buds but also brings joy to the table. Enjoy making this creative dessert!
Step‑by‑Step Instructions for Crispy Fruity Pebbles Cheesecake Tacos
Step 1: Prepare the Taco Shells
Begin by preheating your oven according to the taco shell package instructions, typically around 350°F (175°C). Arrange the taco shells on a baking sheet in a single layer and bake them for about 5–7 minutes or until they are crispy and golden. Keep an eye on them to avoid burning, then remove from the oven and let them cool completely.
Step 2: Make the Cheesecake Filling
In a large mixing bowl, combine softened cream cheese, powdered sugar, and vanilla extract. Use an electric mixer on medium speed to beat the ingredients together for 2–3 minutes until the mixture is smooth and creamy, with no lumps. This will create a rich filling for your Crispy Fruity Pebbles Cheesecake Tacos, adding velvety goodness.
Step 3: Incorporate the Fruity Pebbles
Gently fold in the crushed Fruity Pebbles cereal into the cream cheese mixture. Use a spatula to combine them without over-mixing, as you want to maintain the crunchy texture of the cereal. This step adds that delightful crunch and colorful visual appeal, making your cheesecake tacos even more enticing.
Step 4: Assemble the Tacos
Take each cooled taco shell and spoon the cheesecake filling into them generously. Use a small offset spatula or a spoon to spread the mixture evenly to ensure every bite is packed with flavor. Aim to fill the shells right to the top without spilling, as they will look beautiful and inviting once plated.
Step 5: Serve or Refrigerate
Once assembled, you can serve your Crispy Fruity Pebbles Cheesecake Tacos immediately for the freshest taste or refrigerate them for up to 3 days. If serving later, cover with plastic wrap to keep them firm, and serve chilled. Either way, get ready to delight your friends and family with this playful dessert!
What to Serve with Crispy Fruity Pebbles Cheesecake Tacos
Elevate your dessert experience by pairing these colorful treats with delightful complementary flavors and textures.
-
Whipped Cream: A fluffy dollop adds a light contrast to the creamy filling, enhancing the overall indulgence of the tacos.
-
Fresh Berries: Strawberries, raspberries, or blueberries provide a tart freshness that balances the sweetness of the cheesecake filling beautifully.
-
Chocolate Drizzle: A warm, rich chocolate sauce drizzled on top offers a decadent touch that will satisfy any chocolate lover’s cravings.
-
Ice Cream: Serve with a scoop of vanilla or fruity ice cream for a delightful, creamy contrast that makes every bite even more enjoyable.
-
Mint Sprigs: A sprinkle of fresh mint leaves adds a refreshing burst of flavor while elevating the visual appeal of your dessert spread.
-
Sparkling Water: A crisp, bubbly beverage can cleanse the palate between bites, making your dessert experience feel even more vibrant and fun.
These pairings will take your Crispy Fruity Pebbles Cheesecake Tacos to new heights, creating a festive dessert that everyone will love!
Crispy Fruity Pebbles Cheesecake Tacos Variations
Get ready to explore fun twists that will make your Crispy Fruity Pebbles Cheesecake Tacos even more exciting, delighting your taste buds!
-
Flavored Extracts: Swap vanilla extract for coconut or hazelnut to add a unique twist. A hint of lemon zest can brighten the creamy filling, too!
-
Fruity Cereal Swap: Replace Fruity Pebbles with other fruity cereals like Trix or Froot Loops for a similar crunch and colorful flair. This gives each bite a different taste adventure.
-
Add Some Heat: For a spicy kick, sprinkle a pinch of cayenne pepper into your cheesecake filling. The unexpected heat balances beautifully with the sweetness of the cream cheese.
-
Chocolate Drizzle: Elevate your dessert with a rich chocolate drizzle. Melt dark or white chocolate and drizzle it over the topped tacos for an indulgent finish.
-
Nutty Crunch: Mix in some finely chopped nuts like pecans or almonds with the Fruity Pebbles to enhance the texture and flavor. It adds a delightful layer of crunch!
-
Berry Compote: Top your tacos with a fresh berry compote for an added fruity burst. Raspberries or strawberries paired with the rich cheesecake filling create a lovely contrast.
-
Mini Cheesecake Cups: Get creative! Instead of tacos, layer the cheesecake filling, Fruity Pebbles, and optional toppings in small cups for individual servings. Perfect for parties!
These variations not only enhance the original recipe but also introduce endless possibilities for your sweet taco creations. Serve them alongside our delicious Baked Cheesy Tacos or try blending flavors with Chocolate Raspberry Cheesecake for a dessert spread that will impress!
Make Ahead Options
These Crispy Fruity Pebbles Cheesecake Tacos are perfect for meal prep enthusiasts! You can prepare the cheesecake filling up to 24 hours in advance. Simply mix the softened cream cheese, powdered sugar, and vanilla extract, then gently fold in the crushed Fruity Pebbles. Store the filling in an airtight container in the refrigerator to keep it fresh and maintain its delightful creaminess. Additionally, you can bake the taco shells ahead of time—make sure they are fully crisp and then let them cool completely before storing them. When you’re ready to impress your guests, fill the shells with the chilled cheesecake mixture, and serve for a quick, delicious dessert that tastes just as delightful!
Expert Tips for Crispy Fruity Pebbles Cheesecake Tacos
-
Crisp Taco Shells: Ensure taco shells are fully baked and cooled to maintain their structure. Overbaking can lead to a burnt and unappealing texture.
-
Smooth Filling: Use softened cream cheese for your cheesecake filling to achieve the creamiest consistency. Room temperature makes all the difference!
-
Gentle Mixing: When folding in the Fruity Pebbles, be gentle to keep their crunch intact. Over-mixing will lead to a soggy texture.
-
Chill Time: For the best flavor, refrigerate assembled tacos for a bit before serving, enhancing the creamy cheesecake taste.
-
Make-Ahead Magic: Prepare the cheesecake filling a day in advance. This not only speeds up assembly but also allows flavors to meld beautifully.
-
Customize Flavors: Feel free to experiment with different flavored extracts or cereals. This makes your Crispy Fruity Pebbles Cheesecake Tacos even more fun and personalized!
How to Store and Freeze Crispy Fruity Pebbles Cheesecake Tacos
Fridge: Store assembled tacos in an airtight container in the refrigerator for up to 3 days. This ensures the taco shells stay crisp while the filling remains creamy.
Make-Ahead: You can prepare the cheesecake filling a day in advance to save time during assembly, allowing the flavors to mix beautifully.
Room Temperature: Keep the Crispy Fruity Pebbles Cheesecake Tacos chilled; avoid leaving them out for more than 2 hours to maintain freshness.
Freezer: It’s not recommended to freeze the tacos, as it may alter the texture of the taco shells and cheesecake filling, resulting in a less enjoyable dessert.
Crispy Fruity Pebbles Cheesecake Tacos Recipe FAQs
How do I choose the right taco shells?
Absolutely! Sturdy taco shells are essential to hold your cheesecake filling without leaking. Look for shells labeled as “crunchy” or “crispy,” usually made from corn or flour. Ensure they are fresh and free from any visible damage or breakage that could compromise their structure.
How should I store the assembled tacos?
Very! To keep your Crispy Fruity Pebbles Cheesecake Tacos fresh, store them in an airtight container in the refrigerator for up to 3 days. This will maintain the crispiness of the taco shells and the creaminess of the filling. If you make the filling a day in advance, simply assemble the tacos before serving to keep everything tasty!
Can I freeze the cheesecake tacos?
I recommend against freezing these tacos. Freezing can change the texture of both the taco shells and the cheesecake filling, making them soggy once thawed. For best results, enjoy them fresh or within a few days of preparation!
What should I do if my filling is too runny?
If you find your cheesecake filling is too runny, don’t worry! You can mix in a bit more softened cream cheese until you achieve the desired thickness. Alternatively, chill the mixture in the refrigerator for about 30 minutes to help it firm up before filling the taco shells.
Are these tacos suitable for people with allergies?
Absolutely! However, be sure to check the labels of all ingredients. The recipe includes cream cheese, which contains dairy, so it’s not appropriate for those with dairy allergies. You can substitute it with a dairy-free cream cheese alternative if needed. Always verify your cereal for gluten or nut ingredients as well!
Can I prepare the filling in advance?
Yes! Preparing the filling a day in advance is an excellent idea. Simply blend the ingredients, cover tightly, and store in the fridge. This allows the flavors to develop and makes assembly a breeze when you’re ready to serve your Crispy Fruity Pebbles Cheesecake Tacos.
Crispy Fruity Pebbles Cheesecake Tacos for a Sweet Twist
Ingredients
Equipment
Method
- Preheat your oven to 350°F (175°C). Arrange taco shells on a baking sheet and bake for 5–7 minutes until crispy and golden. Let cool.
- In a large bowl, combine softened cream cheese, powdered sugar, and vanilla extract. Beat for 2–3 minutes until smooth and creamy.
- Gently fold in the crushed Fruity Pebbles into the cream cheese mixture, maintaining the crunch of the cereal.
- Take each cooled taco shell and spoon in the cheesecake filling generously, spreading it evenly.
- Serve immediately or refrigerate for up to 3 days. Cover with plastic wrap if storing.
Leave a Reply