
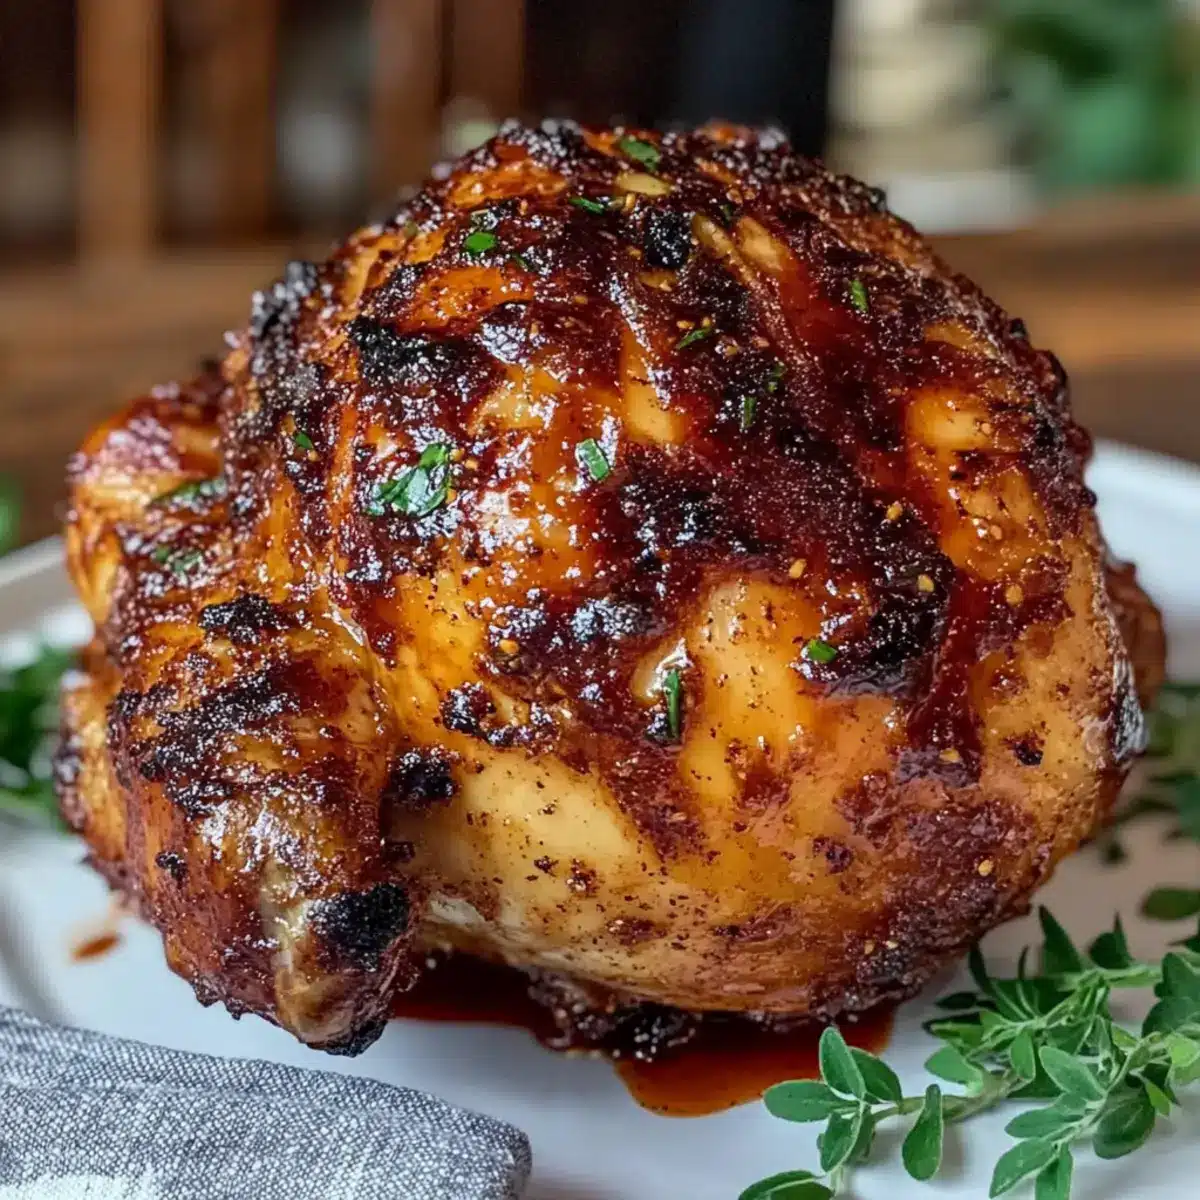
As the sun sets and the tantalizing scent of grilled chicken wafts through the air, nothing brings friends and family together quite like a festive BBQ. My Crispy Beer Can Chicken with Smoked Paprika BBQ Rub takes center stage in any gathering, delivering juicy meat wrapped in a crackling, golden crust. The magic begins with the simple yet effective beer can technique, ensuring this easy chicken recipe is the star of your outdoor meals. Not only does it promise a fun cooking experience, but it also leaves you with minimal cleanup, making it a fantastic choice for busy weeknights or weekend festivities alike. Ready to elevate your grilling game with a dish that impresses every time? Let’s dive into the delicious details!
Why Choose Crispy Beer Can Chicken?
Flavor Explosion: This dish features a smoky, sweet, and slightly spicy BBQ rub that elevates the taste of your chicken to new heights.
Effortless Preparation: With a few simple ingredients, you’ll find that this recipe is as easy as it is delicious, perfect for busy weeknights or impromptu gatherings.
Perfectly Juicy: The beer can technique ensures your chicken remains moist and tender, while the skin crisps beautifully for an irresistible texture.
Crowd-Pleaser: Whether you’re hosting a backyard BBQ or enjoying a family dinner, this Crispy Beer Can Chicken stuns with its look and flavor, winning over even the most discerning eaters.
Versatile Pairings: It pairs wonderfully with classic sides like coleslaw or grilled corn on the cob, making your meal feel complete! For more hearty options, consider serving with Healthy Sticky Chicken or Cheesy Chicken Garlic Bread Sandwich.
Crispy Beer Can Chicken Ingredients
For the Chicken
• Whole Chicken – This is the star of the show; choose a size that fits your crowd, and adjust cooking times accordingly.
• Beer (or alternative) – Provides moisture and depth; consider a gluten-free beer if needed for your dietary choices.
For the BBQ Rub
• Smoked Paprika – Infuses a smoky flavor and vibrant color into your chicken; it’s essential for that BBQ flair.
• Brown Sugar – Adds sweetness that balances the spices; you can swap it with coconut sugar for a healthier option.
• Cayenne Pepper – Brings heat to the dish; feel free to adjust based on your taste preference.
• Garlic Powder – Enhances the overall flavor profile significantly; fresh garlic works too but alters the texture slightly.
• Onion Powder – Complements the garlic well, creating a savory base for your rub.
For the Finish
• Olive Oil – Helps the rub stick and keeps the chicken juicy; you can use melted butter for an extra rich flavor!
Step‑by‑Step Instructions for Crispy Beer Can Chicken
Step 1: Preparation
Begin by patting the whole chicken dry with paper towels. This step is crucial for achieving that coveted crispy skin. Preheat your grill to medium heat, ensuring a two-zone setup with one side hot and the other cool. Let it warm up for about 10–15 minutes, ensuring the grill grates are ready for your chicken.
Step 2: Rub Creation
In a mixing bowl, combine smoked paprika, brown sugar, cayenne pepper, garlic powder, and onion powder. This flavorful mixture will elevate your Crispy Beer Can Chicken with a blend of sweet and spicy notes. Generously apply the rub all over the chicken, ensuring an even coat. Don’t forget to get under the skin for an extra flavor kick!
Step 3: Beer Setup
Open a can of beer or prepare a non-alcoholic substitute like sparkling water. Carefully insert the can into the chicken’s cavity, ensuring it fits snugly, allowing the beer to steam and keep the meat juicy during cooking. Position the chicken upright in a grilling-safe holder or directly on the grill for optimal stability.
Step 4: Grilling Technique
Place the chicken on the cooler side of the grill, maintaining a steady temperature of around 375°F (190°C). Close the lid and cook for approximately 1 hour, making sure to monitor the internal temperature for even cooking. The skin should begin turning a beautiful golden brown, signaling that the rub is caramelizing perfectly.
Step 5: Crisp Finish
Transfer your chicken to the direct heat side of the grill for the final crisping stage. Grill for an additional 5–10 minutes, keeping a close eye to prevent burning. You want the skin to become beautifully crackling and deep golden in color, showcasing your successful craftsmanship with this Crispy Beer Can Chicken.
Step 6: Check Temperature
Using a meat thermometer, check that the internal temperature reaches at least 165°F (74°C) at the thickest part of the thigh. This ensures that your chicken is not only safe to eat but also incredibly juicy. If the temperature is not yet reached, close the lid and let it cook for an additional few minutes before checking again.
Step 7: Resting
Once your chicken is cooked to perfection, carefully remove it from the grill and let it rest for about 10 minutes. This crucial step allows the juices to redistribute throughout the meat, ensuring every bite of your Crispy Beer Can Chicken is tender and moist. Finally, carve and serve to your eagerly awaiting guests!
Make Ahead Options
Preparing your Crispy Beer Can Chicken ahead of time is a fantastic way to save precious moments during the week! You can mix the smoked paprika BBQ rub and store it in an airtight container in the refrigerator for up to 3 days. Alternatively, you can rub it onto the whole chicken and let it marinate in the fridge for 24 hours to amplify the flavors while keeping the chicken moist. When you’re ready to cook, simply set up the beer can and grill it as directed. This not only ensures your chicken is just as delicious and juicy but also allows you to enjoy a stress-free cooking experience on busy nights!
How to Store and Freeze Crispy Beer Can Chicken
Fridge: Store leftover Crispy Beer Can Chicken in an airtight container for up to 3 days to maintain freshness and flavor.
Freezer: Wrap the chicken tightly in plastic wrap and foil before placing it in the freezer to prevent freezer burn. It can last for up to 3 months.
Reheating: To enjoy your leftovers, reheat in the oven at 300°F (150°C) for about 20-25 minutes, ensuring the skin remains crispy—avoid using the microwave for best results.
Thawing: When ready to eat frozen chicken, thaw it in the fridge overnight before reheating to maintain juiciness and taste.
Expert Tips for Crispy Beer Can Chicken
Drying Matters: Ensure the chicken skin is patted completely dry before applying the rub; moisture will prevent crisping.
Steady Heat: Maintain a consistent grill temperature throughout the cooking process; fluctuating heat can lead to uneven cooking and soggy skin.
Use a Thermometer: Always use a meat thermometer to check doneness, concentrating on the thickest parts like the thighs to avoid any undercooked chicken.
Resting Time is Key: Allow the chicken to rest after grilling; this crucial pause helps redistribute juices, ensuring each slice is moist and rich in flavor.
Explore Variations: Don’t hesitate to experiment with different beers or add herbs to the rub for personalized flavor profiles. The key is to keep the cooking technique consistent for your perfect Crispy Beer Can Chicken!
What to Serve with Crispy Beer Can Chicken?
Enhance your outdoor feast with delightful pairings that perfectly complement the irresistible flavors of your chicken!
- Creamy Coleslaw: A crunchy and tangy side dish that offers a refreshing contrast to the smoky, spicy chicken.
- Grilled Corn on the Cob: Sweet and juicy corn brushed with butter is a classic BBQ favorite, adding a burst of flavor and texture.
- Garlic Bread: This warm, buttery bread is perfect for soaking up those delicious juices from the chicken, adding a satisfying crunch.
- Zesty Potato Salad: With its creamy dressing and fresh herbs, a potato salad brightens the meal and keeps everyone coming back for seconds.
- Mixed Green Salad: A simple, fresh salad with a light vinaigrette cuts through the richness, making it an ideal side for balance.
- Baked Beans: Sweet and savory beans pair beautifully with the chicken, their hearty texture creating a comforting addition to your BBQ table.
- Icy Lemonade: A refreshing drink option that cools down the heat from the spices while complementing the BBQ flavor.
- Chocolate Chip Cookies: Round off the meal with warm, gooey cookies, providing a sweet contrast to your delicious Crispy Beer Can Chicken.
Crispy Beer Can Chicken Variations
Feel free to get creative and customize your crispy chicken with these delicious twists that will leave your taste buds tingling!
-
Gluten-Free: Choose a gluten-free beer or use a mixture of sparkling water and broth to keep this meal inclusive for everyone.
You won’t lose the juicy texture, and the flavor will still pop! -
Herb-Infused: Add fresh herbs like rosemary or thyme to your rub for a fragrant twist that complements the smoky flavor nicely.
This adds a touch of elegance to your dish and elevates the overall aroma. -
Spicy Kick: Amp up the heat by adding more cayenne pepper or including crushed red pepper flakes in your rub.
If you’re a heat lover, this variation will make each bite an exciting adventure! -
Sweet Surprise: Swap out the brown sugar for honey or maple syrup to introduce a delightful sweetness.
The caramelization during grilling will add depth and character to your crispy skin. -
Citrus Burst: Squeeze fresh lemon or orange juice over the chicken before applying the rub for a zesty flavor enhancement.
This citrusy note brightens up the dish and cuts through the richness beautifully. -
Barbecue Sauce Glaze: Brush on your favorite BBQ sauce in the last few minutes of grilling for an extra layer of flavor.
This gives your chicken a sticky, sweet glaze that’s hard to resist—perfectly finger-licking good! -
Indoor Roasting: If grilling isn’t an option, roast your chicken in the oven using the same techniques with a roasting pan.
This makes it easy to enjoy crispy beer can chicken, no matter the weather! -
Smoky Variations: Experiment with different types of smoked paprika or even add a touch of liquid smoke for an intensified smoky flavor.
Choose your preference to recreate that authentic backyard BBQ taste indoors.
Whether you decide to delve into the smoky depths of flavor with Applebees Chicken Wonton or try out the sweetness of Honey Lime Chicken, the possibilities are endless. Enjoy the journey of flavor!

Crispy Beer Can Chicken Recipe FAQs
How do I choose the right beer or alternative for my Crispy Beer Can Chicken?
Absolutely! When selecting a beer, opt for something that complements the smoky flavors, such as a lager or pale ale. If you prefer a non-alcoholic option, choose sparkling water or broth—just note that it won’t add the same maltiness that beer does.
What’s the best way to store leftover Crispy Beer Can Chicken?
The best way to store your leftovers is in an airtight container in the fridge, where they’ll stay good for up to 3 days. To reheat, pop it in the oven at 300°F (150°C) for about 20-25 minutes, which helps revive that delicious crispiness. I often reheat mine, and it’s still delightful!
Can I freeze Crispy Beer Can Chicken, and how?
Yes, you can! First, wrap the chicken tightly in plastic wrap, then in aluminum foil before placing it in the freezer. This method helps to prevent freezer burn. You can keep it frozen for up to 3 months. When you want to enjoy it again, transfer it to the fridge to thaw overnight before reheating to retain the juiciness.
What should I do if my chicken skin isn’t crispy?
Very! If your chicken’s skin isn’t crisping as expected, ensure it’s thoroughly dried before applying the rub. Also, check that you’re cooking at the proper temperature—about 375°F (190°C)—and maintain even heat. If the skin still isn’t crisping, consider giving it a quick sear directly over the heat for 5-10 minutes at the end of grilling.
Are there any dietary considerations for this recipe?
Absolutely! For a gluten-free version, simply choose a gluten-free beer. Also, if you or any of your guests have allergies to specific spices, feel free to adjust the rub—omit cayenne pepper for a milder flavor or use garlic and onion powder carefully if there are sensitivities.
Crispy Beer Can Chicken: The Ultimate BBQ Delight
Ingredients
Equipment
Method
- Pat the whole chicken dry with paper towels. Preheat your grill to medium heat with a two-zone setup.
- In a bowl, combine smoked paprika, brown sugar, cayenne pepper, garlic powder, and onion powder. Rub all over the chicken evenly, including under the skin.
- Insert a can of beer into the chicken's cavity and place it upright on a grill-safe holder or directly on the grill.
- Cook the chicken on the cool side of the grill at around 375°F (190°C) for about 1 hour, monitoring the internal temperature.
- Transfer the chicken to the direct heat side of the grill for 5-10 minutes to crisp the skin.
- Check that the internal temperature reaches at least 165°F (74°C) at the thickest part of the thigh.
- Once cooked, remove the chicken from the grill and let it rest for about 10 minutes before carving.
Leave a Reply