
As I flipped through my favorite breakfast recipes, I stumbled upon a gem that instantly refreshed my morning routine: Red Velvet Marble Waffles. This stunning dish combines the rich, velvety texture of red velvet with the light fluffiness of classic waffles, making it a true showstopper for brunch gatherings or special celebrations. Not only do these waffles look incredible with their eye-catching swirls, but they also bring a delightful sweetness and hint of cocoa to each bite, creating a breakfast experience that’s far from ordinary. Plus, you can easily adapt it to be dairy-free, inviting even more guests to join in on the fun. Are you ready to make your mornings a little more magical with these delicious waffles?
Why are Red Velvet Marble Waffles a must-try?
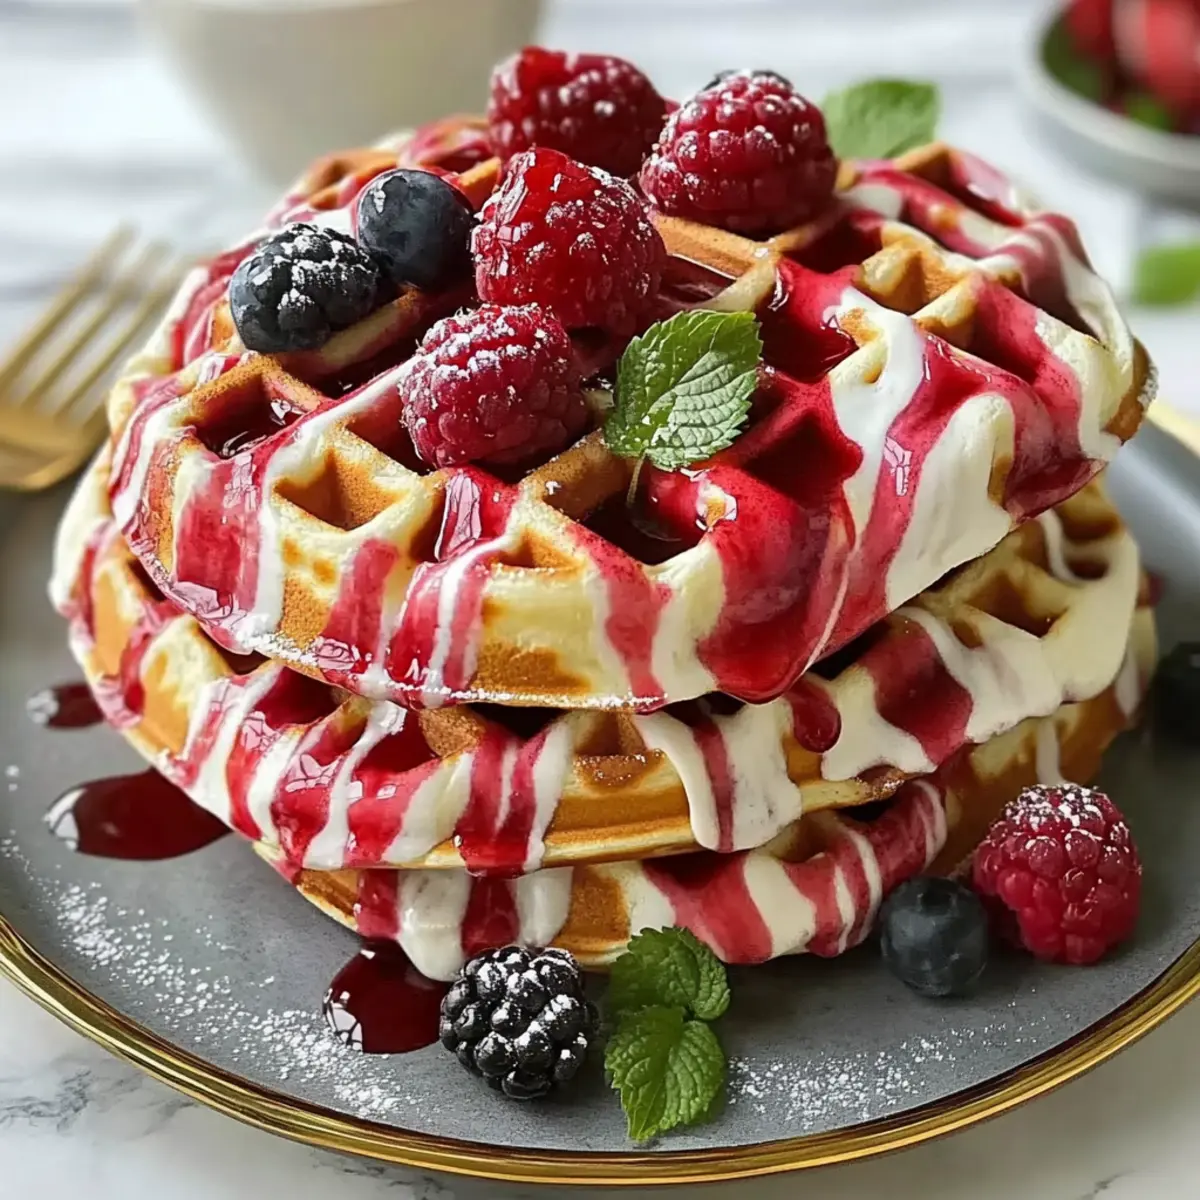
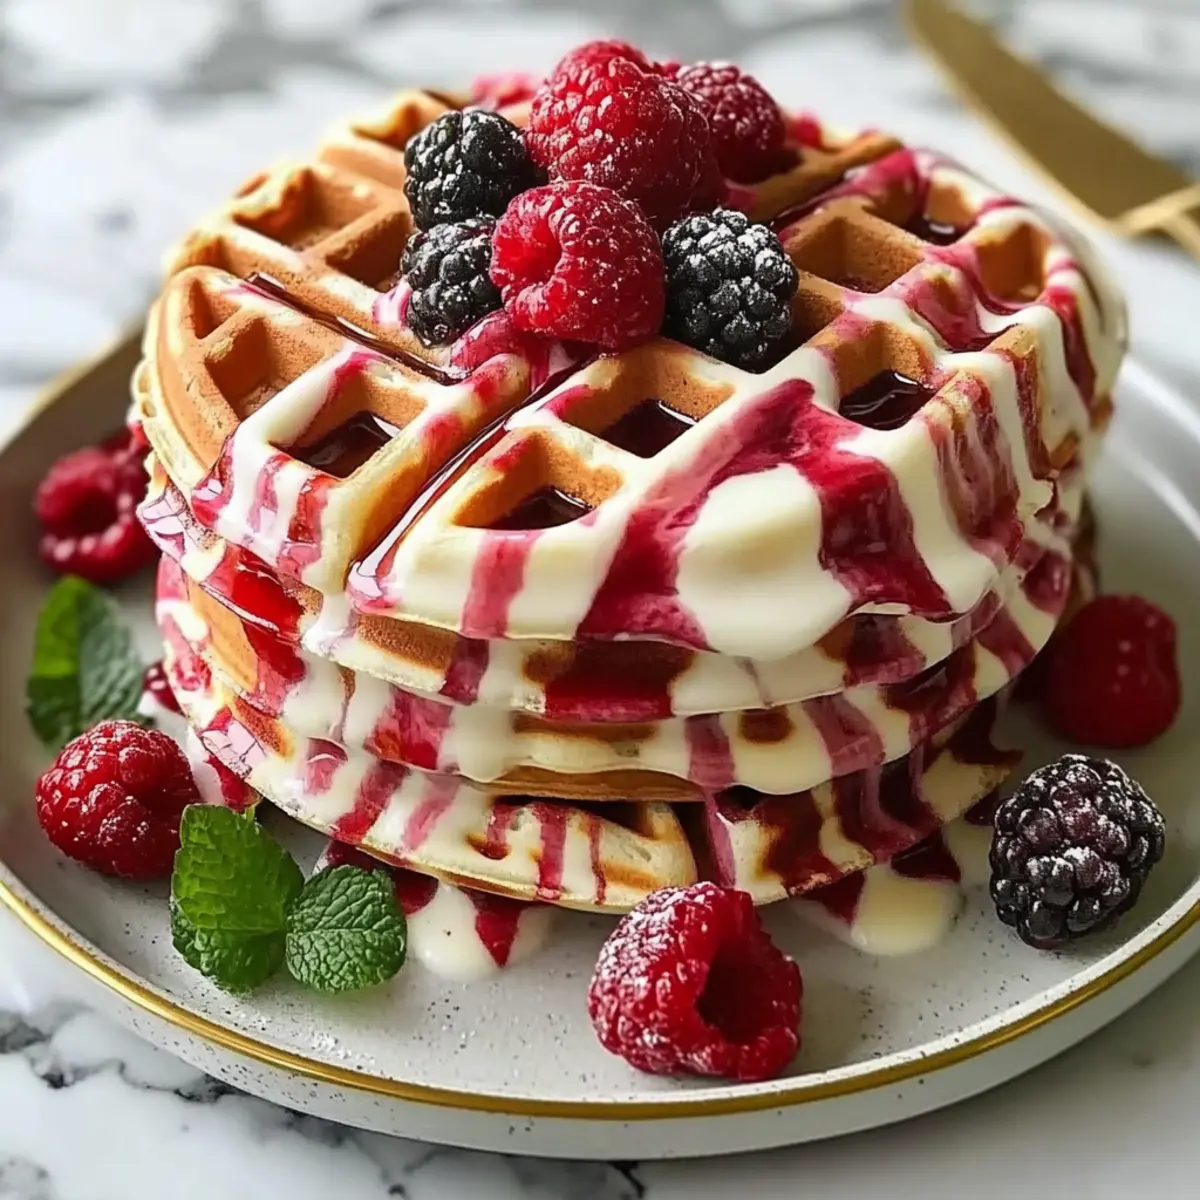
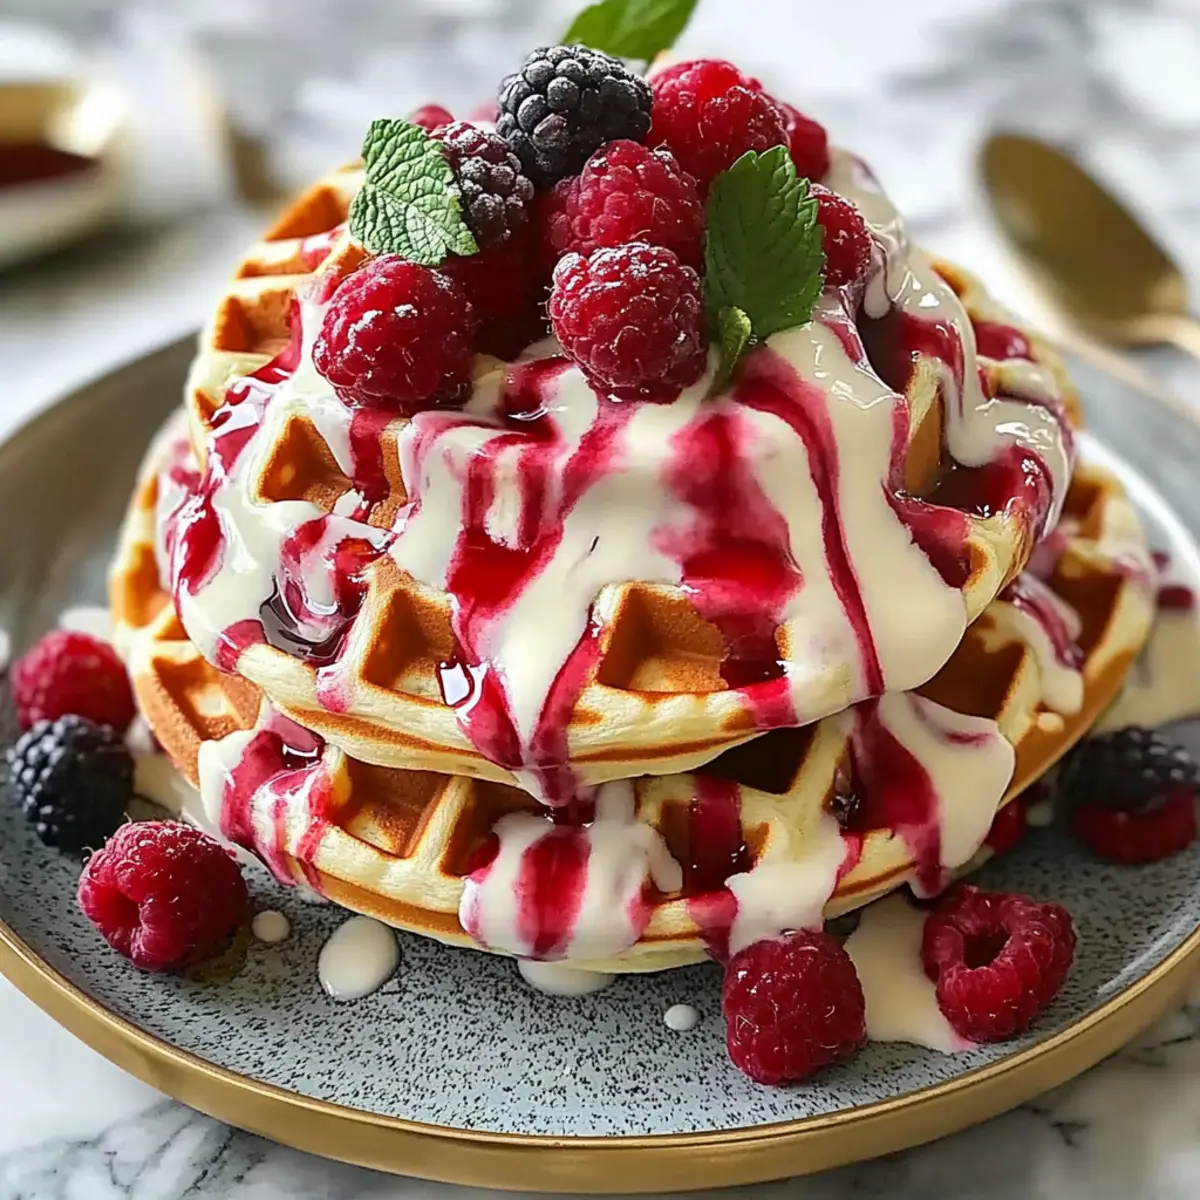
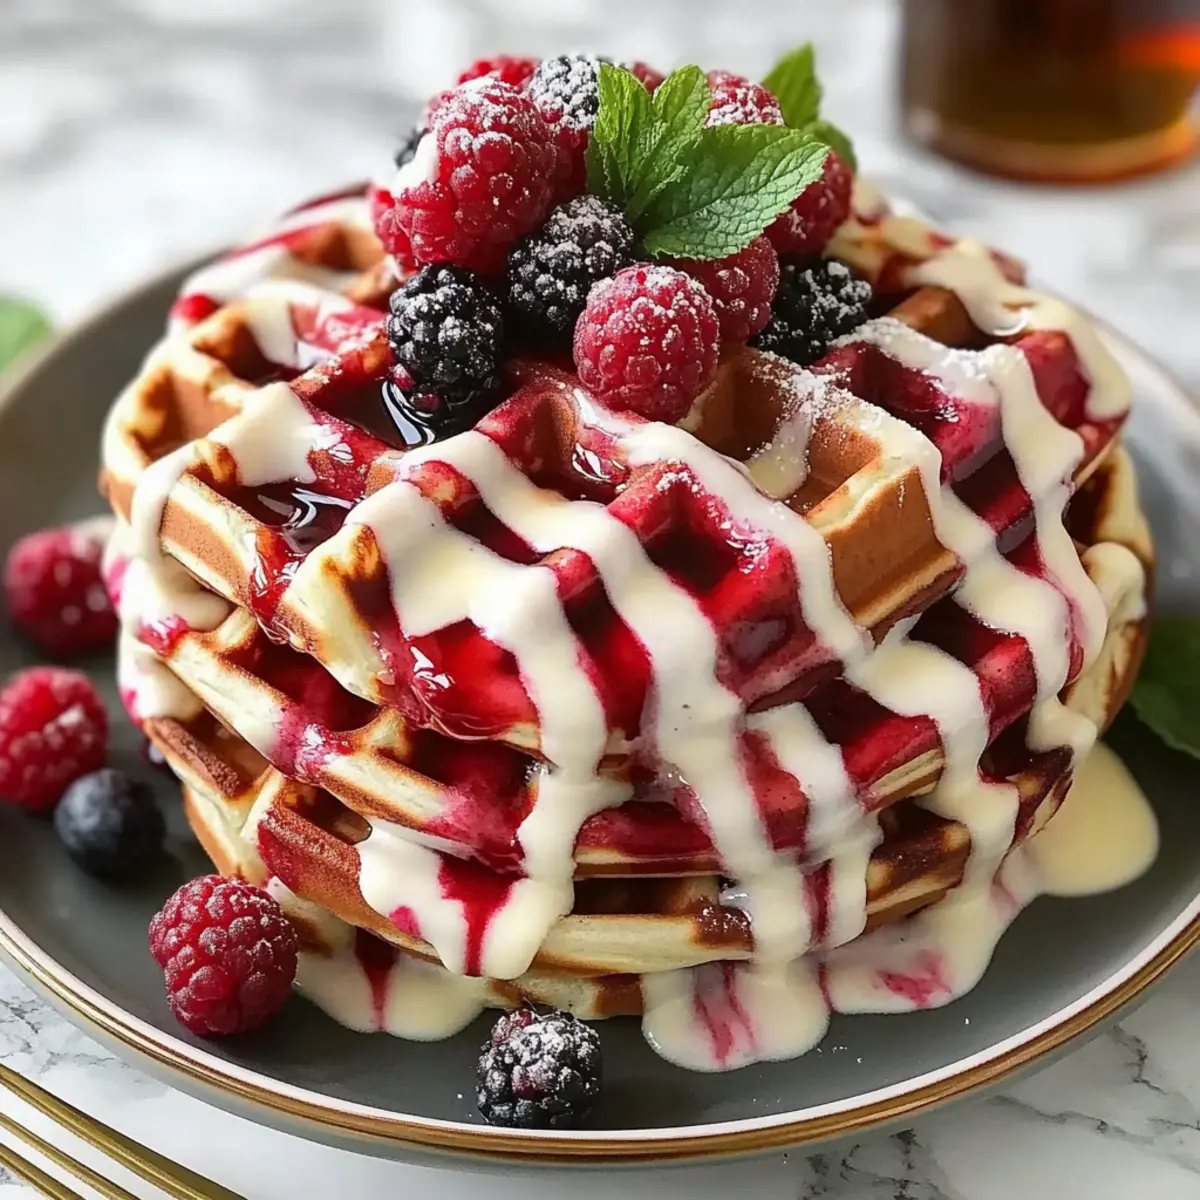
Visual Appeal: The stunning red and white marbling makes these waffles a feast for the eyes, perfect for impressing guests at brunch.
Delicious Combo: Marrying the rich flavor of red velvet with classic waffle lightness creates a balanced and delightful taste.
Flexibility: Easily adapt to dietary needs by substituting buttermilk and eggs, making them friendly for everyone.
Quick & Easy: With straightforward instructions, you’ll have a show-stopping breakfast ready in no time!
Crowd-Pleaser: Be it a festive gathering or a lazy Sunday, these waffles are sure to bring smiles to the table and spark joy in every bite. Want something else to sweeten your morning? Check out my recipe for Velvet Strawberry Cheesecake for another indulgent treat!
Red Velvet Marble Waffle Ingredients
For the Waffle Batter
- All-Purpose Flour – Provides structure to the waffles; substitute with a gluten-free flour blend if needed.
- Buttermilk – Tenderizes the crumb and adds subtle tang; replace with plant-based milk and lemon juice for a dairy-free option.
- Unsweetened Cocoa Powder – Adds depth of flavor without overpowering sweetness; ensure it is unsweetened for the best balance.
- Red Food Coloring (or Beet Juice Powder) – Enhances the visual appeal; natural substitutes can alter coloring intensity while maintaining flavor.
- Granulated Sugar – Adds sweetness and promotes browning; keep the measure consistent or adjust to taste.
- Eggs – Provides moisture and richness; use flax eggs for a versatile vegan alternative.
- Melted Butter (or Neutral Oil/Coconut Oil) – Adds richness and moisture; using oil can also make it dairy-free.
- Vanilla Extract – Enhances overall flavor; always opt for pure vanilla extract for the best results.
- Salt – Balances sweetness and enhances flavors; never skip, as it enriches the taste.
Optional Toppings
- Maple Syrup – Drizzle for added sweetness; rich and complements the flavors beautifully.
- Fresh Berries – Bright and fresh; they add a lovely tart contrast to the sweet waffles.
- Powdered Sugar – A light dusting for extra charm; visually appealing and sweetens the bite further.
These Red Velvet Marble Waffles are sure to create a breakfast that’s not just tasty but also a delightful visual experience for your table!
Step‑by‑Step Instructions for Red Velvet Marble Waffles
Step 1: Prep Ingredients
Begin by carefully measuring all your dry and wet ingredients separately to ensure accuracy. Gather all your necessary tools, including mixing bowls, a whisk, and a waffle iron. This preparation will help streamline the process of creating your delicious Red Velvet Marble Waffles and ensures that you have everything on hand for smooth mixing.
Step 2: Mix Dry Ingredients
In two separate bowls, combine the dry ingredients for both the classic waffle batter and the red velvet batter. For each bowl, mix together the flour, cocoa powder, sugar, and salt. Be sure to whisk thoroughly until there are no lumps, as this will create a uniform texture in your Red Velvet Marble Waffles once cooked.
Step 3: Prepare Wet Ingredients
In another mixing bowl, whisk together the wet ingredients, including buttermilk, melted butter, eggs, and vanilla extract. Mix until well combined and silky smooth. This mixture will blend seamlessly into the dry ingredients, contributing to the rich flavor and tender crumb of your beautiful Red Velvet Marble Waffles.
Step 4: Combine Batters
Gently pour the wet ingredients into the dry ingredient bowls, being cautious not to overmix. Stir each batter just until combined – a few lumps are okay. Aim for a smooth texture within the batters, as this will contribute to the lightness of your waffles. Set the batters aside as you preheat your waffle iron.
Step 5: Preheat Waffle Iron
Plug in your waffle iron and preheat it according to the manufacturer’s instructions, ensuring it reaches a steady temperature. You want the iron hot enough so that the waffles cook evenly and achieve that perfect golden-brown exterior. Take this time to prepare any toppings you’d like for serving.
Step 6: Layer Batters
Once the waffle iron is ready, begin layering the batters. Use a ladle to pour dollops of both the classic and red velvet batters into the hot waffle iron. For an eye-catching swirl effect, gently use a toothpick or knife to swirl the batters together. Avoid over-mixing to preserve the beautiful marbling of your Red Velvet Marble Waffles.
Step 7: Cook Waffles
Close the waffle iron lid and cook for approximately 4 to 5 minutes. Keep an eye on the cooking progress; the waffles should be golden brown and crisp on the outside when ready. The delightful aroma will fill your kitchen, signaling they are just about done.
Step 8: Rest & Serve
Carefully remove the waffles from the iron and place them on a wire rack to cool slightly. Letting them rest ensures the best texture before serving. If desired, stack the Red Velvet Marble Waffles high and top with a drizzle of maple syrup, fresh berries, or a dusting of powdered sugar for that perfect finishing touch!
Make Ahead Options
These Red Velvet Marble Waffles are perfect for busy home cooks looking to save time during hectic mornings! You can pre-mix the batter and store it in the refrigerator for up to 24 hours, which keeps the flavors fresh and ready to go. Simply separate the two batters (red velvet and classic) in airtight containers to prevent them from mixing. When you’re ready to serve, give each batter a gentle stir and layer them in the waffle iron as instructed. This allows you to enjoy delicious, freshly made waffles without the morning rush, ensuring beautiful marbling and that delightful soft texture just as if you made them from scratch that day!
Red Velvet Marble Waffles Variations
Feel free to sprinkle some creativity into your Red Velvet Marble Waffles with these delightful twists that are sure to spark your culinary imagination!
-
Chocolate Chip: Add chocolate chips to the batter for an extra burst of sweetness. Each bite becomes a creamy surprise, bringing joy to chocolate lovers everywhere.
-
Berry Swirl: Incorporate a fruity berry compote into the batter for a refreshing contrast. The vibrant colors and flavors will elevate your waffles to a brunch masterpiece.
-
Mascarpone Topping: Top your waffles with creamy mascarpone or whipped cream for an indulgent treat. The richness pairs beautifully with the cocoa notes, adding a luxurious touch to your breakfast.
-
Savory Twist: Pair your waffles with crispy bacon or sausage for a satisfying savory-sweet experience. The contrast of flavors will please everyone at the breakfast table.
-
Nutty Crunch: Sprinkle chopped nuts into the batter for added crunch and texture. Walnuts or pecans bring warmth and a delightful nutty flavor that complements the sweetness.
-
Dairy-Free Delight: Substitute buttermilk with a plant-based milk and lemon juice to create a dairy-free version. Every bite remains moist and flavorful, welcoming everyone to your table.
-
Pancake Hybrid: Make pancake-like versions using the same batter. Just pour smaller amounts onto a skillet for fluffy, round treats. They’ll still deliver that gorgeous marbling!
For another decadent treat, don’t miss out on trying my delightful Velvet Strawberry Cheesecake for a sweet addition to your breakfast or dessert!
Expert Tips for Red Velvet Marble Waffles
-
Avoid Overmixing: Gently fold the batters together to maintain a light and fluffy texture. Overmixing can lead to tough waffles.
-
Preheat the Iron: Make sure your waffle iron is fully preheated for a crispy exterior. A cold iron can result in soggy waffles that won’t cook properly.
-
Perfect Swirls: Use a toothpick to swirl the batters lightly without combining them completely. This preserves the beautiful red and white marbling.
-
Storage Solutions: If you want to prepare the batter in advance, store it in the refrigerator overnight. Stir gently before using to reintroduce air into the batter.
-
Serving Suggestions: For a festive presentation, stack the waffles with layers of fresh fruits and a drizzle of maple syrup, inviting everyone to indulge in your stunning Red Velvet Marble Waffles!
Storage Tips for Red Velvet Marble Waffles
Fridge: Store leftover waffles in an airtight container for up to 2 days. This keeps them fresh and ready for a quick breakfast!
Freezer: For longer storage, wrap each waffle individually in plastic wrap or foil and place them in a freezer-safe bag. They can be kept for up to 3 months.
Reheating: To restore their delicious crispness, reheat waffles in a toaster or oven at 350°F (175°C) for about 5-7 minutes. Enjoy your Red Velvet Marble Waffles, just like fresh!
What to Serve with Red Velvet Marble Waffles?
Brighten your breakfast table with delightful pairings that enhance the magic of your Red Velvet Marble Waffles.
- Creamy Mascarpone: This rich, velvety topping adds a luxurious touch, balancing sweetness with its smooth texture.
- Fresh Berries: Strawberries, raspberries, or blueberries bring a refreshing tartness, cutting through the sweetness of the waffles beautifully.
- Maple Syrup: A classic choice that adds warmth and richness, drizzling this syrup enhances the comforting flavors of your waffles.
Indulging in these waffles with berries creates a party for your taste buds, merging sweetness with freshness.
- Whipped Cream: Light and airy, whipped cream adds a delightful finishing touch, making each bite feel like a festive treat.
- Crispy Bacon: The savory crunch contrasts wonderfully with the sweet waffles, offering an exciting sweet-and-savory experience.
- Hot Chocolate or Coffee: These drinks provide a cozy complement, enveloping the meal in warmth and enriching the cocoa flavors.
A sip of hot chocolate alongside the waffles amplifies the joyous morning vibe!
Red Velvet Marble Waffles Recipe FAQs
How do I choose the right ripeness for ingredients?
Absolutely! For the best flavor in your Red Velvet Marble Waffles, make sure your eggs are fresh and at room temperature for better emulsification. If using buttermilk, ensure it’s not expired and is slightly chilled. Generally, fresh ingredients yield better results!
What’s the best way to store leftover waffles?
Very! Store your leftover waffles in an airtight container in the refrigerator for up to 2 days. This helps maintain their texture and flavor. When reheating, place them in the toaster or oven at 350°F (175°C) for about 5-7 minutes to bring back that delightful crispness.
Can I freeze Red Velvet Marble Waffles?
Of course! To freeze your waffles, wrap each one individually in plastic wrap or foil, then place them in a freezer-safe bag. They can be stored for up to 3 months. When you’re ready to enjoy them, simply reheat from frozen, warming them in a toaster or oven until heated through and crispy!
What if my waffle batter is too thick?
Sometimes, you might encounter thick batter, which can happen if your flour measurement is off or something dried out unexpectedly. Start by adding a tablespoon of milk (dairy or non-dairy) at a time to loosen the mixture. Whisk gently until you reach your desired consistency—smooth and pourable but not too runny.
Are there any dietary considerations I should keep in mind?
Absolutely! If you or anyone you’re serving has dietary restrictions, you can easily adapt this recipe. Substitute buttermilk with a blend of plant-based milk and lemon juice for a dairy-free version or use flax eggs instead of regular eggs for a vegan alternative. Always check that your cocoa powder and food coloring are vegetarian-friendly as well!
Can I make any adjustments to the sweetness level?
Very! Feel free to adjust the granulated sugar in your batter to suit your taste! If you prefer a less sweet profile, reduce it by a couple of tablespoons. You can also consider topping your waffles with fresh fruit or yogurt, which can add natural sweetness without overpowering the lovely flavors of the waffles themselves.
Red Velvet Marble Waffles That Make Every Morning Special
Ingredients
Equipment
Method
- Begin by measuring all your dry and wet ingredients separately and gather your necessary tools.
- Combine the dry ingredients for both waffle batters in separate bowls, whisking thoroughly to eliminate lumps.
- In a mixing bowl, whisk together the wet ingredients until smooth.
- Pour the wet ingredients into the dry ingredients and stir until just combined to avoid overmixing.
- Preheat your waffle iron according to manufacturer's instructions.
- Layer the batters into the waffle iron, creating swirls without overmixing.
- Close the waffle iron and cook for 4 to 5 minutes until golden brown.
- Remove the waffles and let them cool slightly before serving with toppings.
Leave a Reply