
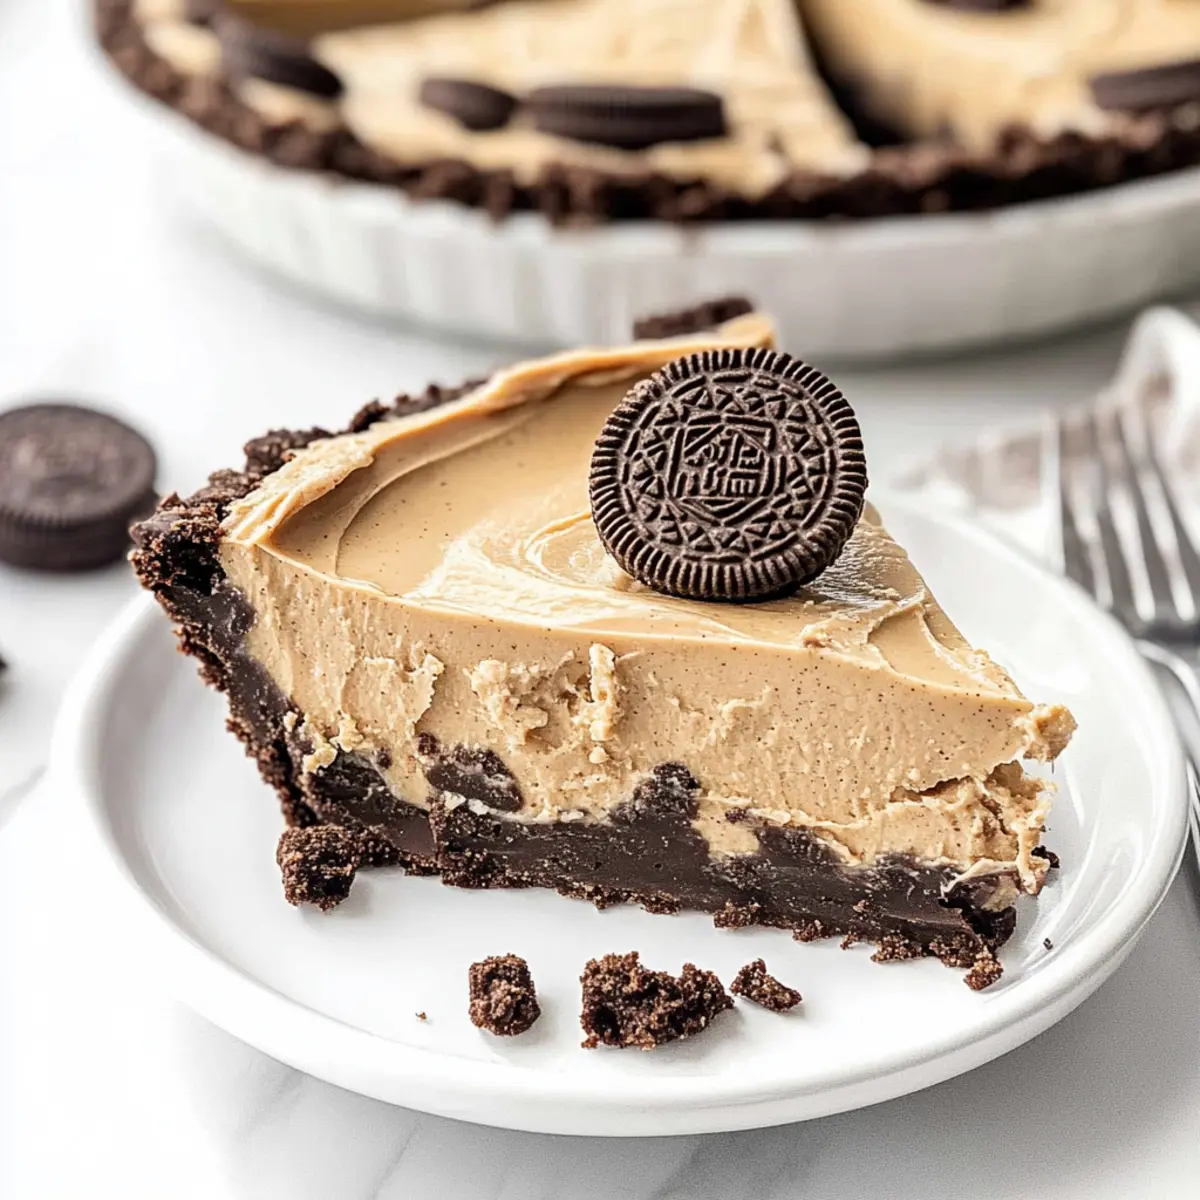
As I stood in my kitchen, the sweet aroma of crushed Oreos filled the air, instantly transporting me to my childhood days spent devouring desserts with reckless abandon. If you’re looking for a delightful treat that comes together effortlessly, look no further than this Peanut Butter Pie with Easy Oreo Crust. With its no-bake glory, you can whip it up in just 30 minutes using only six simple ingredients, making it perfect for those busy weeknights or impromptu gatherings. This dessert isn’t just speedy; its creamy peanut butter filling layered on a crunchy chocolate crust is bound to please everyone at the table, leaving mouths watering for more. Ready to impress your friends? Let’s dive into how to make this irresistible pie!
Why is this Peanut Butter Pie irresistible?
Decadent Indulgence: This pie is a dream come true for peanut butter lovers, featuring a rich and creamy filling that spreads joy in every bite.
Quick and Easy: With just 30 minutes of prep time and six simple ingredients, it’s the ideal solution for busy home cooks craving a homemade dessert.
No-Bake Convenience: Skip the oven and let this pie chill in the fridge, making it a perfect make-ahead treat for any occasion.
Crowd-Pleaser Appeal: Whether it’s a family gathering or a potluck, this dessert is sure to wow guests, keeping them asking for the recipe!
Versatile Toppings: Customize your pie with delectable options like crushed Oreos or drizzles of chocolate, giving it your own personal touch.
Don’t miss checking out my amazing Oreo Milkshake Every for a delicious drink to pair with this dessert!
Peanut Butter Pie with Easy Oreo Crust Ingredients
• Get ready to create a scrumptious dessert!
For the Crust
- 30 Oreo cookies – Crushed to create a rich, chocolatey crust; you can use chocolate wafer cookies if you’re out of Oreos.
- 5 tablespoons butter – Melted to add richness and bind the crust together; margarine works as a substitute too.
For the Filling
- 8 oz cream cheese – Softened to ensure a creamy, stable filling; opt for vegan cream cheese for a dairy-free option.
- 1 cup creamy peanut butter – This is the star ingredient, providing all the creamy nuttiness; feel free to use natural peanut butter for a healthier spin.
- ¾ cup powdered sugar – Sweetens the filling for a perfect balance of flavors; you can use a sugar alternative if you’d like to cut calories.
- 8 oz Cool Whip – Lightens the filling for a delightful texture; try whipped coconut cream for a dairy-free version.
Optional Toppings
- Reese’s cups – Chopped to add extra chocolate and peanut butter flavor; they’re irresistible!
- Crushed Oreos – Sprinkle on top for an added crunch and decoration; or try drizzles of chocolate, caramel, or peanut butter for an extra indulgent touch.
This Peanut Butter Pie with Easy Oreo Crust is sure to be a hit at your next gathering!
Step‑by‑Step Instructions for Peanut Butter Pie with Easy Oreo Crust
Step 1: Prepare the Crust
Begin by preheating your oven to 350°F. Coat a 9-inch pie pan with non-stick spray for easy release. In a food processor, crush 30 Oreo cookies into fine crumbs, then combine with 5 tablespoons of melted butter. Press this mixture evenly into the base and sides of the pie pan, and bake for 8-10 minutes until set. Remove from the oven and let it cool completely.
Step 2: Make the Filling
While the crust cools, prepare the creamy filling. In a large mixing bowl, use an electric mixer to beat 8 oz of softened cream cheese and 1 cup of creamy peanut butter together until smooth and well-combined. Gradually add in ¾ cup of powdered sugar, continuing to beat until incorporated. Lastly, fold in 8 oz of Cool Whip to lighten the mixture, creating a light, airy filling.
Step 3: Assemble the Pie
Once the crust is completely cooled, pour the peanut butter filling into the crust, spreading it evenly with a spatula. Use a smooth motion to ensure a lovely, even top. For an extra touch of indulgence, sprinkle your desired optional toppings like crushed Oreos or chopped Reese’s cups over the filling, allowing for a rich mix of textures and flavors.
Step 4: Chill
Cover the assembled Peanut Butter Pie with Easy Oreo Crust and refrigerate for at least 3 hours, allowing the filling to set properly. For an even firmer texture, you can freeze the pie for 1-2 hours before serving. This chilling step ensures every slice holds its shape and provides a refreshing, cool dessert experience.

Expert Tips for Peanut Butter Pie
-
Room Temperature Cream Cheese: Ensure your cream cheese is softened to room temperature for smooth mixing. Cold cream cheese can lead to lumps.
-
Crust Consistency: Don’t rush the crust! Press the crushed Oreos and butter firmly into the pan to prevent it from crumbling when serving.
-
Chilling Time: Chilling the pie for at least 3 hours is crucial for the filling to set properly. A chilled pie offers the best texture and flavor.
-
Mixing Method: Use an electric mixer for the filling to achieve that light, airy consistency that complements the rich crust perfectly, making your peanut butter pie delightful.
-
Creative Toppings: Experiment with toppings beyond the basics! Adding pretzel pieces or drizzles of caramel can elevate your Peanut Butter Pie with Easy Oreo Crust to an unforgettable treat.
Make Ahead Options
These Homemade Peanut Butter Pie with Easy Oreo Crust are a fantastic choice for busy home cooks looking to save time! You can prepare the crust up to 24 hours in advance, simply baking it and allowing it to cool completely before storing it in the fridge. The filling can also be made and kept refrigerated for up to 3 days; just mix the cream cheese, peanut butter, powdered sugar, and Cool Whip, then transfer it to an airtight container. When ready to serve, spread the filling into the chilled crust, adding your favorite toppings before chilling it again for at least 3 hours. This way, you’ll have a delicious pie ready to impress with minimal last-minute effort!
What to Serve with Decadent No-Bake Peanut Butter Pie with Oreo Crust
Enhance your dessert experience with lovely pairings that play off the creamy, indulgent flavors of this delightful treat.
-
Fresh Berries: Juicy strawberries or raspberries introduce a refreshing tartness, providing contrast to the rich peanut butter pie.
-
Chocolate Sauce Drizzle: A warm drizzle over the pie adds a beautiful presentation and intensifies the chocolatey goodness of the Oreo crust.
-
Whipped Cream: Lightly sweetened whipped cream creates a fluffy texture, balancing the richness of the filling and inviting indulgence.
-
Coffee: A cup of hot coffee complements the flavors beautifully, enhancing the creamy richness while offering a comforting finish to the meal.
-
Ice Cream: Creamy vanilla or chocolate ice cream brings a cold element and makes each bite of pie even more decadent.
-
Nutty Trail Mix: Crunchy elements like almonds and peanuts in a trail mix provide a satisfying contrast, harmonizing with the pie’s creamy texture.
-
Caramel Sauce: A drizzle of caramel adds a sweet, buttery layer, enhancing every spoonful of the peanut butter pie with a luscious finish.
These delightful additions ensure your homemade peanut butter pie isn’t just a treat but a full experience that you and your guests will love!
Peanut Butter Pie Variations & Substitutions
Feel free to unleash your creativity and customize this delicious pie to suit your taste buds!
-
Nutty Twist: Swap out peanut butter for almond or cashew butter for a delightful change in flavor.
-
Dairy-Free Option: Substitute cream cheese with vegan cream cheese and replace Cool Whip with whipped coconut cream; still luscious without the dairy!
-
Healthier Crunch: Use whole grain or gluten-free chocolate wafer cookies for the crust, keeping it wholesome while enjoying that chocolatey base.
-
Spicy Kick: Add a pinch of cayenne or chili powder to the filling for a surprising warm note that complements the sweetness beautifully.
-
Textural Contrast: Toss in some crushed pretzels on top before serving for a fun salty-sweet crunch that’ll surprise and delight your guests!
-
Flavor Enhancer: Incorporate a teaspoon of vanilla extract into the filling for an extra layer of flavor that enhances the creamy texture.
-
Chocolatey Indulgence: Drizzle melted chocolate or caramel over the top before serving for an elegant finish that’s visually stunning and utterly decadent.
-
Lew-Oreo Upgrade: Want to take it up a notch? Blend in some chopped Reese’s cups into the filling for mini bites of chocolate peanut butter bliss throughout your pie!
Feel free to explore and find your perfect version of this Peanut Butter Pie with Easy Oreo Crust! And while you’re at it, don’t forget to try my Coconut Crusted Salmon with Pineapple Salsa for a delicious dinner that pairs wonderfully with this sweet treat!
How to Store and Freeze Peanut Butter Pie
Fridge: Store the pie covered in plastic wrap or aluminum foil in the fridge for up to 5 days, keeping it fresh and delicious for a week of indulgence.
Freezer: For longer storage, wrap the pie tightly in plastic wrap and aluminum foil, storing it in the freezer for up to 3 months. Thaw in the refrigerator before serving.
Serving Tips: When ready to enjoy, slice the pie while still slightly frozen for neat portions, or allow it to chill in the fridge for a softer texture that melts in your mouth.
Reheating: This Peanut Butter Pie is best served cold; avoid reheating to maintain the creamy consistency. Enjoy it fresh for maximum flavor and satisfaction!
Peanut Butter Pie with Easy Oreo Crust Recipe FAQs
How do I choose the best Oreos for the crust?
Absolutely! For the best crust, select Oreos that are fresh and whole, without any dark spots or signs of staleness. You can also opt for any chocolate wafer cookies as a substitute if you’re in a pinch.
What’s the best way to store leftover peanut butter pie?
To keep your peanut butter pie fresh, cover it tightly with plastic wrap or aluminum foil and store it in the refrigerator for up to 5 days. This way, you can enjoy this creamy delight all week long!
Can I freeze the peanut butter pie?
Yes, you can! To freeze, wrap the pie tightly in plastic wrap and then in aluminum foil to prevent freezer burn. It will last for up to 3 months. When you’re ready to enjoy, thaw it in the refrigerator overnight for the best texture.
My filling turned out lumpy; what went wrong?
Very! A common reason for lumpy filling is starting with cold cream cheese. Make sure yours is at room temperature before mixing, as this helps achieve that smooth, creamy filling. If it does happen, try mixing it longer at a high speed until smooth.
Are there any allergy considerations I should be aware of?
Definitely! This pie contains dairy and gluten due to the cream cheese and Oreos. If you need a dairy-free version, you can substitute the cream cheese with a vegan alternative and use gluten-free chocolate wafer cookies. Always check labels for possible allergens.
Can I add additional flavors to the pie?
Absolutely! Feel free to explore different flavors by replacing peanut butter with almond butter for a unique twist. You could also mix in crushed pretzels for a salty-sweet combo or top it off with flavored whipped cream for extra flair!
Creamy Peanut Butter Pie with Easy Oreo Crust Bliss
Ingredients
Equipment
Method
- Preheat oven to 350°F. Coat a 9-inch pie pan with non-stick spray. Crush 30 Oreo cookies, mix with 5 tablespoons melted butter, press into pie pan and bake for 8-10 minutes. Let cool.
- In a bowl, beat 8 oz softened cream cheese and 1 cup peanut butter until smooth. Gradually add ¾ cup powdered sugar and fold in 8 oz Cool Whip.
- Pour filling into cooled crust, spread evenly, and top with optional toppings like chopped Reese's cups or crushed Oreos.
- Cover and refrigerate for at least 3 hours or freeze for 1-2 hours before serving.
Leave a Reply