
“Did you hear what the kids want for dinner?” It’s a question that seems to pop up in every household, especially when you’re trying to balance flavor, nutrition, and a bit of fun. That’s where my collection of 13 high-protein dinner ideas for kids comes in, featuring delightful options like Mini Tuna Melts. These meals not only tick the boxes for being kid-friendly and nutritious, offering up to 26 grams of protein per serving, but they also make cooking a breeze for you. From creamy textures to fun presentations, these dishes are designed to appeal to even the fussiest eaters. Plus, they give you the confidence that your little ones are getting the nutrition they need to grow strong. Curious to find out how you can turn simple ingredients into quick, satisfying meals that will be the talk of your family dinner? Let’s dive in!
What Makes Mini Tuna Melts a Hit?
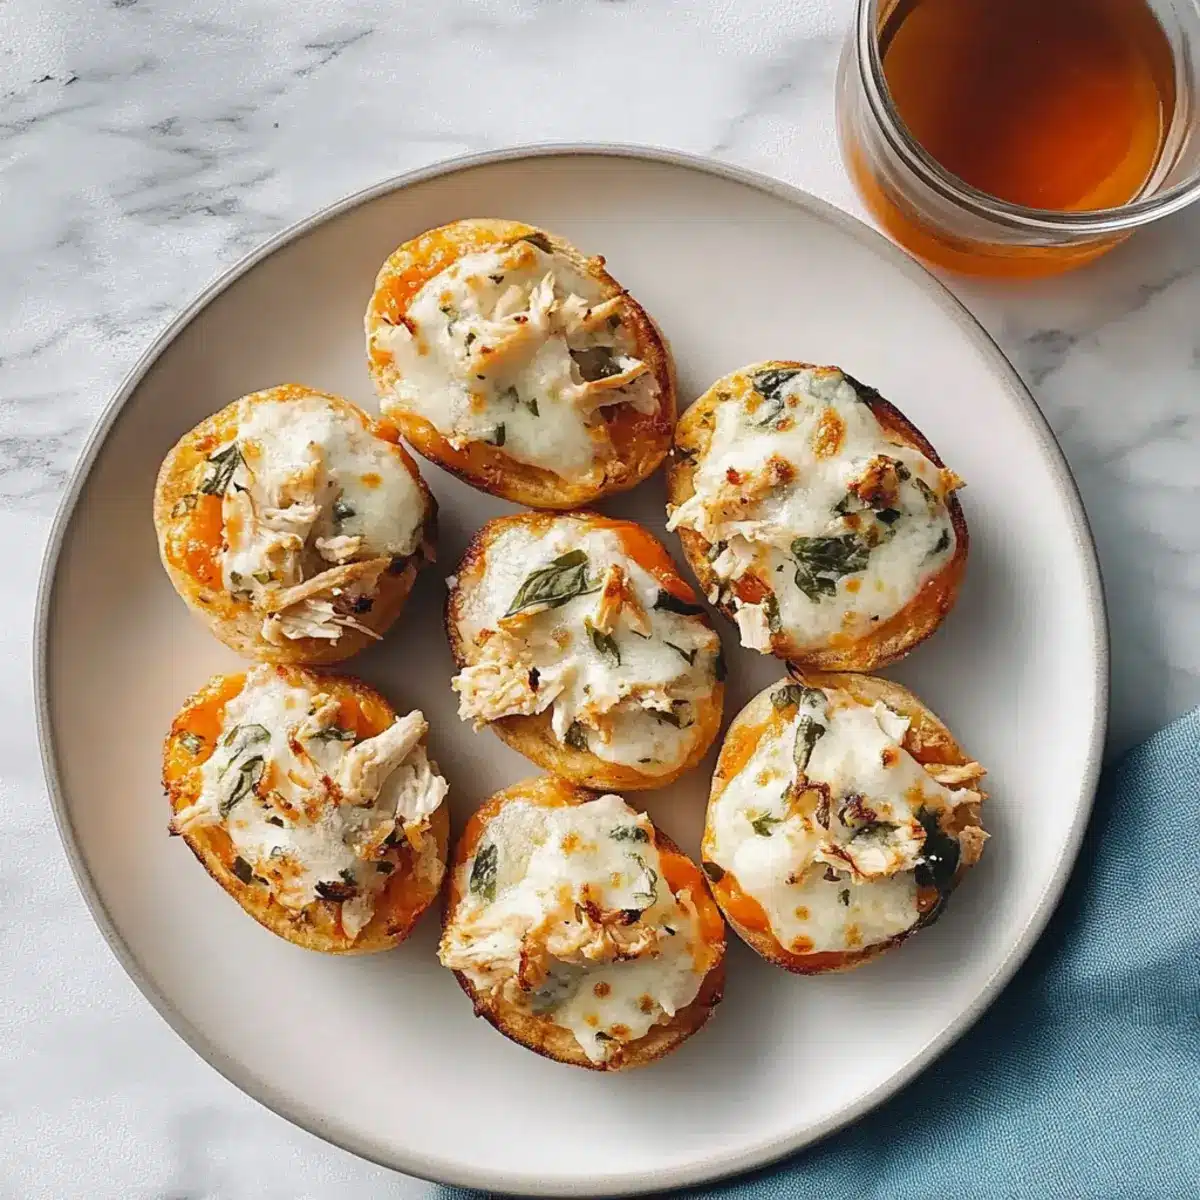
Kid-Friendly Delight: Mini Tuna Melts are a perfect answer to your dinner dilemmas! Protein-Packed: Each serving boasts a whopping 18-26 grams of protein, ensuring your kids are fueled and satisfied. Fun Preparation: Easy to assemble, these treats invite kids to join in, making mealtime interactive! Versatile Ingredients: Feel free to swap tuna for chicken or even beans for a plant-based twist. Looking for more nutritious options? Check out my Velvet Strawberry Cheesecake for a delicious dessert! Quick and Simple: With minimal cooking time, these melts are perfect for busy weeknights. Get ready for the compliments and joy at the dinner table!
Mini Tuna Melts Ingredients
Get ready to make a delightful meal that your kids will ask for again and again!
For the Tuna Mixture
- Canned Tuna – Packed with protein, this is the star of the show and can easily be swapped for grilled chicken or beans.
- Cream Cheese – Adds creaminess to the mixture; Greek yogurt is a great lighter alternative!
- Shredded Cheese – Melts beautifully on top; cheddar or mozzarella will do the trick and add flavor.
- Mayonnaise – This brings everything together; for a healthier option, consider avocado or Greek yogurt.
- Dijon Mustard – A hint of tanginess that kids love; use a milder mustard if preferred.
For the Melts
- Whole Wheat English Muffins – Serve as the base for your mini melts; gluten-free options are available too.
- Cherry Tomatoes – Adds freshness and color; feel free to use diced bell peppers for a crunchy twist.
- Fresh Spinach – Enhances the nutrition factor; switch it out for any leafy green your kids enjoy.
Toppings
- Sliced Avocado – Tasty and creamy for a nutritious boost; jalapeños can spice things up if your kids are adventurous!
- Fresh Herbs – Chopped parsley or dill adds a pop of flavor; let your kids help pick their favorites!
These Mini Tuna Melts are not just delicious but also packed with nutrients, making for a fun and healthy dinner option your kids will surely love!
Step‑by‑Step Instructions for Mini Tuna Melts
Step 1: Preheat the Oven
Begin by preheating your oven to 375°F (190°C). This temperature is perfect for ensuring your Mini Tuna Melts achieve that golden, delicious finish. While the oven heats up, gather your ingredients and line a baking sheet with parchment paper for easy cleanup.
Step 2: Prepare the Tuna Mixture
In a medium bowl, mix together one can of drained canned tuna, 4 oz of softened cream cheese, 1/4 cup of mayonnaise, and 1 teaspoon of Dijon mustard until creamy and well combined. Incorporate 1/2 cup of shredded cheese, adding a delightful cheesiness. Taste and adjust seasoning if needed; you’re aiming for a flavorful tuna filling!
Step 3: Assemble the Melts
Slice whole wheat English muffins in half and arrange them on the prepared baking sheet. Spoon a generous amount of the tuna mixture onto each muffin half, spreading it evenly. Top with halved cherry tomatoes and a handful of fresh spinach, creating layers of color and nutrition for your Mini Tuna Melts.
Step 4: Bake to Perfection
Place the baking sheet in your preheated oven and bake for 12-15 minutes, or until the cheese is melted and bubbles appear. Keep an eye on them; you want a beautifully golden top and bubbling edges, signaling that your Mini Tuna Melts are ready to shine!
Step 5: Add Final Touches
Once out of the oven, let the Mini Tuna Melts cool for a minute. You can add sliced avocado on top for a creamy touch and sprinkle with fresh herbs like parsley or dill for added flavor. This step enhances both the presentation and taste of your delicious tuna melts.
Step 6: Serve and Enjoy
Carefully transfer the Mini Tuna Melts to plates and serve them warm. Encourage your kids to customize their melts with favorite toppings. This interactive aspect not only adds fun to the meal but also allows your little ones to enjoy a nutritious dinner tailored just for them!
Mini Tuna Melts Variations & Substitutions
Feel free to get creative and tailor these Mini Tuna Melts to suit your family’s tastes and dietary needs!
-
Turkey Swap: Replace tuna with shredded turkey for a delicious variation that’s still packed with protein. Perfect for using up leftover holiday turkey!
-
Plant-Based Option: Use chickpeas or mashed white beans instead of tuna to create a vegan-friendly melt. Simply mash and mix with your favorite spices for flavor.
-
Spice it Up: Add a pinch of cayenne pepper or chopped jalapeños to the tuna mixture for an exciting kick that adventurous eaters will love!
-
Cheese Variety: Swap out the cheddar for pepper jack or gouda to enhance the flavor profile and introduce some delightful new tastes.
-
Veggie Boost: Incorporate finely chopped veggies like bell peppers, carrots, or zucchini into the tuna mixture to sneak in even more nutrients.
-
Herb Infusion: Try using fresh dill or chives mixed into the cream cheese for an herby twist that brightens up the flavor of the melts.
-
Open-Faced Style: For a fun presentation, turn your melts into open-faced sandwiches on toasted bread, allowing for greater topping variety.
-
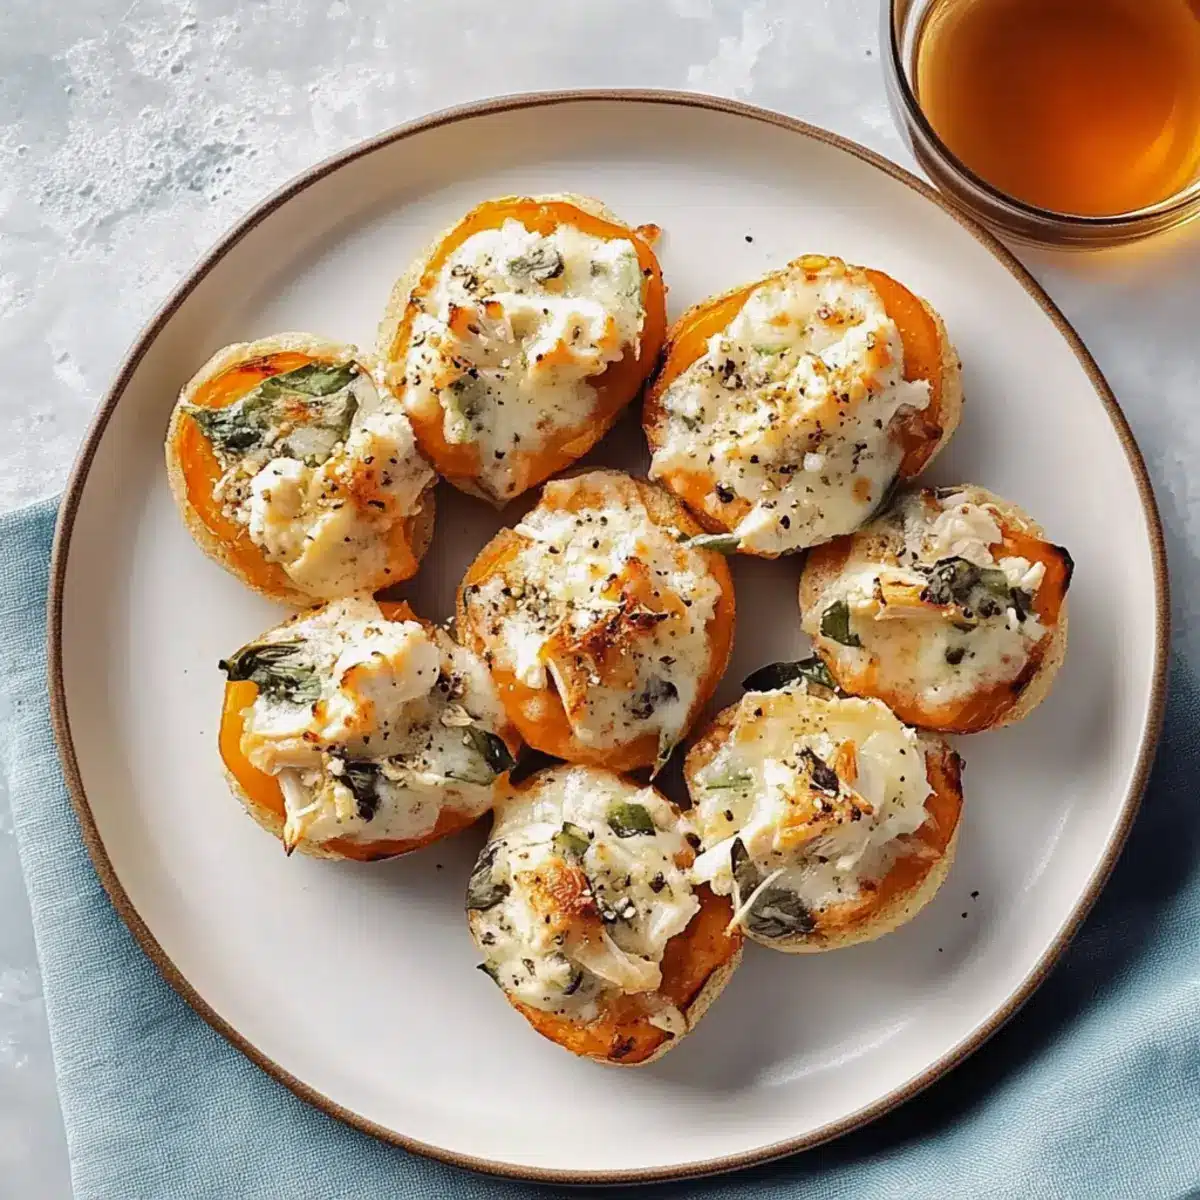
Sweet Potato Base: Use roasted sweet potato slices instead of English muffins for a gluten-free option that adds a touch of sweetness to the dish.
Want to explore more delicious recipes? Try making my delightful Mini Monster Meatloaf for another family favorite!
Make Ahead Options
Mini Tuna Melts are an excellent choice for meal prep, saving you precious time during busy weeknights! You can prepare the tuna mixture and store it in an airtight container in the refrigerator for up to 3 days. If you want to freeze them, assemble the mini melts on English muffins before freezing—just be sure to wrap them tightly to prevent freezer burn. When you’re ready to serve, bake the prepared tuna melts straight from the freezer or after thawing in the fridge overnight, adjusting the bake time accordingly. This way, you’ll still enjoy the delicious, cheesy goodness fresh from the oven, just as satisfying as if you made them that day!
Tips for the Best Mini Tuna Melts
-
Ingredient Prep: Ensure all your ingredients are at room temperature, especially the cream cheese, making it easier to blend into a creamy mixture.
-
Tuna Quality: Choose high-quality tuna packed in water for the best flavor. Avoid overcooking, as it can make the mixture dry; keep it flavorful and moist!
-
Customize Wisely: Encourage kids to mix in their favorite veggies in the tuna mixture. This not only adds nutrition but also makes them more eager to eat.
-
Watch the Bake: Keep an eye on the cooking time! Remove the melts once the cheese is bubbling and golden to prevent them from getting too dry.
-
Let Them Assemble: Involve your children in assembling their Mini Tuna Melts. They’ll love choosing their toppings, turning dinner into a fun family activity!
These Mini Tuna Melts are sure to become a favorite, blending fun and nutrition into every bite!
What to Serve with Mini Tuna Melts?
Imagine a delightful dinner table filled with vibrant colors and tempting aromas, perfectly complementing your tasty melts.
-
Fresh Garden Salad: A crisp salad adds a refreshing crunch that contrasts nicely with the warm melts. Top it with a tangy vinaigrette for balance.
-
Sweet Potato Fries: These offer a sweet crunch, packed with nutrients. Kids will love the fun shape, making for a perfect side option. Dip in ketchup for an added touch!
-
Fruit Skewers: Colorful fruit on skewers brings a playful element to the meal! Melons, grapes, and strawberries help cleanse the palate and are favorite finds among little fingers.
-
Creamy Coleslaw: This tangy, creamy dish pairs well with the savory melts. The coolness of the slaw enhances the taste experience.
-
Vegetable Sticks with Hummus: Crunchy and nutritious, carrot and cucumber sticks can be dipped in a variety of hummus flavors for a wholesome side that keeps kids engaged.
-
Apple Sauce Cups: A sweet and simple dessert, apple sauce offers a light finish—its natural sweetness is often a hit with kids.
These sides will elevate your Mini Tuna Melts, creating a vibrant, balanced meal that your family will eagerly gather around!
How to Store and Freeze Mini Tuna Melts
-
Room Temperature: Mini Tuna Melts are best enjoyed fresh, but if left out, they can remain at room temperature for no more than 2 hours to ensure safety.
-
Fridge: Store any leftovers in an airtight container in the refrigerator for up to 3 days. Reheat gently in the oven or microwave when ready to serve again.
-
Freezer: For longer storage, individually wrap Mini Tuna Melts in plastic wrap and place them in a freezer-safe bag for up to 3 months. Thaw in the fridge overnight before reheating.
-
Reheating: Reheat in a preheated oven at 350°F (175°C) for about 10-15 minutes until heated through, ensuring a soft, cheesy melt. Enjoy these delightful Mini Tuna Melts again without losing their flavor!
Mini Tuna Melts Recipe FAQs
Can I use fresh tuna instead of canned tuna?
Absolutely! You can use fresh tuna; simply cook it thoroughly and then flake it before mixing it with the other ingredients. Just ensure it’s well-seasoned to maintain that delicious flavor your kids will love.
How long can I store leftovers in the fridge?
Store leftover Mini Tuna Melts in an airtight container in the refrigerator for up to 3 days. When reheating, I recommend warming them in the oven for a couple of minutes to keep them from becoming soggy.
Can I freeze Mini Tuna Melts?
Yes! You can freeze Mini Tuna Melts. Individually wrap each melt in plastic wrap, then place them in a freezer-safe bag. They’ll keep fresh for up to 3 months. When you’re ready to enjoy them again, thaw in the fridge overnight and reheat in a preheated oven.
What can I substitute for cream cheese in the recipe?
If you’d like a healthier option, try using Greek yogurt as a substitute for cream cheese. It’ll still provide the creaminess you need while adding a bit of extra protein. You can also use low-fat cream cheese or cottage cheese for a lighter alternative.
What’s the best way to serve Mini Tuna Melts for picky eaters?
Engage your little ones by letting them customize their Mini Tuna Melts! Provide various toppings like sliced avocado, diced bell peppers, or fresh herbs, allowing them to create their own perfect melt. This interactive approach makes mealtime fun and encourages them to try new things.
How can I make these Mini Tuna Melts healthier?
To boost the nutrition in your Mini Tuna Melts, consider using whole grain English muffins or adding extra veggies to the tuna mixture, such as finely chopped carrots or zucchini. You can also reduce the mayo quantity and replace it with mashed avocado for a creamy texture and healthy fats.
Irresistible Mini Tuna Melts Your Kids Will Beg For
Ingredients
Equipment
Method
- Preheat your oven to 375°F (190°C) and line a baking sheet with parchment paper.
- In a medium bowl, mix together the tuna, cream cheese, mayonnaise, Dijon mustard, and shredded cheese until creamy.
- Slice the English muffins in half and arrange them on the baking sheet. Spoon the tuna mixture onto each half.
- Top with halved cherry tomatoes and a handful of fresh spinach.
- Bake in the oven for 12-15 minutes until cheese is melted and edges are bubbly.
- Add sliced avocado and sprinkle with fresh herbs before serving.
- Serve warm and let kids customize their melts with favorite toppings.
Leave a Reply