
As I unwrapped the vibrant layers of a fruit roll-up, a childhood joy washed over me—one that combines sweet memories with today’s need for quick, no-fuss snacks. Enter my Quick and Colorful Fruit Roll-Up Ice Cream Bites. Perfectly blending the chewy excitement of Fruit Roll-Ups with creamy vanilla ice cream, these little bites can be whipped up in just ten minutes! Not only are they a fantastic way to engage kids in the kitchen, but they also offer a customizable twist that’s great for any occasion. Whether you’re looking for a speedy after-school treat or a playful dessert to wow your guests, these no-bake delights are sure to be a hit. Ready to discover how this fun confection can spark some joy in your kitchen? Let’s dive into the details!

Why Are These Ice Cream Bites So Fun?
Quick Preparation: You can whip these up in just 10 minutes, allowing you to serve an impressive treat without the fuss of baking.
Colorful Customization: The vibrant hues of different Fruit Roll-Ups mean you can mix and match flavors to suit any palate or occasion.
Family-Friendly Fun: This recipe provides a great opportunity for kids to get involved, turning snack time into a creative bonding experience.
Nostalgic Experience: Each bite is a delightful blend of chewy fruitiness and creamy ice cream that evokes childhood memories.
Versatile Treat: Perfect for any party or gathering, these bites are a hit among both kids and adults, making them an irresistible crowd-pleaser. Plus, if you enjoy ice cream treats, you might want to check out our Pistachio Ice Cream or Sticky Steak Bites for more sweet and savory delights!
Fruit Roll-Up Ice Cream Bites Ingredients
For the Bites
- Fruit Roll-Ups – The vibrant colors and sweetness make these the star of the treat; feel free to customize with different flavors!
- Vanilla Ice Cream – This creamy base complements the chewy exterior perfectly; try swapping it for your favorite ice cream flavor for a personal touch.
- Parchment Paper – Essential for an easy assembly; if you don’t have it, wax paper works just as well to prevent sticking.
Enjoy crafting these delightful Fruit Roll-Up Ice Cream Bites with ease and creativity!
Step‑by‑Step Instructions for Fruit Roll-Up Ice Cream Bites
Step 1: Prep Your Work Surface
Start by clearing a clean, flat work surface and laying out a sheet of parchment paper. This will be your assembly area, preventing the Fruit Roll-Up Ice Cream Bites from sticking and ensuring easy cleanup. Organize your ingredients nearby: grab the Fruit Roll-Ups and a scoop for the vanilla ice cream to make the assembly process smooth and quick.
Step 2: Unroll the Fruit Roll-Ups
Carefully unroll a Fruit Roll-Up and place it flat on the parchment paper, ensuring it is fully extended before placing the ice cream. The vibrant colors should easily catch your eye, setting the stage for these delightful Fruit Roll-Up Ice Cream Bites. Repeat this with as many Fruit Roll-Ups as you plan to make, arranging them with space in between to avoid overlap.
Step 3: Scoop the Ice Cream
Using a heaping teaspoon, scoop some vanilla ice cream and position it at the center of the unrolled Fruit Roll-Up. Aim for just enough ice cream so that it will be fully enveloped when you wrap the roll-up. This step is crucial, as you’ll want a creamy bite inside that perfectly complements the chewy exterior, making the Fruit Roll-Up Ice Cream Bites irresistible.
Step 4: Wrap the Treats
Gently fold the edges of the Fruit Roll-Up over the ice cream, ensuring the ice cream is completely sealed inside. Take care to fold tightly but not too forcefully, which can cause the roll-up to tear. This wrapping technique preserves the creamy center and shapes the Fruit Roll-Up Ice Cream Bites into neat little packages, ready for freezing.
Step 5: Freeze for Firmness
Place the assembled Fruit Roll-Up Ice Cream Bites on a baking sheet lined with parchment paper, making sure none are touching. Pop them into the freezer for about five minutes until they are firm but not rock solid. Watching them closely during this freezing time is essential, so you achieve that delightful texture that makes them fun to eat.
Step 6: Serve and Enjoy
After freezing, remove your creations from the freezer and serve them immediately for the best experience. The contrast of the chewy Fruit Roll-Up against the creamy ice cream creates a delightful snack that is sure to impress! Enjoy these colorful Fruit Roll-Up Ice Cream Bites with family and friends as a fantastically fun dessert option or afternoon treat.
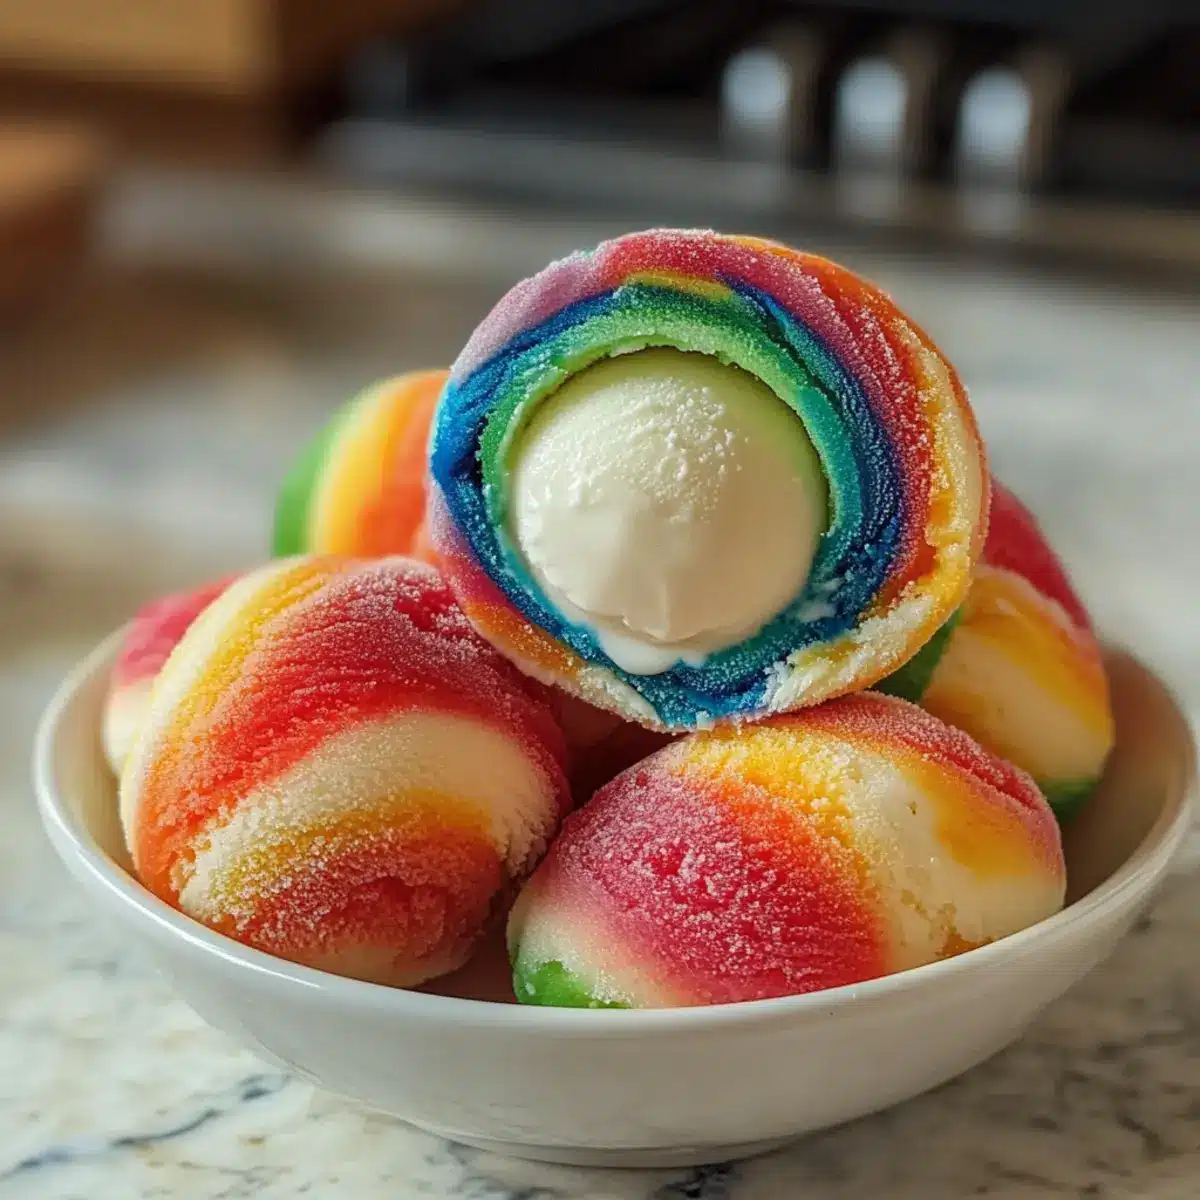
Expert Tips for Fruit Roll-Up Ice Cream Bites
- Freezing Time: Monitor the bites closely in the freezer; you want them firm yet still creamy inside. Over-freezing will lead to a hard center that loses the delightful texture.
- Get Creative: Don’t hesitate to mix flavors; using different ice cream and Fruit Roll-Up flavors allows for a unique twist tailored to your taste buds!
- Avoid Tearing: When wrapping the Fruit Roll-Up, be gentle yet firm; tearing can lead to spills and a mess—no one wants a sad scoop!
- Involve the Kids: Make this a family affair by letting kids scoop and wrap. It turns snack time into a joyful activity that enhances creativity.
- Storage Tips: If you have leftovers, store them in an airtight container in the freezer. Just remember, they taste best when served fresh!
Storage Tips for Fruit Roll-Up Ice Cream Bites
- Freezer: Keep the bites stored in an airtight container in the freezer for up to 1 month. This ensures they stay fresh and retain their delightful texture.
- Serving Size: When ready to enjoy them, remove only the amount you need to prevent thawing the remainder, as they soften quickly at room temperature.
- Reheating: These bites are best served frozen; avoid reheating as it can compromise their fun texture and delicious combination of chewy and creamy.
- Freshness Check: Always check for any signs of freezer burn before enjoying, as this can affect the flavor of your Fruit Roll-Up Ice Cream Bites.
Make Ahead Options
These delightful Fruit Roll-Up Ice Cream Bites are perfect for meal prep, allowing you to enjoy a whimsical snack anytime without the last-minute fuss. You can assemble the bites and keep them in the freezer for up to 3 days. To ensure the best quality, wrap each bite in parchment paper before placing them in an airtight container to prevent freezer burn. When you’re ready to serve, simply let them sit at room temperature for a few minutes until they soften slightly, providing that perfect chewiness and creamy center. With this easy prep, you’ll have a delicious, fun treat ready whenever the craving strikes!
What to Serve with Fruit Roll-Up Ice Cream Bites?
Elevate your Fruit Roll-Up Ice Cream Bites experience with delightful side dishes and treats that create a memorable spread.
-
Fresh Fruit Salad: A vibrant medley of seasonal fruits offers a refreshing contrast to the chewy ice cream bites, adding a burst of flavor that complements them beautifully.
-
Chocolate Dipping Sauce: A warm, rich chocolate sauce for drizzling creates indulgence, making each bite feel like a special occasion.
-
Whipped Cream: Light and airy, a dollop of whipped cream adds a fluffy texture that pairs perfectly with the chewy bites and creamy ice cream inside.
-
Nutty Granola: Crunchy nutty granola provides a satisfying crunch against the soft, chewy texture of the ice cream bites, enhancing the overall experience.
-
Mini Cups of Sorbet: These fruity mini servings provide a light and refreshing palate cleanser between bites, enhancing the deliciousness of the ice cream treats.
-
Sparkling Water: A sparkling beverage adds a touch of sophistication and fizz, refreshing your palate and nicely balancing the sweetness of the bites.
-
Ice Cream Sandwiches: For an extra treat, serve with mini ice cream sandwiches for a nostalgic experience that combines a variety of sweet delights on one serving plate.
Fruit Roll-Up Ice Cream Bites Variations
Each bite can be customized to delight your taste buds in different ways!
-
Dairy-Free: Substitute vanilla ice cream with coconut or almond milk-based ice creams for a creamy, plant-based alternative that everyone can enjoy.
-
Flavor Boost: Try chocolate or mint ice cream for a refreshing twist! The crunchy chew of the Fruit Roll-Up paired with chocolate adds an indulgent layer that elevates each bite.
-
Tropical Vibes: Swap in tropical-flavored Fruit Roll-Ups like mango or pineapple to bring a sunny twist. This fruity combination is perfect for a summer treat that’ll make you feel like you’re on vacation.
-
Nutty Crunch: Add crushed nuts like almonds or pistachios inside the roll-up with the ice cream for a delightful crunch, creating an exciting texture contrast with every bite.
-
Spicy Kick: For those who enjoy a little heat, sprinkle a tiny pinch of cayenne or chili powder in the ice cream before wrapping it up. This unexpected twist will leave your taste buds thrilled!
-
Berry Bliss: Use berry-flavored Fruit Roll-Ups and swap vanilla ice cream for a mixed berry flavor. The pairing of berries with creaminess creates a delightful burst of flavor that feels like a sweet summer day.
-
Make It Crunchy: Roll the finished bites in crushed graham crackers or cookie crumbs before freezing for added texture and fun! This crispy exterior can make a classic dessert even more enjoyable.
-
Sundae Style: Drizzle some chocolate or caramel sauce over the bites just before serving for a decadent finished touch. Pairing the sweetness of the sauces with the fruity bites is a match made in dessert heaven.
Indulging in these variations will only enhance your experience, and if you’re in the mood, check out our delicious Cajun Chicken Spaghetti or treat yourself to some crispy Butter Steak Bites for a complete snack adventure!

Fruit Roll-Up Ice Cream Bites Recipe FAQs
How should I choose the ripeness of my Fruit Roll-Ups?
Absolutely! When selecting Fruit Roll-Ups, look for packages that are intact with no tears or discoloration. Aim for those that are vibrant and fresh without any dark spots or hard edges, as these will provide the best flavor and texture for your Fruit Roll-Up Ice Cream Bites.
How long can I store the Fruit Roll-Up Ice Cream Bites in the freezer?
You can store the Fruit Roll-Up Ice Cream Bites in an airtight container in the freezer for up to one month. To maintain their delightful texture, remember to take out only the amount you plan to enjoy immediately, as they tend to soften quite quickly at room temperature.
Can I freeze leftover Fruit Roll-Ups?
Very! If you have extra Fruit Roll-Ups on hand, you can store them in a cool, dry place—like your pantry—for up to 6 months. However, avoid freezing them. They are best enjoyed fresh, as freezing may alter their texture. Use them for your next batch of Fruit Roll-Up Ice Cream Bites instead!
What if my Fruit Roll-Ups tear while wrapping?
Don’t worry! If your Fruit Roll-Ups tear, simply use a bit of additional Fruit Roll-Up to patch the tear or embrace a different approach by forming ice cream balls instead of wrapping. Just scoop the ice cream into balls and enjoy them as is, or freeze them individually for a fun, no-fuss treat!
Are Fruit Roll-Up Ice Cream Bites suitable for kids with food allergies?
Ensure that you check all ingredient labels for potential allergens, especially if you’re preparing these delightful treats for children. Common allergens in ice cream can include milk, gluten (from some brands), and nuts, so always opt for allergy-friendly substitutes based on your child’s dietary needs.
Can I make these Fruit Roll-Up Ice Cream Bites ahead of time for a party?
Absolutely! You can prepare them a few hours before your event. Just follow the assembly instructions, freeze for about five minutes or until firm, and keep them in an airtight container in the freezer until it’s time to serve. This will save you time while ensuring a fun, colorful treat for your guests!
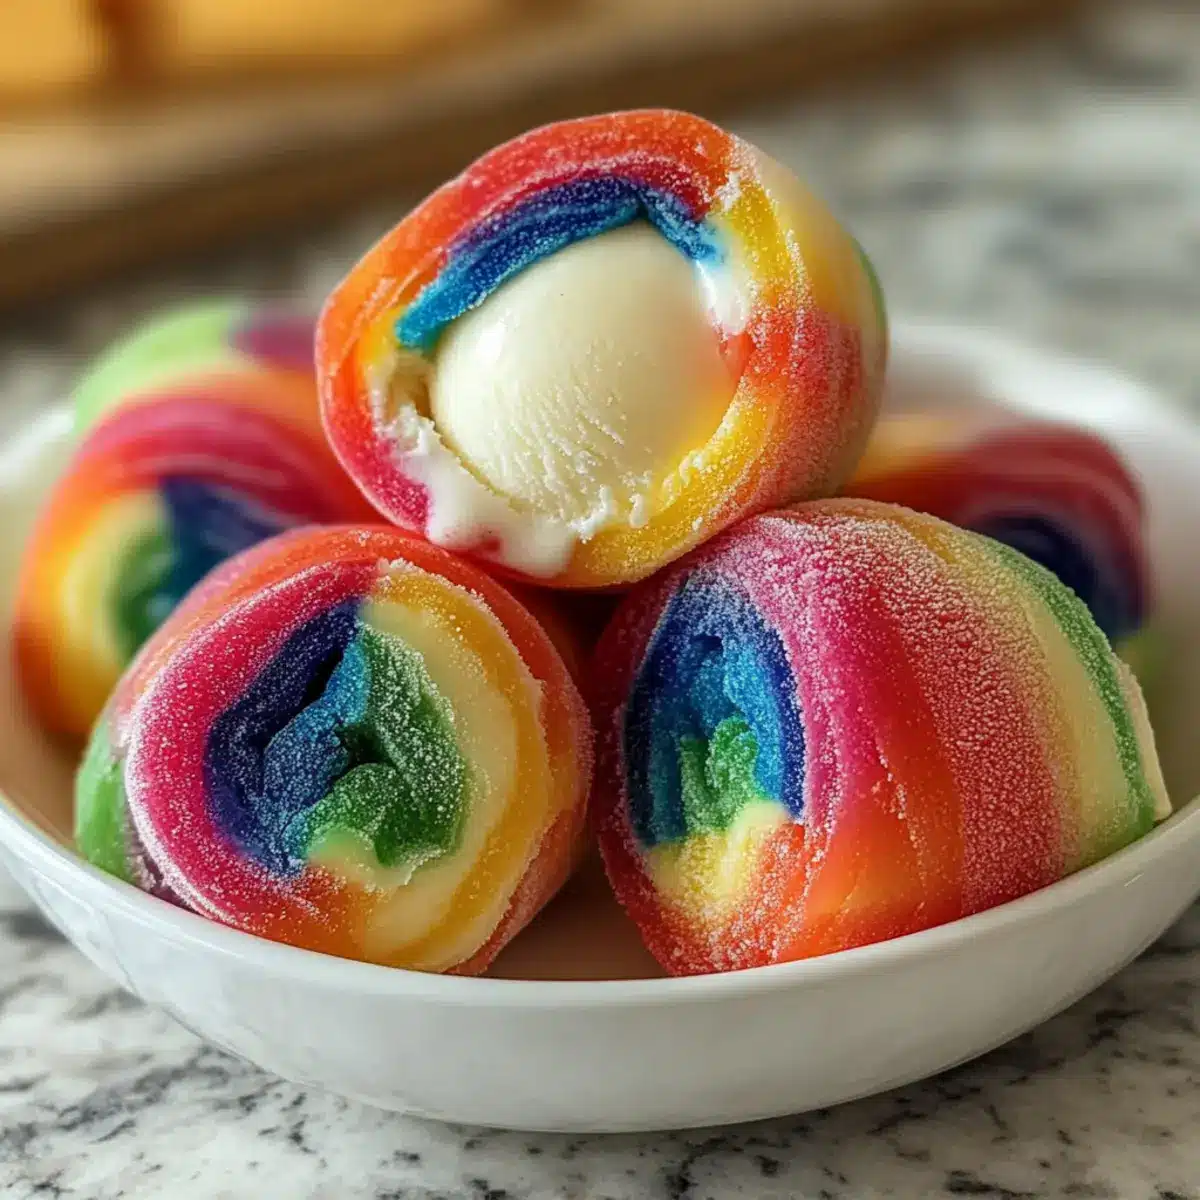
Delightful Fruit Roll-Up Ice Cream Bites for Easy Snacking
Ingredients
Equipment
Method
- Clear a clean, flat work surface and lay out a sheet of parchment paper for assembly.
- Unroll a Fruit Roll-Up, placing it flat on the parchment paper.
- Scoop vanilla ice cream and position it in the center of the unrolled Fruit Roll-Up.
- Fold the edges of the Fruit Roll-Up over the ice cream, sealing it inside.
- Place the assembled bites on a baking sheet lined with parchment paper and freeze for 5 minutes.
- Remove from the freezer and serve immediately for the best experience.
Leave a Reply