
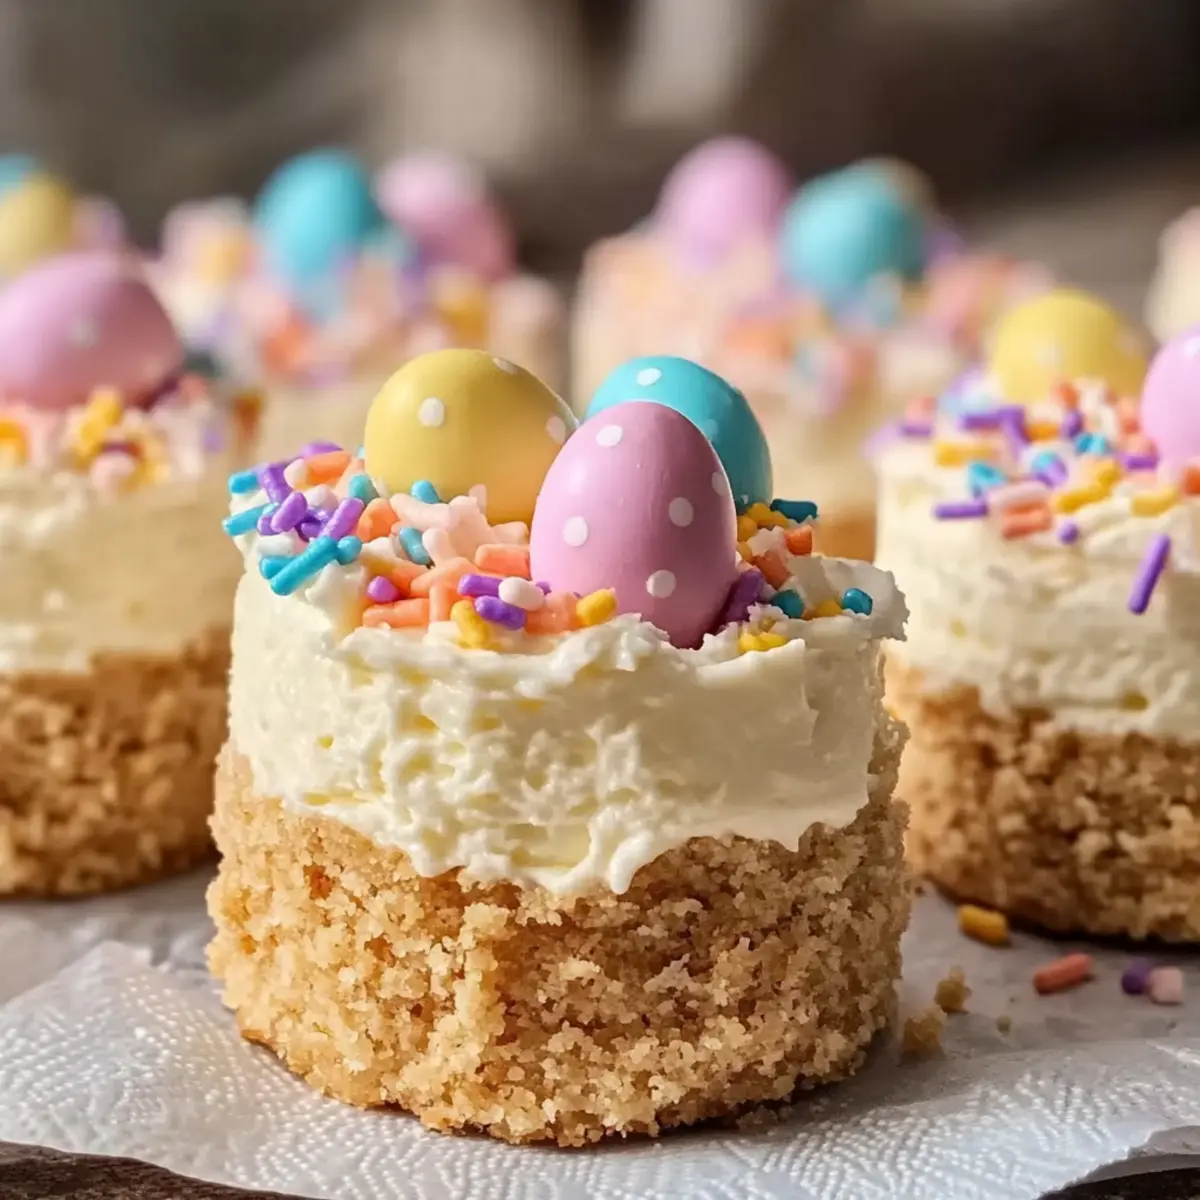
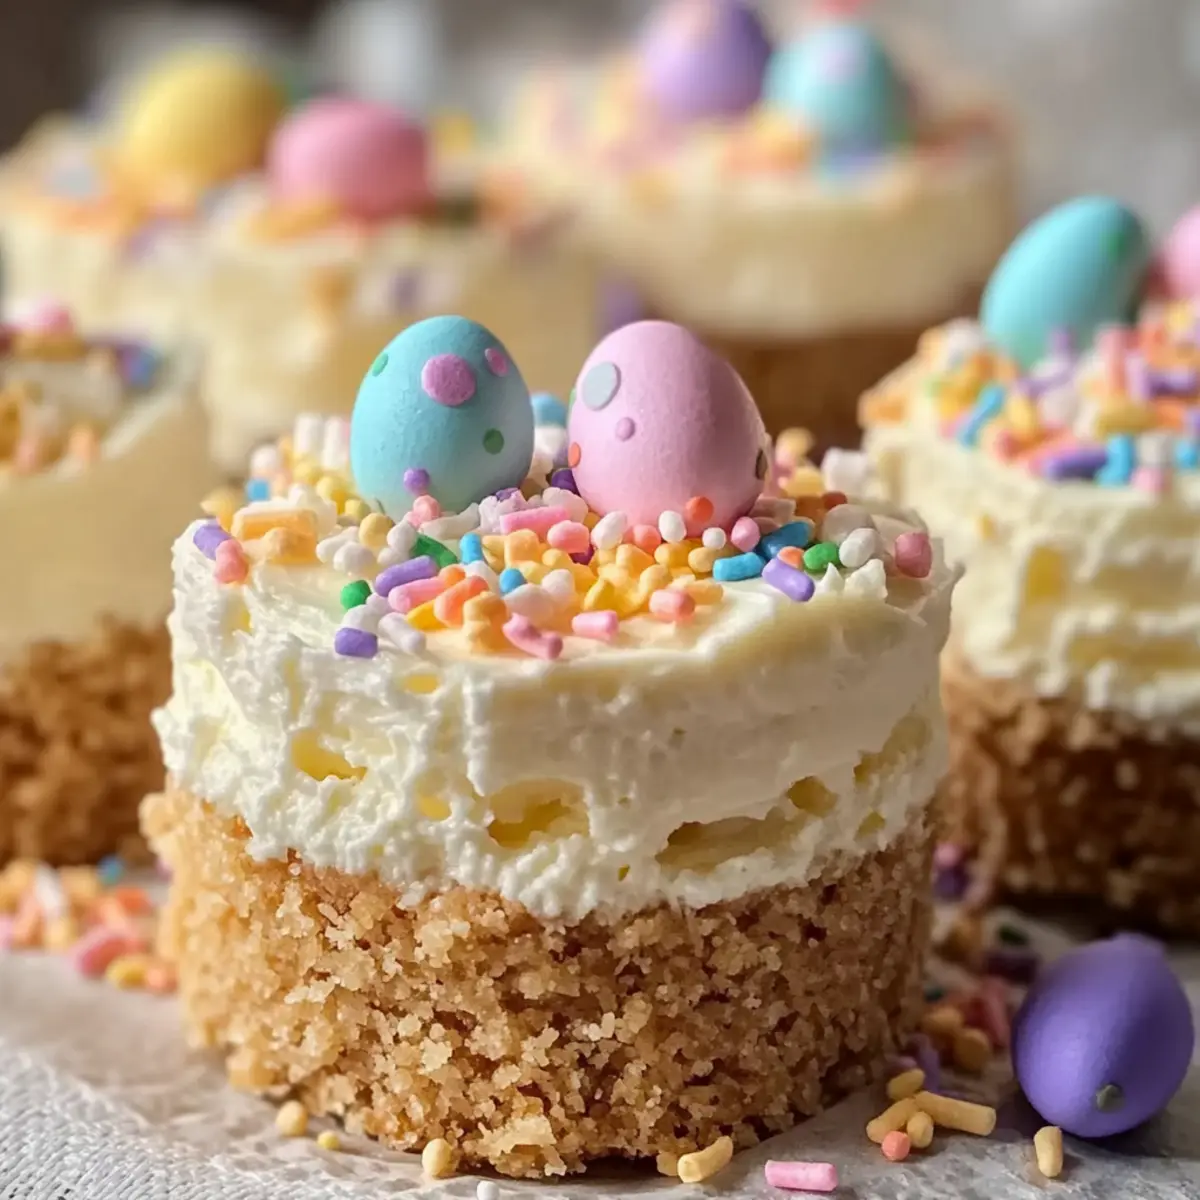
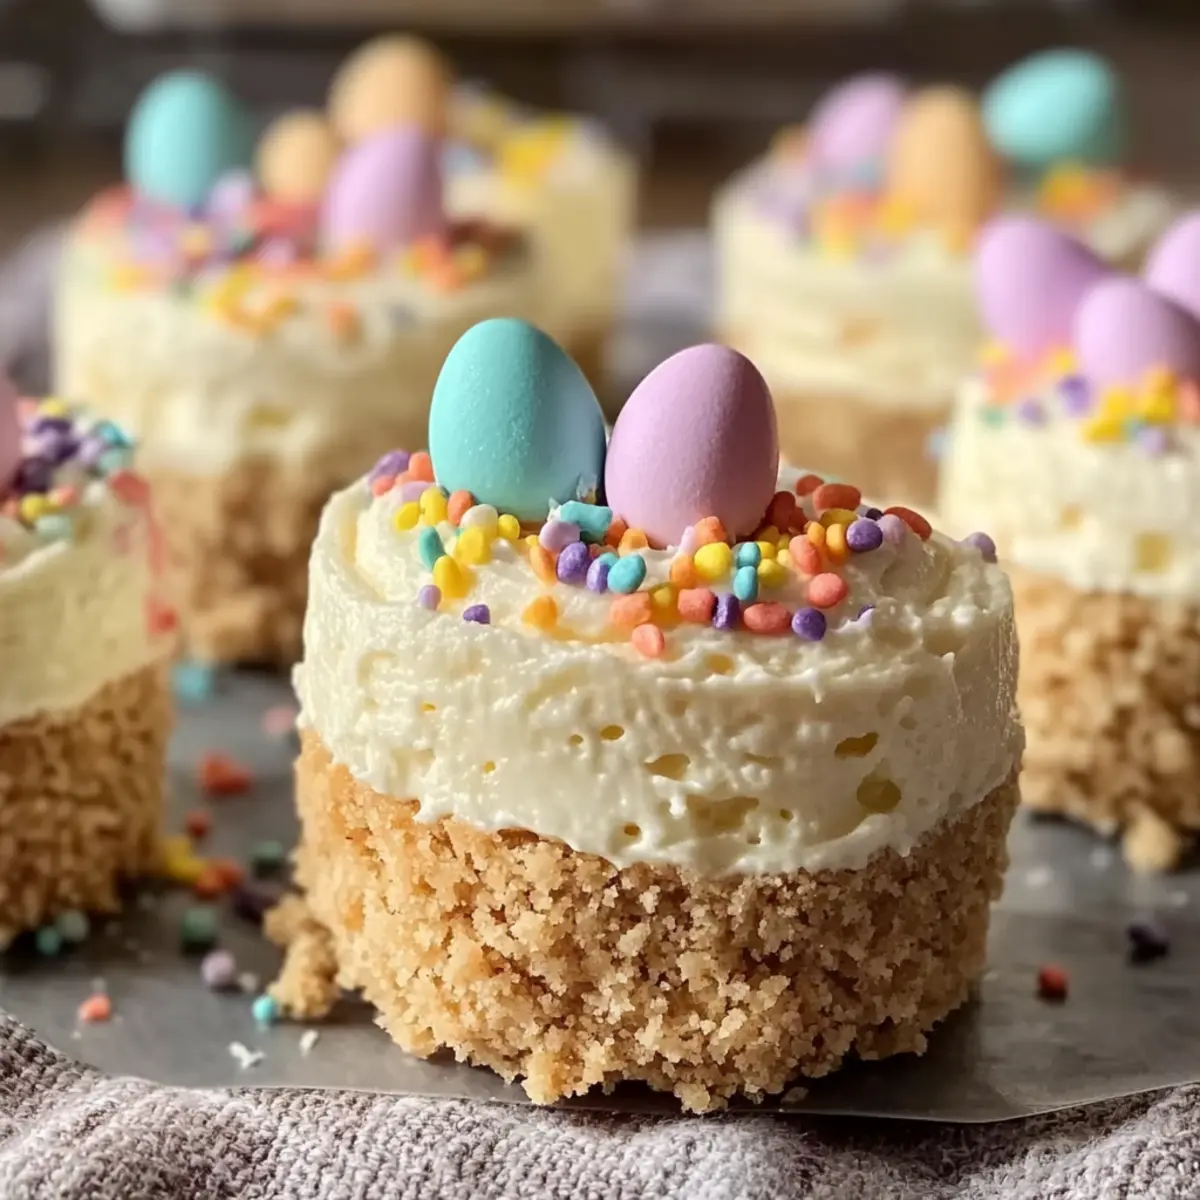
As I stood in the kitchen surrounded by soft pastel colors and the sweet smell of spring, it hit me—Easter isn’t just about egg hunts; it’s about delightful sweets like these Easter No-Bake Mini Cheesecakes. Each bite brings together a creamy filling and a crunchy graham cracker crust that makes indulging feel like a celebration. The best part? These mini cheesecakes are a breeze to whip up in just 20 minutes, giving you more time to enjoy the festivities. Plus, they’re vegetarian-friendly and a hit with both kids and adults, ensuring that everyone gets a delicious taste of the season. Are you ready to impress your guests with this enchanting dessert?
Why Are These Cheesecakes So Irresistible?
Simplicity: They require just 20 minutes of prep, making them incredibly quick and straightforward.
Decorative Delight: Stunning pastel colors and fun toppings guarantee a show-stopping dessert for any occasion.
Crowd-Pleasing Flavor: The creamy filling combined with a crunchy graham cracker crust offers a delightful taste everyone loves, perfect for family gatherings or spring celebrations.
Versatile Options: Customize toppings with your favorite candies or seasonal decorations, ensuring a unique twist every time. Consider even trying the protein boost by incorporating Greek yogurt like in our Mini Monster Meatloaf recipe!
No Baking Required: Enjoy all the flavors without the hassle of baking—this no-bake recipe allows you to focus on other spring festivities while your cheesecakes chill.
Easter Mini Cheesecake Ingredients
For the Crust
• Graham Cracker Crumbs – Provides structure and texture for the crust; you can use pre-made graham cracker crusts to save time.
• Unsalted Butter (melted) – Binds the crumbs together while adding a rich flavor.
• Granulated Sugar – Sweetens the crust, ensuring a balanced flavor profile.
For the Cheesecake Filling
• Cream Cheese (softened) – Acts as the base for the filling, contributing creaminess; ensure it’s at room temperature for easy mixing.
• Powdered Sugar – Sweetens the cheesecake mixture, resulting in a smooth texture without graininess.
• Vanilla Extract – Adds a depth of flavor that elevates the filling.
• Heavy Whipping Cream – Whipped to create a light, airy texture in the filling; beat until stiff peaks form for the best results.
For the Topping
• Pastel-colored Candy Melts – Used for drizzling, these add a decorative touch and a festive flair.
• Mini Chocolate Eggs or Jelly Beans – Enhance both the look and taste, ensuring an eye-catching presentation.
• Easter-themed or Pastel Sprinkles – A final touch that adds color and charm to your dessert.
With these ingredients in hand, you’re just a whisk away from creating the most delightful Easter Mini Cheesecakes that everyone will love!
Step‑by‑Step Instructions for Easter No-Bake Mini Cheesecakes
Step 1: Prepare the Crust
In a mixing bowl, combine the graham cracker crumbs, melted unsalted butter, and granulated sugar until fully blended. The mixture should resemble wet sand. This will form the delicious graham cracker crust for your Easter Mini Cheesecakes.
Step 2: Press into Muffin Tin
Line a muffin tin with paper liners and firmly press the crust mixture into the bottoms of each cup, ensuring an even distribution for a solid base. Aim for a thickness of about 1/4 inch. This step is crucial for building a sturdy crust that holds its shape once chilled.
Step 3: Chill Crust
Place the muffin tin in the refrigerator for about 15 minutes. This will allow the crust to firm up and make assembly easier later on. You’ll know it’s ready when the mixture feels set and holds together when pressed lightly.
Step 4: Beat Cream Cheese
In a large mixing bowl, add the softened cream cheese and beat with an electric mixer on medium speed until smooth and free of lumps, which should take about 2 minutes. A smooth texture is essential for the creaminess of your Easter Mini Cheesecakes.
Step 5: Add Sugar and Vanilla
Gradually mix in the powdered sugar and vanilla extract into the cream cheese mixture. Beat until combined and smooth, about 1-2 minutes more. This will enrich the filling with sweetness and flavor while ensuring a creamy consistency.
Step 6: Whip the Cream
In a separate chilled bowl, whip the heavy whipping cream using an electric mixer until stiff peaks form, which typically takes about 3-5 minutes. This step creates a light and airy texture, making your cheesecake filling fluffy and delightful.
Step 7: Fold in Whipped Cream
Gently fold the whipped cream into the cream cheese mixture using a spatula. Do this carefully to maintain the airy texture of the whipped cream. The goal is to create a smooth and creamy filling for your Easter No-Bake Mini Cheesecakes without deflating the mixture.
Step 8: Fill the Crusts
Once the crust has chilled, evenly spoon the cheesecake filling into each cup over the crusts, smoothing the tops with a spatula. Ensure that each mini cheesecake is filled generously, but aim for an even level across all cups for a beautiful presentation.
Step 9: Refrigerate to Set
Cover the muffin tin with plastic wrap and refrigerate for at least 2 hours, or until the cheesecakes are fully set. They should hold their shape when removed from the tin. This chilling time allows the flavors to meld beautifully.
Step 10: Melt Candy Melts
While the cheesecakes chill, melt your pastel-colored candy melts according to package instructions. Using a microwave or double boiler, heat gradually until smooth and drizzling consistency is achieved. This will add a delightful decorative touch.
Step 11: Add Toppings
Once the cheesecakes are fully set, carefully remove them from the muffin tin. Drizzle the melted candy over each cheesecake and finish with mini chocolate eggs or jelly beans, along with pastel sprinkles for a festive flair. Each topping will enhance the visual and taste experience of your Easter Mini Cheesecakes.

Easter Mini Cheesecakes Variations & Substitutions
Feel free to unleash your creativity and customize these Easter Mini Cheesecakes with delicious alternatives and enhancements!
-
Greek Yogurt: Substitute half the cream cheese with Greek yogurt for a protein-packed twist that doesn’t skimp on flavor.
-
Flavor Extracts: Elevate the taste by adding a splash of almond, lemon, or orange extract to the filling for a refreshing zing. A hint of citrus can take these cheesecakes to a whole new level!
-
Dairy-Free: Use dairy-free cream cheese and coconut cream for a delightful vegan-friendly version that everyone can enjoy. It still maintains a rich texture without sacrificing taste.
-
Sweetener Swap: Opt for natural sweeteners like honey or maple syrup instead of granulated sugar to create a more wholesome dessert. Just remember to adjust the quantities!
-
Nut-Crust Base: For a gluten-free option, replace graham cracker crumbs with finely chopped nuts like almonds or walnuts mixed with butter. This adds a delightful crunch!
-
Fruit Toppings: Top with fresh berries, sliced strawberries, or tropical fruit for a burst of color and flavor that screams spring! These juicy bites will brighten every cheesecake.
-
Chocolate Drizzle: Melt some dark chocolate instead of candy melts for a rich, decadent drizzle that adds depth to the dessert. Pair it with a hint of sea salt for that sweet-salty balance everyone loves.
-
Mini Egg Variants: Experiment with different types of mini eggs or themed candies, like pastel chocolate-covered almonds, to keep the festive spirit alive. Your creative toppings will steal the show!
Don’t forget you can experiment with flavors and textures inspired by our delightful Mini Monster Meatloaf for your next family gathering! Let your imagination run wild and make these cheesecakes a true reflection of your taste.
How to Store and Freeze Easter Mini Cheesecakes
• Fridge: Store in an airtight container for up to 5 days. This keeps your Easter Mini Cheesecakes fresh and ready for indulgence any day!
• Freezer: If you want to make these delightful treats ahead of time, freeze them for up to 1 month. Ensure they are wrapped well to prevent freezer burn.
• Thawing: To enjoy, simply transfer your frozen cheesecakes to the fridge the night before serving. This allows for a gentle thaw, maintaining their smooth texture.
• Reheating: These cheesecakes are best served cold, so there’s no need to reheat them. Just pop them out of the fridge and enjoy!
Make Ahead Options
These Easter No-Bake Mini Cheesecakes are perfect for meal prep and can save you valuable time during busy holiday gatherings! You can prepare the graham cracker crust and refrigerate it up to 24 hours in advance, ensuring a sturdy base when you’re ready to fill them. Additionally, the cheesecake filling can be mixed and stored in an airtight container for up to 3 days in the refrigerator, preventing any separation and maintaining that delightful creaminess. When it’s time to serve, simply spoon the filling into the chilled crusts, refrigerate for another 2 hours to set, and drizzle with melted candy melts right before enjoying. This way, you’ll have a stunning dessert that looks and tastes just as delicious as if you made it all in one go!
What to Serve with Easter No-Bake Mini Cheesecakes
Spring celebrations call for a delightful spread, and these mini cheesecakes will steal the show!
-
Fresh Berries: The tartness of strawberries, blueberries, or raspberries adds a juicy contrast that brightens every bite of cheesecake.
-
Minty Pea Salad: This light and refreshing salad, packed with crisp peas and mint, offers a vibrant pop of color and freshness that complements the rich cheesecakes beautifully.
-
Lemonade Spritzers: Enjoy bubbly lemonade with a splash of club soda for a refreshing beverage that balances the sweetness of the desserts perfectly.
-
Chocolate-Dipped Fruit: Offering an indulgent bite, strawberries or banana slices dipped in dark chocolate play off the sweetness of the mini cheesecakes while adding a touch of decadence.
-
Coconut Macaroons: These chewy treats introduce a tropical flair, their texture harmonizing splendidly with the creamy cheesecake without overwhelming the palate.
-
Vanilla Ice Cream: A scoop of creamy vanilla ice cream adds extra richness and a delightful softness to pair with the crunchy graham cracker crust of your cheesecakes.
With these delicious pairings, your Easter celebration will be both festive and unforgettable!
Expert Tips for Easter Mini Cheesecakes
• Room Temperature Cream Cheese: Always ensure your cream cheese is at room temperature before mixing to avoid lumps in your filling.
• Gentle Folding: When combining whipped cream with the cream cheese mixture, fold gently. Over-mixing can deflate the airiness crucial for a light texture.
• Chill Time Matters: Don’t rush the chilling time; refrigerating for at least 2 hours allows the Easter Mini Cheesecakes to set properly and hold their shape.
• Custom Toppings: Feel free to get creative with toppings! Experiment with different candies or fresh fruits for unique variations each time you make these cheesecakes.
• Check Crust Firmness: After chilling, ensure the crust is firm enough to hold its shape; a well-pressed mixture will create a sturdy base for your delightful treats.
Easter No-Bake Mini Cheesecakes Recipe FAQs
How do I choose the right cream cheese for these cheesecakes?
Absolutely! I recommend using full-fat cream cheese for the richest flavor and smoothest texture in your Easter Mini Cheesecakes. Make sure to choose a brand that you trust, and ensure it’s at room temperature before mixing. This helps avoid any lumps, creating a delightful, creamy filling.
How should I store my Easter Mini Cheesecakes?
You can store your cheesecakes in an airtight container in the refrigerator for up to 5 days. It’s always best to cover them well to keep them fresh and delicious. If you want to savor them a bit longer, you can freeze them for up to 1 month. Just be sure to wrap them tightly to prevent freezer burn.
Can I freeze these cheesecakes? How do I do it?
Very! Freezing your Easter Mini Cheesecakes is simple. First, make sure they are fully set in the refrigerator. Then, carefully wrap each cheesecake in plastic wrap or place them in a freezer-safe container. When you’re ready to enjoy them, just transfer them to the refrigerator the night before, allowing them to thaw slowly while maintaining their lovely texture.
What if my cheesecake filling is lumpy?
If you find that your filling is not as smooth as you’d like, don’t worry! This usually happens when the cream cheese isn’t softened enough. Make sure to beat the softened cream cheese thoroughly until it’s completely smooth before adding any other ingredients. If mishaps occur, you can also run the mixture through a fine mesh strainer to eliminate lumps.
Are these cheesecakes safe for my pets?
It’s best to keep these Easter Mini Cheesecakes away from pets, especially dogs. The ingredients like sugar and dairy can upset their stomachs. If you’re looking for pet-friendly treats, consider making a version specifically for them with safe ingredients.
Deliciously Easy Easter Mini Cheesecakes for Spring Treats
Ingredients
Equipment
Method
- In a mixing bowl, combine the graham cracker crumbs, melted unsalted butter, and granulated sugar until fully blended.
- Line a muffin tin with paper liners and firmly press the crust mixture into the bottoms of each cup.
- Place the muffin tin in the refrigerator for about 15 minutes to firm up the crust.
- In a large mixing bowl, beat the softened cream cheese with an electric mixer until smooth and free of lumps.
- Gradually mix in the powdered sugar and vanilla extract into the cream cheese mixture.
- In a chilled bowl, whip the heavy whipping cream until stiff peaks form.
- Gently fold the whipped cream into the cream cheese mixture.
- Evenly spoon the cheesecake filling into each cup over the crusts.
- Cover the muffin tin with plastic wrap and refrigerate for at least 2 hours or until fully set.
- Melt the pastel-colored candy melts according to package instructions until smooth.
- Once set, drizzle the melted candy over each cheesecake and add mini chocolate eggs or jelly beans, along with pastel sprinkles.
Leave a Reply