
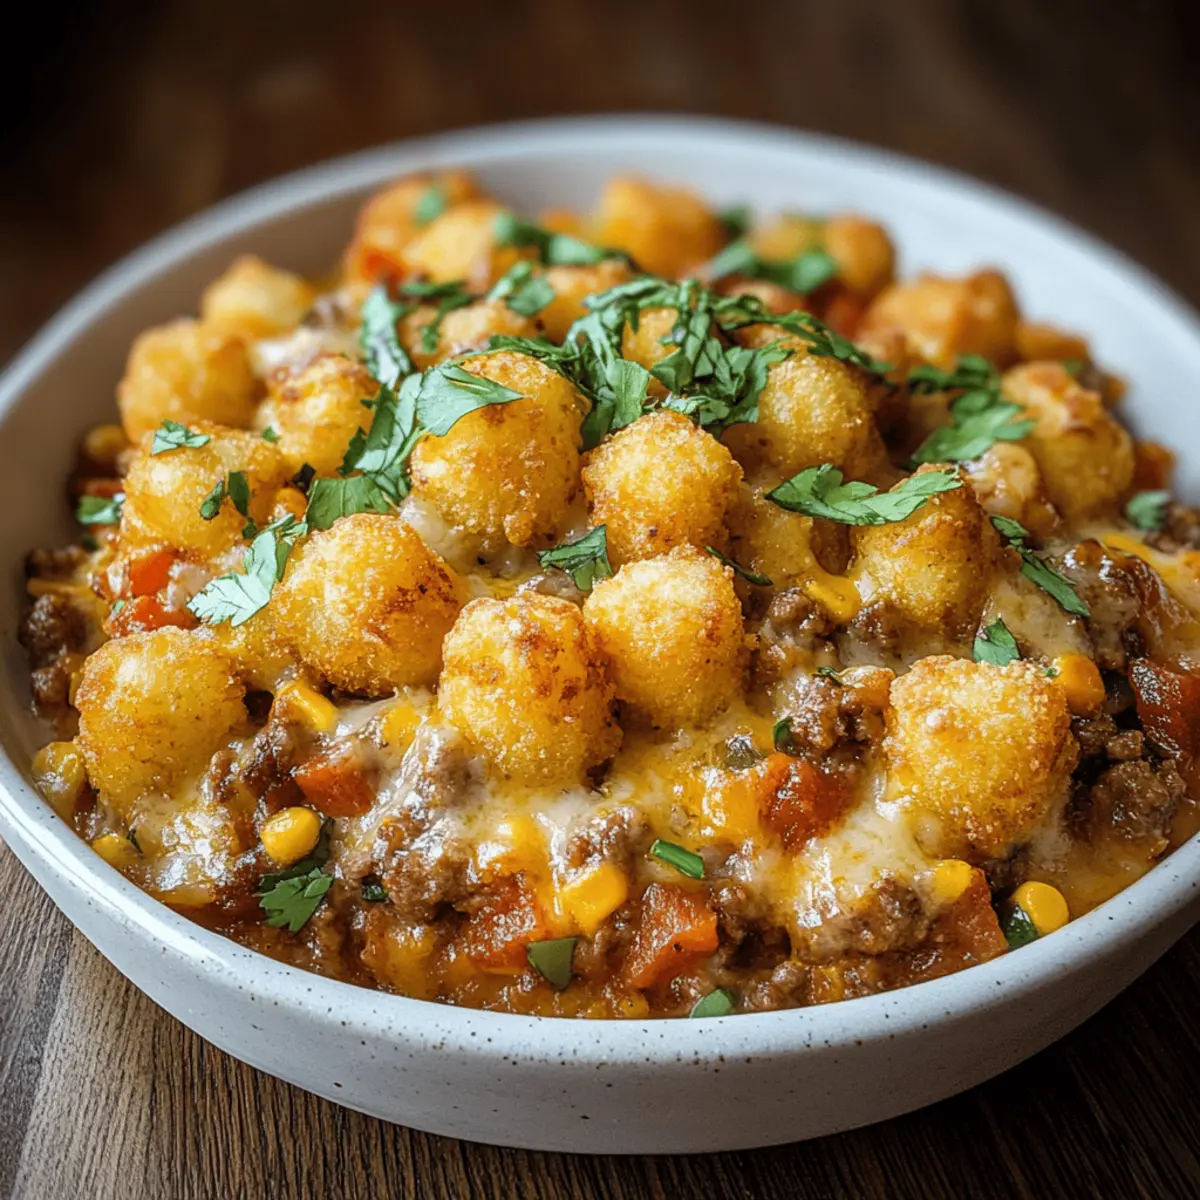
As I rummaged through my freezer looking for comfort after a long day, I stumbled upon a bag of gluten-free tater tots that sparked a delightful memory. This moment inspired me to create a Dairy-Free Tater Tot Casserole—a cozy dish that combines nostalgia with today’s dietary needs. Packed with wholesome ingredients, this easy casserole brings together a hearty blend of flavors while being both dairy and gluten-free. Not only is it a breeze to prepare, but it also serves as a perfect crowd-pleaser, ensuring even those with dietary concerns can indulge in a warm and filling meal. Who wouldn’t want to escape into a world of creamy goodness and crispy perfection? Ready to dive into this delicious comfort food? Let’s get cooking!
Why is this casserole a must-try?
Comforting Nostalgia: Indulge in the warm memories of childhood with every bite of this Dairy-Free Tater Tot Casserole, where old-fashioned flavors meet modern dietary needs.
Easy to Make: This quick-to-prepare dish is ideal for busy weeknights, saving you time without sacrificing flavor.
Healthier Twist: Packed with wholesome ingredients, it’s a guilt-free version of a beloved classic that everyone can enjoy.
Customizable: Feel free to play around with different proteins and veggies, making it truly your own. Pair it with a refreshing salad or some steamed veggies for a balanced meal, or check out my recipes for Chicken Enchilada Casserole and Thai Peanut Noodle for more cozy dinner ideas!
Crowd-Pleaser: With its creamy base and crispy topping, this casserole will have your guests coming back for seconds—everyone loves a hearty meal!
Dairy-Free Tater Tot Casserole Ingredients
For the Filling
• Ground Turkey or Beef – Protein base for the casserole; substitute with vegan ground meat or mushrooms for a plant-based version.
• Onion – Adds depth of flavor; can be substituted with shallots or leeks.
• Garlic – Enhances overall flavor; fresh garlic preferred, but garlic powder may be used in a pinch.
• Red Bell Pepper – Contributes sweetness and color; substitute with green bell pepper or any favorite vegetable.
• Frozen Corn – Provides sweetness and texture; can replace with fresh corn or peas.
• Frozen Mixed Vegetables – Adds nutrients and variety; use any combination of frozen vegetables available.
• Coconut Milk – Creamy base for the sauce, replacing traditional dairy; almond milk can work, but may alter the flavor.
• Dried Thyme – Herb for added depth; use Italian seasoning as a substitute.
• Paprika – Adds warmth and color; smoked paprika can enhance the flavor profile.
• Salt and Pepper – Essential seasonings for flavor enhancement; adjust to taste.
For the Topping
• Frozen Tater Tots (Gluten-Free) – Provides the signature crispy top layer; ensure they’re gluten-free as some brands may not be.
Step‑by‑Step Instructions for Dairy-Free Tater Tot Casserole
Step 1: Preheat the Oven
Start by preheating your oven to 425°F (220°C). This ensures that your Dairy-Free Tater Tot Casserole will bake evenly and achieve that deliciously crispy topping you crave. While the oven warms up, gather your ingredients and equipment, such as a large skillet and a 9×13 inch baking dish, to streamline your cooking experience.
Step 2: Cook the Meat
In your large skillet, add the ground turkey or beef and cook it over medium heat. Stir it well for about 5-7 minutes, or until the meat is browned and fully cooked. Keep an eye on the texture; it should be crumbly and no longer pink. This protein base will be the heart of your casserole, creating a robust flavor.
Step 3: Sauté the Aromatics
Next, add the chopped onion and minced garlic to the skillet with the cooked meat. Sauté these ingredients for 3-4 minutes until the onion becomes translucent and tender. This step deepens the flavor profile of your Dairy-Free Tater Tot Casserole, infusing the filling with a lovely aromatic base.
Step 4: Mix in Veggies and Seasonings
Incorporate the red bell pepper, corn, and mixed vegetables into the skillet. Pour in the creamy coconut milk along with the dried thyme, paprika, salt, and pepper. Stir everything together and heat through for about 5-7 minutes until everything is warmed and the flavors meld beautifully.
Step 5: Assemble the Casserole
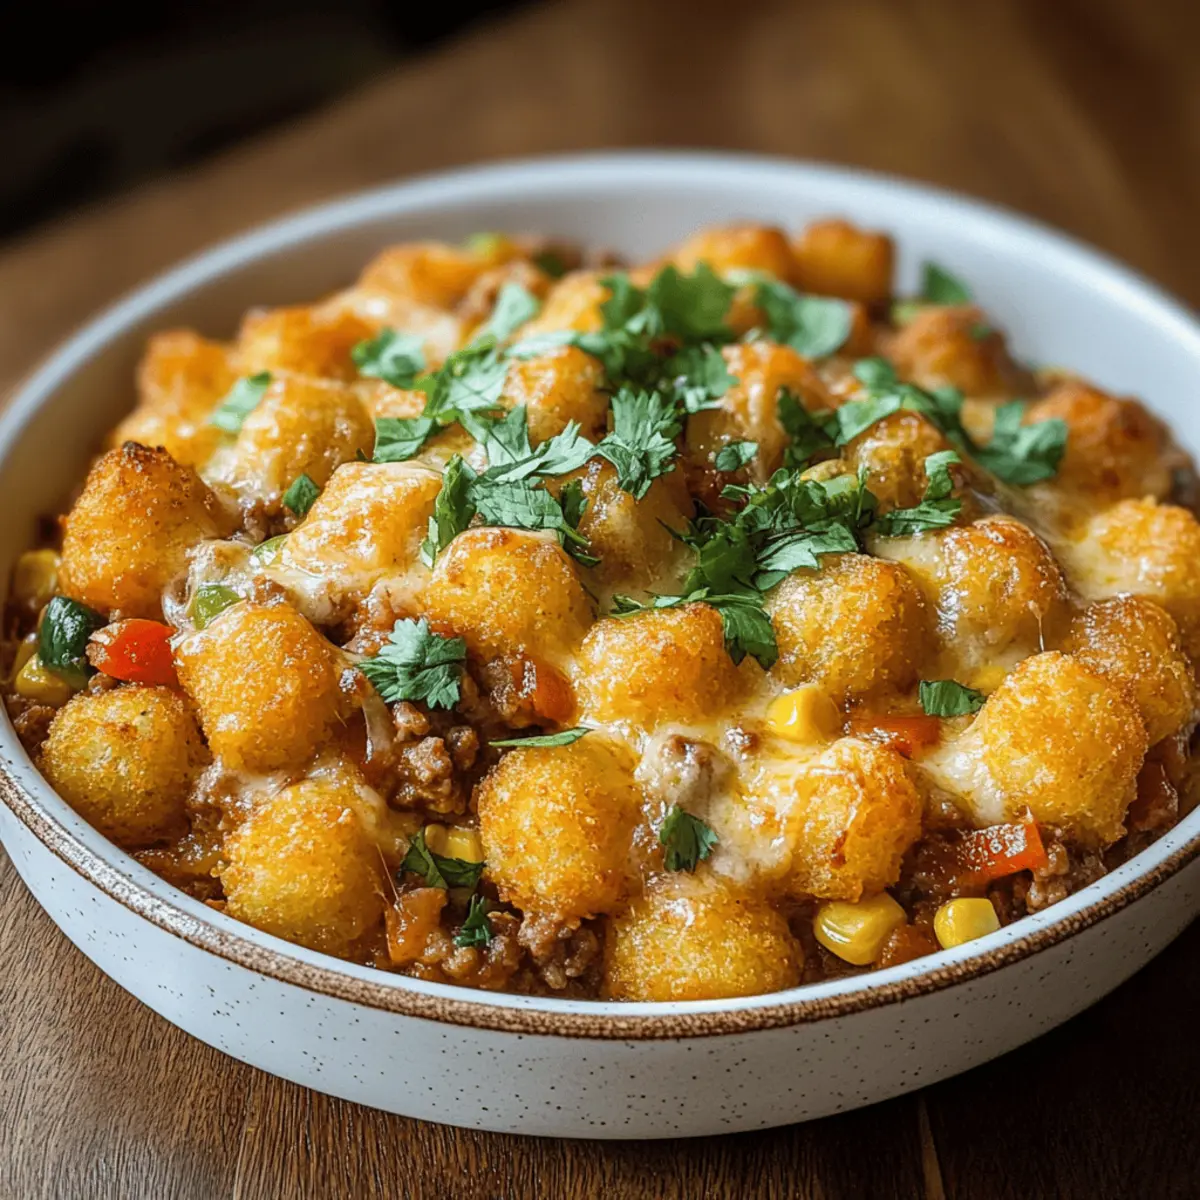
Transfer the hearty mixture to your prepped 9×13 inch baking dish. Spread it out evenly, ensuring that every corner gets that delicious filling. This step sets the foundation for your Dairy-Free Tater Tot Casserole, allowing for a wonderfully balanced dish when baked.
Step 6: Add the Tater Tots
Carefully arrange the frozen tater tots in a single layer on top of the filling. This will create a delightful, crispy topping that contrasts with the creamy filling beneath. Ensure the tater tots are spaced out for maximum crispiness—a key feature of a great casserole!
Step 7: Bake the Casserole
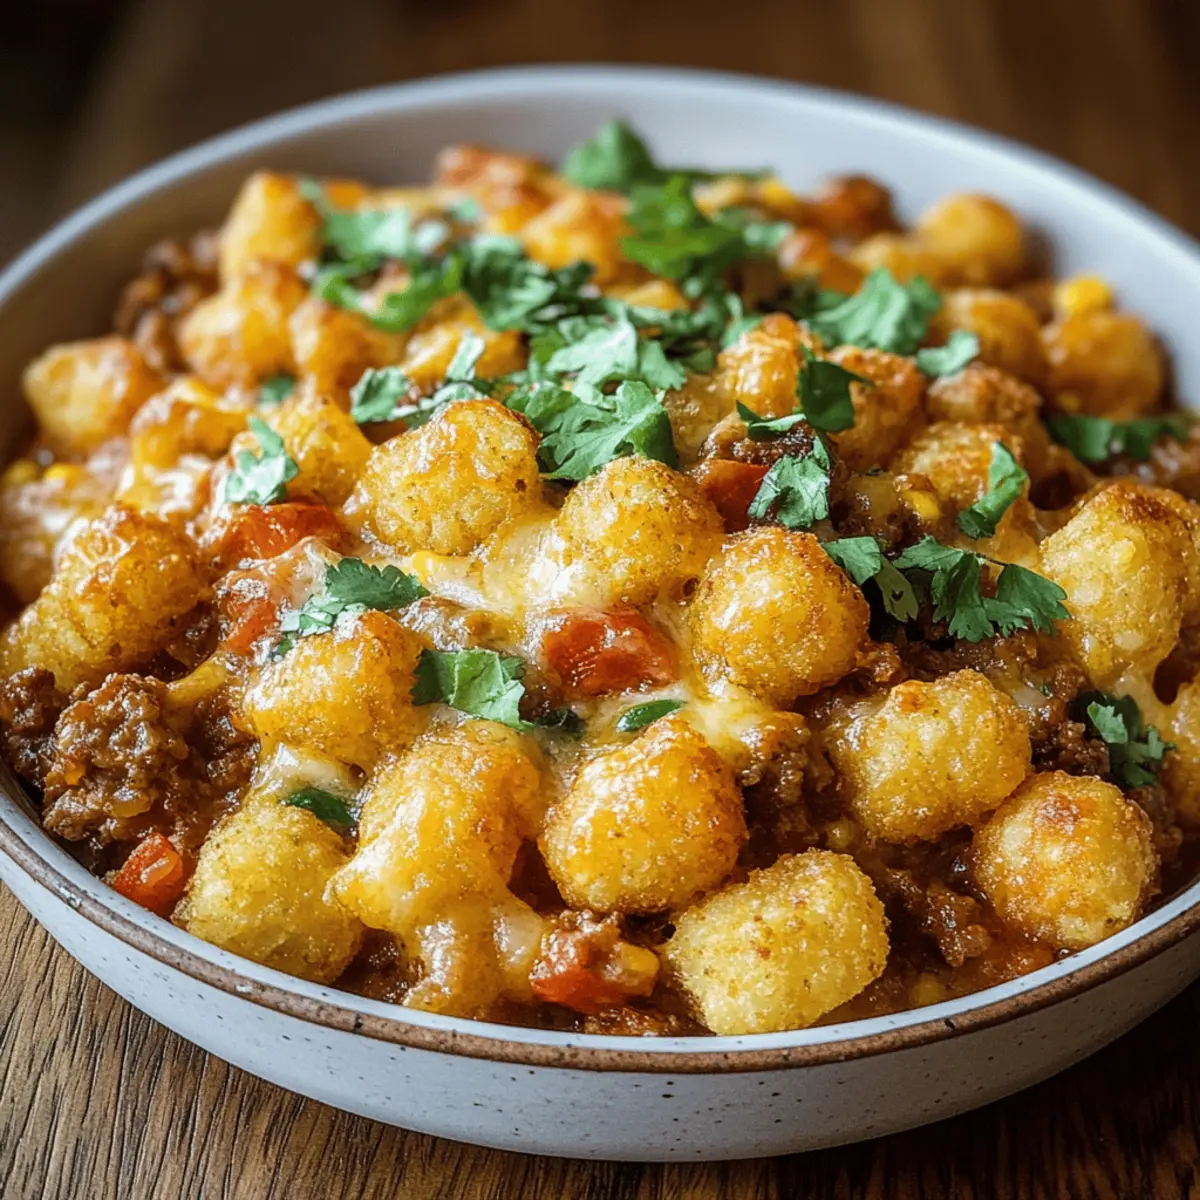
Place the baking dish in your preheated oven and bake for 25-30 minutes. Keep an eye out for the tater tots, which should be golden brown and crispy when done. The visual cue of bubbling filling around the edges signifies that your Dairy-Free Tater Tot Casserole is approaching perfection.
Step 8: Cool and Serve
Once baked, remove the casserole from the oven and allow it to cool slightly for about 5 minutes before serving. This resting time lets the flavors settle and makes it easier to serve. Now, you can enjoy this warm and comforting dish with family or friends!
Expert Tips for Dairy-Free Tater Tot Casserole
-
Crispy Tater Tots: Ensure tater tots are spread out evenly to achieve maximum crispiness on top, preventing them from steaming and becoming soggy.
-
Make Ahead: You can prepare the filling the night before and refrigerate it; just add the tater tots before baking for a quick, easy dinner.
-
Veggie Boost: Feel free to add leafy greens like spinach or kale into the filling for extra nutrients and flavor, making your Dairy-Free Tater Tot Casserole even healthier.
-
Flavor Adjustments: Experiment with seasonings and incorporate other spices like oregano or cumin for a flavor twist, ensuring the casserole suits your taste.
-
Storage Tips: Leftovers can be stored in an airtight container for up to 3 days; reheat in the oven for a perfectly crispy texture, avoiding the microwave which may make the tots soggy.
Dairy-Free Tater Tot Casserole Variations
Feel free to put your twist on this delightful dish and explore a whole new world of flavors!
-
Vegan Option: Substitute ground turkey or beef with Beyond Meat or lentils for a hearty plant-based choice. This switch keeps all the satisfaction while making it completely vegan-friendly.
-
Veggie Lovers: Add fresh or sautéed vegetables such as zucchini, carrots, or spinach in the filling for a colorful and nutritious upgrade. Not only does this add a delightful crunch, but it also enhances the overall flavor.
-
Cheesy Delight: Sprinkle dairy-free cheese on top for a melty, cheesy layer that adds richness without the dairy. This creates a comforting experience reminiscent of classic casseroles.
-
Spice It Up: For those who enjoy a kick, add diced jalapeños or a pinch of cayenne pepper into the filling before baking. This twist introduces an exciting heat that livens up the dish.
-
Flavor Boost: Consider using different herbs and spices, like rosemary or smoked paprika, to create unique flavor profiles that excite the palate. A simple change can transform the casserole into something extraordinary.
-
Creamy Sauce: Swap the coconut milk for a blend of cashew cream or a dairy-free ranch dressing for extra creaminess. This enhances the casserole’s rich texture and flavor.
-
Tater Tot Alternatives: If you’re feeling adventurous, try using baked sweet potato rounds or cauliflower tots for a creative, lower-carb option. These alternatives will give a new taste and texture to your casserole.
-
Seasonal Variations: Incorporate seasonal vegetables for a fresh touch—think butternut squash in the fall or asparagus in the spring. This keeps the dish exciting and relevant year-round!
Looking for more delicious meal ideas? Try my creamy Glazed Corn Casserole for a sweet side or a hearty Thai Peanut Noodle salad that pairs beautifully with any hearty casserole!
How to Store and Freeze Dairy-Free Tater Tot Casserole
-
Room Temperature: Allow the casserole to cool completely before storing at room temperature, but only for up to 2 hours to ensure food safety.
-
Fridge: Store leftovers in an airtight container in the fridge for up to 3 days. Reheat in the oven at 350°F (175°C) until warmed through for best results.
-
Freezer: You can freeze the casserole before baking. Wrap tightly in foil and store in the freezer for up to 3 months. Bake from frozen, adding an extra 10-15 minutes to the cooking time.
-
Reheating: For reheating, place the leftover Dairy-Free Tater Tot Casserole in the oven at 350°F (175°C) until heated through and the tater tots regain their crispiness.
Make Ahead Options
These Dairy-Free Tater Tot Casserole preparations are perfect for busy weeknights! You can assemble the entire casserole up to 24 hours in advance by preparing the filling and layering the tater tots on top. Simply cover the baking dish tightly with plastic wrap or aluminum foil and refrigerate it until you’re ready to bake. When you’re ready to serve, preheat your oven and bake right from the fridge for 30-35 minutes to ensure it’s heated through. If you want to make it even earlier, the filling can be refrigerated for up to 3 days before baking; just add the tater tots right before popping it in the oven to keep them crispy. Enjoy the convenience of a homemade meal without the last-minute stress!
What to Serve with Dairy-Free Tater Tot Casserole
Bring warmth and comfort to your dinner table by pairing this hearty casserole with delightful accompaniments that enhance its deliciousness.
-
Simple Side Salad: A fresh mix of greens and cherry tomatoes brings a crisp contrast to the creamy casserole, lightening up the meal.
-
Steamed Broccoli: Tender, vibrant broccoli adds a nutritional punch and brightens your plate, complementing the rich flavors of the casserole.
-
Garlic Breadsticks: The buttery, garlicky crunch of breadsticks is perfect for sopping up any leftover creamy goodness, creating a satisfying bite.
-
Roasted Sweet Potatoes: Their natural sweetness and crispy edges enhance the casserole’s savory elements, introducing a beautiful balance of flavors.
-
Crispy Brussels Sprouts: Roasted until caramelized, these offer a delightful crunch and a hint of nuttiness that pairs wonderfully with the casserole’s rich, creamy texture.
-
Fruit-Infused Sparkling Water: A refreshing drink that helps cleanse the palate, making each bite of the Dairy-Free Tater Tot Casserole even more enjoyable.
-
Vegan Chocolate Chip Cookies: For dessert, these classic treats offer a sweet finish, pairing well with the savory flavors enjoyed throughout the meal.
You can taste the joy of a cozy night in with these delightful choices by your side!
Dairy-Free Tater Tot Casserole Recipe FAQs
How do I choose the right vegetables for my casserole?
Absolutely! Fresh vegetables are a great choice when available. When selecting frozen mixed vegetables, look for blends that include a variety of carrots, peas, and corn; these add flavor and texture. If you’re opting for fresh veggies, make sure they are vibrant in color and firm to the touch. For bell peppers, avoid those with dark spots or wrinkled skin, as these indicate overripeness.
What’s the best way to store leftover Dairy-Free Tater Tot Casserole?
You can store leftovers in an airtight container in the fridge for up to 3 days. Just make sure it cools down first—about an hour after serving should be sufficient. When you’re ready to reheat, pop it in the oven at 350°F (175°C) until it’s warmed through, which helps retain the crispiness of the tater tots.
Can I freeze Dairy-Free Tater Tot Casserole?
Yes, you can! For freezing, I recommend preparing the casserole without baking it first. Just wrap it tightly in foil or plastic wrap and store it in the freezer for up to 3 months. When you’re ready to bake it, remove it from the freezer, unwrap, and bake it directly from frozen, adding an extra 10-15 minutes to the cooking time. This gives you a delicious homemade meal that’s ready in no time.
What should I do if my tater tots are soggy after baking?
Very good question! To avoid soggy tater tots, the crucial step is ensuring they are spread out evenly on top of the filling before baking. If they do become soggy, try reheating the casserole in the oven—this can help restore some of that beloved crispiness. It’s also wise to check that your filling isn’t too watery before adding the tots; if it seems soupy, you might want to thicken it a bit with additional corn or a bit of cornstarch before baking.
Is this casserole suitable for kids or those with allergies?
Absolutely! This Dairy-Free Tater Tot Casserole is a fantastic option for families, especially since it’s gluten-free and made without dairy, making it inclusive for those with lactose intolerance and gluten sensitivities. Always double-check your tater tot packaging to ensure they’re gluten-free, as some brands may contain gluten. If you’re dealing with food allergies, simply make adjustments based on the specific dietary needs, such as using hypoallergenic protein alternatives or omitting ingredients that could trigger allergies.

Delicious Dairy-Free Tater Tot Casserole for a Cozy Night In
Ingredients
Equipment
Method
- Preheat your oven to 425°F (220°C). Gather your ingredients and equipment.
- In your large skillet, add the ground turkey or beef and cook it over medium heat for 5-7 minutes until browned.
- Add the chopped onion and minced garlic to the skillet and sauté for 3-4 minutes until translucent.
- Incorporate the red bell pepper, corn, and mixed vegetables. Pour in the coconut milk, thyme, paprika, salt, and pepper. Heat through for 5-7 minutes.
- Transfer the mixture to your baking dish, spreading it out evenly.
- Arrange the frozen tater tots in a single layer on top of the filling.
- Bake for 25-30 minutes until the tater tots are golden brown and crispy.
- Remove from the oven and allow to cool slightly for about 5 minutes before serving.
Leave a Reply