
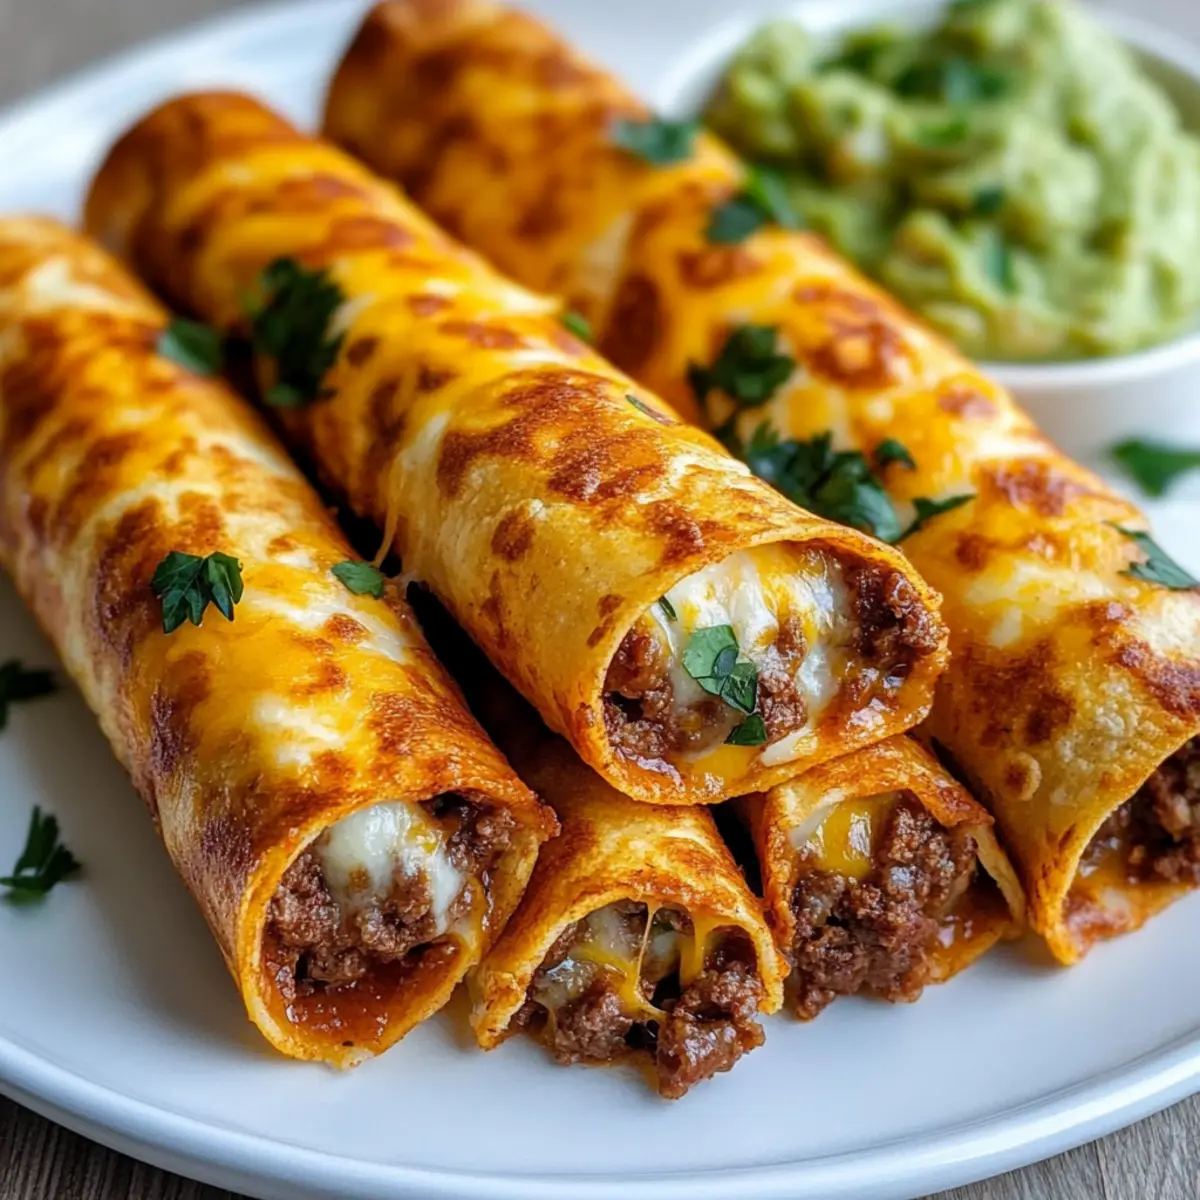
As I scoured my kitchen for a quick meal one evening, I stumbled upon a treasure trove of flavors just waiting to be combined: Crispy Cheesy Beef Taquitos! These little bundles of joy come together in a mere 30 minutes—perfect for those chaotic weeknights when time is short but appetites are high. With their golden, crunchy exteriors encasing a savory, melty filling, they quickly became a family favorite. Not only are these taquitos fast and easy to whip up, but they also offer a customizable experience, allowing you to sneak in any veggies or spices you love. Best of all, they make for a delightful freezer-friendly option, ready to transform any unplanned evening into a festive feast. Ready to roll up some deliciousness in your kitchen? Let’s dive into the recipe!
Why Are These Taquitos a Must-Try?
Speedy Preparation: In just 30 minutes, you can have these delicious Crispy Cheesy Beef Taquitos on your table, making it a go-to recipe for busy weeknights or unplanned gatherings.
Crowd-Pleasing Flavor: The combination of savory beef, creamy cheese, and aromatic garlic results in an irresistible filling that delights both kids and adults alike.
Endless Customization: You can easily switch up the ingredients based on your taste and pantry—add different vegetables like bell peppers or mushrooms for a personal twist!
Freezer-Friendly: Prep a batch ahead and freeze them, making it simple to enjoy homemade goodness anytime. Simply fry from frozen for a quick meal—perfect for those hectic days.
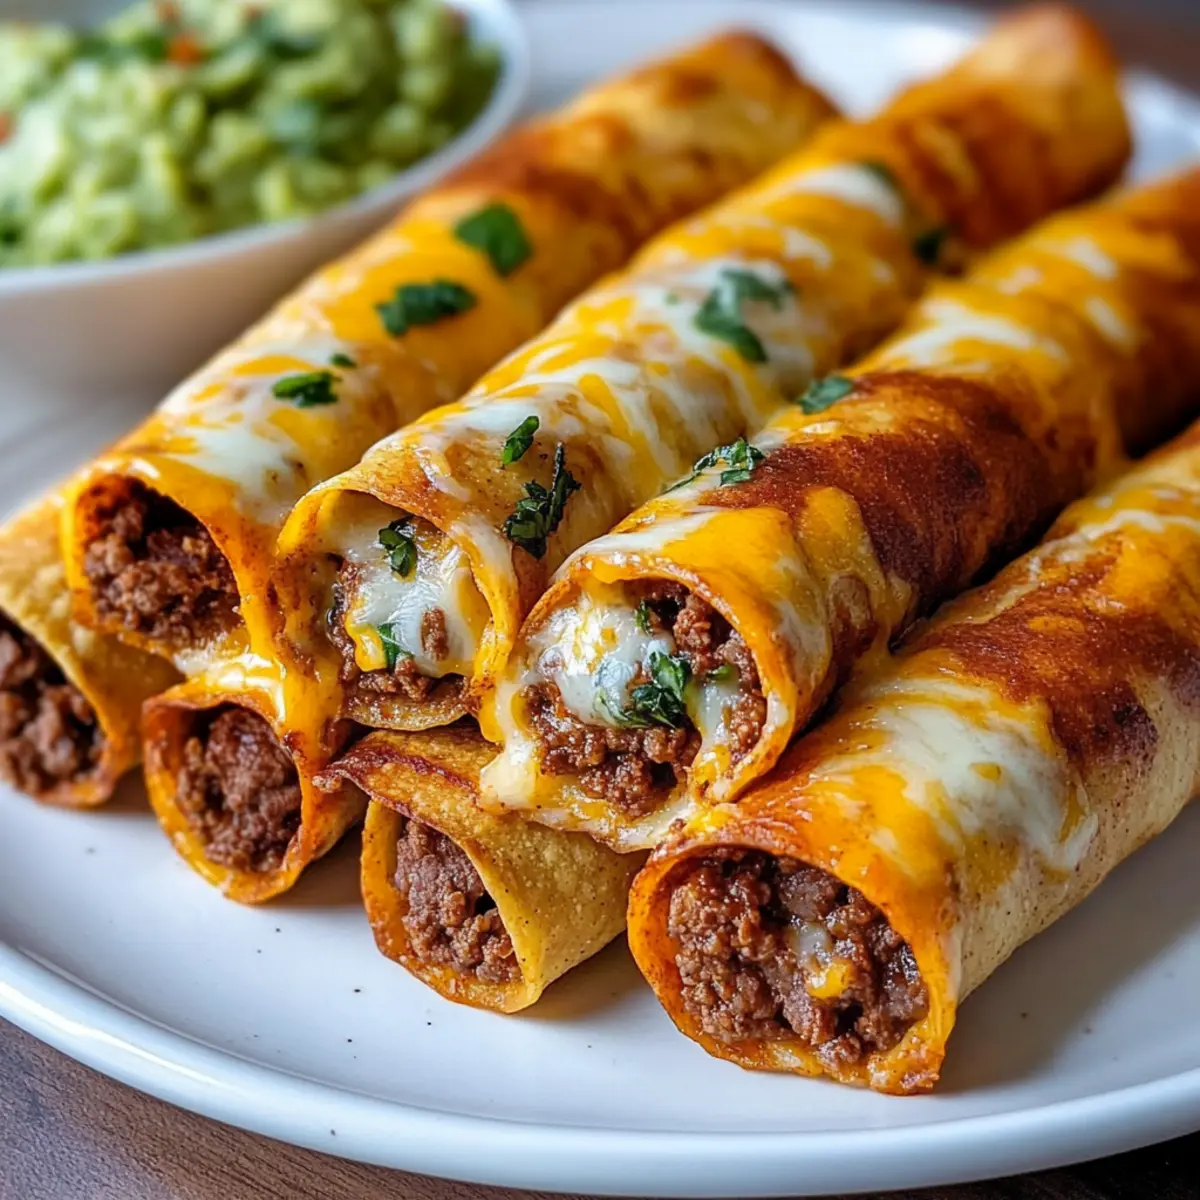
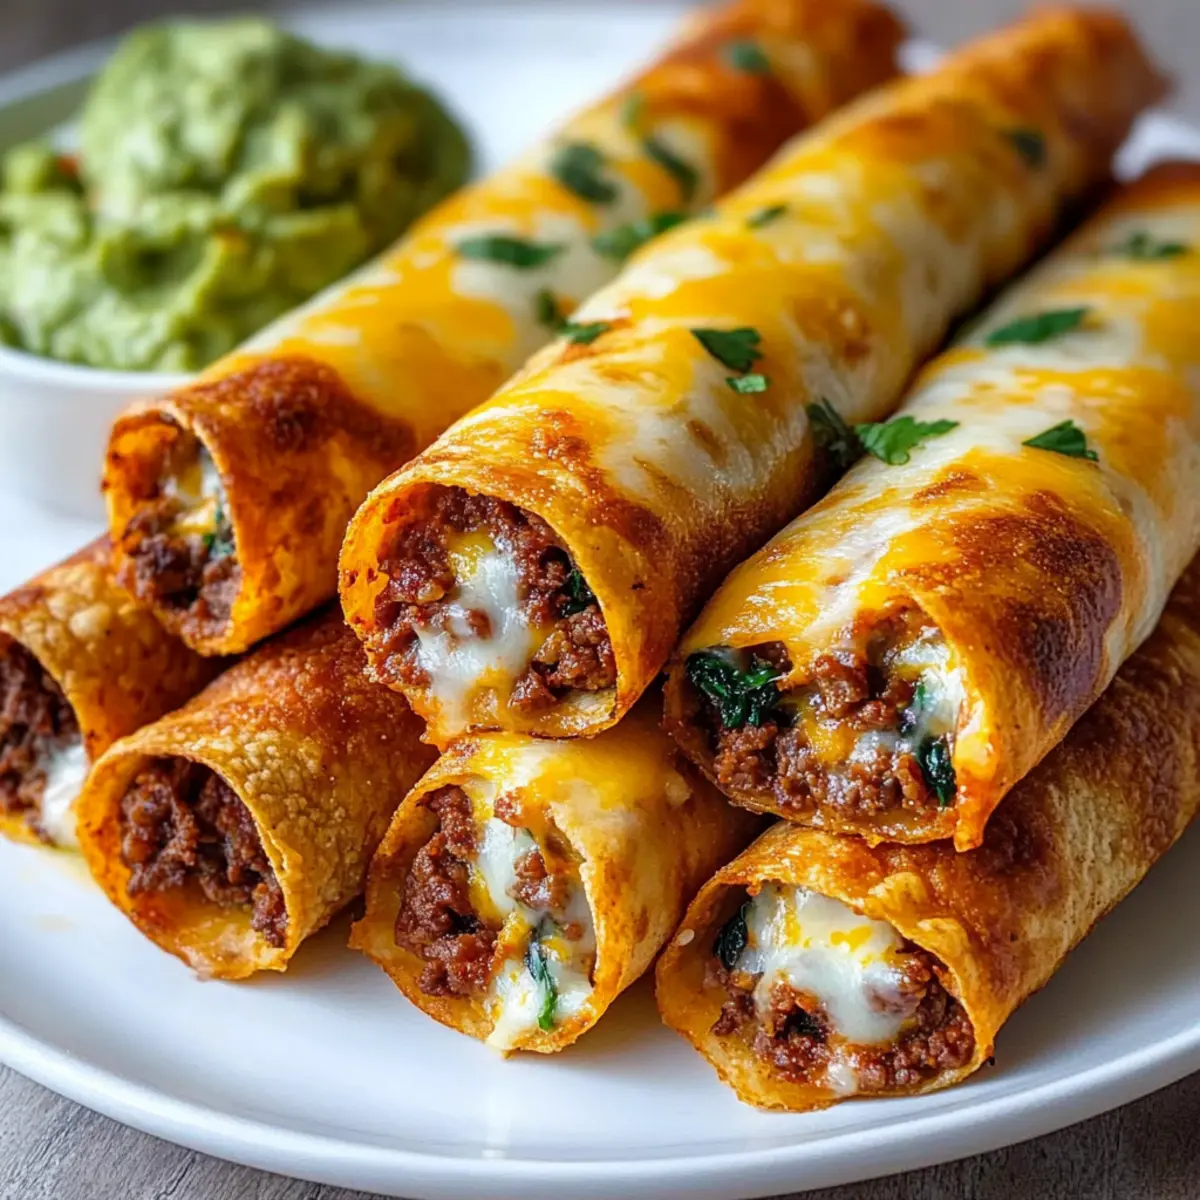
Impressive Crunch: The golden, crispy shell perfectly pairs with the gooey, cheesy filling, elevating these taquitos to a flavor experience that beats any fast food option. Try serving them with sour cream and salsa for a complete meal!
Crispy Cheesy Beef Taquitos Ingredients
For the Filling
• Ground Beef – Provides the primary protein and savory flavor; use lean beef for less grease.
• Garlic – Adds aromatic depth; fresh is best—avoid pre-minced for optimal flavor.
• Heavy Cream – Creates a rich, creamy filling; substitute with half-and-half for a lighter option.
• Italian Seasoning – Adds Italian flavor notes; can be swapped with taco seasoning for a Mexican twist.
• Parmesan Cheese – Enhances creaminess and adds umami; use freshly grated for better melting.
• Spinach – Adds nutrition and color; can be swapped for kale or omitted if desired.
For the Taquito Construction
• Tortillas – Encases the filling; choose corn or flour based on your preference.
• Oil (Vegetable/Canola) – Essential for frying; ensure it has a high smoke point for perfect crispiness.
• Salt and Pepper – Enhances overall flavor; adjust according to your taste.
These Crispy Cheesy Beef Taquitos are a wonderful combination of flavor and texture, making them a delightful addition to your family’s mealtime lineup!
Step‑by‑Step Instructions for Crispy Cheesy Beef Taquitos
Step 1: Heat the Skillet
Begin by heating a large skillet over medium-high heat. Allow it to warm up for about 2 minutes. This ensures your Crispy Cheesy Beef Taquitos will have the perfect crisp while frying. Once hot, you’re ready to move on to the next step.
Step 2: Brown the Beef
Add ground beef to the skillet, seasoning it generously with salt and pepper. Cook the beef for approximately 5-7 minutes, breaking it up as it browns. It’s ready when it’s no longer pink and has a lovely, rich color. Spoon out any excess grease to avoid soggy taquitos.
Step 3: Sauté the Garlic
With the beef cooked, add minced garlic to the skillet and sauté for about 30 seconds. Stir constantly to prevent the garlic from burning. This step adds a fragrant aroma that signals the filling is coming together for your Crispy Cheesy Beef Taquitos.
Step 4: Add Cream and Seasoning
Pour in the heavy cream, scraping the bottom of the pan to lift any flavorful bits leftover from the beef. Allow it to cook for 2-3 minutes until bubbly. Stir in the Italian seasoning and gently fold in the freshly grated Parmesan cheese, continuing to cook until the sauce thickens.
Step 5: Incorporate Spinach
Once the sauce has thickened, add in the fresh spinach. Fold it gently until it’s wilted and well combined with the creamy beef mixture. This not only adds a nutritional boost but also enhances the texture of your Crispy Cheesy Beef Taquitos.
Step 6: Prepare the Tortillas
Take your tortillas and lay them flat on a clean surface. Spoon a generous amount of the beef and cheese filling into each tortilla. Be careful not to overfill them, as this can cause them to burst while frying. Roll them tightly and secure with toothpicks if necessary.
Step 7: Heat the Oil
In a separate large frying pan, heat about an inch of vegetable oil over medium-high heat, aiming for around 350°F. You can test the oil’s readiness by dropping a small piece of tortilla into it; it should sizzle and float to the surface. This is essential for achieving that signature crunch!
Step 8: Fry the Taquitos
Carefully place the rolled taquitos in the hot oil, frying them for 2-3 minutes on each side until they are golden brown and crispy. Use tongs to flip them gently, ensuring an even crisping. The aroma will be irresistible as they cook!
Step 9: Drain for Crispiness
Once fried, remove the taquitos from the oil and place them on a wire rack. This helps drain any excess oil, ensuring that your Crispy Cheesy Beef Taquitos stay perfectly crispy. Avoid placing them directly on paper towels, as this can make them soggy.
Step 10: Serve and Enjoy
Once cooled slightly, serve your crispy taquitos alongside your favorite dipping sauces like sour cream, guacamole, and salsa. They make a perfect quick family feast that delights everyone!
Crispy Cheesy Beef Taquitos Variations
Dive into a world of flavor by personalizing your taquitos! These crispy delights offer endless possibilities for customization, and I can’t wait to share some fun ideas with you.
-
Beverly’s Version: Swap ground beef for shredded chicken or ground turkey for a lighter protein option. This keeps the flavors hearty while catering to different tastes.
-
Veggie Boost: Add colorful bell peppers, sweet corn, or earthy mushrooms into the filling for a delightful crunch and added nutrition. Feel free to get creative with seasonal vegetables; they can truly elevate your taquitos!
-
Spicy Kick: Use Pepper Jack cheese instead of Parmesan for a spicy twist. You can also mix in some chopped jalapeños or a dash of hot sauce for that extra heat.
-
Dairy-Free Delight: Replace heavy cream with coconut milk and use dairy-free cheese for a completely dairy-free option. You won’t lose the creamy texture, but it’ll be a hit with lactose-intolerant family members!
-
Herbal Infusion: Instead of Italian seasoning, try using taco seasoning or fresh herbs like cilantro and lime juice to give them a zesty Mexican flair. It adds an inviting brightness that’s hard to resist.
-
Corn Tortillas: For a gluten-free option, use corn tortillas for that authentic taquito experience. These tortillas will provide the perfect crunch and flavor that complements the filling beautifully.
-
Freezer-Friendly Base: Prepare a big batch of the filling and freeze it. You can make taquitos fresh anytime by simply assembling and frying them right from the freezer, just like those Oven Baked Cheesy options!
Experimenting with these variations not only keeps dinnertime exciting, but it also allows you to cater to every palate in your family. And remember, you can always pair your taquitos with delicious sides like Cheesy Chicken Garlic or French Onion Beef for a well-rounded meal that’s simply unforgettable! Bon appétit!
How to Store and Freeze Crispy Cheesy Beef Taquitos
Fridge: Store leftover taquitos in an airtight container for up to 3 days. Reheat them in the oven or air fryer for best results, ensuring they regain their crispy goodness.
Freezer: For longer storage, freeze uncooked taquitos individually on a baking sheet before transferring them to freezer bags. They can last for up to 3 months. Fry them straight from frozen, adding extra cooking time.
Reheating: If you have any leftovers, reheat your taquitos in a preheated oven at 375°F for about 10-15 minutes until they’re warm and crispy again. This ensures that the filling stays melty and delicious.
Wrapping: To maintain freshness, wrap the taquitos tightly in foil or plastic wrap before refrigerating or freezing. This helps prevent freezer burn and keeps your Crispy Cheesy Beef Taquitos tasting homemade for longer.
Expert Tips for Crispy Cheesy Beef Taquitos
-
Avoid Sogginess: Drain excess fat from the beef after cooking to prevent soggy taquitos. This ensures that crispy texture that everyone loves!
-
Cheese Matters: Use freshly grated Parmesan cheese for the filling. It melts better and provides a richer flavor compared to pre-shredded options, enhancing your crispy cheesy beef taquitos.
-
Test Oil Temperature: Maintain the frying oil around 350°F. An easy test is to drop a small piece of tortilla and see if it sizzles. Proper oil temperature is key for achieving that golden crunch.
-
Mind the Fill: Don’t overfill your tortillas! Doing so can cause them to burst while frying. Leave enough space to roll them tightly without risk.
-
Cooling Technique: Let the taquitos cool on a wire rack after frying. This helps maintain their crispy exterior, avoiding steam buildup that can lead to sogginess.
What to Serve with Crispy Cheesy Beef Taquitos
Pairing your taquitos with the right sides transforms them into a delightful feast that’s sure to impress.
-
Creamy Guacamole: This rich, creamy dip complements the crispy taquitos, balancing textures while adding freshness and flavor. Scoop it generously to elevate each bite!
-
Zesty Salsa: A bright, tangy salsa adds a refreshing kick, cutting through the richness of the cheesy filling. It’s the perfect accompaniment to enhance your taquito experience.
-
Crispy Mexican Rice: Serve a side of fluffy, seasoned Mexican rice for a hearty meal. The grains soak up any extra salsa or guacamole, creating a satisfying combination.
-
Refried Beans: Smooth and flavorful, these beans offer a creamy side that pairs excellently with the crunch of the taquitos. Plus, they add an extra protein boost to your meal.
-
Fresh Pico de Gallo: This vibrant, chunky salsa made with tomatoes, onions, and cilantro brings brightness to your platter. Its freshness is a lovely contrast to the comforting warmth of the taquitos.
-
Chilled Mexican Street Corn Salad: A refreshing corn salad with lime, chili, and cheese offers a sweet and savory contrast. It brings a cool touch that perfectly complements the crispy tacos.
-
Margaritas or Fresh Limeade: Pair with a refreshing margarita or non-alcoholic limeade for a zesty drink option that completes your festive table. These drinks enhance the flavors of the taquitos while keeping you cool.
Each of these delicious sides takes your Crispy Cheesy Beef Taquitos from a simple dish to a well-rounded, unforgettable meal!
Make Ahead Options
These Crispy Cheesy Beef Taquitos are a fantastic time-saver for meal prep! You can prepare the filling (ground beef, garlic, heavy cream, seasonings, and spinach) and store it in an airtight container in the refrigerator for up to 3 days. To maintain freshness, avoid assembling the taquitos until you’re ready to fry. When you’re set to enjoy them, simply fill your tortillas, roll them up, and fry them as directed. Alternatively, you can freeze uncooked taquitos individually on a baking sheet for up to 3 months, then transfer them to freezer bags. Fry them straight from the freezer, adding a couple of extra minutes to achieve that perfect crispy exterior—dinner will be a breeze!

Crispy Cheesy Beef Taquitos Recipe FAQs
What type of ground beef is best for this recipe?
I recommend using lean ground beef (around 80/20) for these Crispy Cheesy Beef Taquitos. This allows you to enjoy the rich flavor without excess grease that can lead to sogginess.
How do I store leftover taquitos?
To store leftover taquitos, place them in an airtight container in the fridge. They will stay fresh for up to 3 days. When reheating, use an oven preheated to 375°F for around 10-15 minutes to restore their crispy texture.
Can I freeze taquitos? How?
Absolutely! To freeze, arrange uncooked taquitos in a single layer on a baking sheet and place them in the freezer until solid. Once frozen, transfer them to airtight freezer bags. They can be stored for up to 3 months. When you’re ready to fry, just drop them into hot oil straight from the freezer, adding a couple of extra minutes to the cook time.
What should I do if my taquitos burst while frying?
If your taquitos burst while frying, it’s often a sign they were overfilled or not rolled tightly enough. To avoid this, ensure you leave enough space when filling each tortilla, and roll them snugly but not too tight. Additionally, using toothpicks can help keep them together during frying.
Are these taquitos suitable for kids?
Definitely! These Crispy Cheesy Beef Taquitos are family-friendly and customizable. If your little ones are picky, you can easily adjust the filling based on their preferences, adding more veggies or opting for a milder cheese for a kid-approved meal.
Crispy Cheesy Beef Taquitos for a Quick Family Feast
Ingredients
Equipment
Method
- Begin by heating a large skillet over medium-high heat for about 2 minutes.
- Add ground beef to the skillet, seasoning it with salt and pepper. Cook for 5-7 minutes, breaking it up as it browns.
- Add minced garlic to the skillet and sauté for about 30 seconds.
- Pour in the heavy cream and scrape the bottom of the pan. Cook for 2-3 minutes until bubbly.
- Stir in the Italian seasoning and fold in the Parmesan cheese until the sauce thickens.
- Add fresh spinach and fold gently until wilted and combined.
- Lay tortillas flat and spoon a generous amount of filling into each. Roll tightly and secure if needed.
- Heat about an inch of vegetable oil in a frying pan over medium-high heat until around 350°F.
- Carefully place taquitos in the hot oil, frying for 2-3 minutes on each side until golden brown.
- Remove taquitos from oil and place on a wire rack to drain excess oil.
- Serve taquitos with sour cream, guacamole, and salsa.
Leave a Reply