
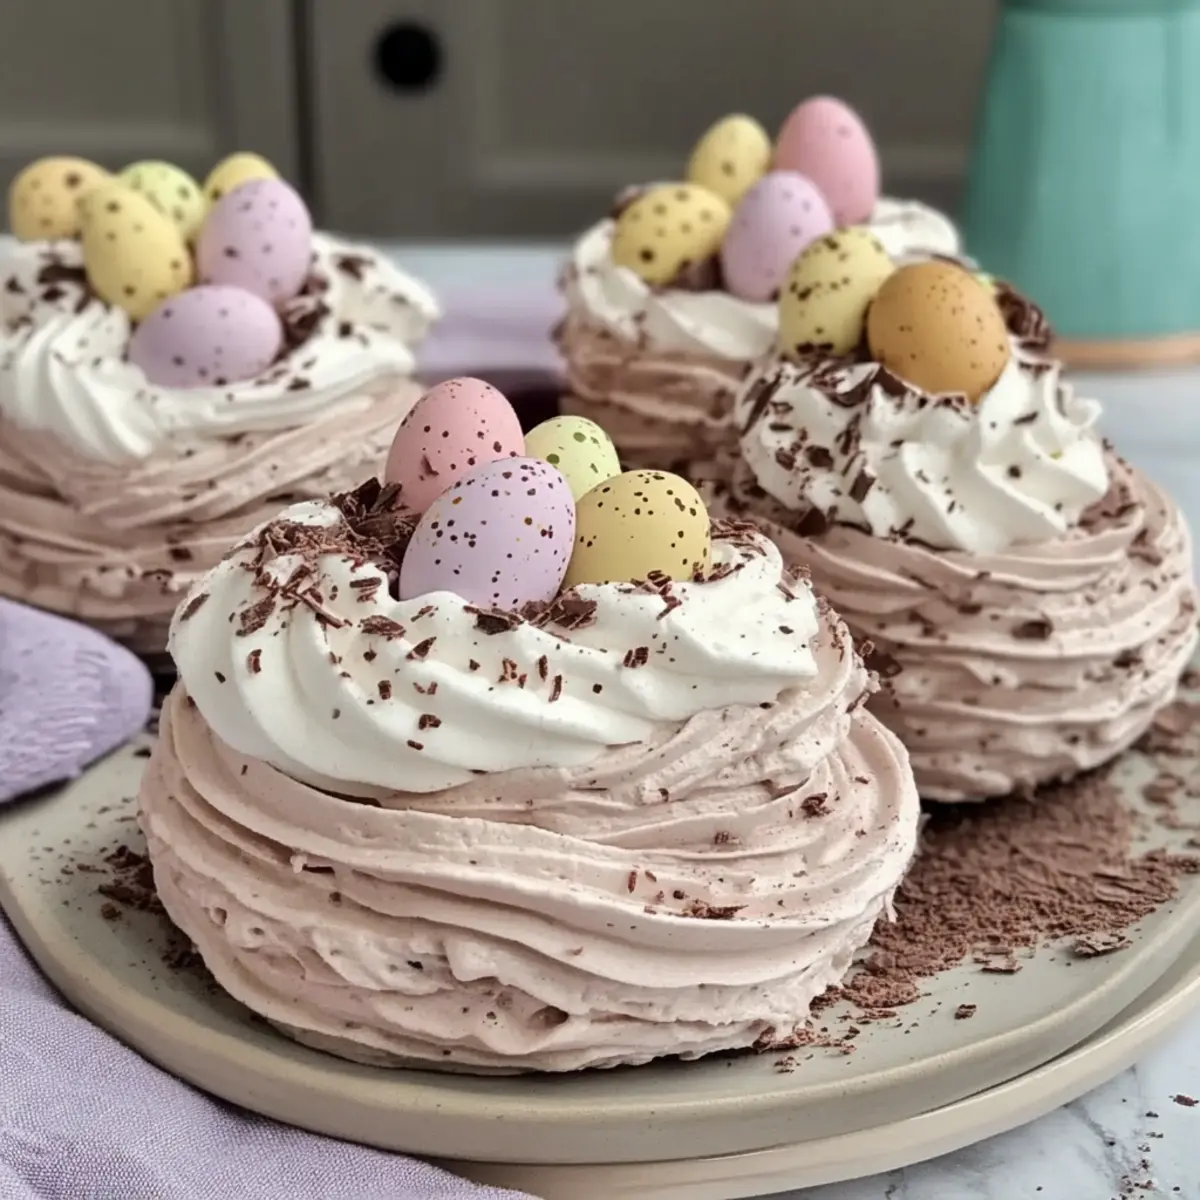
As I whipped up what would become my annual Easter masterpiece, I stumbled upon a delightful surprise—the lightness of meringue kissed by rich chocolate. These Chocolate Meringue Easter Nests have quickly become my go-to for festive gatherings. Their gluten-free crispiness, complemented by a creamy filling, offers a blissful contrast that leaves everyone craving more. Not only are they a showstopper, but they’re also surprisingly simple to make and can be dressed up with different fillings year-round, whether it’s luscious berries or dairy-free cream. Why not bring some whimsy into your dessert table this Easter? Curious how to create your very own chocolatey nests of joy? Let’s dive right in!
Why are these nests so irresistible?
Decadent Chocolate: The rich dark chocolate infuses the meringue with a deep flavor that’s simply divine.
Light and Airy: Enjoy the perfect melt-in-your-mouth texture that contrasts beautifully with the creamy filling.
Versatile Filling Options: Whether it’s seasonal berries or a rich dairy-free alternative, these nests can be customized for any taste or occasion!
Gluten-Free Delight: Perfect for everyone at your table, these meringue nests are a guilt-free treat that won’t compromise on taste.
Simple Yet Impressive: With easy-to-follow steps, you’ll create a stunning centerpiece without spending hours in the kitchen.
Make sure to check out my other favorite chocolate desserts like the Dark Chocolate Raspberry or the whimsical Halloween Chocolate Skull!
Chocolate Meringue Easter Nest Ingredients
For the Meringue
- Dark Chocolate – Provides rich flavor; use finely grated chocolate for the best integration.
- Cocoa Powder – Enhances the chocolate flavor; ensure it’s unsweetened for depth.
- Egg Whites – Create the meringue structure; fresh eggs yield the best results.
- Cream of Tartar – Stabilizes egg whites for volume; can be substituted with vinegar or lemon juice.
- Caster Sugar – Sweetness and texture; dissolves easily for glossy meringues.
For the Filling
- Double Cream – Rich and creamy; can be replaced with dairy-free options for variations.
- Icing Sugar – Adds sweetness; ensures a smooth texture in the whipped cream.
For Decoration
- Mini Eggs – Fun toppings for an Easter theme; can be swapped with berries or chocolate of choice.
- Dark Chocolate Curls/Sprinkles – Optional decoration; create curls using a vegetable peeler for a touch of elegance.
These Chocolate Meringue Easter Nests not only celebrate Easter but are also a delightful treat year-round!
Step‑by‑Step Instructions for Chocolate Meringue Easter Nests
Step 1: Preheat Your Oven
Begin by preheating your oven to 100°C (225°F). While the oven warms up, line multiple baking trays with baking paper, ensuring a smooth surface for your meringues. This preparation is crucial as it provides a non-stick surface for your Chocolate Meringue Easter Nests, allowing for easy removal once they’re baked to perfection.
Step 2: Prepare the Chocolate Mixture
Grate the dark chocolate finely and combine it with cocoa powder in a mixing bowl. Use a whisk to gently mix these two ingredients until thoroughly blended. This combination will infuse your meringues with a rich chocolate flavor, enhancing the overall taste of your delightful nests. Set this chocolate mixture aside for later incorporation.
Step 3: Whisk Egg Whites
In a clean, grease-free mixing bowl, add the egg whites and cream of tartar. Using an electric mixer, whisk them on medium speed until they become foamy and start to form soft peaks. This process typically takes around 3-5 minutes. Remember, using fresh egg whites yields the best results, ensuring your meringues are light and airy.
Step 4: Incorporate Caster Sugar
Gradually add the caster sugar to the whipped egg whites, one tablespoon at a time, while continuing to whisk on high speed. Keep mixing until the egg whites form stiff peaks and the sugar fully dissolves, which should take about 5-7 minutes. You’ll know it’s ready when the mixture is glossy and holds its shape firmly, creating the base for your Chocolate Meringue Easter Nests.
Step 5: Fold in Chocolate
Carefully fold the chocolate and cocoa mixture into the meringue using a spatula, ensuring not to deflate the air bubbles you’ve created. This step is crucial to maintain the light texture of your meringue. Gently mix until the chocolate is just incorporated, resulting in a beautifully swirled meringue mix that will make your nests rich in flavor.
Step 6: Pipe Nest Shapes
Transfer the meringue mixture into a piping bag fitted with a large round nozzle. Pipe circular bases onto your prepared baking trays, making small nests by swirling the mixture upwards to create a ring shape on top. Aim for about 3-4 inches in diameter, ensuring the nests are thick enough to hold their shape during baking.
Step 7: Bake the Meringues
Place the trays in the preheated oven and bake for 1 hour and 30 minutes. Avoid opening the oven door during this time, as it can cause the meringues to crack. Once baked, turn off the oven, leaving the meringues inside to cool completely overnight. This cooling period helps them maintain their delicate texture and prevents collapse.
Step 8: Prepare the Filling
Once your Chocolate Meringue Easter Nests are fully cooled, whip the double cream in a bowl with icing sugar and vanilla extract until soft peaks form. This luscious whipped cream filling will contrast beautifully with the crispy meringue, adding a delightful creaminess to your nests. Keep it chilled until ready to fill the meringue shells.
Step 9: Fill and Decorate
Spoon the whipped cream generously into each cooled meringue nest, creating a lovely mound in the center. Top each with colorful Mini Eggs, pressing them gently into the cream. For an added touch of elegance, sprinkle dark chocolate curls or shavings over the nests. These finishing touches will make your Chocolate Meringue Easter Nests truly irresistible and visually stunning!
What to Serve with Chocolate Meringue Easter Nests?
Creating a memorable Easter feast is all about pairing flavors and textures that complement one another beautifully.
-
Fresh Berries: The tartness of mixed berries like strawberries and raspberries adds a refreshing contrast to the sweetness of the nests, enhancing each bite.
-
Vanilla Ice Cream: A scoop of creamy vanilla ice cream brings a delightful cold element, balancing the meringue’s crunchiness with a rich, smooth texture.
-
Chocolate Sauce: Drizzling some luscious chocolate sauce over the nests can elevate the dessert experience, providing an extra layer of indulgence and richness.
-
Coconut Whipped Cream: For a light, tropical twist, whipped coconut cream serves as a fantastic dairy-free alternative that pairs perfectly with the chocolate.
-
Minty Mojito: An invigorating mint mojito can cleanse the palate between bites, making it a refreshing accompaniment to the sweet nests.
-
Coffee: A warm cup of freshly brewed coffee creates a delightful contrast, enhancing the chocolate flavors and making for a perfect after-dinner treat.
-
Easter-themed Fruit Salad: A colorful fruit salad, adorned with chopped chocolate, offers a crunchy and sweet companion to the nests, adding brightness to your Easter spread.
-
Lemon Sorbet: This light, zesty sorbet provides a refreshing palate cleanser, nicely offsetting the rich chocolate meringue.
-
Pistachio Shortbread Cookies: The nutty flavor of these cookies adds another layer of deliciousness, creating a satisfying assortment on your dessert table.
-
Chilled White Wine: A glass of chilled white wine can offer a lovely pairing, enhancing the flavors while providing a crisp and refreshing experience alongside the sweet meringue nests.
How to Store and Freeze Chocolate Meringue Easter Nests
• Room Temperature: Store unfilled meringue nests in an airtight container at room temperature for up to 2 days. Ensure they are kept in a cool, dry place to maintain crispness.
• Fridge: Once filled with whipped cream, keep the Chocolate Meringue Easter Nests in the fridge and consume them within 2 days for optimal freshness.
• Freezer: To freeze, wrap unfilled meringue nests tightly in plastic wrap and place them in a freezer-safe container. They can be frozen for up to 1 month; however, filling them after thawing is recommended to avoid sogginess.
• Reheating: If needed, you can crisp up any leftover filled nests in a low oven for a few minutes, but it’s best to enjoy them freshly made for the ultimate experience!
Expert Tips for Chocolate Meringue Easter Nests
-
Grease-Free Bowl: Ensure your mixing bowl is completely grease-free; wipe it with lemon juice. Any grease can hinder the meringue’s ability to whip up properly.
-
No Yolks Allowed: Be careful to avoid any egg yolk in your egg whites. Even a tiny amount will prevent proper foaming and the lightness needed for the nests.
-
Oven Door Control: Resist the temptation to open the oven door while baking or cooling. A sudden temperature change can crack your beautiful meringues!
-
Fresh Egg Whites: Use fresh egg whites for the best texture and stability in your meringue. Cartons made for meringue can also work wonders for perfect results.
-
Customize Wisely: Feel free to experiment with filling variations, but remember to maintain the balance of textures. Light fillings like whipped cream complement the chewy meringue best in these Chocolate Meringue Easter Nests.
Make Ahead Options
These Chocolate Meringue Easter Nests are perfect for busy home cooks looking to save time without sacrificing taste! You can prepare the meringue nests up to 2 days in advance; simply bake and let them cool completely in the oven overnight as directed. After cooling, store them in an airtight container in a cool, dry place to maintain their crispness. The whipped cream filling can also be made up to 24 hours beforehand; just keep it refrigerated until you’re ready to fill the nests. When it’s time to serve, simply fill each meringue with the chilled cream and top with Mini Eggs for a delightful treat that’s just as delicious as if made fresh!
Chocolate Meringue Easter Nests Variations
Feel free to let your creativity shine by customizing these nests to suit your taste!
-
Fruit-Filled: Add mixed berries or seasonal fruits for a refreshing twist. The tartness beautifully contrasts the sweet meringue.
-
Dairy-Free: Swap out double cream for whipped coconut cream or a dairy-free whipped topping for a vegan option. This substitution keeps the nests delightful for everyone!
-
Nutty Surprise: Add finely chopped nuts into the meringue mix for a delightful crunch throughout. The nuttiness adds a great texture variation!
-
Spiced Version: Dust the meringues with a pinch of cinnamon or cardamom to introduce warmth and spice. This aromatic addition can elevate your nests to new flavor heights.
-
Chocolate Swirl: Incorporate more chocolate by drizzling melted dark chocolate over the meringue nests before they cool. It will create a beautiful and indulgent finish!
-
Heat it Up: Sprinkle in some chili powder or cayenne for a surprising spicy kick in your filling. This unexpected heat can enhance the chocolate flavor!
-
Creamy Alternatives: Replace double cream with a rich mousse, such as chocolate or whipped avocado, for a decadent filling. The silky texture will be a lovely surprise inside your nests!
These Chocolate Meringue Easter Nests can be dressed up in delightful ways, making them perfect for any occasion. If you’re also a fan of rich chocolate desserts, consider trying the enchanting Chocolate Skull Cake or prepare a special treat like the Perfect Chocolate Tuxedo Cake!
Chocolate Meringue Easter Nests Recipe FAQs
How do I select the best egg whites for meringue?
Absolutely! Fresh egg whites are crucial for achieving the best meringue texture. Be sure to use eggs at room temperature, which whip better. If you’re using carton egg whites, make sure they’re labeled for meringue-making for optimal results.
What’s the best way to store unfilled meringue nests?
Very! Store your unfilled Chocolate Meringue Easter Nests in an airtight container at room temperature for up to 2 days. Keep them in a cool, dry place to maintain their crispy texture. Wet conditions can ruin their delightful crunch, so avoid the fridge until they are filled.
Can I freeze Chocolate Meringue Easter Nests?
Yes, indeed! To freeze, wrap unfilled meringue nests tightly in plastic wrap and place them in a freezer-safe container. They will remain good for up to 1 month. Just remember, it’s best to fill and decorate them after thawing to prevent sogginess when the cream is added.
What should I do if my meringue doesn’t rise properly?
If your meringue fails to rise, check that no egg yolk has mixed into the whites, as even a tiny trace can affect foaming. Ensure your mixing bowl is completely grease-free, and you’re using fresh, cold egg whites. If you notice the mixture isn’t forming stiff peaks, it may be over-whipped or under-whipped; aim for glossy, stiff peaks.
Are there any common allergies I should be aware of?
Absolutely! This recipe is naturally gluten-free, making it suitable for gluten-sensitive individuals. However, be cautious with the double cream if anyone has dairy allergies—substituting with coconut cream offers a delicious, non-dairy alternative! Always double-check ingredients for hidden allergens if you’re serving guests with dietary sensitivities.
How long should I wait to eat the filled meringue nests?
The more the merrier! Once filled, enjoy your Chocolate Meringue Easter Nests within 2 days for maximum freshness and flavor. They’re best served chilled, so keep them in the fridge until you’re ready to impress your guests!
Chocolate Meringue Easter Nests for a Sweet Celebration
Ingredients
Equipment
Method
- Preheat your oven to 100°C (225°F) and line baking trays with baking paper.
- Grate dark chocolate finely and mix with cocoa powder in a bowl.
- Whisk egg whites and cream of tartar until foamy and soft peaks form.
- Gradually add caster sugar, whisking until stiff peaks form and mixture is glossy.
- Fold in the chocolate and cocoa mixture until just combined.
- Pipe circular bases onto prepared baking trays to form nests.
- Bake for 1 hour and 30 minutes, then cool in the oven overnight.
- Whip double cream with icing sugar until soft peaks form.
- Fill the cooled meringue nests with whipped cream and top with Mini Eggs and dark chocolate curls.
Leave a Reply