
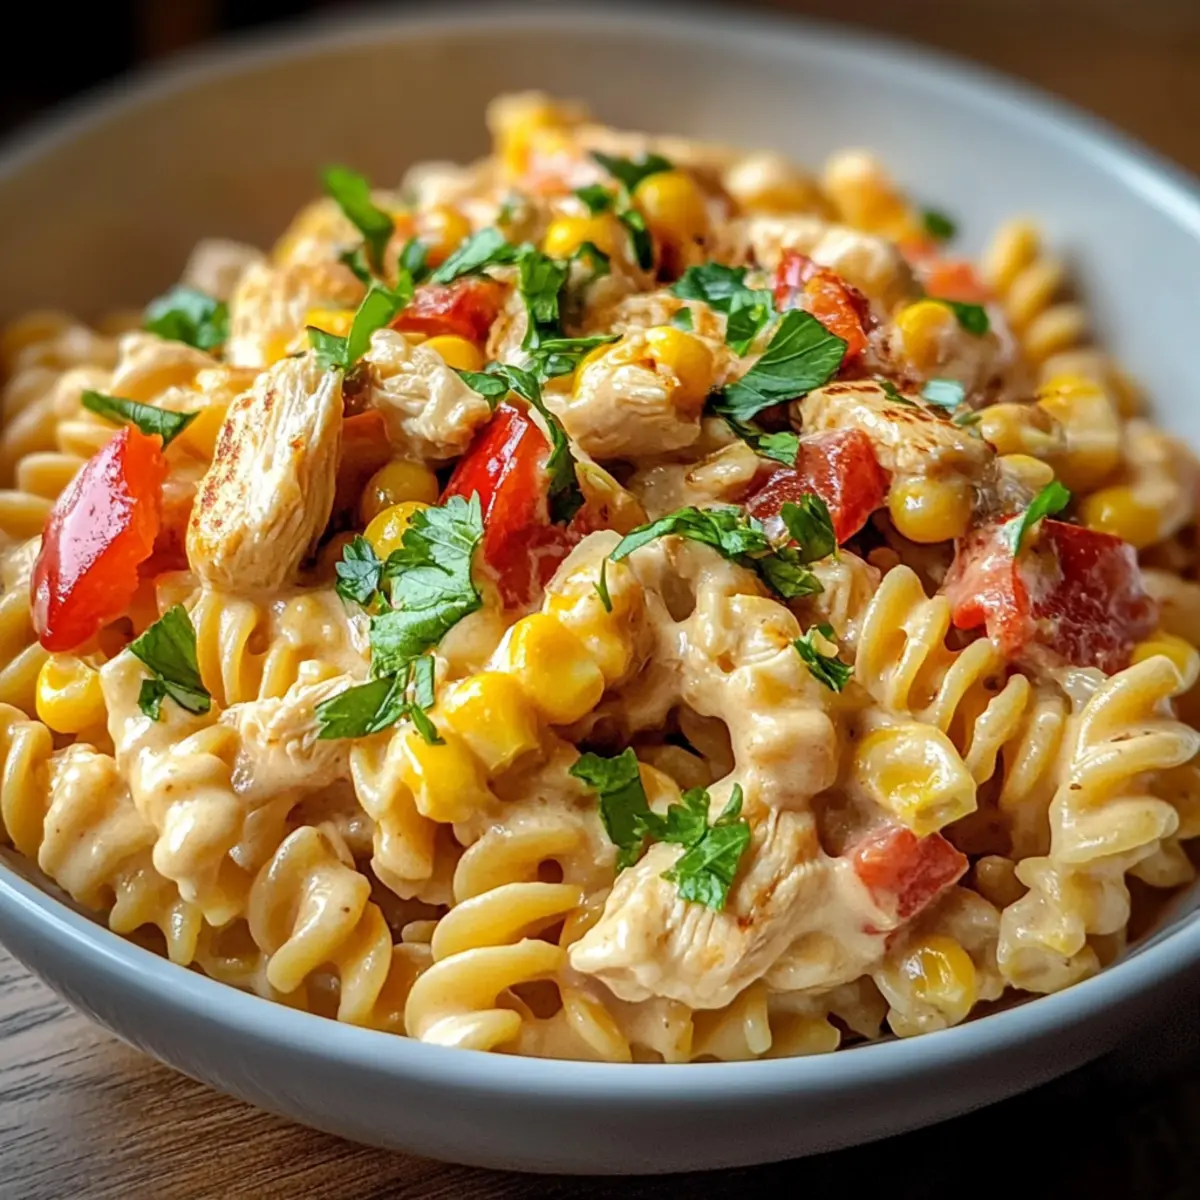
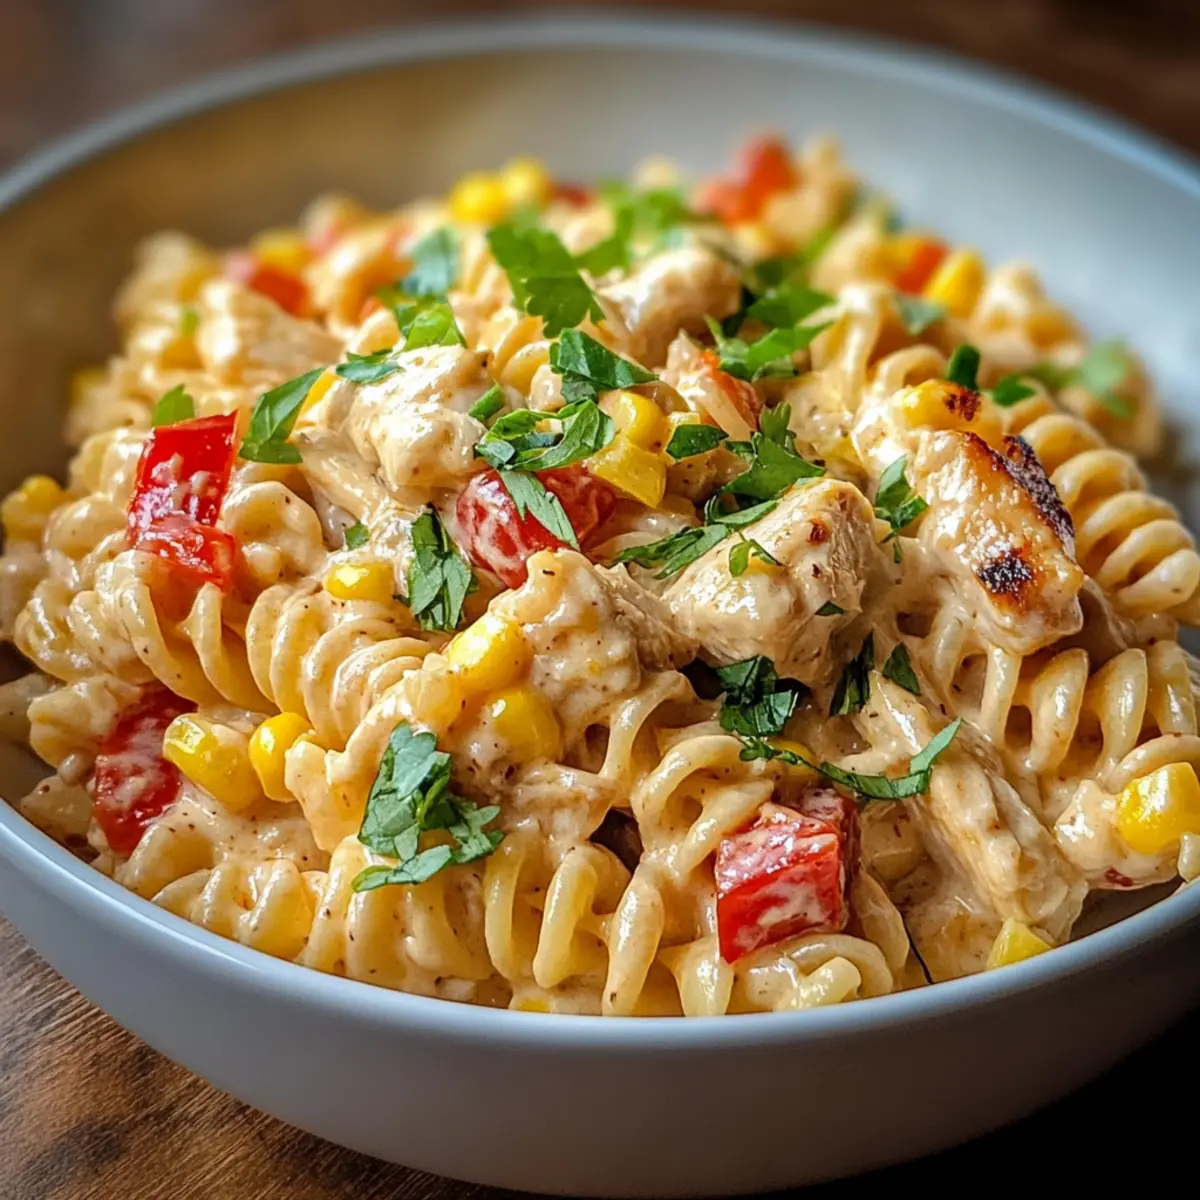
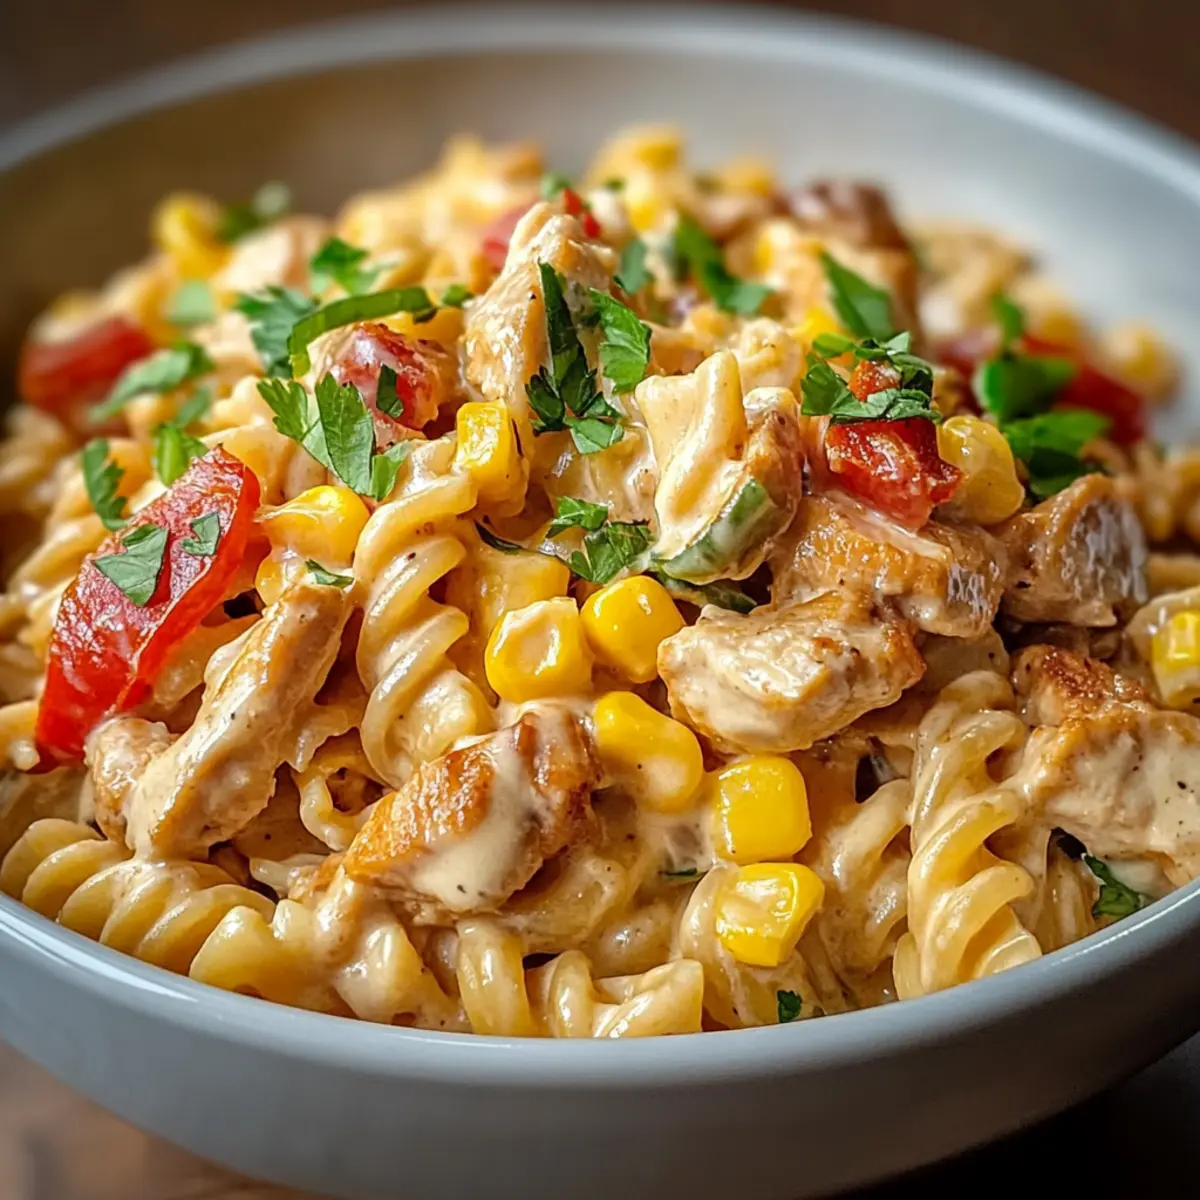
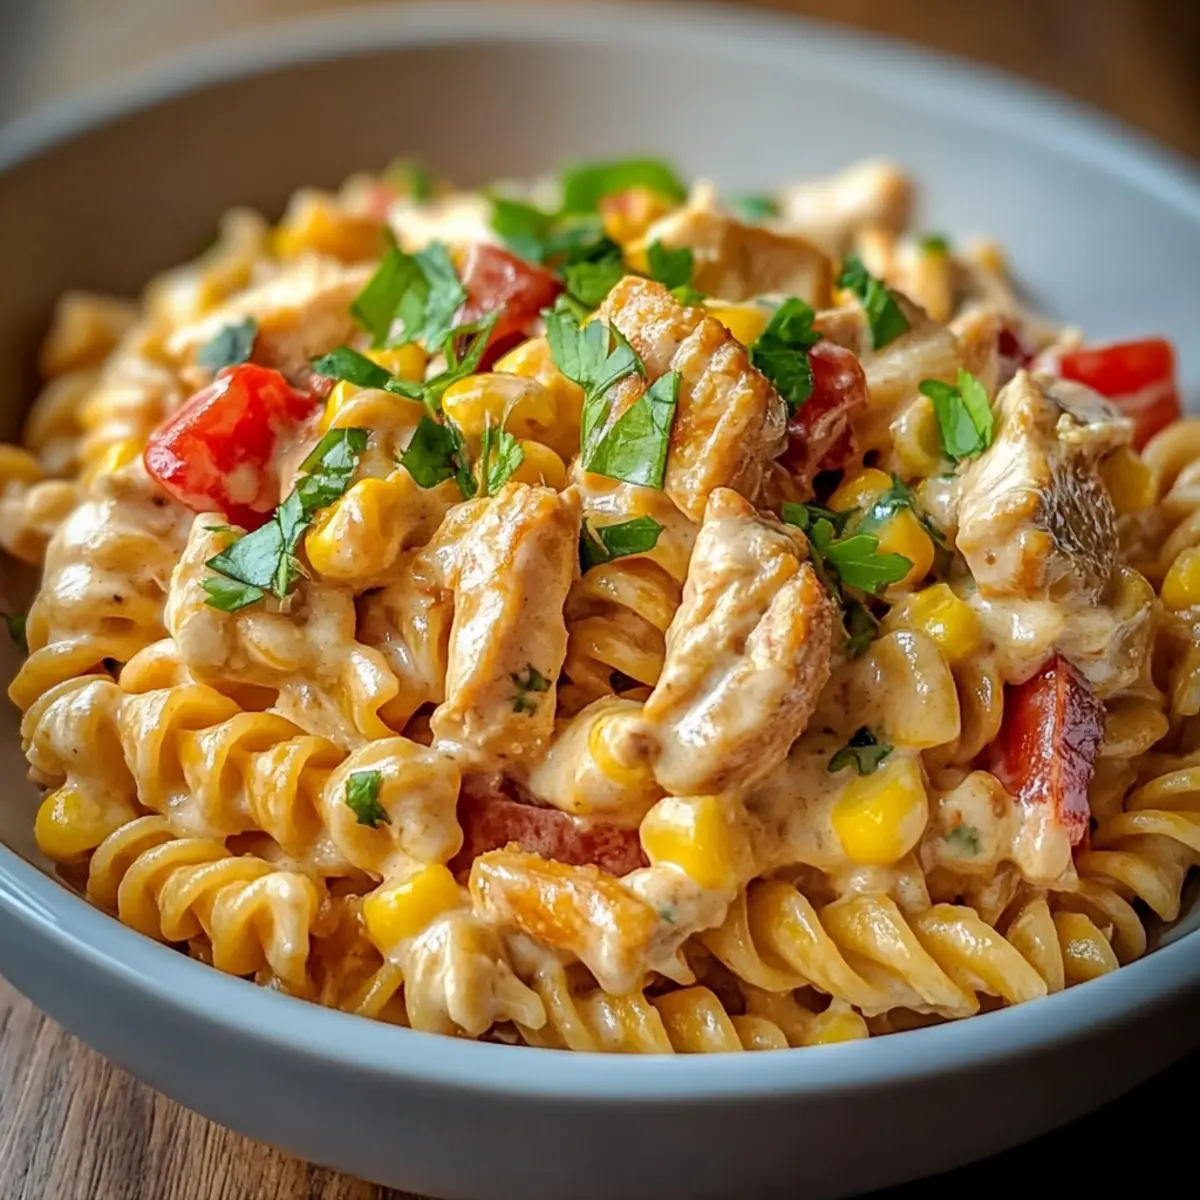
The aroma of sizzling chicken fills the kitchen as I toss together a dish that promises to be a weeknight savior: Cheesy Chicken Taco Pasta. In just 30 minutes, this creamy, taco-flavored pasta comes together effortlessly, combining the richness of cheesy goodness with the zesty kick of taco seasoning. It’s a delightful way to please even the pickiest eaters, while being a gluten-free option that doesn’t skimp on flavor. Plus, it’s perfect for those evenings when you want comfort food without spending hours in the kitchen. Are you ready to dive into a bowl of pure deliciousness? Let’s get cooking!
Why You’ll Crave This Recipe?
Simplicity at its finest: Whip up this Cheesy Chicken Taco Pasta in just 30 minutes, making it an ideal choice for busy weeknights.
Flavor-packed delight: The combination of creamy pasta, juicy chicken, and zesty taco seasoning will have your taste buds dancing!
Versatile options: Switch out chicken for black beans or chickpeas for a vegetarian twist, or experiment with different cheeses to customize your dish.
Crowd-pleaser guaranteed: This pasta is sure to impress family and friends, even the pickiest of eaters will be asking for seconds.
Meal prep friendly: Make-ahead convenience means you can enjoy delicious leftovers for days! Reheat easily, helping you steer clear of fast food.
Ready to elevate your dinner game? Try pairing this dish with a refreshing side salad or consider these Baked Cheesy Tacos for a fun twist on taco night!
Cheesy Chicken Taco Pasta Ingredients
• The key ingredients that will make your dish shine!
For the Pasta
• Gluten-free pasta – Use this alternative to keep your dish gluten-free and still delicious!
For the Protein
• Chicken breast – Diced for quick cooking; this protein option is essential for a hearty meal.
For the Flavor
• Taco seasoning – Infuses vibrant, zesty flavors; feel free to use your favorite store-bought mix or make your own!
• Salsa – Adds moisture and a kick; choose a spicy variety for extra heat if desired.
For Moisture
• Chicken broth – Keeps everything creamy and combined; vegetable broth works for a vegetarian option.
For Texture
• Corn – Optional for sweetness and crunch; it brightens up the dish wonderfully!
• Diced bell peppers – Gives a pop of color and subtle sweetness; can be left out if not your favorite.
For the Creaminess
• Shredded cheese – Mix different types for a richer flavor profile; it’s the secret to that luscious creaminess in Cheesy Chicken Taco Pasta.
Now that you have the ingredients in front of you, let’s get cooking and savor a dish that’s not only easy to prepare but can also become a beloved family staple!
Step‑by‑Step Instructions for Cheesy Chicken Taco Pasta
Step 1: Cook Pasta
Begin by bringing a large pot of salted water to a rolling boil over high heat. Add the gluten-free pasta and cook according to package instructions for about 8-10 minutes, or until al dente. Once cooked, drain the pasta well in a colander and set it aside, allowing the steam to evaporate while you prepare the rest of the Cheesy Chicken Taco Pasta.
Step 2: Cook Chicken
In a large skillet, heat a drizzle of oil over medium heat. Add the diced chicken breast and sauté for 5-7 minutes, stirring occasionally, until the chicken is browned and cooked through. Make sure the pieces are no longer pink in the center; this will ensure a deliciously tender base for your Cheesy Chicken Taco Pasta.
Step 3: Add Seasoning
Stir in the taco seasoning, salsa, and chicken broth to the skillet with the cooked chicken. If you opted to include corn and diced bell peppers, add them now too. Stir the mixture well, bringing it to a simmer and allowing the vibrant flavors to meld together for about 3-4 minutes, until everything is heated through and fragrant.
Step 4: Combine Ingredients
Once the chicken mixture is simmering, gently fold the drained pasta into the skillet. Sprinkle in the shredded cheese, stirring until the cheese has melted and coated the pasta evenly. If you prefer a creamier texture, you can add a bit more chicken broth to adjust the consistency, ensuring every bite of Cheesy Chicken Taco Pasta is luscious and cheesy.
Step 5: Season and Serve
Taste the Cheesy Chicken Taco Pasta and season with salt and pepper to your liking. Serve the dish hot, garnished with additional toppings like sour cream or fresh cilantro if desired. Enjoy the comforting and flavorful experience that this quick and creamy dinner brings to your table!
Make Ahead Options
This Cheesy Chicken Taco Pasta is perfect for meal prep enthusiasts! You can cook the entire dish up to 3 days in advance and store it in an airtight container in the refrigerator. To prepare ahead, simply follow the recipe up until Step 4, combining the pasta and sauce, but do not add the cheese yet; this will help maintain its creamy texture. When you’re ready to eat, reheat it on the stove over low heat, adding the shredded cheese just before serving to ensure it melts beautifully. This way, you’ll enjoy restaurant-quality results with minimal effort, making weeknight dinners a breeze!
Tips for the Best Cheesy Chicken Taco Pasta
-
Pasta Perfection: Ensure you cook the gluten-free pasta al dente for the best texture; overcooking can make it mushy and less enjoyable.
-
Flavor Boost: For a richer taste, consider making your own taco seasoning; customizing the spice levels ensures maximum flavor in your Cheesy Chicken Taco Pasta.
-
Protein Variations: Don’t hesitate to substitute the chicken with black beans or chickpeas for a vegetarian option; this adds versatility and keeps the dish enjoyable for all.
-
Add Freshness: Enhance your dish with fresh toppings like diced avocado, chopped cilantro, or a dollop of sour cream to elevate the experience and add creamy texture.
-
Storage Savvy: Store leftovers in an airtight container in the fridge for up to three days; reheating on the stove helps retain its creamy deliciousness.
How to Store and Freeze Cheesy Chicken Taco Pasta
Fridge: Keep leftovers in an airtight container for up to 3 days. Reheat on the stove over low heat, adding a splash of broth for moisture as needed.
Freezer: Portion the Cheesy Chicken Taco Pasta into freezer-safe containers. It can be frozen for up to 2 months. Thaw overnight in the fridge before reheating.
Reheating: For best results, reheat in a skillet over medium heat, adding a little chicken broth to revive the creamy texture. Avoid the microwave if possible to maintain quality.
What to Serve with Cheesy Chicken Taco Pasta?
As the aroma of your Cheesy Chicken Taco Pasta fills the kitchen, it’s time to think about what delightful companions will complete your meal.
-
Crispy Side Salad: A light, refreshing salad with mixed greens and a tangy vinaigrette balances the creaminess of the pasta perfectly. The crunch of fresh vegetables will keep things exciting!
-
Garlic Breadsticks: Warm, buttery breadsticks add a satisfying crunch and are perfect for mopping up any extra creamy sauce. The garlic flavor enhances the zesty taco seasoning in your main dish.
-
Roasted Vegetables: Seasonal veggies like zucchini and bell peppers, roasted to golden perfection, bring a delightful sweetness and texture that complements the rich pasta.
-
Nacho Chips with Guacamole: For a fun twist, serve crispy nacho chips alongside fresh guacamole. The creamy dip offers a contrasting texture and a burst of flavor that ties the meal together beautifully.
-
Sour Cream and Fresh Cilantro: Offering a dollop of sour cream and a sprinkle of fresh cilantro right on top of your pasta adds an extra layer of creaminess and brightness that elevates your dish.
-
Margaritas or Lemonade: A chilled margarita or refreshing glass of lemonade serves as the perfect accompaniment, balancing the dish’s richness with a zingy, thirst-quenching finish.
By incorporating these delightful sides, your Cheesy Chicken Taco Pasta transforms from a simple dinner into a comforting feast that’ll have everyone coming back for more!
Cheesy Chicken Taco Pasta Variations
Feel free to get creative and customize your Cheesy Chicken Taco Pasta with these fun twists!
-
Vegetarian Delight: Swap diced chicken for black beans or chickpeas. This change will give you a protein-packed, meatless meal that’s just as satisfying.
-
Spice it Up: Add diced jalapeños or a splash of hot sauce to the taco seasoning for an extra kick. This is perfect for those who crave some heat!
-
Cheese Lovers Unite: Experiment with different cheese combinations like pepper jack for a spicy twist or a blend of cheddar and mozzarella for richness.
-
Creamy Dream: Add a dollop of cream cheese or sour cream as you combine the ingredients for an extra creamy texture. This elevates the overall richness and flavor!
-
Crispy Toppings: Top with crushed tortilla chips or crispy bacon bits before serving. This adds a delightful crunch that contrasts beautifully with the creamy pasta.
-
Veggie Boost: Include additional veggies like zucchini or spinach to increase the nutritional value and flavor. A pop of color and nutrition makes this dish even more inviting!
-
Savory Sweetness: Consider adding diced tomatoes or roasted corn to enhance the sweetness, complementing the savory taco flavors perfectly.
-
Fresh Finish: Garnish with freshly chopped cilantro and a squeeze of lime juice just before serving. This adds brightness and a refreshing taste that balances the richness of the pasta.
For even more exciting meals, why not try these delicious Baked Cheesy Tacos or get cozy with some Pumpkin Chicken Pasta? Your dinner options are endless!
Cheesy Chicken Taco Pasta Recipe FAQs
How do I choose the right pasta for my Cheesy Chicken Taco Pasta?
Absolutely! For a gluten-free option, look for pasta labeled specifically as gluten-free, made from ingredients like brown rice or quinoa. Ensure the texture is similar to regular pasta, and check the cooking time, as it can vary between brands. A good tip is to pick a shape that holds sauce well, like penne or rotini.
What’s the best way to store leftovers of Cheesy Chicken Taco Pasta?
Very! Ensure the Cheesy Chicken Taco Pasta is fully cooled before transferring it to an airtight container. Store in the refrigerator for up to 3 days. When you’re ready to enjoy it again, gently reheat on the stove over low heat, adding a splash of chicken broth to maintain its creamy consistency.
Can I freeze Cheesy Chicken Taco Pasta?
Yes, you can! Portion the cooked Cheesy Chicken Taco Pasta into freezer-safe containers or bags. It can be frozen for up to 2 months. For reheating, thaw it overnight in the fridge for best results. When you’re ready to eat, reheat in a skillet over medium heat, adding a touch of chicken broth to keep it deliciously creamy.
What should I do if my pasta becomes too mushy?
It happens! If overcooked, you can still salvage it. Try mixing it with a bit more shredded cheese or fresh vegetables to add texture. If you feel it’s too late, turn it into a casserole by baking with extra cheese on top to create a crispy layer, which can help mask the mushiness.
Are there any dietary concerns with Cheesy Chicken Taco Pasta?
Yes, keep an eye on potential allergens! The recipe contains chicken and cheese, so if anyone has dairy allergies or is vegetarian, you can substitute chicken with black beans or chickpeas and choose dairy-free cheese alternatives. Always check labels for gluten-free products to accommodate those with gluten sensitivities.
Can I spice up my Cheesy Chicken Taco Pasta?
Of course! If you’re looking to add some kick, consider adding diced jalapeños or using spicy salsa. You could also sprinkle some red pepper flakes while cooking or heat it up with a spicy taco seasoning blend. The more the merrier when it comes to flavor!
Creamy Cheesy Chicken Taco Pasta You Can't Resist
Ingredients
Equipment
Method
- Bring a large pot of salted water to a rolling boil. Add the gluten-free pasta and cook according to package instructions for 8-10 minutes, or until al dente. Drain and set aside.
- In a large skillet, heat a drizzle of oil over medium heat. Add the diced chicken breast and sauté for 5-7 minutes until browned and cooked through.
- Stir in the taco seasoning, salsa, and chicken broth to the skillet with the cooked chicken. If adding corn and bell peppers, include them now. Simmer for 3-4 minutes.
- Gently fold the drained pasta into the skillet. Sprinkle in the shredded cheese, stirring until melted and the pasta is coated.
- Season with salt and pepper to taste. Serve hot, garnished with toppings like sour cream or cilantro if desired.
Leave a Reply