
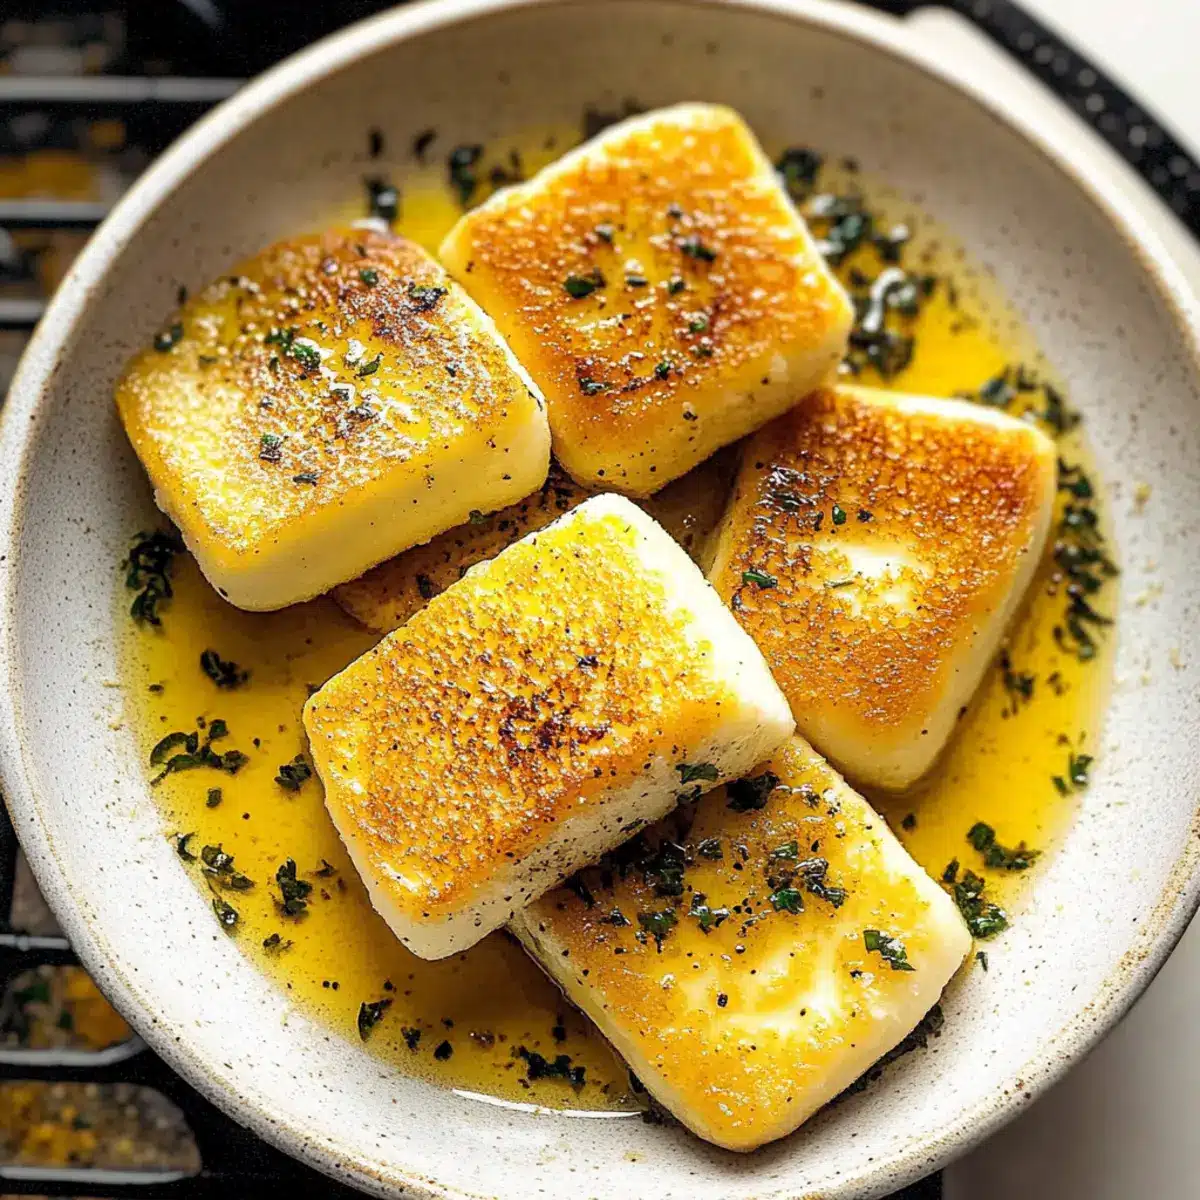
As I stirred the pot of bubbling cashews, a thought crossed my mind: how could I recreate that irresistible, chewy texture of halloumi cheese without dairy? Enter my Homemade Vegan Halloumi, a surprisingly easy recipe that quickly became a staple in my plant-based kitchen. This delightful alternative combines tangy, salty flavors and a unique texture that’s perfect for grilling, salads, or even just snacking straight from the pan. Not only is it a crowd-pleaser, but it’s also a wholesome addition to your meals without the guilt of fast food. Whether you’re a seasoned home chef or simply looking for a fresh twist on cheese, I’m excited to share this delicious recipe with you. Ready to uncover how to make your own creamy dairy-free halloumi at home? Let’s get cooking!
Why Choose Homemade Vegan Halloumi?
Unique Flavor: This recipe delivers a bold, tangy taste that rivals traditional halloumi, giving your dishes an exciting twist.
Easy to Make: The process is simple and requires just a few ingredients, making it perfect for home cooks of all skill levels.
Versatile Usage: Enjoy it in salads, on veggie skewers, or in hearty sandwiches—ideas are endless!
Healthier Alternative: With wholesome ingredients and no dairy, it caters beautifully to vegan diets, offering a guilt-free indulgence.
Crowd-Pleasing: Impress friends and family with a delicious, homemade cheese that’s sure to win over even the toughest critics. Try it with a refreshing salad or alongside Homemade Pumpkin Milk for a complete meal experience!
Homemade Vegan Halloumi Ingredients
For the Cheese Base
• Raw Cashews – Soak them in water before boiling for a creamier texture.
• Dijon Mustard – Adds a delightful tanginess; swap for yellow mustard if needed.
• Lemon Juice – Brightens the flavor with acidity; try fresh lime juice for a twist.
• Sea Salt – Enhances the overall flavor; regular salt can be substituted.
• Light Olive Oil – Provides richness; other neutral oils may work as well.
For the Thickening Agent
• Agar Agar – Essential for achieving that halloumi-like texture; avoid cornstarch as a substitute.
• Cornstarch (Cornflour in UK) – Thickens the mixture; arrowroot powder can be an alternative in adjusted amounts.
Other Ingredients
• White Wine Vinegar – Brightens up the cheese; apple cider vinegar serves as a good alternative.
• Nutritional Yeast – Infuses cheesy flavor; don’t skip this for the full umami experience.
• Cold Water – Helps in blending to achieve the right consistency; substitute with any clear liquid if necessary.
Delve into the art of making Homemade Vegan Halloumi that not only delights the tastebuds but also adds a heartwarming touch to your meals!
Step‑by‑Step Instructions for Homemade Vegan Halloumi
Step 1: Boil Cashews
Start by placing the raw cashews in a medium-sized pan, covering them completely with boiling water. Allow them to boil for about 15 minutes to soften adequately. After boiling, carefully drain the cashews using a colander and set them aside, ensuring you remove any excess water for the best texture in your Homemade Vegan Halloumi.
Step 2: Blend Ingredients
In a high-speed blender, add the drained cashews along with the Dijon mustard, lemon juice, sea salt, light olive oil, white wine vinegar, and nutritional yeast. Blend the mixture on high for about 2-3 minutes, or until it reaches a silky-smooth consistency. You may need to stop and scrape down the sides occasionally to ensure everything is well incorporated for your rich cheese base.
Step 3: Heat Mixture
Transfer the blended mixture to a nonstick pan over medium heat. Begin stirring continuously to avoid lumps, cooking for about 5-10 minutes until the mixture thickens significantly and pulls away from the sides of the pan. Look for a glossy finish and a custard-like texture that indicates your Homemade Vegan Halloumi is ready to set.
Step 4: Set the Mixture
Once thickened, pour the mixture into a shallow dish, spreading it evenly. Allow it to cool slightly at room temperature for about 10 minutes before placing it in the refrigerator. Chill for at least 3 hours to firm up completely; this step is crucial for achieving that distinctive halloumi-like texture when you slice it.
Step 5: Slice and Fry
After the setting period, remove the chilled mixture from the refrigerator and slice it into six even pieces. Heat a lightly oiled nonstick pan over medium heat and carefully place the slices in the pan. Fry each side for approximately 5 minutes until they turn golden brown and crispy, creating a delicious exterior while keeping the interior soft and creamy, perfect for your Homemade Vegan Halloumi.
Homemade Vegan Halloumi Variations
Feel free to explore new flavors and textures with these creative twists tailored for your taste buds!
-
Nut-Free: Replace cashews with silken tofu for a creamy, nut-free option that still carries a lovely texture.
-
Flavor Burst: Swap Dijon mustard for spicy mustard or even harissa for a zesty kick that transforms the base flavor.
-
Citrus Zing: Experiment with different citrus by using lime juice instead of lemon to brighten your vegan cheese and add a unique twist.
-
Herby Delight: Add a handful of fresh herbs like basil or dill while blending for a fresh twist that deepens the taste and aroma.
-
Vinegar Variety: Use balsamic vinegar for a slightly sweet version that will surprise your palate in salads and sandwiches.
-
Smoky Flavor: Incorporate smoked paprika into the mixture for an intriguing, smoky flavor that pairs excellently with grilled vegetables.
-
Fiery Heat: Toss in a pinch of chili flakes or cayenne pepper if you fancy a spicy kick that enhances every bite!
-
Creaminess Upgrade: For an extra indulgent version, blend in a splash of coconut cream; it adds richness and a hint of sweetness.
Consider combining your delicious halloumi with a refreshing salad or pairing it alongside some homemade Pistachio Ice Cream for an exquisite meal finale! Enjoy these variations, and let your culinary creativity shine in the kitchen!
Make Ahead Options
These Homemade Vegan Halloumi cheese slices are perfect for meal prep enthusiasts! You can prepare the cheese mixture a full 24 hours in advance, allowing the flavors to meld beautifully. Simply follow the initial steps of boiling and blending the cashews, then transfer the thickened mixture to a dish and let it chill in the refrigerator. When you’re ready to enjoy, slice and fry the cheese as directed; this will ensure you get that delicious, crispy exterior that makes this dish so irresistible. For optimal freshness, store the finished cheese in an airtight container in the refrigerator for up to 3 days. This way, you’ll have a scrumptious plant-based cheese ready in no time, perfect for busy weeknights!
Expert Tips for Homemade Vegan Halloumi
-
Soak Cashews: Make sure to soak the cashews for a few hours before boiling; this enhances creaminess and makes blending easier for your homemade vegan halloumi.
-
Use Fresh Ingredients: Fresh lemon juice and quality dijon mustard elevate flavors; avoid stale or old products to ensure the best taste in your cheese.
-
Monitor Cooking Time: Stir continuously and keep an eye on the heat when thickening the mixture; burnt bits can ruin the texture of your homemade vegan halloumi.
-
Chill Properly: Don’t rush the cooling process—it’s essential! The right set time in the fridge allows your halloumi to achieve that desired texture.
-
Fry with Care: Ensure your pan is well-oiled and hot enough before frying; avoid overcrowding to allow for crispy edges on your delicious cheese slices.
How to Store and Freeze Homemade Vegan Halloumi
Fridge: Store leftover homemade vegan halloumi in an airtight container in the refrigerator for up to 4 days to maintain its freshness and flavor.
Freezer: While freezing is possible, the texture may alter slightly upon reheating. Wrap slices tightly in plastic wrap and place them in an airtight container for up to 2 months.
Thawing: To thaw, place the frozen vegan halloumi in the refrigerator overnight, then reheat in a lightly oiled pan over medium heat until warm and crispy.
Reheating: Enjoy your refrigerated or thawed halloumi by frying slices in a nonstick pan for about 3-5 minutes per side, allowing that delightful crispy exterior to form again!
What to Serve with Homemade Vegan Halloumi?
Elevate your dining experience with complementary dishes that bring out the best in this creamy, plant-based cheese.
-
Fresh Garden Salad: A vibrant salad with mixed greens, tomatoes, and a zesty vinaigrette balances the tanginess of the halloumi beautifully. Crisp veggies and a light dressing provide a refreshing contrast to the rich flavors.
-
Grilled Veggie Skewers: Pair your halloumi with skewers of marinated bell peppers, zucchini, and cherry tomatoes. The charred, smoky essence of grilled vegetables enhances the savory notes of the cheese, making each bite a festival of flavors.
-
Avocado Toast: Add sliced or pan-fried halloumi atop a bed of creamy avocado on whole-grain bread. This creamy texture duo creates a hearty and satisfying meal that’s perfect for brunch or a light lunch.
-
Mediterranean Quinoa Bowl: Serve halloumi over fluffy quinoa, topped with olives, cucumbers, and a drizzle of tahini sauce. Each mouthful combines different textures and flavors that celebrate Mediterranean cuisine.
-
Roasted Sweet Potatoes: The natural sweetness of roasted sweet potatoes complements the salty, chewy halloumi. Together, they create an irresistible combination that’s both comforting and nutritious.
-
Chickpea and Spinach Stew: Pair with a hearty chickpea stew for a protein-packed meal. The spicy, aromatic flavors of the stew accompany the vegan halloumi, enriching your dining experience.
-
Chardonnay or Sparkling Water: For drinks, a chilled Chardonnay or sparkling water with lemon can refresh your palate and enhance the overall meal. Both options complement the flavors without overshadowing them.
Homemade Vegan Halloumi Recipe FAQs
What type of cashews should I use?
Absolutely! Raw cashews are the star of this recipe, providing the creamy base for your homemade vegan halloumi. Soaking them in water for about 4 hours (or just boiling them for 15 minutes, as mentioned in the recipe) will ensure they blend smoothly and contribute to that rich, creamy texture you desire.
How do I store leftover vegan halloumi?
Very simply! Store any leftover homemade vegan halloumi in an airtight container in the refrigerator, where it will stay fresh for up to 4 days. Just make sure it’s sealed well to prevent it from drying out or absorbing any fridge odors.
Can I freeze homemade vegan halloumi?
Yes, you can! To freeze, wrap the slices tightly in plastic wrap and place them in an airtight container. It can keep in the freezer for up to 2 months. Keep in mind that the texture may change slightly upon reheating, but I still find it delicious!
What’s the best way to reheat frozen halloumi?
For best results, thaw the frozen vegan halloumi by placing it in the refrigerator overnight. When you’re ready to enjoy it, reheat slices in a lightly oiled pan over medium heat for about 3-5 minutes on each side until warm and crispy. This helps restore its delightful texture!
How can I make this recipe nut-free?
Absolutely! For a nut-free version, you can replace the raw cashews with silken tofu. The flavor and texture will differ slightly, but you’ll still get a creamy base. Begin by blending the silken tofu with all the other ingredients until smooth, and follow the rest of the instructions as usual.
Can pets eat homemade vegan halloumi?
While this recipe is dairy-free, it’s best to avoid sharing it with pets. Ingredients like nutritional yeast in large quantities may not sit well with animals, so it’s safer to keep this delicious treat strictly for your plant-based indulgence!
Creamy Homemade Vegan Halloumi You'll Love in Every Bite
Ingredients
Equipment
Method
- Start by placing the raw cashews in a medium-sized pan, covering them with boiling water. Boil for about 15 minutes, then drain.
- In a high-speed blender, combine drained cashews, Dijon mustard, lemon juice, sea salt, light olive oil, white wine vinegar, and nutritional yeast. Blend until smooth.
- Transfer the mixture to a nonstick pan over medium heat and stir continuously for about 5-10 minutes until thickened.
- Pour the mixture into a shallow dish, let it cool for 10 minutes, then refrigerate for at least 3 hours until firm.
- Slice the chilled mixture into six pieces, heat a lightly oiled pan, and fry each side for about 5 minutes until golden brown.
Leave a Reply