
As I prepared for Halloween, my kitchen transformed into a whimsical workshop of spookiness and surprise. What better way to summon the spirit of the season than with these Witch Finger Breadsticks? Perfectly creepy, these delightful treats are not only a hit at any Halloween kids’ party but also a fun culinary adventure for family and friends to enjoy together. With just a short prep time, you can create a batch of these spooky snacks that are sure to be the talk of your gathering. Crispy on the outside and soft within, they’re a hauntingly delicious addition to your Halloween feast. So, are you ready to make some magical memories in the kitchen? Let’s dive into the recipe!
Why Are These Breadsticks So Fun?
Crispy Charm: The Witch Finger Breadsticks boast a perfect balance of crispy exteriors and soft interiors, making them a delightful treat to snack on.
Kid-Friendly Fun: Involve your kids in shaping these spooky fingers, turning cooking into a fun family activity that sparks creativity and laughter.
Endless Customizations: Whether you prefer a cheesy topping or a spicy kick, the recipe is versatile enough to cater to every palate.
Perfect Halloween Party Snack: These breadsticks double as creepy decor and tasty snacks, ensuring that they’ll be a hit at any spooky gathering. Pair them with warm marinara for an additional delicious twist!
Quick and Easy: With short prep time and simple ingredients, these finger foods can be whipped up in no time, leaving you more time to enjoy the festivities. For more seasonal ideas, check out Witchs Cauldron Mac and Ghoul Gheroni Cheese!
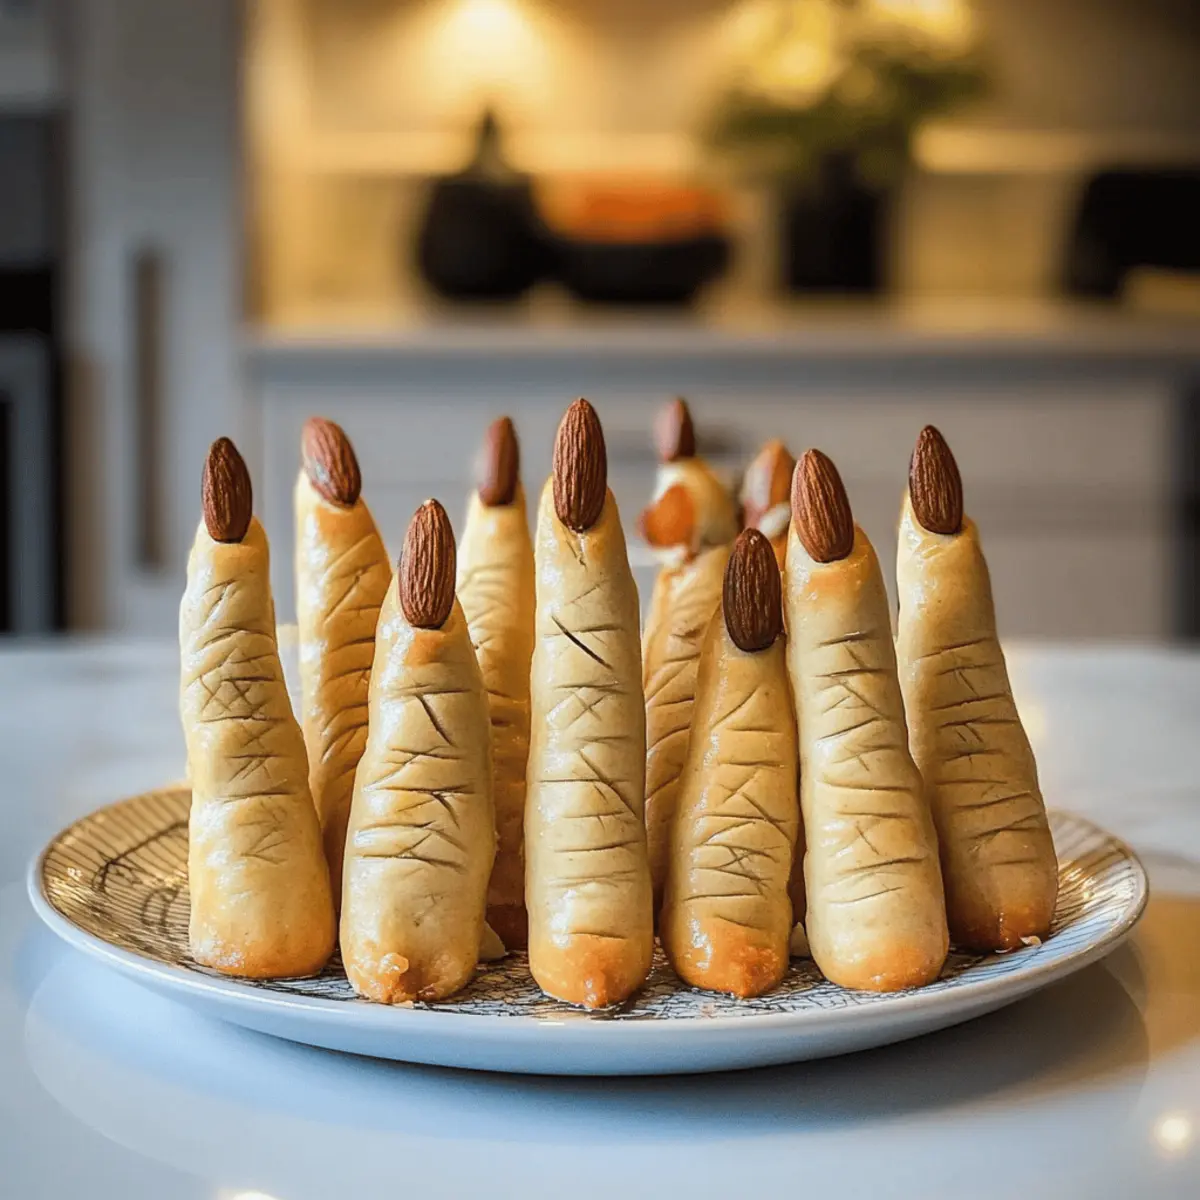
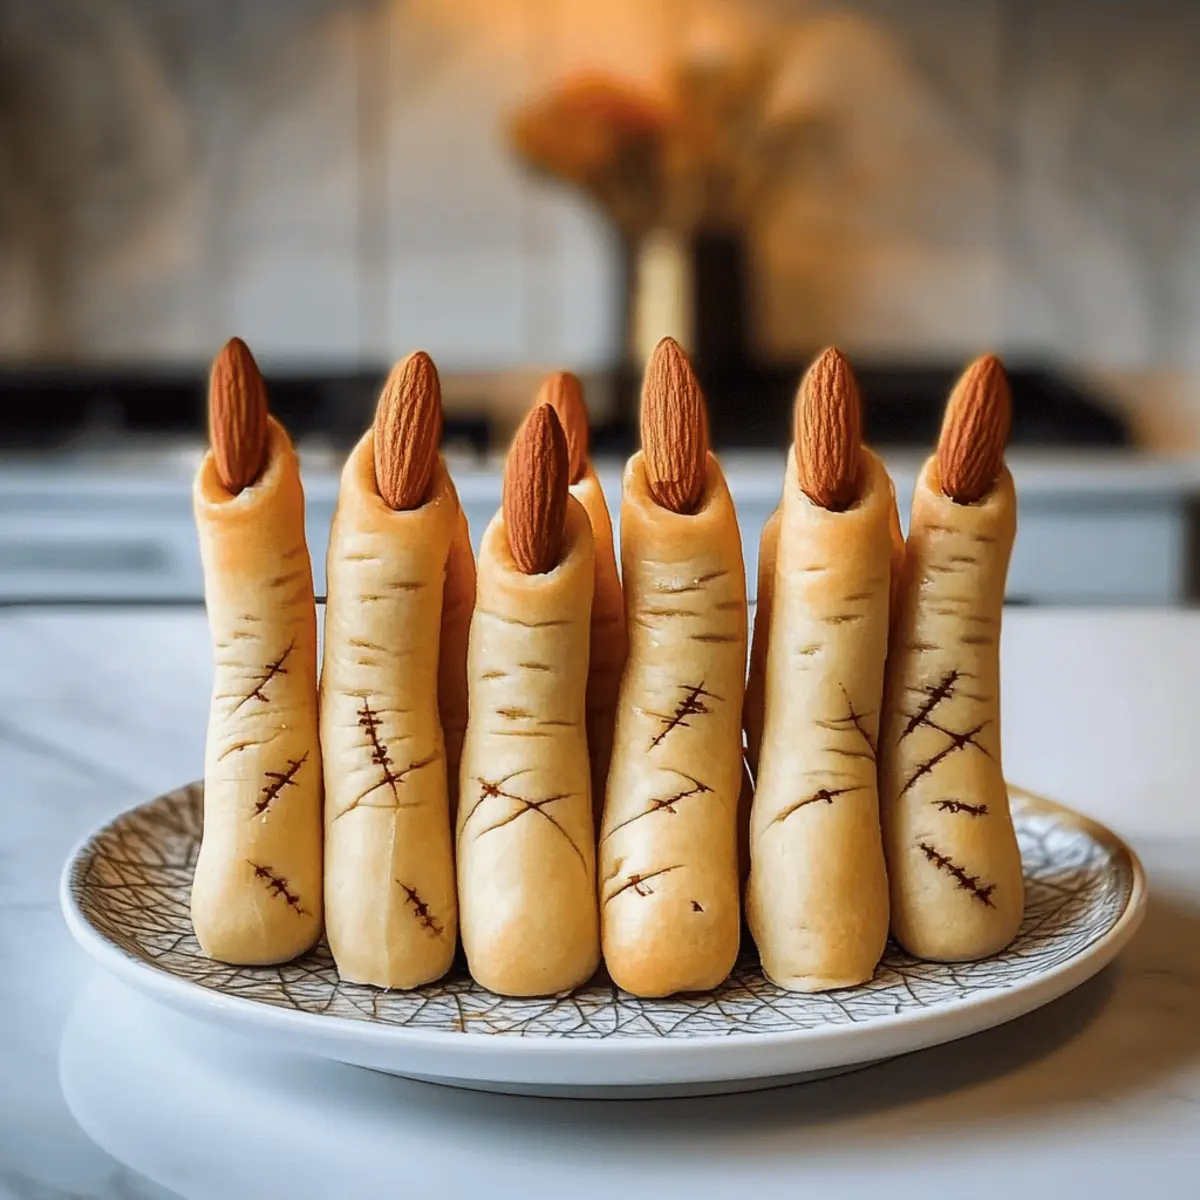
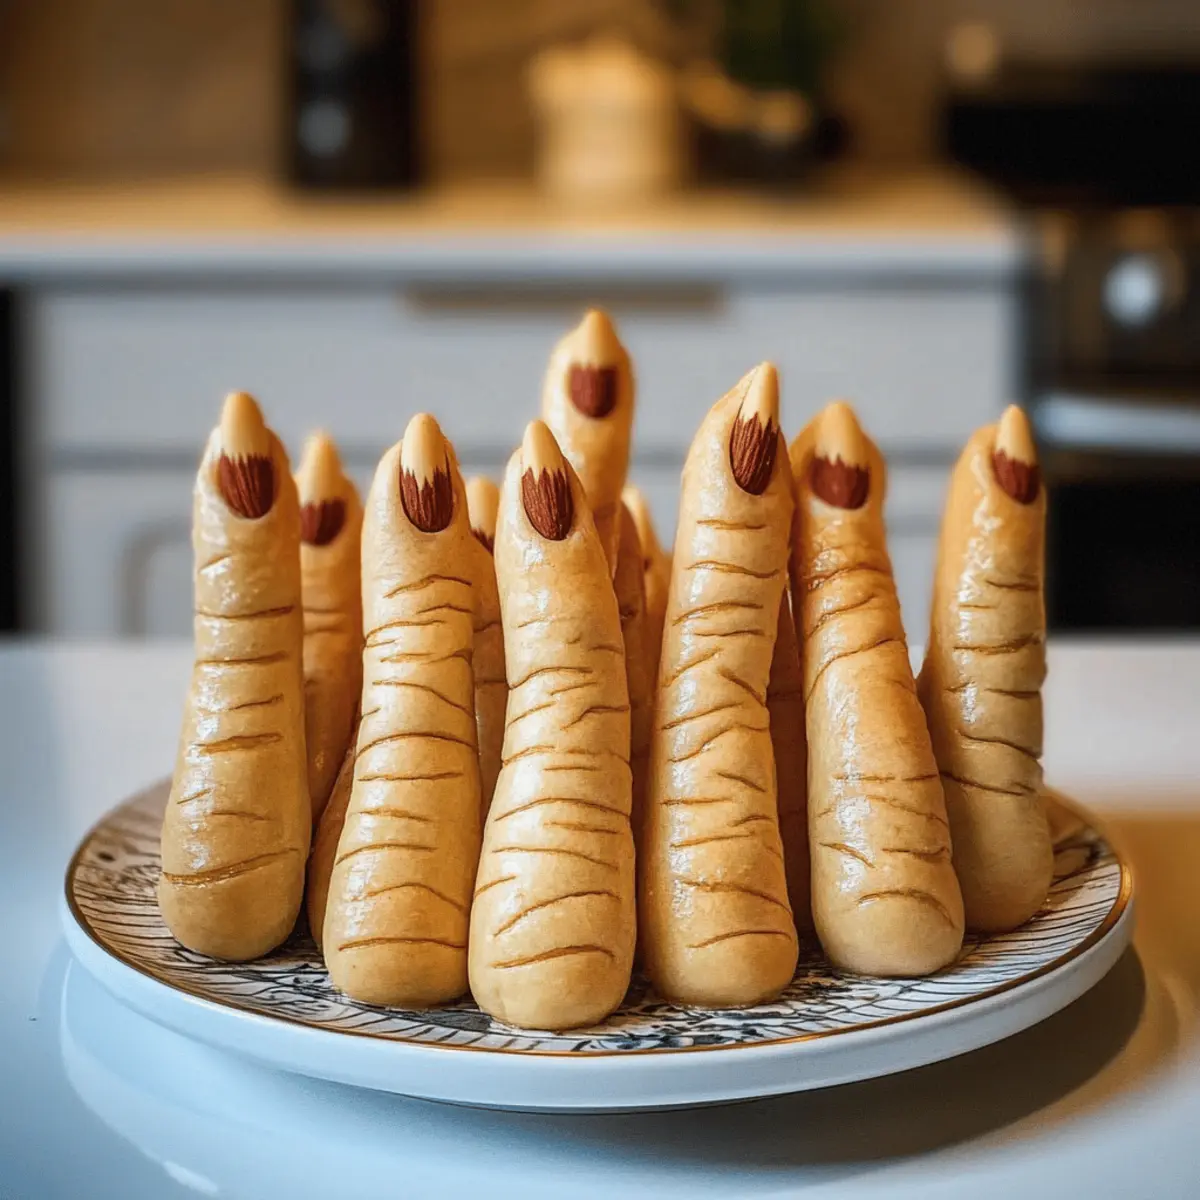
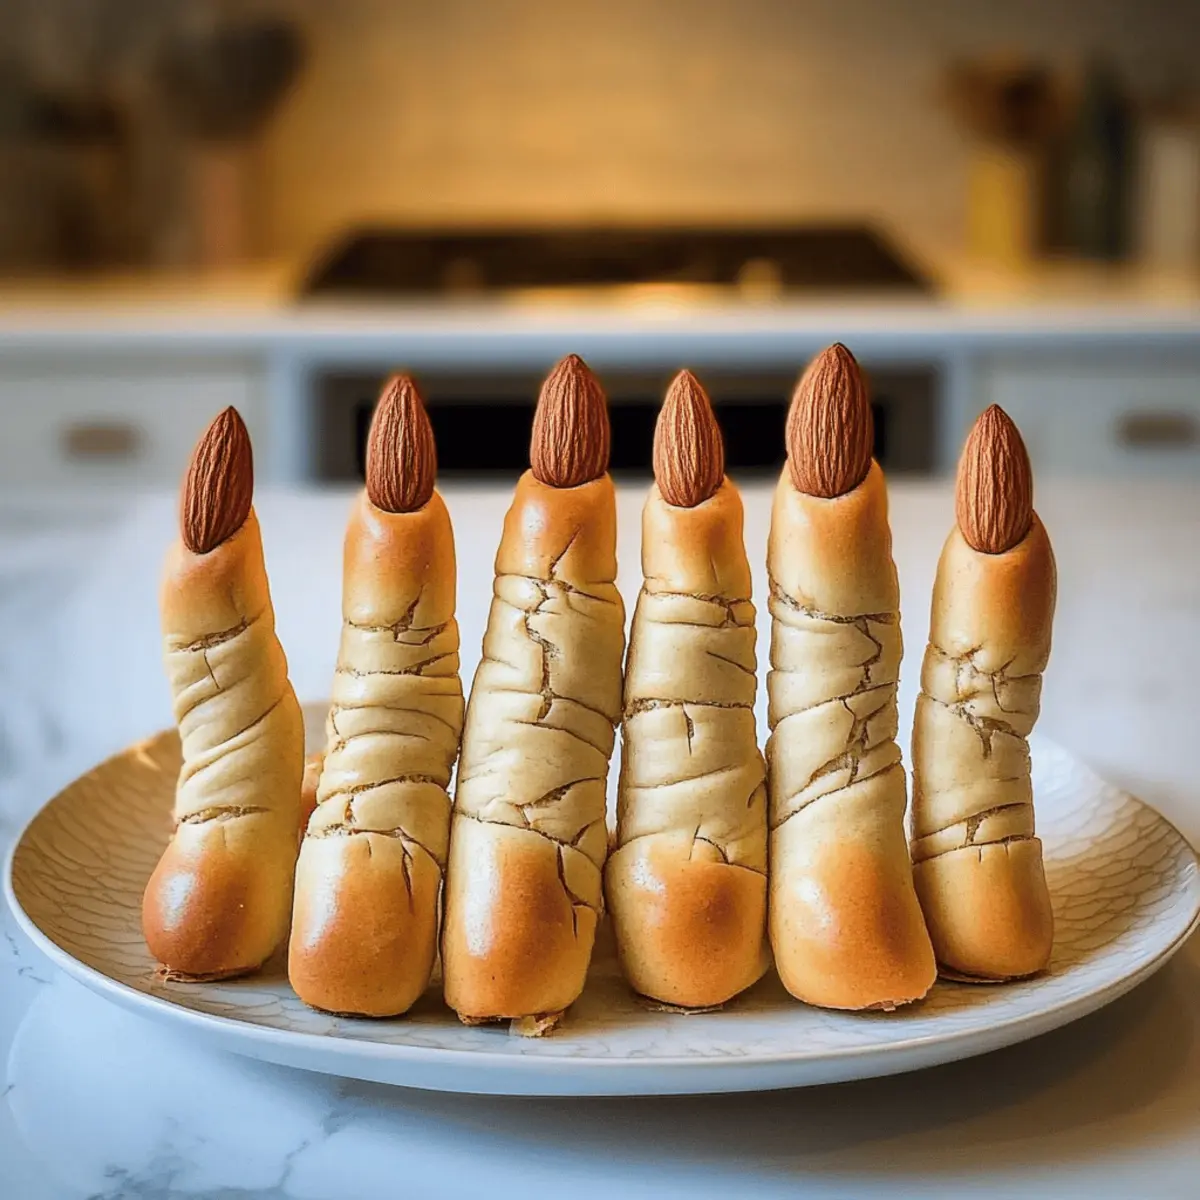
Witch Finger Breadsticks Dinner
These creepy breadsticks are perfect for your Halloween festivities!
For the Dough
- Pizza Dough – Use 1 pound of your favorite homemade or store-bought dough for the base structure.
- Egg – 1 beaten; an egg wash gives the breadsticks a golden finish that’s both tasty and appealing.
- Olive Oil – 2 tablespoons added for flavor and shine, enhancing the overall deliciousness.
- Salt – A sprinkle on top for enhanced taste that elevates the savory goodness.
For the Decorations
- Almonds or Pumpkin Seeds – Use as creepy nails for each finger; you can swap these with any nut or seed of your choosing.
- Red Food Coloring – Optional for a bloody touch, adding an eerie effect that makes these Witch Finger Breadsticks truly spooky!
For Flavor Variations
- Spices – Incorporate garlic powder, rosemary, or your favorite seasoning to customize the flavor profile to your liking.
These Witch Finger Breadsticks are just the spooky treat you need for your Halloween dinner! 🕷️🎃
Step‑by‑Step Instructions for Witch Finger Breadsticks Dinner
Step 1: Prepare the Baking Sheet
Start by preheating your oven to 375°F (190°C). While it’s warming up, line a baking sheet with parchment paper to prevent your Witch Finger Breadsticks from sticking. This easy preparation ensures a hassle-free cleanup later. The parchment will also help achieve those crispy, golden crusts on your breadsticks.
Step 2: Roll the Dough
Next, take your pound of pizza dough and place it on a lightly floured surface. Use a rolling pin to flatten the dough into an even rectangle, about 1/4 inch thick. Aim for a smooth surface for cutting out your strips. Once rolled out, admire the possibilities of creating your creepy breadsticks!
Step 3: Shape Each Stick
Cut the flattened dough into strips, roughly 1 inch wide, using a sharp knife or pizza cutter. Now, twist or roll each strip into a finger shape, tapering one end to form the finger tip. The more irregular the shape, the spookier your Witch Finger Breadsticks will look. Place them on the prepared baking sheet, ensuring some space between each stick.
Step 4: Add Almonds or Seeds
To give your breadsticks a creepy touch, press one almond or pumpkin seed into the tapered end of each dough strip to resemble a nail. Make sure they’re firmly attached to avoid any slipping during baking. This detail will transform your breadsticks into the perfect Halloween finger food within minutes!
Step 5: Brush with Egg
In a small bowl, beat one egg to create your egg wash. Using a pastry brush, generously coat the shaped breadsticks with the egg wash. This step gives them an attractive golden finish when baked, enhancing their appearance for your spooky Halloween feast.
Step 6: Bake
Now that your Witch Finger Breadsticks are prepped, place the baking sheet in the preheated oven. Bake for 15-20 minutes or until they turn golden brown and crispy. Keep an eye on them as they bake; they should puff slightly and take on an inviting aroma that fills your kitchen!
Step 7: Cool and Serve
Once baked, remove the breadsticks from the oven and allow them to cool slightly on the baking sheet. This resting time helps them firm up a bit. If you desire an extra spooky effect, dab a little red food coloring at the fingertips before serving. Gather your Witch Finger Breadsticks on a spooky platter and get ready to impress your guests!
Tips for the Best Witch Finger Breadsticks
-
Dough Thickness: Ensure the dough is rolled out evenly to about 1/4 inch thick. Thinner dough will puff too much and lose the creepy finger shape.
-
Nail Placement: Press almonds or pumpkin seeds firmly into the dough ends. Loose nails might fall off during baking, ruining the spooky effect.
-
Egg Wash: Don’t skip the egg wash! This step is crucial for achieving that golden, appetizing finish on your Witch Finger Breadsticks.
-
Baking Position: Bake in the upper half of the oven for a crispier texture. Keeping them close to the heat source gives that perfect crunch!
-
Flavor Boost: Customize with spices like garlic powder or herbs for added flavor. A little seasoning elevates these spooky snacks!
-
Serving Style: For extra flair, style your breadsticks on a spooky-themed platter and serve with warm marinara for a delicious dip!
Witch Finger Breadsticks Variations
Get ready to unleash your creativity with these spooky breadsticks and customize them to fit your festive spirit while tantalizing your taste buds!
-
Spice It Up: Add cayenne pepper or chili flakes for an unexpected kick. This fiery twist makes for a thrilling balance against the soft dough!
-
Cheesy Delight: Sprinkle grated Parmesan or shredded cheddar on top before baking for a mouthwatering layer of flavor. The cheesy goodness adds a delightful richness that complements the eerie appearance.
-
Herb Garden: Mix in finely chopped fresh rosemary or thyme into the dough for an aromatic twist. The fresh herbs elevate the overall flavor and create an enticing aroma as they bake.
-
Sweet Surprise: For a dessert twist, substitute savory toppings with cinnamon and sugar. Imagine a sweet finger breadstick that’s perfect for Halloween parties—it’s a unique treat that will surprise your guests!
-
Gluten-Free Option: Swap traditional pizza dough for gluten-free dough to make these treats accessible for everyone. This allows those with dietary restrictions to join in on the fun without sacrificing flavor!
-
Nut-Free Delight: If you’re allergic or prefer to skip nuts, try pumpkin seeds or even chocolate chips for a sweet touch instead. The chocolate chips lend a playful aesthetic while providing a satisfying contrast in flavors.
-
Spooky Blood: Drizzle a sauce made from crushed tomatoes and a hint of red food coloring on top after baking for graphic horror appeal. This creative addition is perfect for accentuating the “bloody” Halloween vibe!
-
Mini Finger Bites: Shape the dough into mini fingers for bite-sized snacks. These smaller versions are delightful for serving at parties, making it easy for guests to grab and munch!
If you’re looking for more hauntingly good ideas, try pairing these delicious treats with warm marinara for dipping, or explore even more spooky recipes like Witchs Cauldron Mac and Pumpkin Feta Pasta. Happy haunting!
Storage Tips for Witch Finger Breadsticks
-
Cool Completely First: Always let your Witch Finger Breadsticks cool completely before storing them. This prevents moisture build-up, keeping them crisp for longer.
-
Airtight Container: Store in an airtight container at room temperature for up to 2-3 days. For best results, separate layers with parchment paper to maintain their shape.
-
Freezer: For longer storage, place the breadsticks in a freezer bag, removing excess air, and freeze for up to 2 months. When ready to enjoy, reheat in the oven at 350°F (175°C) for about 10-15 minutes until warmed through and crispy again.
-
Reheating: To restore crispiness when reheating, avoid microwaving. Instead, place them back in a preheated oven for a few minutes. This method helps recreate that fresh-baked goodness!
What to Serve With Witch Finger Breadsticks
As you bring these whimsical finger-shaped delights to life, there are perfect companions waiting to elevate your Halloween feast.
-
Warm Marinara Sauce: A classic dip bringing rich tomato flavor; its warmth enhances the breadsticks’ crispy exterior.
Pair these breadsticks with marinara for a delicious balance of flavors—perfect for both kids and adults. -
Creamy Ranch Dip: Cool and creamy, ranch adds a lovely contrast to the savory breadsticks, making each bite irresistible.
This easy dip strikes the right note between comforting and fun, ideal for snacking at Halloween gatherings. -
Garlic Butter Dip: Melted garlic butter drizzled over the breadsticks provides an indulgent twist sure to delight your taste buds.
This buttery goodness adds a savory boost that enhances the flavor profile of your Witch Finger Breadsticks beautifully. -
Spicy Mustard: A zesty, tangy option that offers a delightful kick and balances the richness of the breadsticks perfectly.
Its bright flavor keeps your palate intrigued, creating a bold contrast that adventurous eaters will love. -
Crispy Veggie Platter: Fresh, colorful vegetables add crunch and freshness, creating a delightful contrast to the soft breadsticks.
Carrots, celery, and bell peppers are excellent additions to your Halloween spread, promoting a balanced snack! -
Apple Slices with Caramel Dip: Sweet apple slices paired with rich caramel bring a whimsical sweetness that complements the creepy flavors.
This dessert finish captures all the autumn vibes while creating a delightful contrast to the savory breadsticks. -
Witch’s Brew Punch: A fun, spooky drink can bring your meal together; think fruity with a touch of fizz for a vibrant touch.
This punch, with its eerie color, will intrigue guests and keep the festive spirit alive throughout your gathering!
Make Ahead Options
These Witch Finger Breadsticks are a fantastic option for busy home cooks looking to save time without sacrificing fun or flavor! You can easily prepare the dough shapes up to 24 hours in advance—simply follow the instructions up to shaping each stick and then cover them tightly with plastic wrap. This prevents drying out and keeps them fresh in the refrigerator. On the day of your Halloween gathering, just brush them with the egg wash, add the almonds or seeds, and bake as directed. This way, you’ll have creepy, delightful snacks ready with minimal effort, ensuring your spooky festivities are a hit!
Witch Finger Breadsticks Dinner Recipe FAQs
How do I choose the right pizza dough?
Absolutely! Whether homemade or store-bought, be sure to choose a pizza dough that’s fresh and pliable. If using store-bought dough, check the expiration date and look for a dough that feels soft and has no dark spots or dryness, which can affect the breadsticks’ texture.
How should I store leftover Witch Finger Breadsticks?
To keep your Witch Finger Breadsticks at their best, allow them to cool completely first. Then, place them in an airtight container at room temperature for up to 2-3 days. This prevents them from becoming soggy. You can also separate layers with parchment paper for extra protection!
Can I freeze Witch Finger Breadsticks?
Yes, indeed! To freeze, let your breadsticks cool completely. Then, wrap them individually in plastic wrap and place them in a freezer bag, removing as much air as possible. They can be frozen for up to 2 months! When you’re ready to enjoy, reheat them in an oven at 350°F (175°C) for about 10-15 minutes until crispy and warm.
What if the breadsticks puff up too much during baking?
Very important! If your Witch Finger Breadsticks puff up excessively, it could mean they were rolled too thick. Aim for a thickness of about 1/4 inch when rolling out the dough. Additionally, give them a gentle squeeze or reshape them slightly before baking, if needed, to maintain that spooky finger look.
Are there any allergy considerations with this recipe?
Absolutely! If you have nut allergies, consider substituting almonds with pumpkin seeds or sunflower seeds for the creepy nail effect. Always check your ingredients, especially if serving children or those with dietary restrictions. You can also adjust seasonings and dough types to accommodate gluten sensitivities or other dietary needs.
Can I add more flavorings to the breadsticks?
Absolutely! You can increase the flavor by mixing herbs like rosemary or thyme directly into the dough, or sprinkling garlic powder or grated cheese on top before baking. For a spicy kick, try adding chili flakes or cayenne as well! The more the merrier when it comes to customizing these spooky snacks.
Witch Finger Breadsticks Dinner: Spooky Snacks for All Ages
Ingredients
Equipment
Method
- Preheat your oven to 375°F (190°C) and line a baking sheet with parchment paper.
- Flatten the pizza dough on a lightly floured surface to about 1/4 inch thick.
- Cut the flattened dough into 1 inch wide strips and shape into fingers.
- Press an almond or pumpkin seed into the tip of each strip.
- Brush the shaped breadsticks with the egg wash.
- Bake for 15-20 minutes until golden brown and crispy.
- Cool slightly and optionally add red food coloring at the fingertips before serving.
Leave a Reply