
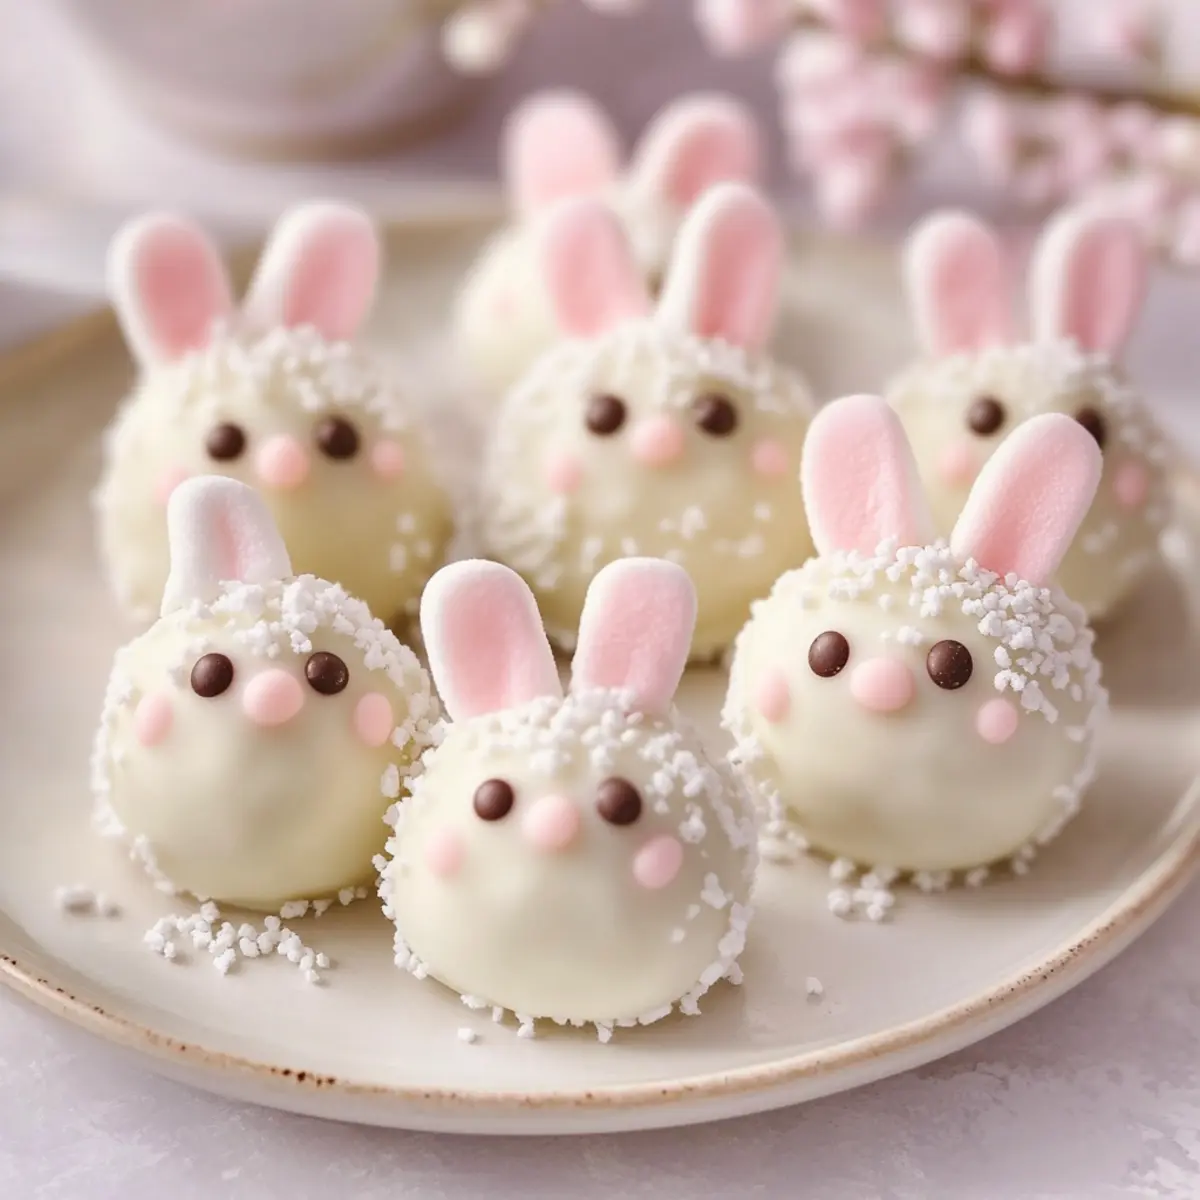
As I rummaged through my pantry one afternoon, I unearthed a forgotten pack of Oreo cookies, glistening with untapped potential. Instantly, a lightbulb moment struck: why not transform these classic cookies into delightful Bunny Oreo Balls? These adorable no-bake Easter treats are simple to whip up, making them perfect for those bustling spring days when you crave a fun, homemade dessert without the fuss. The creamy, fudgy centers nestled beneath a crisp white chocolate shell not only promise smiles from both kids and adults but also offer endless opportunities for creative embellishments and variations. Whether you’re looking to impress at a festive gathering or just want to indulge in a sweet treat, these Bunny Oreo Balls are your go-to recipe! Ready to hop into the kitchen and craft your own batch?
Why Make Bunny Oreo Balls?
Irresistible Bunny Oreo Balls are not only adorable but also incredibly easy to make, allowing you to enjoy a homemade treat without the hassle. Versatile at heart, you can customize these delightful truffles with your favorite Oreo flavors or creative decorations. No-bake means you can whip them up in no time—perfect for last-minute cravings or gatherings. Family-friendly fun awaits as both kids and adults will love the creamy, rich center and fun shape. For a twist, check out Oreo Milkshake Every for another delicious way to enjoy Oreos, or try the festive Ghost Popcorn Balls that are sure to delight!
Bunny Oreo Balls Ingredients
For the Base
• Oreo cookies – These form the rich chocolate base; feel free to experiment with different Oreo flavors!
• Cream cheese – Ensures a creamy texture that binds the Oreo crumbs; make sure it’s fully softened for effortless mixing.
For the Coating
• White chocolate or candy melts – This provides a smooth, sweet outer coating that enhances the overall treat.
• Pink candy melts – An optional fun addition for cute decorative accents like noses or small details.
• Black candy melts – Perfect for creating the intricate features like whiskers and other small details.
For the Decoration
• Mini marshmallows – Slice these for adorable bunny ears that bring your treats to life.
• Pink sugar sprinkles – Optional to add a touch of visual appeal to the ears and make them pop!
• Edible black food marker – Essential for detailing the faces of your Bunny Oreo Balls with charming eyes.
Embrace your creativity as you assemble these delightful Bunny Oreo Balls, a no-bake treat that will undoubtedly bring joy to your celebrations!
Step‑by‑Step Instructions for Bunny Oreo Balls
Step 1: Cookie Preparation
Start by placing 18 Oreo cookies into a food processor. Pulse them until they become fine crumbs, resembling sand. Transfer the crumbs to a mixing bowl and add 8 oz of softened cream cheese. Mix thoroughly until you achieve a smooth, cohesive mixture that easily holds together when pressed.
Step 2: Chill Mixture
Cover the bowl with plastic wrap and refrigerate the Oreo and cream cheese mixture for about 30 minutes. This chilling allows it to firm up, making it easier to roll into balls. You’ll know it’s ready when it feels sturdy to the touch, perfect for shaping, so don’t skip this important step!
Step 3: Roll Balls
Once chilled, take the mixture out and scoop it into equal portions—about 1 inch in diameter works best. Roll each portion into smooth balls using your hands. Place the rolled Bunny Oreo Balls on a parchment-lined baking sheet to prevent sticking, and return them to the refrigerator until they firm up, about 15 minutes.
Step 4: Melt Chocolate
While the Oreo balls chill, melt 1 cup of white chocolate or candy melts by placing them in a microwave-safe bowl. Heat in the microwave in 30-second intervals, stirring well between each, until fully melted and smooth. The chocolate should be glossy and free of lumps, making it ideal for dipping.
Step 5: Dip Balls
Remove the chilled Bunny Oreo Balls from the refrigerator. Using a fork, dip each ball into the melted white chocolate, ensuring it’s fully coated. Allow any excess chocolate to drip off before placing them back on the parchment. This layer will harden, creating the delectable outer shell we love!
Step 6: Add Ears
Before the chocolate sets, take mini marshmallows and cut them in half. Gently press the cut sides into the top of each Bunny Oreo Ball, creating adorable ears. If desired, add a sprinkle of pink sugar on the ears while the chocolate is still warm for an extra pop of color.
Step 7: Decorate
For the final touches on your Bunny Oreo Balls, melt pink and black candy melts separately. Use a piping bag or a small ziplock with a corner snipped off to create charming faces. Add tiny noses, whiskers, and use the edible black food marker for eyes—let your creativity shine through!
Step 8: Set and Store
Finally, allow the decorated Bunny Oreo Balls to sit at room temperature until the chocolate coating completely sets, about 30 minutes. Once set, store them in an airtight container in the refrigerator to keep them fresh and delicious for up to five days, ready to be shared and enjoyed!
How to Store and Freeze Bunny Oreo Balls
Fridge: Store Bunny Oreo Balls in an airtight container in the refrigerator for up to 5 days. This keeps them fresh and ready for quick snacking.
Freezer: For longer storage, freeze Bunny Oreo Balls in a single layer until solid, then transfer them to a freezer bag. They can be frozen for up to 3 months.
Thawing: To maintain texture, thaw the frozen Bunny Oreo Balls in the refrigerator overnight before serving. Enjoy them chilled for the best experience.
Reheating: These treats are best enjoyed cold and don’t require reheating. Simply take them out of the fridge or freezer and dig in!
Make Ahead Options
These Bunny Oreo Balls are a fantastic option for meal prep, making them easy to whip up in advance for busy gatherings! You can prepare the Oreo and cream cheese mixture up to 24 hours ahead of time—just cover it tightly with plastic wrap and refrigerate until you’re ready to roll. The rolled balls can also be made ahead; refrigerate them for up to 3 days before dipping in chocolate. When you’re ready to finish, simply melt the white chocolate, dip the chilled balls, and decorate them to your heart’s content. This way, you’ll have delightful treats that are just as delicious and ready for any occasion!
Expert Tips for Bunny Oreo Balls
• Cream Cheese Consistency: Always start with fully softened cream cheese for a smooth mixture that blends easily. Cold cream cheese will result in lumps.
• Dipping Technique: Thin thick white chocolate with a bit of coconut oil for easier dipping. This ensures a smooth, even coating on your Bunny Oreo Balls.
• Decoration Timing: Attach decorations while the chocolate is still tacky; this helps them stick better and prevents any slipping off after setting.
• Chill to Shape: Chill the Oreo mixture before rolling to ensure neat shapes and make handling easier. This step is crucial for achieving perfectly round truffles.
• Creative Variations: Don’t hesitate to experiment with different Oreo flavors or pastel candy melts to customize your Bunny Oreo Balls for various occasions!
What to Serve with Bunny Oreo Balls?
These delightful no-bake treats are sure to satisfy your sweet tooth, making them the perfect centerpiece for your Easter celebration or any gathering.
- Fresh Fruit Salad: A mix of vibrant fruits like strawberries, blueberries, and kiwi brings a refreshing contrast to the rich Bunny Oreo Balls, balancing flavors perfectly.
- Easter-themed Cupcakes: Adorned with colorful frosting and sprinkles, these festive cupcakes not only add sweetness but also joy to your dessert table.
For a cozy flavor pairing, consider Mint Hot Chocolate: The creamy chocolate and minty warmth beautifully complement the indulgent sweetness of your Bunny Oreo Balls.
-
Chocolate Covered Pretzels: The salty crunch of pretzels dipped in chocolate pairs perfectly with the creamy, sweet Bunny Oreo Balls for a delightful sweet-salty experience.
-
Carrot Cake: An Easter classic, this moist cake provides nostalgic flavors that tie back to the holiday, while complementing the bunny theme beautifully.
-
Chocolate Milkshake: Creamy and rich, a chocolate milkshake makes for a decadent drink option that echoes the chocolaty goodness of your treats, making them even more irresistible.
-
Ice Cream Sundae Bar: Set up a sundae station with various toppings and sauces. The fun of customizing sundaes with Bunny Oreo Balls as a topping opens up a world of creativity!
Bunny Oreo Balls Variations
Feel free to make these delightful treats your own with these fun twists and substitutions!
-
Golden Oreos: Swap regular Oreos for Golden Oreos for a light, buttery flavor. This adds a delicious twist that those who prefer a milder taste will enjoy.
-
Dark Chocolate Coating: Use dark chocolate instead of white for a richer, more decadent treat. The contrast between the bittersweet chocolate and creamy filling will elevate this dessert to gourmet status.
-
Flavor Infusion: Add a splash of vanilla or mint extract to the cream cheese mixture for an exciting flavor boost. Just a little can transform the whole taste profile and surprise the taste buds.
-
Mini Egg Surprise: Incorporate mini chocolate eggs into the mix before chilling for a delightful crunch. This will make your Bunny Oreo Balls even more festive during Easter!
-
Pastel Shades: Experiment with pastel candy melts for a vibrant array of colors. You can also mix different colors to create a marbled effect on your Bunny Oreo Balls, making them even more visually appealing.
-
Nut Butter Base: For a unique twist, try using peanut butter or almond butter mixed in with the cream cheese. This will give a nutty flavor to your Bunny Oreo Balls, pairing beautifully with the chocolate coating.
-
Heat it Up: Add a pinch of cayenne pepper or chili powder to the cream cheese mixture for a spicy kick. This unexpected heat will certainly catch the attention of adventurous eaters!
Feel inspired by these variations to create Bunny Oreo Balls that suit your taste! And if you’re in the mood for more Oreo creations, check out the sweet Oreo Poke Cake for a delightful dessert that everyone will love.
Bunny Oreo Balls Recipe FAQs
What kind of Oreo cookies should I use?
Absolutely, you can use any flavor of Oreo cookies for these Bunny Oreo Balls! Classic chocolate Oreos offer a rich base, but feel free to experiment with Golden Oreos, mint-flavored, or even seasonal varieties for unique twists. Each type will bring its delightful flavor and personality to the treats.
How should I store Bunny Oreo Balls?
To keep your Bunny Oreo Balls fresh, store them in an airtight container in the refrigerator for up to 5 days. If you want to make them ahead of time, they can also be frozen. Simply place them in a single layer on a baking sheet until solid, then transfer them to a freezer bag for up to 3 months. This way, they’re ready whenever you need a sweet treat!
Can Bunny Oreo Balls be frozen?
Yes, you can freeze Bunny Oreo Balls! After they are fully decorated and set, place them in a single layer on a baking sheet and freeze until firm. Then transfer them to a freezer bag, squeezing out any excess air. When you’re ready to enjoy them, thaw the balls overnight in the refrigerator to maintain their creamy texture and delightful taste.
What’s the best way to ensure my chocolate coating is smooth?
For a flawlessly smooth chocolate coating, thin your melting white chocolate with a teaspoon of coconut oil or vegetable oil. Melt the chocolate in short bursts, stirring in between until completely smooth and glossy. This extra step makes dipping easier and helps the chocolate adhere nicely to your Bunny Oreo Balls.
Can I make Bunny Oreo Balls gluten-free or vegan?
Certainly! To make these Bunny Oreo Balls gluten-free, look for gluten-free Oreo varieties that are widely available. For a vegan version, opt for dairy-free cream cheese and use dark chocolate or vegan candy melts for coating. This way, you can still enjoy the delightful treats while accommodating dietary preferences!

Bunny Oreo Balls: Irresistibly Fun No-Bake Easter Treats
Ingredients
Equipment
Method
- Place 18 Oreo cookies into a food processor and pulse until fine crumbs. Transfer to a mixing bowl and mix with 8 oz softened cream cheese until smooth.
- Cover with plastic wrap and refrigerate for about 30 minutes until firm.
- Scoop mixture into 1-inch portions and roll into balls. Place on a parchment-lined sheet and refrigerate for 15 minutes.
- Melt 1 cup of white chocolate in a microwave-safe bowl in 30-second intervals until smooth.
- Dip each ball in the melted white chocolate and allow excess to drip off.
- Cut mini marshmallows in half and press into the top of each ball to create ears. Optionally sprinkle pink sugar on top.
- Melt pink and black candy melts separately to decorate faces with noses and whiskers. Use an edible marker for eyes.
- Allow to set at room temperature for about 30 minutes, then store in an airtight container for up to 5 days.
Leave a Reply