
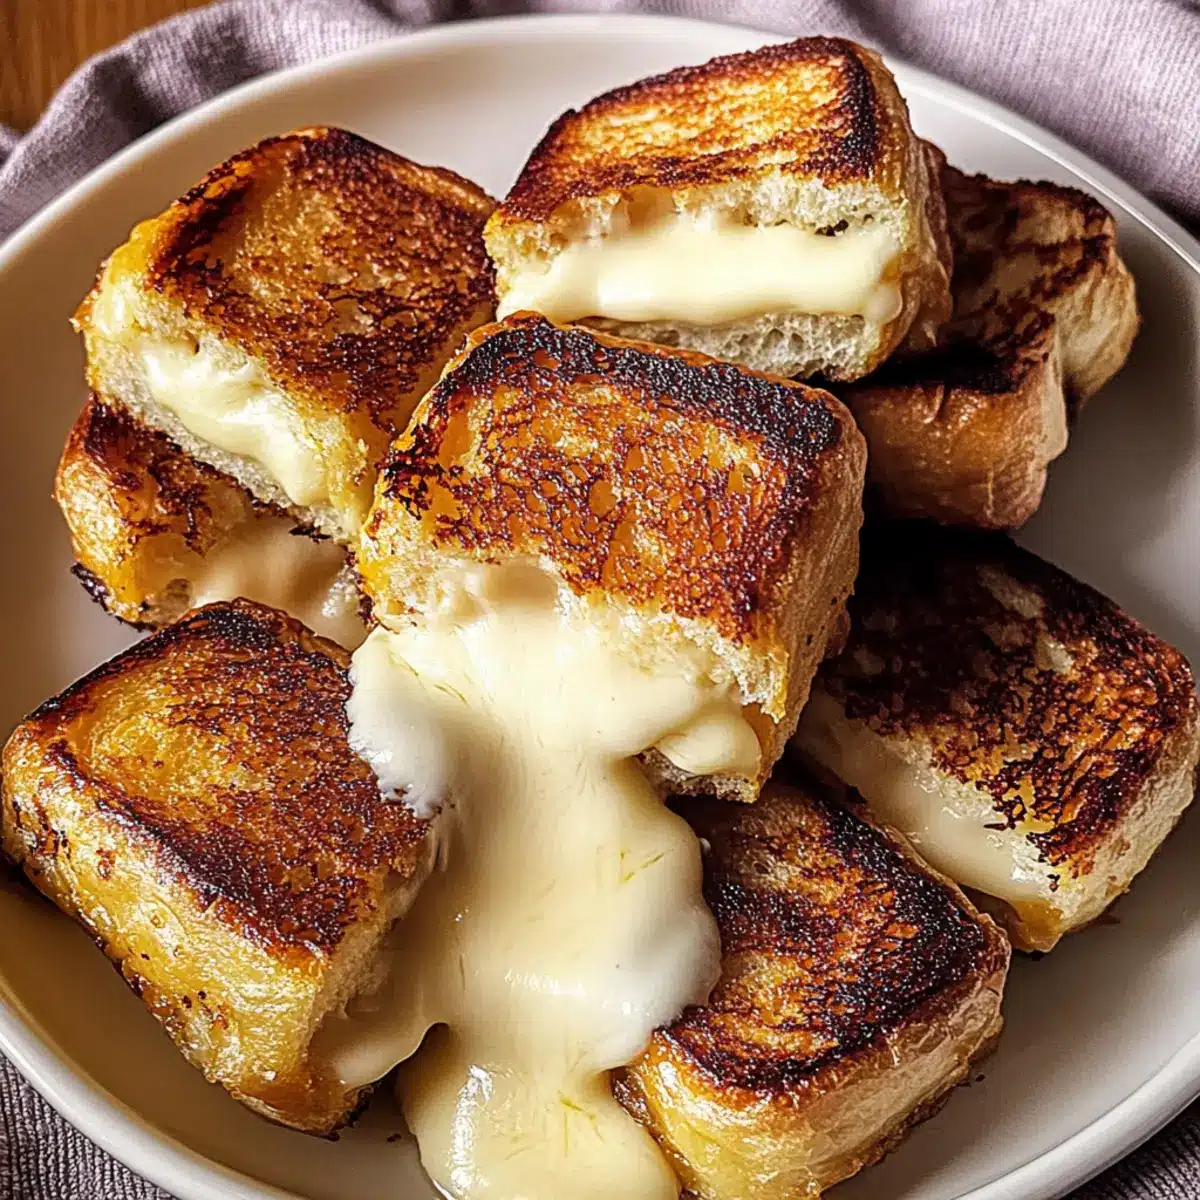
As I pulled open the fridge door, a tiny light flickered on, revealing an enticing treasure: soft, golden Hawaiian rolls nestled next to a block of gooey cheese just waiting to be savored. That’s when I felt the craving for an unforgettable, comforting bite—a Hawaiian Roll Grilled Cheese that unfolds like a warm embrace with every mouthful. This delightful twist on the classic grilled cheese is not only a quick and easy option for weeknight dinners but also perfect for cozy movie nights, igniting joy and comfort in every kitchen. With the sweetness of those fluffy rolls paired with your favorite melty cheese, you’re in for a treat that could effortlessly steal the spotlight at any meal. Curious how to whip up this tropical escape in no time? Let’s dive in!
Why is Hawaiian Roll Grilled Cheese a Must-Try?
Delightful Twist: The combination of soft Hawaiian rolls and gooey cheese brings a unique flavor profile that will elevate your typical grilled cheese experience.
Customizable Fun: Whether you prefer cheddar or want to spice it up with pepper jack, the possibilities are endless! Feel free to toss in caramelized onions or crispy bacon for extra oomph.
Quick to Prepare: This recipe comes together in under 15 minutes—ideal for those busy weeknights or lazy weekends.
Crowd-Pleasing Appeal: It’s the perfect comfort food that appeals to both kids and adults, guaranteed to bring everyone together around the table.
Pair It Right: Serve with a light salad or some creamy tomato soup for the ultimate combo, making each meal a cozy occasion.
Dive into this delicious dish and watch how it can steal the show, just like our Mushroom Goat Cheese tarts or even an exciting Hawaiian Chicken Salad for a refreshing side!
Hawaiian Roll Grilled Cheese Ingredients
For the Sandwich
- Hawaiian Rolls – These provide a sweet and fluffy base that truly elevates the dish. Substitute with brioche or sourdough if you’re in the mood for a different texture!
- Cheese (e.g., cheddar, mozzarella) – The star of the show, creating that deliciously gooey center. Feel free to explore spicy options like pepper jack for a zesty kick.
- Butter – Essential for greasing the insides of the rolls, helping to create that irresistible golden crust. Remember, generous buttering is key for that perfect crispy bite.
Optional Add-ins
- Caramelized Onions – These add a sweet and savory depth, making your Hawaiian Roll Grilled Cheese even more delightful.
- Crispy Bacon – For an extra crunch and layer of flavor, bacon is a popular choice that never disappoints!
- Vegetables (e.g., spinach, bell peppers) – Consider adding veggies to set off the rich cheese, adding both nutrition and vibrant colors.
Step‑by‑Step Instructions for Hawaiian Roll Grilled Cheese
Step 1: Prepare Your Ingredients
Begin by slicing the Hawaiian rolls in half horizontally, ensuring you do not cut all the way through—this will create a hinge. Gather your chosen cheese and optional add-ins like caramelized onions or crispy bacon. Having everything ready will streamline the assembly process, allowing you to create your Hawaiian Roll Grilled Cheese seamlessly.
Step 2: Heat Up Your Pan
Preheat a non-stick skillet over medium heat, allowing it to warm for about 2-3 minutes. While it’s heating, generously butter the insides of each roll. The butter is essential for achieving a crispy, golden crust that perfectly complements the gooey cheese, so don’t hold back!
Step 3: Assemble Your Sandwiches
Once your skillet is hot and ready, place the bottom half of each Hawaiian roll in the skillet. Pile on a generous amount of cheese, adding any additional toppings you desire, then gently place the top half of the roll on top. Press down lightly with a spatula to encourage that melty goodness to start oozing out.
Step 4: Grill Until Golden Brown
Cook the sandwiches for about 3-4 minutes, or until the underside is a lovely golden brown. Carefully flip the sandwiches using a spatula, taking care not to lose any cheesy filling. Grill the second side for another 3-4 minutes, ensuring both sides are crispy and the cheese has melted to perfection.
Step 5: Slice and Serve
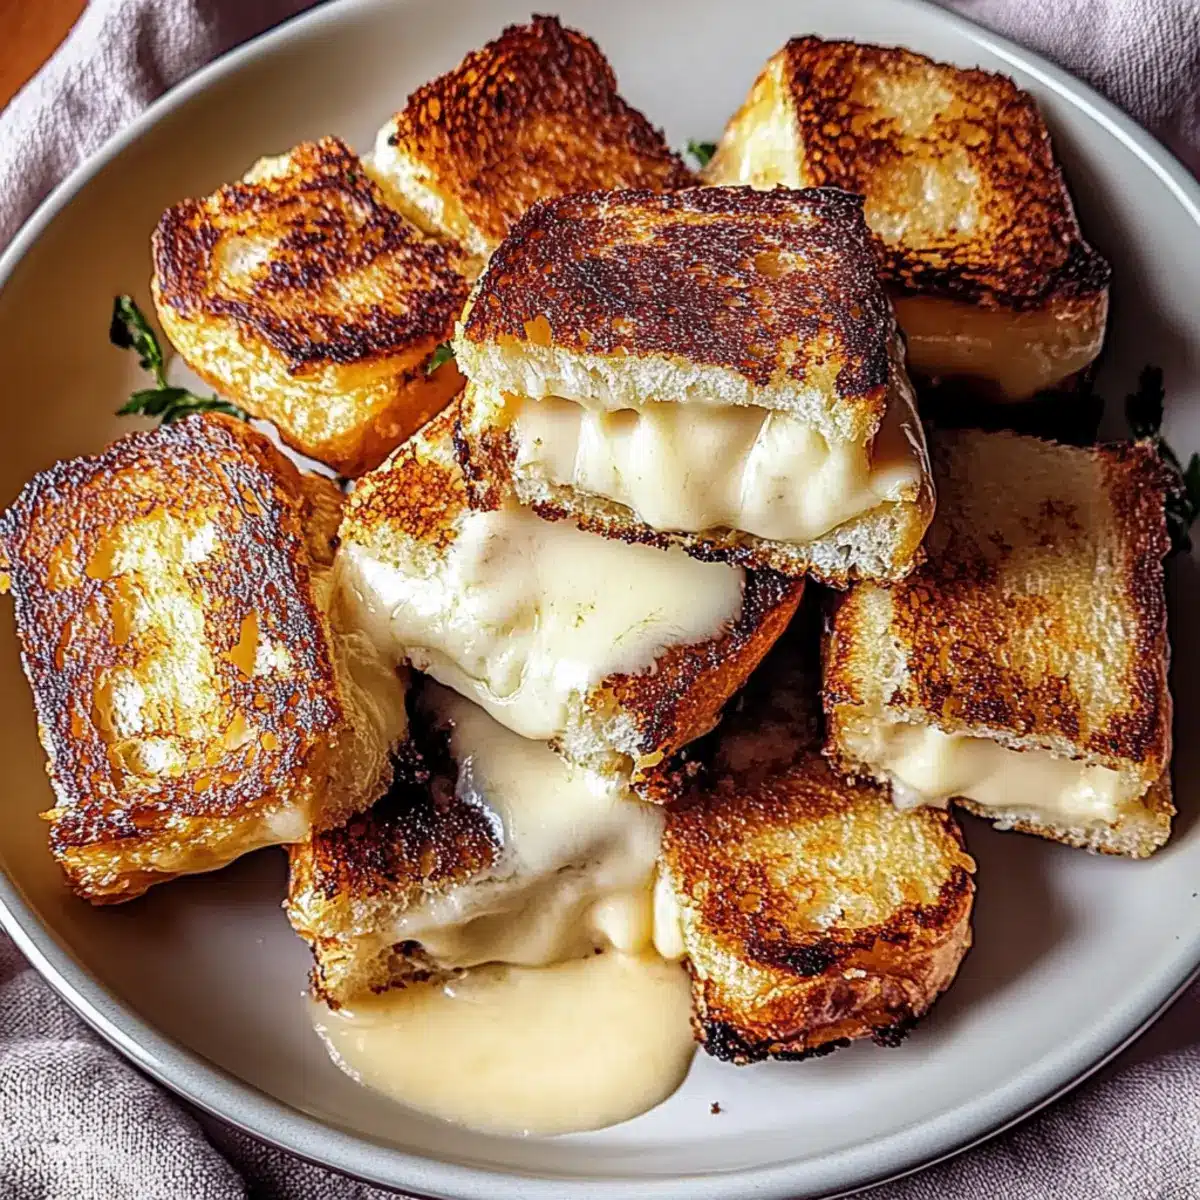
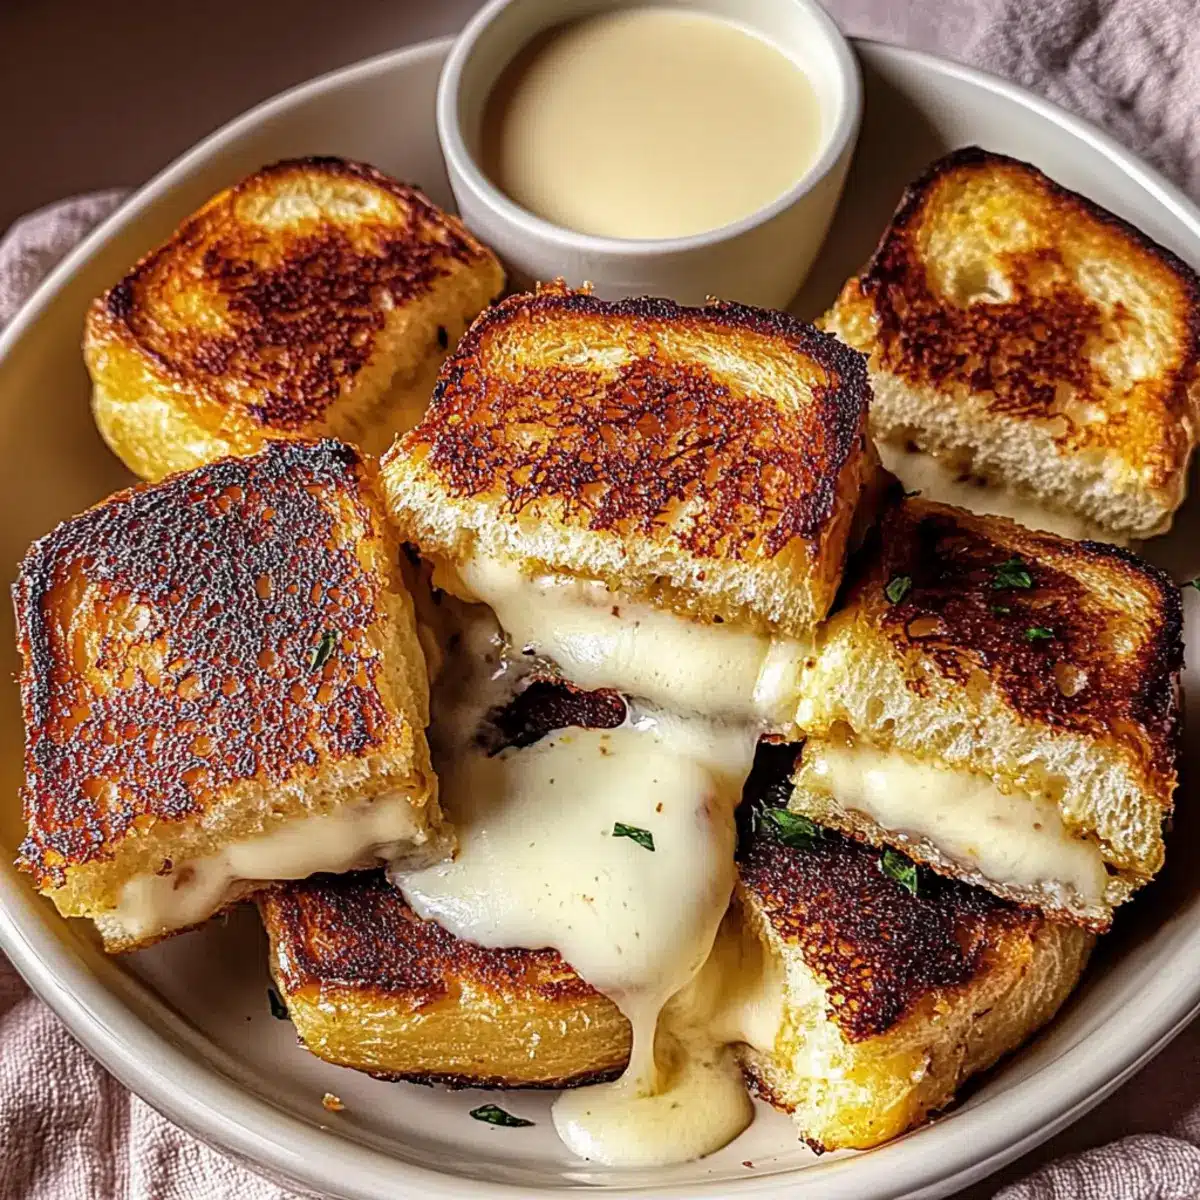
After cooking, let the Hawaiian Roll Grilled Cheese cool for a minute before slicing in half vertically. This will reveal the gooey, melted cheese inside. Serve immediately with your favorite dipping sauce, or enjoy as is for a delightful comfort food experience that brings smiles to everyone around the table.
Storage Tips for Hawaiian Roll Grilled Cheese
-
Room Temperature: Enjoy your Hawaiian Roll Grilled Cheese fresh for the best taste. If left out, it’s best consumed within 2 hours to ensure optimal quality.
-
Fridge: Store leftovers in an airtight container in the fridge for up to 2 days. Limit exposure to air to maintain that delightful gooey texture.
-
Freezer: If you have extra sandwiches, wrap them tightly in foil or plastic wrap and store in an airtight container for up to 1 month. Thaw in the fridge before reheating.
-
Reheating: For the best results, reheat in a skillet over low heat, flipping gently to prevent burning and ensuring even melting of the cheese. Enjoy your Hawaiian Roll Grilled Cheese warm!
Expert Tips for Hawaiian Roll Grilled Cheese
-
Preheat Properly: Ensure the skillet is hot enough before placing your sandwiches. A medium-low heat helps prevent burnt bread while allowing the cheese to melt perfectly.
-
Butter Generously: Use ample butter on the rolls for the best texture. A crispy and golden exterior is crucial for the ultimate Hawaiian Roll Grilled Cheese experience.
-
Cover for Melting: If your cheese isn’t melting, briefly cover the skillet with a lid. This helps trap heat and speed up the melting process while keeping the bread crispy.
-
Watch Cooking Times: Thicker rolls or additional toppings may require extra cooking time. Keep an eye on your sandwiches to prevent burning while ensuring thorough melting.
-
Experiment with Fillings: Don’t be afraid to customize! Add caramelized onions, crispy bacon, or even spicy peppers for a delightful twist in your Hawaiian Roll Grilled Cheese.
Make Ahead Options
These Hawaiian Roll Grilled Cheese sandwiches are perfect for busy weeknights and meal prep enthusiasts! You can slice the Hawaiian rolls and prepare your desired cheese fillings up to 24 hours in advance, storing the components separately in airtight containers in the fridge to maintain freshness. If you’re incorporating add-ins like caramelized onions or bacon, those can also be prepped ahead and refrigerated. When you’re ready to serve, simply assemble the sandwiches and grill them according to the instructions until they’re golden brown and the cheese is melted. This way, you’ll enjoy restaurant-quality Hawaiian Roll Grilled Cheese with minimal effort, making your cooking experience feel like a breeze!
What to Serve with Hawaiian Roll Grilled Cheese
The perfect meal deserves delightful companions that elevate every bite and experience.
-
Creamy Tomato Soup: The classic pairing of a warm, rich soup brings comfort and balances the sandwich’s gooey sweetness.
-
Crunchy Green Salad: A refreshing mix of greens topped with a zesty vinaigrette adds a bright, crisp contrast to the rich sandwich.
-
Sweet Potato Fries: Crispy and slightly sweet, these fries provide a fun texture and flavor that complements the Hawaiian Roll Grilled Cheese perfectly.
-
Garlic Butter Roasted Vegetables: Roasted veggies add delicious earthy notes to your meal while keeping things bright and healthy.
-
Fruit Salad: A side of fresh fruit like pineapple or mango adds tropical flair, enhancing those Hawaiian flavors with a refreshing sweetness.
-
Sparkling Lemonade: This fizzy drink offers a bright, citrusy kick that refreshes the palate and balances the richness of the sandwich.
Each suggestion brings its own unique charm, allowing the flavors in your Hawaiian Roll Grilled Cheese to shine while creating a meal that’s memorable and satisfying.
Hawaiian Roll Grilled Cheese Variations
Feel free to infuse your creation with delightful twists and turns, transforming each bite into a fresh experience!
-
Brioche Substitute: Use brioche rolls for a rich, buttery alternative that brings an indulgent touch to your grilled cheese delight.
-
Spicy Cheese: Swap in pepper jack or a spicy gouda for a little kick. This adds a flavorful heat that perfectly balances the sweetness of the rolls.
-
Veggie-Packed: Add some fresh spinach or sliced bell peppers for a colorful, nutritious boost. It’s a simple way to brighten up your meal while keeping it delicious!
-
Savory Onions: Incorporate caramelized onions for a sweet, savory kick. Their deep flavor enhances the sandwich, making every bite more delightful.
-
Crispy Bacon: Elevate your grilled cheese by tossing in crispy bacon bits. The savory crunch adds a satisfying texture that contrasts beautifully with the gooey cheese.
-
Herb Infusion: Sprinkle in some fresh herbs like basil or chives for a fragrant lift. Their vibrant freshness complements the richness of the cheese wonderfully.
-
Tomato Slice: Add a slice of tomato for a juicy, flavorful twist. This classic pairing offers a delightful contrast and adds a touch of summer freshness.
-
Fruity Sweetness: Consider a layer of thinly sliced pineapple or apple for unexpected sweetness. It’s a fun way to play with flavors and give your grilled cheese an extra pop!
Take these suggestions to heart while enjoying your Hawaiian Roll Grilled Cheese, and feel free to explore accompanying dishes like our delicious Strawberry Cheesecake Dessert to sweeten the meal! Enjoy crafting a unique version that suits your taste!
Hawaiian Roll Grilled Cheese Recipe FAQs
How do I select the right Hawaiian rolls?
When choosing Hawaiian rolls, look for ones that are soft, slightly sweet, and have a golden color. The rolls should feel fluffy but not overly compressed. Avoid any that have dark spots or signs of staleness; freshness is key for achieving the perfect texture in your grilled cheese.
How should I store leftover Hawaiian Roll Grilled Cheese?
After enjoying your Hawaiian Roll Grilled Cheese, store any leftovers in an airtight container in the fridge for up to 2 days. This will help retain that gooey texture and flavor. When ready to eat, simply reheat in a skillet over low heat for the best results!
Can I freeze Hawaiian Roll Grilled Cheese?
Absolutely! To freeze, wrap the prepared sandwiches tightly in foil or plastic wrap, then place them in an airtight container or freezer bag. They’ll be good for up to 1 month. When you’re ready to enjoy them, thaw in the fridge overnight, then reheat in a skillet to bring back that crispy outer layer and melty cheese.
What if my cheese isn’t melting properly?
No worries! If you find that your cheese isn’t melting as well as you’d like, try covering the skillet with a lid for a few moments. This traps the heat and helps the cheese melt more evenly while still achieving a crispy exterior. Keeping your cooking temperature slightly lower can also help.
Are there any dietary concerns I should be aware of?
While this Hawaiian Roll Grilled Cheese recipe is not labeled as gluten-free or vegan, you can easily make it more accommodating! Substitute the Hawaiian rolls with gluten-free bread or opt for vegan cheese alternatives to cater to those dietary preferences. Always check the ingredient labels for allergens if you’re serving others.

Hawaiian Roll Grilled Cheese: A Tropical Twist You'll Love
Ingredients
Equipment
Method
- Slice the Hawaiian rolls in half horizontally, creating a hinge.
- Preheat a non-stick skillet over medium heat for 2-3 minutes.
- Butter the insides of each roll generously.
- Place the bottom half of each roll in the skillet and pile on cheese and any add-ins.
- Close the roll and press down lightly with a spatula.
- Cook for 3-4 minutes until golden brown, then flip and grill the other side.
- Let cool for a minute before slicing in half and serve immediately.
Leave a Reply