
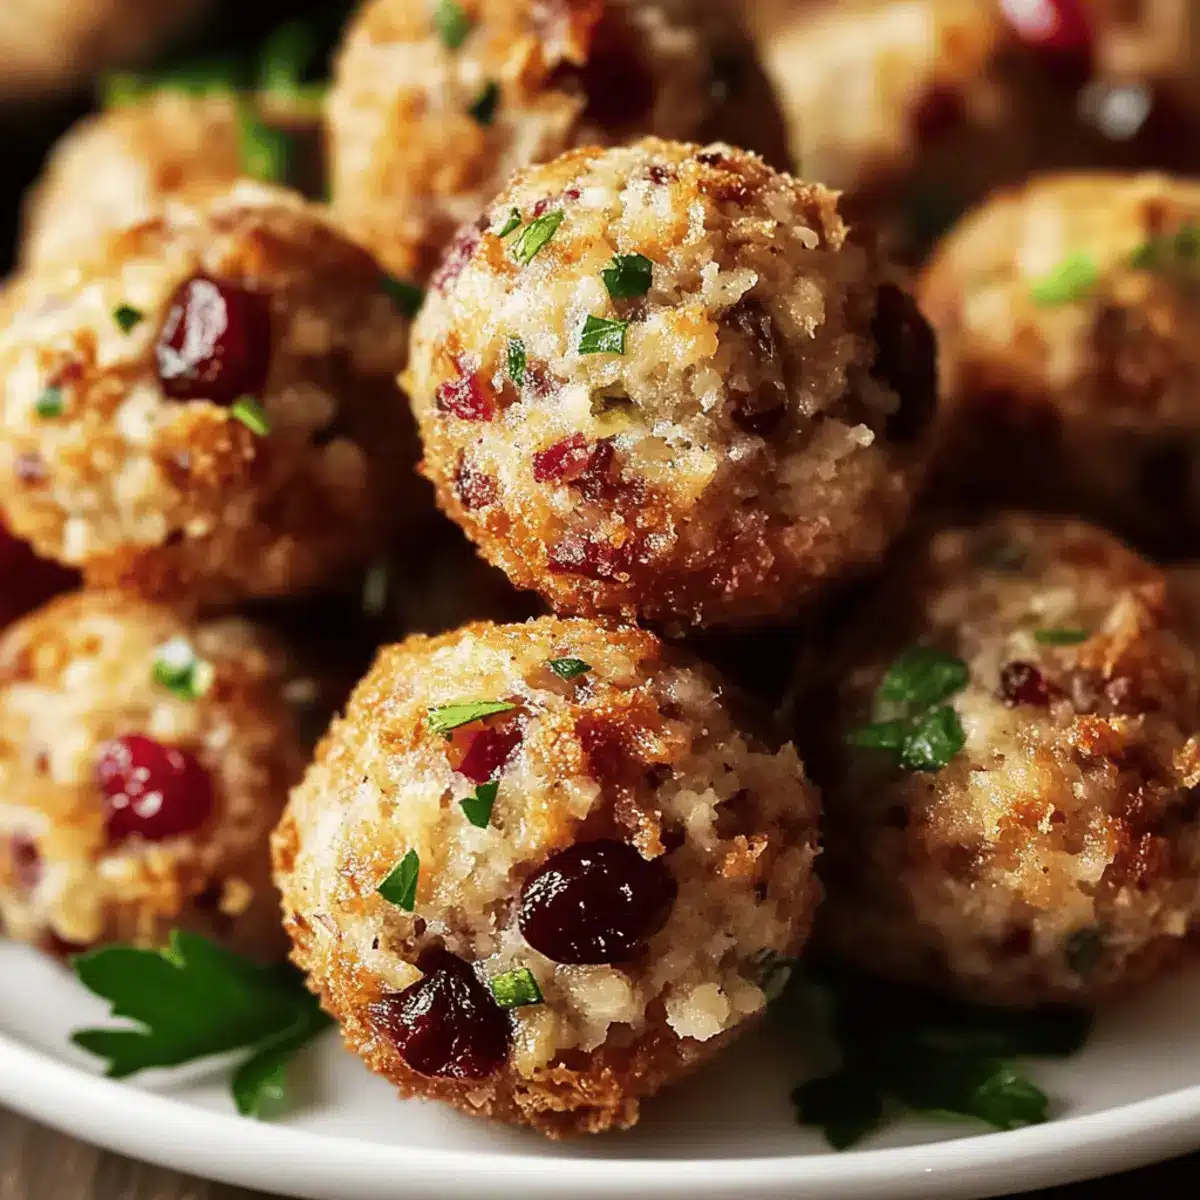
As the autumn leaves crunch beneath my feet, I find myself daydreaming about the comforting flavors of Thanksgiving, particularly these irresistible Thanksgiving Stuffing Balls – delicious holiday sides that everyone loves. Just imagine bite-sized, savory morsels packed with the warm aromas of sage and cranberries, ready to steal the spotlight at your next gathering. Not only are these festive bites easy to throw together, but they’re also a delightful way to share traditional stuffing flavors in a fun, portable format. Plus, with plenty of opportunities for customization, you’ll be able to cater to your guests’ preferences, whether they’re gluten-free or simply craving a creative twist. Curious to discover just how simple it is to create these delicious appetizers? Let’s dive in!
Why Are Thanksgiving Stuffing Balls a Must-Try?
Deliciously Versatile: These stuffing balls can easily adapt with various ingredients, allowing you to cater to every palate. Replace cranberries with apples or try different herbs like rosemary or thyme for a unique twist.
Quick and Easy: With just a few simple steps, you can whip up these delightful bites in no time, making them a breeze for any holiday gathering.
Crowd-Pleasing Flavor: The combination of savory sage and sweet cranberries creates a delightful taste explosion in each bite, ensuring they’ll be a hit at your next feast!
Customizable for All: Whether you’re looking for gluten-free options or want to go dairy-free, this recipe accommodates various dietary preferences seamlessly.
Perfect for Sharing: Serve these alongside turkey or as a cozy appetizer; they’re sure to become the star of your holiday spread! If you’re looking for more festive options, check out my Pumpkin Shaped Cheese for a seasonal appetizer or the Honey Lime Chicken for a tasty main dish.
Thanksgiving Stuffing Balls Ingredients
Experience the magic of homemade Thanksgiving Stuffing Balls with these easy-to-follow ingredients!
For the Base
- Bread Crumbs – Provides structure and bulk; substitute with gluten-free breadcrumbs for a delicious gluten-free option.
- Cooked Cranberries – Adds a sweet and tangy flavor; can substitute with raisins or chopped apples for a different taste.
- Sage – Offers aromatic herbal notes; both dried or fresh work perfectly in this recipe.
- Onion (finely chopped) – Contributes moisture and flavor; using cooked onions gives a milder taste.
- Garlic (minced) – Enhances the overall flavor profile; powdered garlic can be used for a different intensity.
For the Binding
- Vegetable Broth – Binds ingredients together; feel free to use chicken broth for a non-vegetarian option.
- Butter (melted) – Adds richness and helps in binding everything together; can substitute with olive oil for a dairy-free version.
- Salt and Pepper – Enhances all the flavors; adjust according to your taste preferences for optimal deliciousness.
Step‑by‑Step Instructions for Thanksgiving Stuffing Balls – Delicious Holiday Side
Step 1: Preheat the Oven
Begin by preheating your oven to 350°F (175°C). While the oven warms up, prepare a baking sheet by greasing it lightly with cooking spray or lining it with parchment paper for easy cleanup later. This step is essential to ensure your Thanksgiving Stuffing Balls bake evenly and achieve that delightful golden brown color.
Step 2: Mix the Dry Ingredients
In a large mixing bowl, combine your bread crumbs, cooked cranberries, sage, finely chopped onion, and minced garlic. Use a wooden spoon or spatula to mix the ingredients thoroughly, ensuring the flavors meld beautifully. This mixture should be fragrant and ready to absorb the moisture from the next step—make sure it’s evenly dispersed for the best taste.
Step 3: Prepare the Wet Mixture
In a separate bowl, whisk together the vegetable broth and melted butter until the mixture is well combined. This rich liquid will serve as the binding agent for your Thanksgiving Stuffing Balls. The goal is to create a homogenous blend that adds moisture without making the mixture soupy—look for a consistency that will hold the ingredients together without being too wet.
Step 4: Combine the Mixtures
Pour the wet mixture over the dry ingredients and stir gently until the bread crumbs are thoroughly moistened. If the mixture appears too dry, add a little more broth gradually until it reaches a moist, moldable consistency. This is a crucial step for achieving that perfect balance which keeps the stuffing balls from being crumbly while ensuring they hold their shape.
Step 5: Season the Mixture
Once the mixtures are well combined, season your mixture with a pinch of salt and pepper to enhance the overall flavor of your Thanksgiving Stuffing Balls. Stir again to make sure the seasoning is evenly spread throughout. Taste a small sample to check if it meets your preferred flavor profile before moving on to the next step.
Step 6: Shape the Balls
Using your hands, take small portions of the mixture and roll them into balls about 1 to 1.5 inches in diameter. Place them neatly on the prepared baking sheet, leaving a little space between each ball for even baking. This ensures that each Thanksgiving Stuffing Ball bakes uniformly and develops a crispy exterior.
Step 7: Bake to Perfection
Slide the baking sheet into the preheated oven and bake the Thanksgiving Stuffing Balls for 20 to 25 minutes. Keep an eye on them as they bake; you’re looking for a beautiful golden brown finish. Halfway through baking, gently turn them over to promote even cooking and browning on both sides.
Step 8: Cool and Serve
Once the stuffing balls are golden and have a crisp exterior, remove them from the oven and allow them to cool for about 5 minutes. This brief resting time helps the flavors settle. Serve them warm as a delightful holiday side or a crowd-pleasing appetizer at your Thanksgiving gathering, and watch as they quickly become a favorite!
Make Ahead Options
These Thanksgiving Stuffing Balls are fantastic for meal prep, providing a delicious solution for busy holiday cooking! You can prepare the mixture up to 24 hours in advance—simply combine all the ingredients and refrigerate it until you’re ready to bake. This not only saves you time on the day of your celebration but also allows the flavors to meld beautifully overnight. When it’s time to serve, just roll the mixture into balls and bake them as instructed. For longer storage, you can freeze the uncooked balls for up to 2-3 months. To maintain quality, ensure they are sealed in an airtight container. Enjoy restaurant-quality stuffing balls with minimal effort on the busiest of days!
Expert Tips for Thanksgiving Stuffing Balls
- Watch Your Consistency: Ensure the mixture isn’t too dry; if it’s crumbly, add more broth to achieve a moist, cohesive blend for your Thanksgiving Stuffing Balls.
- Perfectly Golden: Rotate your baking sheet halfway through baking to encourage even browning and a crispy texture, ensuring every ball is deliciously golden.
- Make-Ahead Magic: Prepare the mixture a day in advance and refrigerate. Baking just before serving makes for an effortless holiday experience.
- Flavor Options: Don’t be afraid to experiment with different herbs and fruits in your stuffing balls, creating unique variations that keep your guests guessing and delighted!
- Storage Savvy: Store leftovers in an airtight container in the fridge for up to 4 days or freeze them for future gatherings—these bites are perfect for impromptu festive occasions!
What to Serve with Thanksgiving Stuffing Balls
These delightful bites create the perfect foundation for your festive feast, drawing on flavors that will elevate your meal.
- Savory Turkey Gravy: A warm, rich gravy adds a layer of comfort and flavor, perfectly complementing the stuffing balls’ savory notes.
- Crispy Roasted Brussels Sprouts: Their slightly bitter, crispy texture balances the rich flavors of the stuffing, making a delightful pairing. Toss them with a hint of balsamic for brightness.
- Garlic Mashed Potatoes: Creamy and fluffy, these mashed potatoes serve as a delightful counterpart, allowing guests to create mini bites of comfort.
- Sweet Cranberry Sauce: A dollop of homemade cranberry sauce brings a sweet and tangy contrast, enhancing the stuffing ball experience without overpowering it.
- Herbed Green Beans: Fresh green beans sautéed in garlic and olive oil add crunch and a vibrant touch, keeping your plate visually appealing and nutritious.
- Warm Apple Cider: The comforting sweetness of apple cider perfectly pairs with the stuffing balls, making it an ideal beverage choice during the holiday season.
- Pumpkin Pie: End your meal on a sweet note with a slice of pumpkin pie; its spiced sweetness complements the savory stuffing wonderfully, embracing all holiday flavors.
How to Store and Freeze Thanksgiving Stuffing Balls
Fridge: Store any leftover Thanksgiving Stuffing Balls in an airtight container for up to 3–4 days, keeping them fresh and ready to enjoy again.
Freezer: For longer storage, freeze the stuffing balls in a single layer on a baking sheet before transferring them to a freezer-safe bag. They can be frozen for up to 2–3 months without losing flavor.
Reheating: To enjoy your frozen Thanksgiving Stuffing Balls, bake them directly from the freezer at 350°F (175°C) for 20-25 minutes until heated through and crispy on the outside.
Make-Ahead Option: Prepare the mixture a day ahead and store it in the refrigerator. Shape and bake just before serving for the freshest taste!
Thanksgiving Stuffing Balls Variations & Substitutions
Feel free to get creative and customize these Thanksgiving Stuffing Balls to suit your taste and dietary needs!
- Gluten-Free: Use gluten-free breadcrumbs to make this holiday favorite suitable for gluten-sensitive guests.
- Fruit Swap: Replace cranberries with finely chopped apples or even pears for a delightful seasonal twist.
- Herb Options: Experiment with thyme or rosemary instead of sage for a fresh herbal flavor that elevates the stuffing.
- Spicy Kick: Add a pinch of red pepper flakes to the mixture for a little heat that balances the sweetness of the cranberries.
- Onion Variation: For a sweeter taste, use caramelized onions instead of raw; they will add a rich depth of flavor.
- Dairy-Free: Substitute melted butter with olive oil or a dairy-free margarine for a perfectly rich yet dairy-free option.
- Savory Cheese Twist: Incorporate shredded cheese, like mozzarella or cheddar, for an extra burst of flavor—just be mindful of cooking time to prevent over-browning.
- Savory Umami: Stir in some chopped cooked sausage or mushrooms for a heartier stuffing ball that promises to steal the show.
For even more festive ideas, you might enjoy exploring these delightful recipes: Sticky Chicken Bowls for a hearty main or Ghost Popcorn Balls for a fun dessert treat!
Thanksgiving Stuffing Balls Recipe FAQs
What kind of bread crumbs should I use?
I recommend using fresh bread crumbs for a more cohesive texture. However, if you’re looking for a gluten-free option, gluten-free bread crumbs work beautifully and maintain the flavor!
What’s the best way to store leftover Thanksgiving Stuffing Balls?
Store any leftover Thanksgiving Stuffing Balls in an airtight container in the refrigerator for up to 3–4 days. Be sure to let them cool completely before sealing to avoid condensation buildup, which can affect texture.
Can I freeze Thanksgiving Stuffing Balls?
Absolutely! To freeze, place the cooked stuffing balls on a baking sheet in a single layer until frozen. Then transfer them to a freezer-safe bag. They can be stored for up to 2–3 months. When ready to enjoy, bake from frozen at 350°F (175°C) for 20-25 minutes until heated through.
What if my stuffing mixture is too dry?
No worries! If your mixture appears too crumbly, simply add more vegetable broth or melted butter gradually, mixing well until it reaches a moist, moldable consistency. This ensures your Thanksgiving Stuffing Balls will hold together beautifully.
Can these stuffing balls be made dairy-free?
Definitely! To make your Thanksgiving Stuffing Balls dairy-free, substitute the melted butter with olive oil or a dairy-free margarine. The flavor will still be rich and delicious!
Are Thanksgiving Stuffing Balls suitable for pets?
While these stuffing balls are safe for human consumption, it’s best to limit or avoid feeding them to pets due to potential onion and garlic content, which can be harmful to them. Always check with your vet for pet-friendly alternatives.
Thanksgiving Stuffing Balls – Your New Favorite Holiday Side
Ingredients
Equipment
Method
- Preheat your oven to 350°F (175°C). Prepare a baking sheet by greasing it or lining it with parchment paper.
- In a large mixing bowl, combine the bread crumbs, cooked cranberries, sage, finely chopped onion, and minced garlic. Mix thoroughly.
- In a separate bowl, whisk together the vegetable broth and melted butter until well combined.
- Pour the wet mixture over the dry ingredients and stir gently until the bread crumbs are moistened. Adjust moisture as needed.
- Season the mixture with salt and pepper, and stir again to evenly distribute the seasoning.
- Using your hands, roll small portions of the mixture into balls about 1 to 1.5 inches in diameter and place them on the baking sheet.
- Bake the stuffing balls for 20 to 25 minutes, turning them halfway through for even cooking.
- Allow the stuffing balls to cool for about 5 minutes before serving them warm.
Leave a Reply