
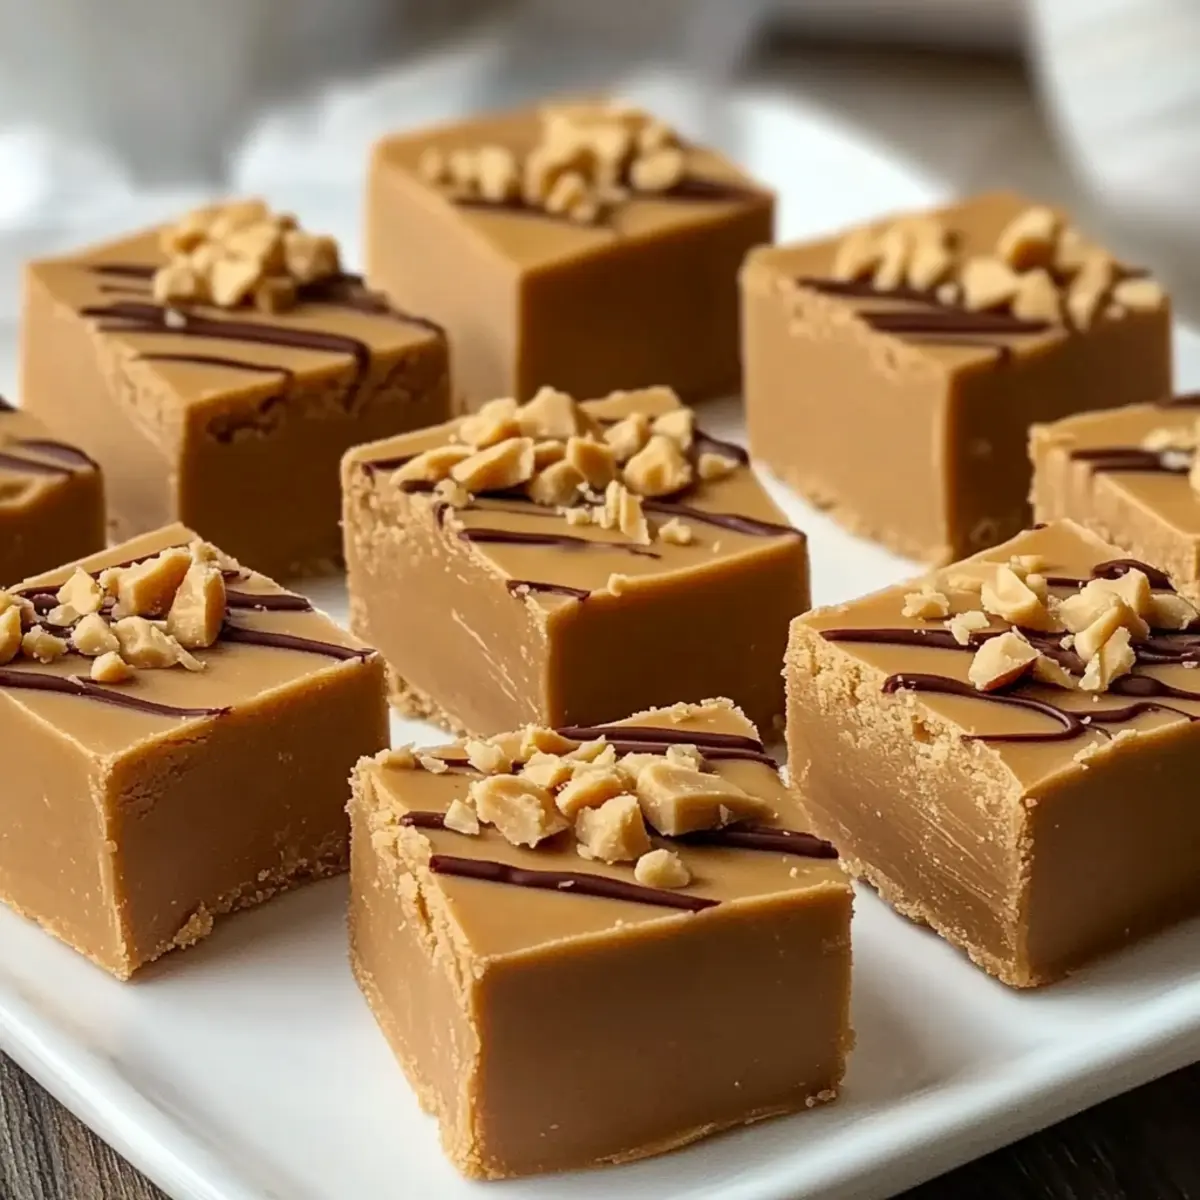
As I tossed aside my phone and ventured into my kitchen, memories of childhood cravings flooded my mind. There’s something magical about a good old Peanut Butter Fudge Recipe that takes me right back to sun-soaked afternoons spent concocting sweet delights with family. In just 20 minutes, you can whip together a batch of this smooth, creamy fudge that’s simply irresistible. No candy thermometer is required, making this recipe perfect for both novice bakers and seasoned pros looking for a quick treat. Whether you’re eager to impress at your next gathering or looking for an easy homemade gift, this fudge will tick all the boxes. Curious about how to bring a little nostalgia into your kitchen? Let’s dive into this delightful recipe!
Why Is This Peanut Butter Fudge So Good?
Nostalgic Comfort: This fudge brings back warm memories of family and joy, making every bite a trip down memory lane.
Time-Saving Delight: Ready in just 20 minutes, this recipe guarantees your sweet cravings will be satisfied quickly.
No-Fuss Method: With no need for a candy thermometer, even novice bakers can achieve delicious results.
Creamy Perfection: Enjoy a rich and creamy texture that melts in your mouth—much better than store-bought varieties!
Versatile Options: Top with crushed nuts or chocolate chips for an extra flair, or make it your own by swapping in almond butter.
Whether served at gatherings or gifted to a friend, this Peanut Butter Fudge is bound to impress!
Peanut Butter Fudge Ingredients
For the Fudge Base
- Jif Creamy Peanut Butter – A smooth, rich choice for flavor and texture; avoid natural nut butters that can create graininess.
- Kraft Marshmallow Fluff – Essential for that delightful smoothness; substituting with mini marshmallows is possible, but may alter the final texture.
- Granulated Sugar – Gives the fudge its sweetness and helps establish structure; this is essential for a perfect fudge consistency.
- Milk – Works with the sugar to form a syrupy base; for best results, opt for whole or 2% milk.
- Butter (implied) – Though not mentioned, adding it can create an even smoother fudge.
Optional Toppings
- Crushed Nuts – Perfect for adding crunch and a nutty kick; try walnuts or pecans for a delightful twist.
- Chocolate Chips – Sprinkle on top for a sweet contrast; consider using semi-sweet or dark chocolate for depth of flavor.
- Drizzled Chocolate – Melt and drizzle for an elegant touch, enhancing both flavor and presentation!
This Peanut Butter Fudge Recipe is sure to become a cherished favorite, creating sweet moments in your kitchen!
Step‑by‑Step Instructions for Peanut Butter Fudge Recipe
Step 1: Prepare Your Pan
Begin by lining an 8×8 inch square pan with parchment paper, allowing some overhang for easy removal later. This simple step ensures your fudge releases easily without sticking, leading to clean cuts and beautiful squares.
Step 2: Combine Sugar and Milk
In a heavy-bottomed saucepan, mix 2 cups of granulated sugar with ½ cup of milk over medium heat. Stir continually to combine, ensuring the sugar dissolves fully. This should take about 2-3 minutes before you move to the next step, as the mixture begins to heat up.
Step 3: Bring to a Rolling Boil
Increase the heat slightly until the mixture reaches a full rolling boil, which you’ll notice when it bubbles vigorously without stopping for a moment. Allow it to boil for exactly 3 minutes, stirring gently, ensuring it doesn’t scorch on the bottom for a silky smooth Peanut Butter Fudge.
Step 4: Add Peanut Butter and Marshmallow Fluff
After boiling, remove the saucepan from heat and immediately stir in 1 cup of Jif Creamy Peanut Butter and 1 jar (7 ounces) of Kraft Marshmallow Fluff. Mix thoroughly until the ingredients are fully incorporated, creating a luscious, creamy fudge base that drips invitingly from the spoon.
Step 5: Pour and Spread
Carefully pour the fudge mixture into the prepared 8×8 inch pan, using a spatula to spread it evenly. Give it a gentle shake to level the surface, ensuring that every corner of the pan is filled with that rich, creamy Peanut Butter Fudge, ready for setting.
Step 6: Cool and Set
Allow the fudge to cool at room temperature for at least 2-3 hours or until completely firm. For a quicker set, you can refrigerate it for about 30 minutes. This cooling process is crucial for achieving the perfect creamy texture, so resist the urge to speed it up too much!
Step 7: Cut and Serve
Once your Peanut Butter Fudge has firmly set, lift it out of the pan using the parchment overhang. Use a sharp knife to cut it into squares or rectangles, revealing the smooth, creamy interior. Serve these homemade delights at gatherings or enjoy them yourself for a sweet treat!
What to Serve with Quick & Creamy Peanut Butter Fudge?
Indulging in homemade treats is always better when paired with complementary flavors and textures that enhance the experience.
- Cool Glass of Milk: A classic pairing that balances sweetness, allowing you to savor each rich bite of fudge and cleanse the palate.
- Fresh Berries: Juicy strawberries or raspberries add a refreshing contrast, bringing acidity to cut through the creamy richness of the fudge.
- Crunchy Pretzel Bites: The salty crunch provides a delightful textural contrast with the smooth fudge, creating an addictive sweet-and-salty combination.
- Coffee or Espresso: The deep, rich flavors of coffee beautifully complement the peanut butter, making this a cozy afternoon indulgence.
- Mini Vanilla Ice Cream Sundaes: Top with your homemade fudge for a heavenly dessert; the cool ice cream paired with warm fudge is simply blissful.
- Nutty Granola Parfaits: Layered with yogurt and fruit, these add a wholesome touch that balances the indulgence of the fudge with fresh elements.
- Chocolate Chip Cookies: For the ultimate dessert platter, cookies alongside creamy fudge create a tempting variety that will please any sweet lover.
- Sparkling Water with Lime: A refreshing drink to cleanse the palate; the acidity from the lime zest complements the fudge beautifully.
These pairings turn simple satisfaction into a delightful culinary experience, making your Peanut Butter Fudge truly irresistible!
Make Ahead Options
These peanut butter fudge squares are perfect for meal prep enthusiasts! You can make the fudge up to 24 hours in advance by following the initial steps and allowing it to set at room temperature. Once it’s cooled and firm, wrap the fudge tightly in plastic wrap and store it in an airtight container at room temperature or refrigerate for up to 3 days to maintain its creamy texture. When you’re ready to serve, simply cut it into squares as instructed. This way, you’ll have a delightful treat on hand for gatherings or an easy sweet fix that is just as delicious as fresh-made!
Expert Tips for Peanut Butter Fudge
-
Proper Temperature: Ensure the sugar and milk mixture reaches a rolling boil for exactly 3 minutes; undercooking may yield soft fudge that won’t set properly.
-
Gentle Stirring: Stir gently once you add the peanut butter and marshmallow fluff. Over-mixing can cause undesirable graininess in your Peanut Butter Fudge.
-
Use Heavy Cookware: Opt for a heavy-bottomed saucepan to evenly distribute heat and prevent scorching. This integral step will set you up for success.
-
Cool Completely: Allow the fudge to cool at room temperature for at least 2-3 hours. A well-set fudge will be smooth and easy to cut.
-
Refrigerate Before Cutting: For cleaner squares, refrigerate the fudge for 30 minutes before slicing. This helps create sharp edges and an attractive presentation.
How to Store and Freeze Peanut Butter Fudge
Room Temperature: Store your fudge in an airtight container at room temperature for up to 2 weeks. This will keep it soft and delicious, perfect for snacking!
Fridge: For extended freshness, place the fudge in the fridge where it will stay good for about 3 weeks. Just ensure it’s wrapped tightly to prevent it from absorbing any odors.
Freezer: You can freeze peanut butter fudge for up to 3 months. Cut it into squares, wrap each piece in plastic wrap, and then store them in a freezer-safe bag.
Reheating: No need to reheat—you can enjoy straight from the fridge or freezer! However, let it sit at room temperature for a few minutes for perfect texture.
Peanut Butter Fudge Recipe Variations
Feel free to get creative with this delightful fudge, personalizing it to suit your taste buds and preferences!
- Dairy-Free: Substitute regular milk with almond or coconut milk for a luscious, dairy-free treat that’s equally creamy.
- Nutty Additions: Stir in crushed peanuts or walnuts for a delightful crunch that complements the smooth fudge.
- Choco-Lovers: Mix in or sprinkle chocolate chips into the fudge before it sets for an irresistible chocolate-peanut butter combination.
- Spicy Twist: Add a dash of cayenne pepper or chili powder to the mixture for a surprising heat that elevates the classic sweetness.
- Vegan Option: Use a plant-based butter and marshmallow fluff substitute to make this fudge vegan-friendly without sacrificing flavor.
- Flavor Infusion: Experiment with extracts; a hint of vanilla or almond can add unique flavor nuances to your fudge.
- Cookie Crumbles: Fold in crumbled cookies, such as Oreos, for an unexpected texture and an extra layer of deliciousness. You might love to check out our Oreo Milkshake Recipe for more cookie-inspired indulgence!
- Salted Caramel Drizzle: Top your fudge with a drizzle of homemade or store-bought salted caramel for a sweet and savory contrast that’s totally decadent.
Whatever your choice, these variations ensure your Peanut Butter Fudge will always be the star treat at any gathering!
Peanut Butter Fudge Recipe FAQs
What type of peanut butter should I use for the best fudge?
I recommend using Jif Creamy Peanut Butter for its rich flavor and smooth texture. Natural nut butters can create a grainy consistency due to oil separation, which is best avoided for this recipe.
How should I store my peanut butter fudge?
Store your fudge in an airtight container at room temperature for up to 2 weeks, which keeps it soft and delicious. If you prefer longer storage, refrigerate it for about 3 weeks, ensuring it’s tightly wrapped to avoid absorbing odors.
Can I freeze peanut butter fudge? How?
Absolutely! You can freeze your peanut butter fudge for up to 3 months. Cut it into squares, then wrap each piece individually in plastic wrap. Place the wrapped pieces inside a freezer-safe bag, and be sure to remove as much air as possible to prevent freezer burn. When you’re ready to enjoy, let it thaw at room temperature.
What should I do if my fudge does not set properly?
If your fudge is too soft and won’t set, it may not have reached the rolling boil stage for the full 3 minutes. Try returning it to the saucepan, heating gently to remelt, and then adding more sugar mixed with a splash of milk as you bring it back to a boil. Stir well, and then pour back into the pan to set. This process can help firm it up.
Are there any allergy concerns with this recipe?
Yes, this Peanut Butter Fudge Recipe contains peanuts and dairy, so it may not be suitable for individuals with nut allergies or lactose intolerance. Always check with your guests and consider using alternatives like sunbutter or dairy-free milk for a modified version if required.
Can I customize the toppings on my peanut butter fudge?
Very! You can let your creativity shine by adding toppings, such as crushed nuts, chocolate chips, or even a drizzle of melted chocolate. Just sprinkle them on top after pouring the fudge into the pan, pressing them lightly into the surface to ensure they stick.
Irresistibly Creamy Peanut Butter Fudge Recipe in 20 Minutes
Ingredients
Equipment
Method
- Line an 8x8 inch square pan with parchment paper for easy removal.
- In a heavy-bottomed saucepan, mix 2 cups of granulated sugar with ½ cup of milk over medium heat until sugar dissolves, about 2-3 minutes.
- Increase heat until the mixture reaches a full rolling boil, and let it boil for exactly 3 minutes while stirring gently.
- Remove from heat and stir in 1 cup of Jif Creamy Peanut Butter and 1 jar (7 oz) of Kraft Marshmallow Fluff until fully mixed.
- Pour the mixture into the prepared pan and spread evenly using a spatula.
- Allow the fudge to cool at room temperature for at least 2-3 hours or refrigerate for about 30 minutes to set it faster.
- Once set, lift it out using the parchment overhang and cut into squares or rectangles.
Leave a Reply