
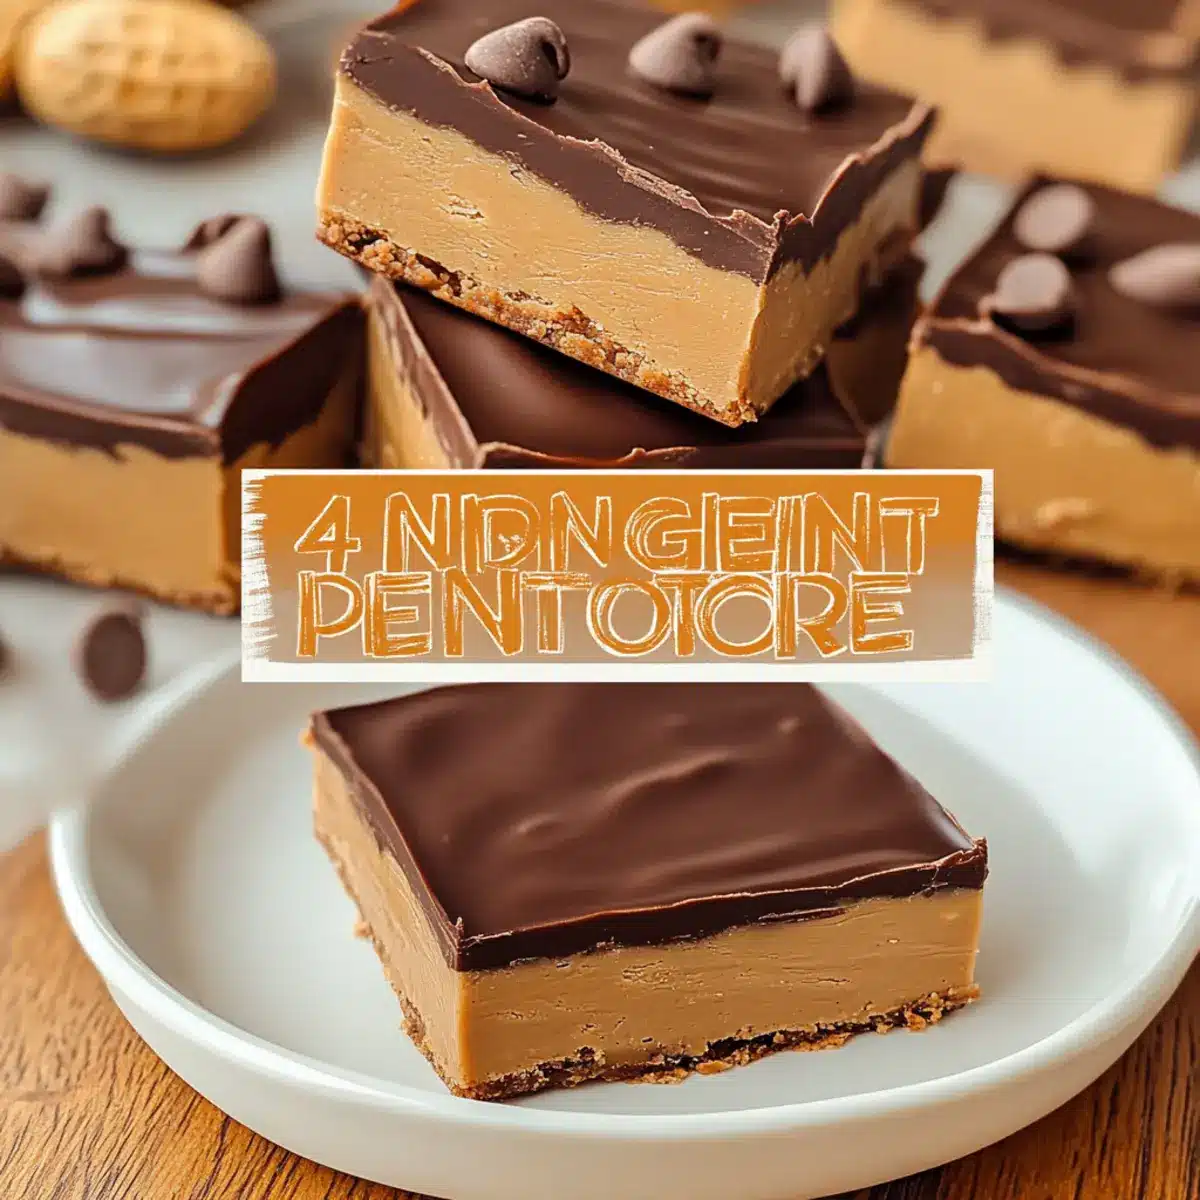
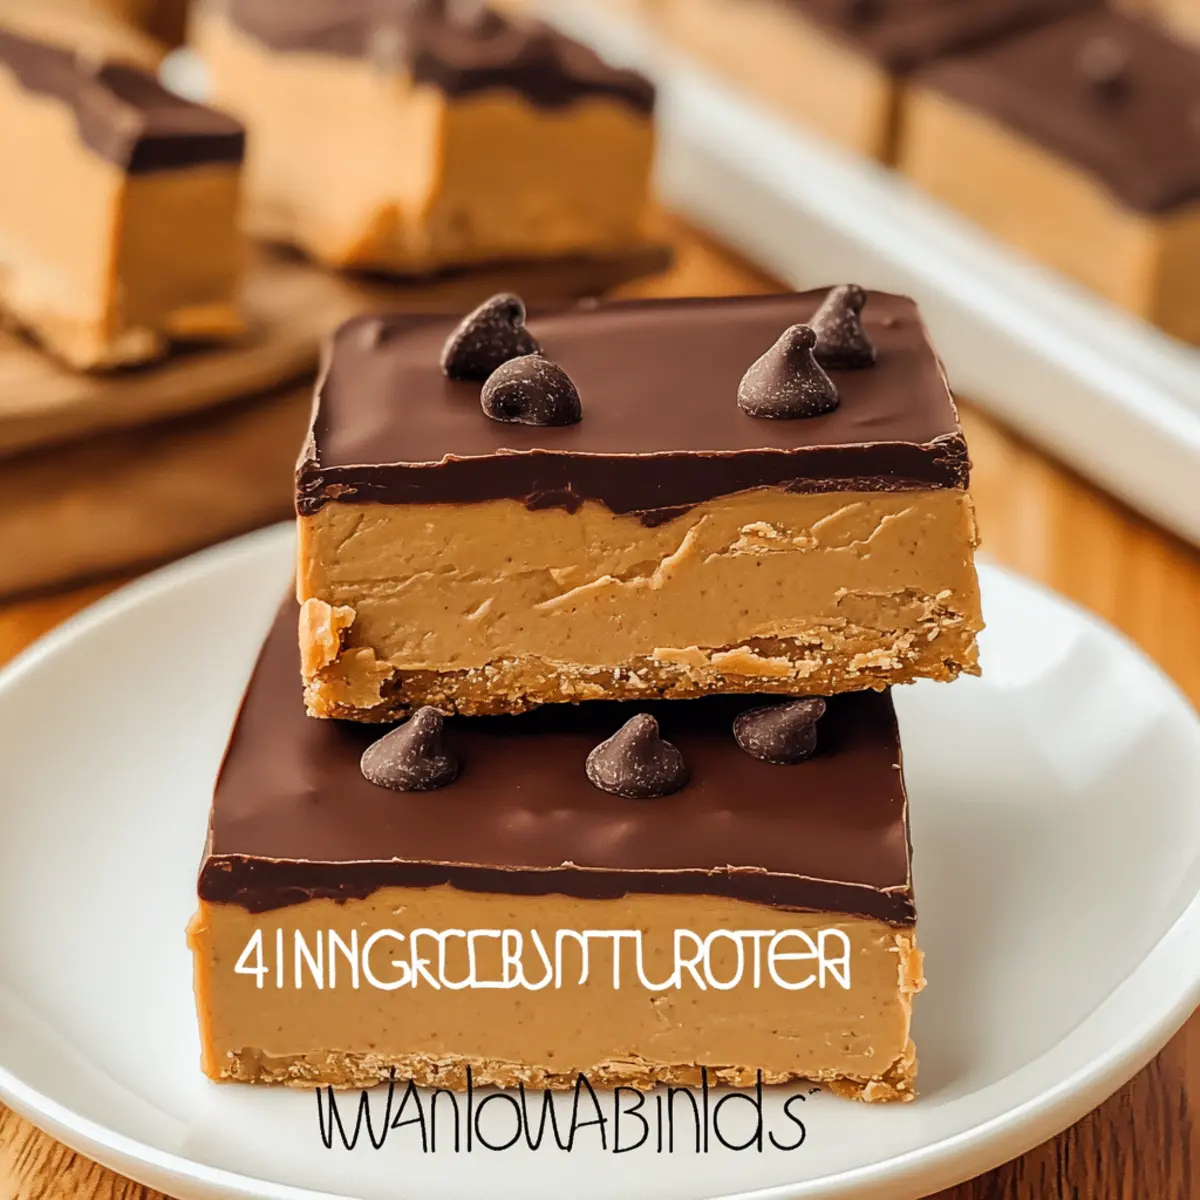
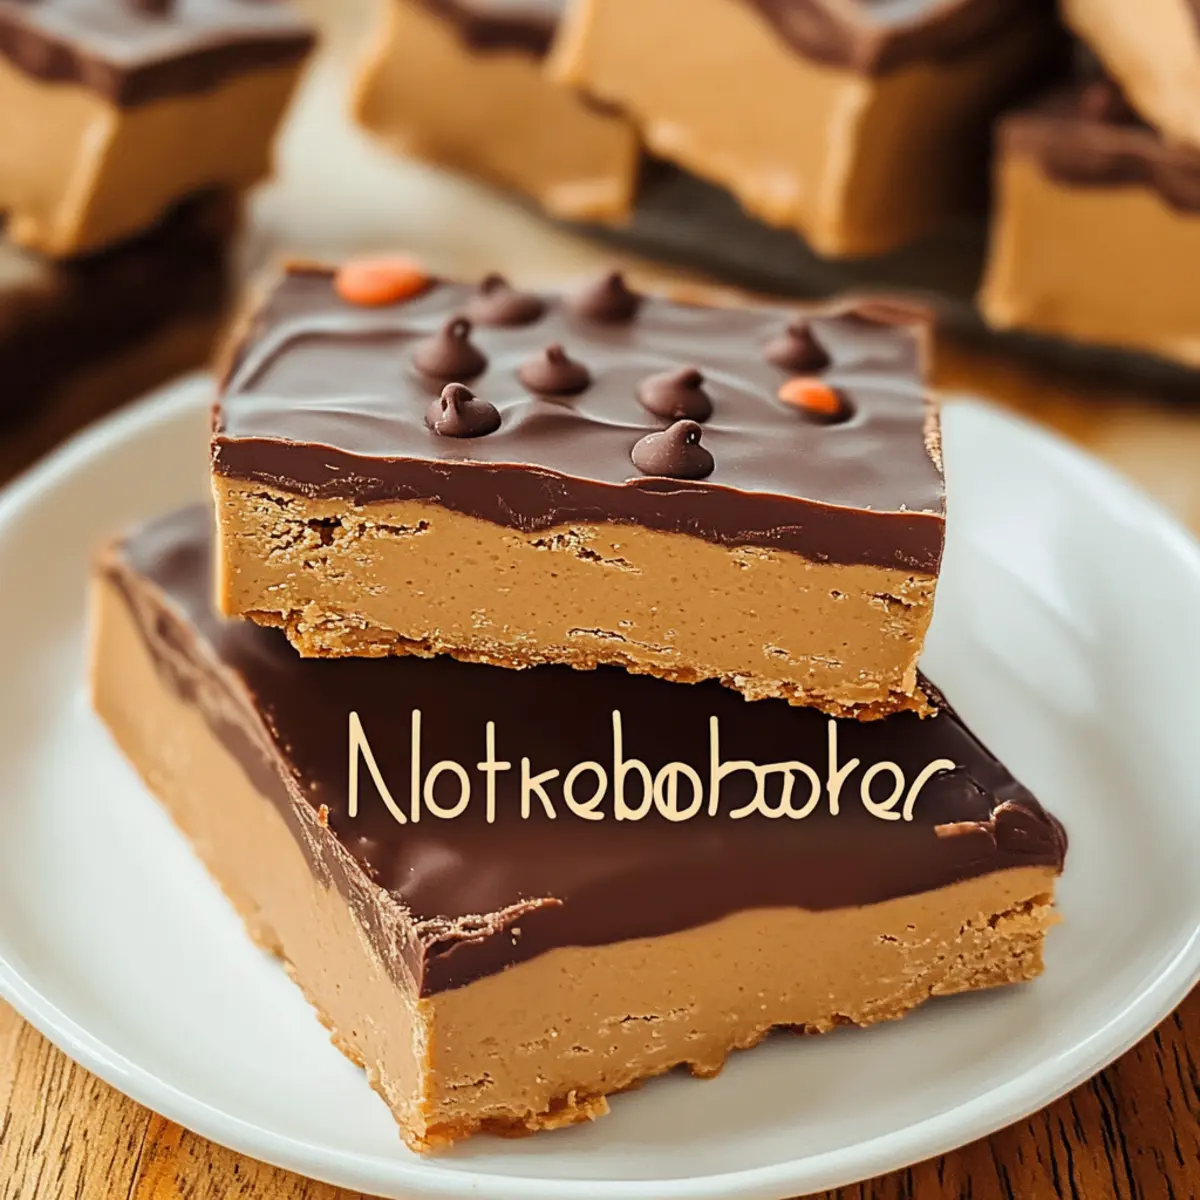
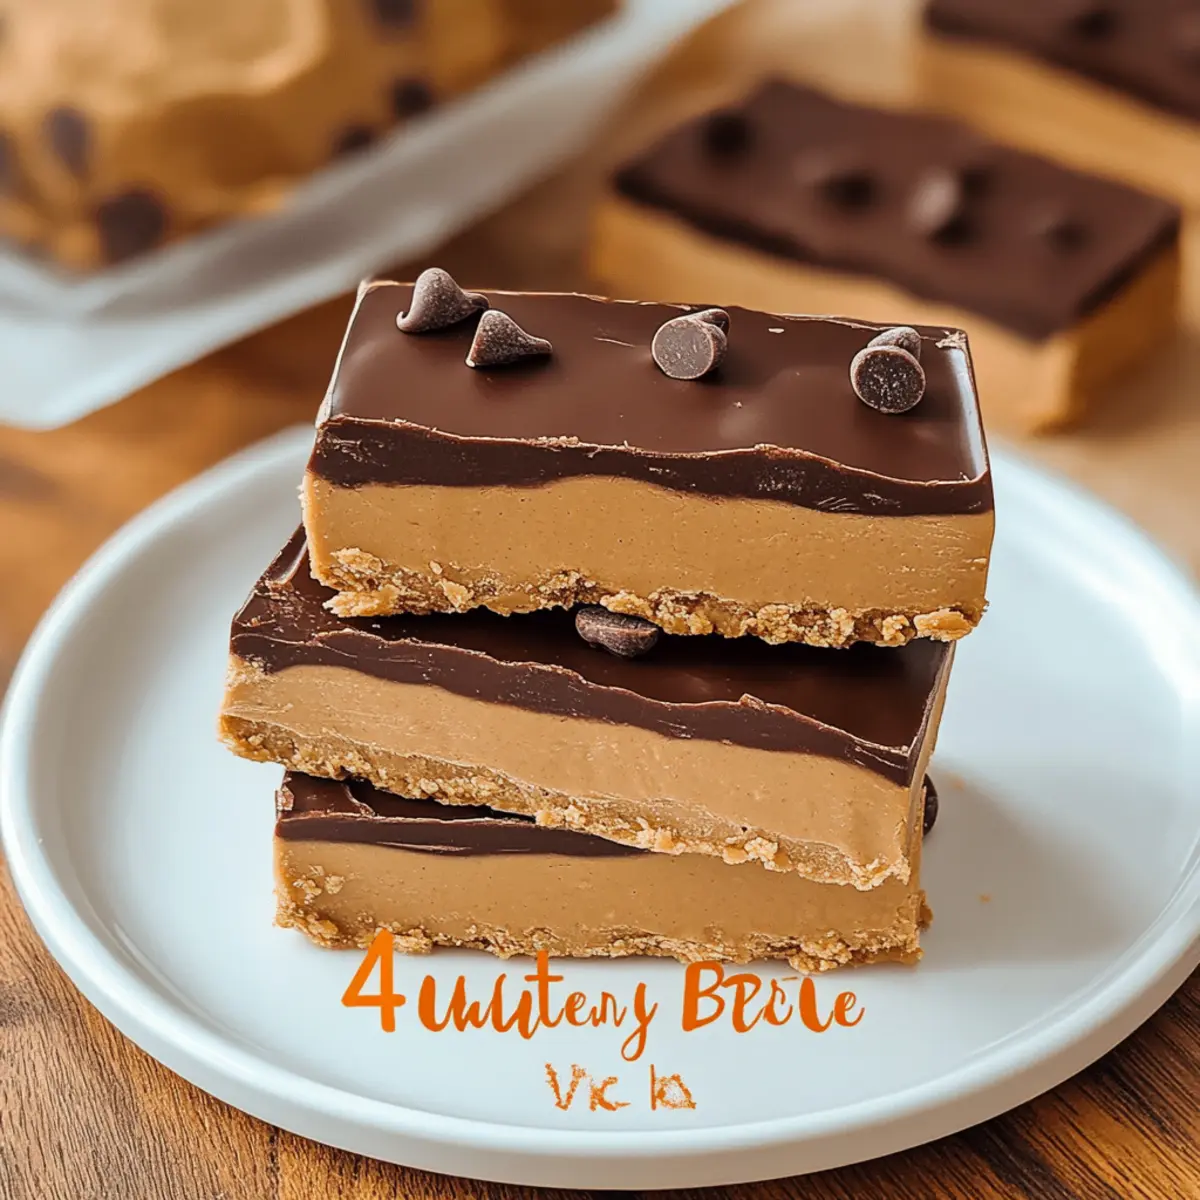
A quick rummage through my pantry revealed a hidden gem: peanut butter, full of flavor and energy. It’s the perfect foundation for my 4-Ingredient No-Bake Peanut Butter Protein Bars, which have become my go-to for a nutritious snack. These bars are not only simple to whip up but also offer a customizable experience that fits any lifestyle, whether you’re vegan or just looking for a healthier treat. Packed with protein and healthy fats, they keep my energy levels steady while their rich chocolate topping makes them feel indulgent. No more relying on store-bought bars filled with mysterious additives—once you try making your own, you’ll understand why they’re a must-have in my kitchen. Ready to join me? Let’s dive into this delicious and satisfying recipe!
Why are these bars a game changer?
Simplicity at Its Finest: With only 4 ingredients, these No-Bake Peanut Butter Protein Bars are incredibly easy to prepare, making them perfect for any kitchen skill level.
Customizable Options: From adding dried fruits to experimenting with different nut butters, you can easily tailor these bars to fit your taste and dietary needs.
Nutritious Snacking: Packed with protein and healthy fats, they provide a sustainable energy boost without the sugar crash, offering a wholesome alternative to fast food.
Quick and Convenient: Made without the need for baking, they come together in minutes, making them a quick solution for busy days. For even more inspiration, check out my Garlic Butter Steak for a satisfying meal.
Crowd-Pleasing Treat: Ideal for sharing, these bars are sure to delight family and friends alike, proving that healthy snacks can also be delicious!
No-Bake Peanut Butter Protein Bars Ingredients
For the Base
• Peanut Butter – A deliciously creamy base, providing healthy fats and protein; consider almond butter for a different taste.
• Protein Powder – Essential for boosting the protein content; opt for plant-based versions if you’re crafting vegan-friendly bars.
• Maple Syrup – A natural sweetener that binds ingredients together; honey can be substituted if you’re not strict about vegan options.
For the Topping
• Chocolate Chips – Adds a sweet and delightful crunch to each bite; use dairy-free chips to keep your No-Bake Peanut Butter Protein Bars vegan.
Step‑by‑Step Instructions for No-Bake Peanut Butter Protein Bars (5 Simple Ingredients!)
Step 1: Combine the Base Ingredients
In a large mixing bowl, gather your creamy peanut butter, protein powder, and maple syrup. Use a rubber spatula to mix these ingredients thoroughly for about 2–3 minutes until you achieve a smooth and even consistency. The mixture should be thick yet pliable, perfect for forming your No-Bake Peanut Butter Protein Bars.
Step 2: Incorporate the Chocolate Chips
Gently fold in half of your chocolate chips to the mixture, ensuring they are evenly distributed throughout. This should take about a minute of gentle mixing; be careful not to overwork the mixture. The chocolate will bring a delightful sweetness that complements the nutty flavor of the bars, making them extra tempting!
Step 3: Press into the Pan
Line a square baking pan (8×8 inches works great) with parchment paper. Transfer the peanut butter mixture into the prepared pan, using a spatula to press it down firmly and evenly until it’s smooth and compact. This step is crucial for ensuring your No-Bake Peanut Butter Protein Bars hold their shape once chilled, so make sure the surface is flat.
Step 4: Add the Topping
Sprinkle the remaining chocolate chips over the pressed mixture, distributing them evenly to ensure every bite has that delicious chocolate goodness. If desired, add a pinch of sea salt on top to enhance the flavors, balancing the sweetness of the chocolate. Now, you’re ready to chill!
Step 5: Chill to Set
Place the baking pan in the refrigerator and let it chill for about 1 hour. This process allows the No-Bake Peanut Butter Protein Bars to firm up beautifully. Once the time is up, check the bars—the mixture should feel set and firm to the touch, making them easy to cut into squares or rectangles.
Step 6: Cut and Store
Once set, remove the bars from the pan using the parchment paper as a handle. Place them on a cutting board and slice into your desired size—whether small bites or hearty bars. Store the extra pieces in an airtight container in the fridge for up to a week, or freeze them for longer storage, keeping your healthy snacks ready to go!
What to Serve with No-Bake Peanut Butter Protein Bars
Elevate your snacking experience with delightful pairings that complement the rich and creamy goodness of these bars.
- Fresh Fruit Salad: A vibrant medley of seasonal fruits adds a refreshing contrast to the dense bars, enhancing your snack time.
- Creamy Greek Yogurt: The tanginess of yogurt pairs beautifully with these bars, creating a balanced treat rich in protein and probiotics.
- Dark Chocolate Dipped Strawberries: Indulging in chocolate-covered strawberries brings a luscious sweetness that perfectly complements the nutty flavors of the bars.
- Nutty Granola: Adding a sprinkle of crunchy granola on top or the side gives an extra layer of texture and flavor, making your snack even more satisfying.
- Nut Milk: Enjoy a glass of almond or cashew milk alongside your bars for a creamy, dairy-free option that enhances the nutty experience.
- Ice-Cream Whip: A dollop of whipped coconut cream or your favorite dairy-free whipped topping transforms your snack into a dessert-like treat, making it even more indulgent.
- Chia Seed Pudding: Pairing with this protein-packed pudding offers an interesting texture contrast while adding a fiber boost for sustained energy.
Expert Tips for No-Bake Peanut Butter Protein Bars
-
Well-Stirred Peanut Butter: Ensure your peanut butter is completely mixed before measuring. This prevents a grainy texture in your bars.
-
Testing Consistency: If the mixture feels too soft, refrigerate it longer or add a touch more protein powder to help firm it up.
-
Proper Pan Lining: Line your baking pan with parchment paper for effortless bar removal, ensuring a clean cut and easy serving of your No-Bake Peanut Butter Protein Bars.
-
Customize Thoughtfully: When adding extras like dried fruits or oats, adjust the quantity of peanut butter or syrup to maintain balance and stickiness in your bars.
-
Perfect Chocolate Distribution: Be gentle when folding in the chocolate chips to avoid over-mixing, which can affect the texture of your bars.
How to Store and Freeze No-Bake Peanut Butter Protein Bars
Fridge: Store your No-Bake Peanut Butter Protein Bars in an airtight container in the refrigerator for up to one week. This helps maintain their freshness and prevents them from drying out.
Freezer: For longer storage, you can freeze these bars for up to 3 months. Wrap each bar individually in parchment paper and place them in a freezer-safe container to keep them fresh.
Thawing: When you’re ready to enjoy a frozen bar, simply remove it from the freezer and let it sit at room temperature for about 10–15 minutes to soften before indulging.
Reheating: These bars are best enjoyed cold or at room temperature, but if you prefer a warm treat, you can microwave them for about 10 seconds for a soft, melty experience.
Make Ahead Options
These No-Bake Peanut Butter Protein Bars are perfect for busy home cooks looking to save time during the week! You can prepare the base mixture up to 3 days in advance by mixing the peanut butter, protein powder, and maple syrup, then refrigerating it. Additionally, they can be cut into bars and stored in an airtight container for up to 1 week in the refrigerator or frozen for longer storage. To maintain that delicious chewy texture, ensure they are kept cool and tightly sealed; just before serving, pop them in the fridge briefly to refresh. When you’re ready to enjoy, simply top with freshly added chocolate chips and a sprinkle of sea salt if desired for that perfect finishing touch!
No-Bake Peanut Butter Protein Bars Variations
Feel free to let your creativity shine as you customize your No-Bake Peanut Butter Protein Bars with these delightful twists!
-
Vegan Option: Swap out the regular protein powder for a plant-based version to make these bars completely vegan-friendly. You can still enjoy all the deliciousness without compromising on dietary preferences.
-
Nut Butter Swap: Experiment with different nut butters like almond or cashew for unique flavors. Each nut butter brings its own personality to the bars, transforming your snack into something exciting every time.
-
Flavor Boost: Add a teaspoon of vanilla extract or a sprinkle of cinnamon to enhance the overall flavor. This small addition can lead to a warm, inviting aroma that makes the bars even more tempting.
-
Extra Crunch: Mix in some rolled oats, seeds, or chopped nuts for added texture and nutrition. These elements create a beautiful crunch that pairs wonderfully with the chewy bars and adds a wholesome touch.
-
Sweet Twist: Fold in some dried fruits such as cranberries or apricots for a pop of sweetness and chewy texture. This addition not only balances the nutty flavors but also packs in some extra nutrients!
-
Chocolate Lovers: Use dark chocolate chips or chunks for a richer chocolate experience. This indulgent swap adds an irresistible depth of flavor while keeping it oh-so-satisfying.
-
Spicy Surprise: For a kick, add a pinch of cayenne pepper or chili powder. The unexpected heat will tantalize your taste buds and turn these bars into a unique treat!
-
Protein Punch: For an extra protein boost, blend in some chia seeds or hemp hearts. They enhance the nutritional value and offer a lovely nutty flavor, making your bars even more filling.
Each of these variations will make your No-Bake Peanut Butter Protein Bars uniquely yours while keeping them as delicious as ever! If you’re looking for more inspiration, consider pairing them with my Peanut Butter Spider or try them as a delightful side to the Irresistible Thai Peanut Chicken. Enjoy experimenting!
No-Bake Peanut Butter Protein Bars Recipe FAQs
What type of peanut butter should I use?
Absolutely! For the best results, ensure your peanut butter is smooth and well-stirred. This prevents a grainy texture in your No-Bake Peanut Butter Protein Bars. If you’re looking for a different flavor, almond butter works wonderfully as a substitute!
How should I store my No-Bake Peanut Butter Protein Bars?
Store your delicious No-Bake Peanut Butter Protein Bars in an airtight container in the refrigerator for up to one week. This keeps them fresh and prevents them from drying out.
Can I freeze these protein bars?
Yes, you can freeze your No-Bake Peanut Butter Protein Bars for up to 3 months! To do this, wrap each individual bar in parchment paper and place them in a freezer-safe container. When you’re ready to enjoy one, let it sit at room temperature for about 10-15 minutes to soften before indulging.
What should I do if the mixture is too soft?
If the mixture feels too soft to hold shape, simply add a touch more protein powder to help firm it up. Another option is to refrigerate the mixture longer before pressing it into the pan. Make sure to test the consistency—it should be thick yet pliable for perfect bars!
Are these bars suitable for vegan diets?
Yes, they can be easily made vegan! Just use plant-based protein powder and replace maple syrup with agave nectar if needed. Ensure you choose dairy-free chocolate chips for the topping to keep everything vegan-friendly.
Can I add additional ingredients or flavors?
Very! You’re encouraged to customize your No-Bake Peanut Butter Protein Bars! Add in dried fruits like cranberries or raisins for sweetness, or mix in oats and seeds for crunch and fiber. Just remember to adjust the binding ingredients slightly to maintain the bar’s texture!
No-Bake Peanut Butter Protein Bars in 5 Simple Ingredients
Ingredients
Equipment
Method
- In a large mixing bowl, gather your creamy peanut butter, protein powder, and maple syrup. Mix thoroughly for about 2–3 minutes until smooth and even.
- Gently fold in half of your chocolate chips to the mixture, ensuring they are evenly distributed.
- Line an 8x8 inch baking pan with parchment paper. Transfer the mixture into the pan and press down firmly until smooth.
- Sprinkle the remaining chocolate chips over the mixture, distributing them evenly.
- Place the pan in the refrigerator and chill for about 1 hour until firm.
- Remove the bars from the pan and slice into desired size. Store extra pieces in an airtight container in the fridge for up to a week.
Leave a Reply