
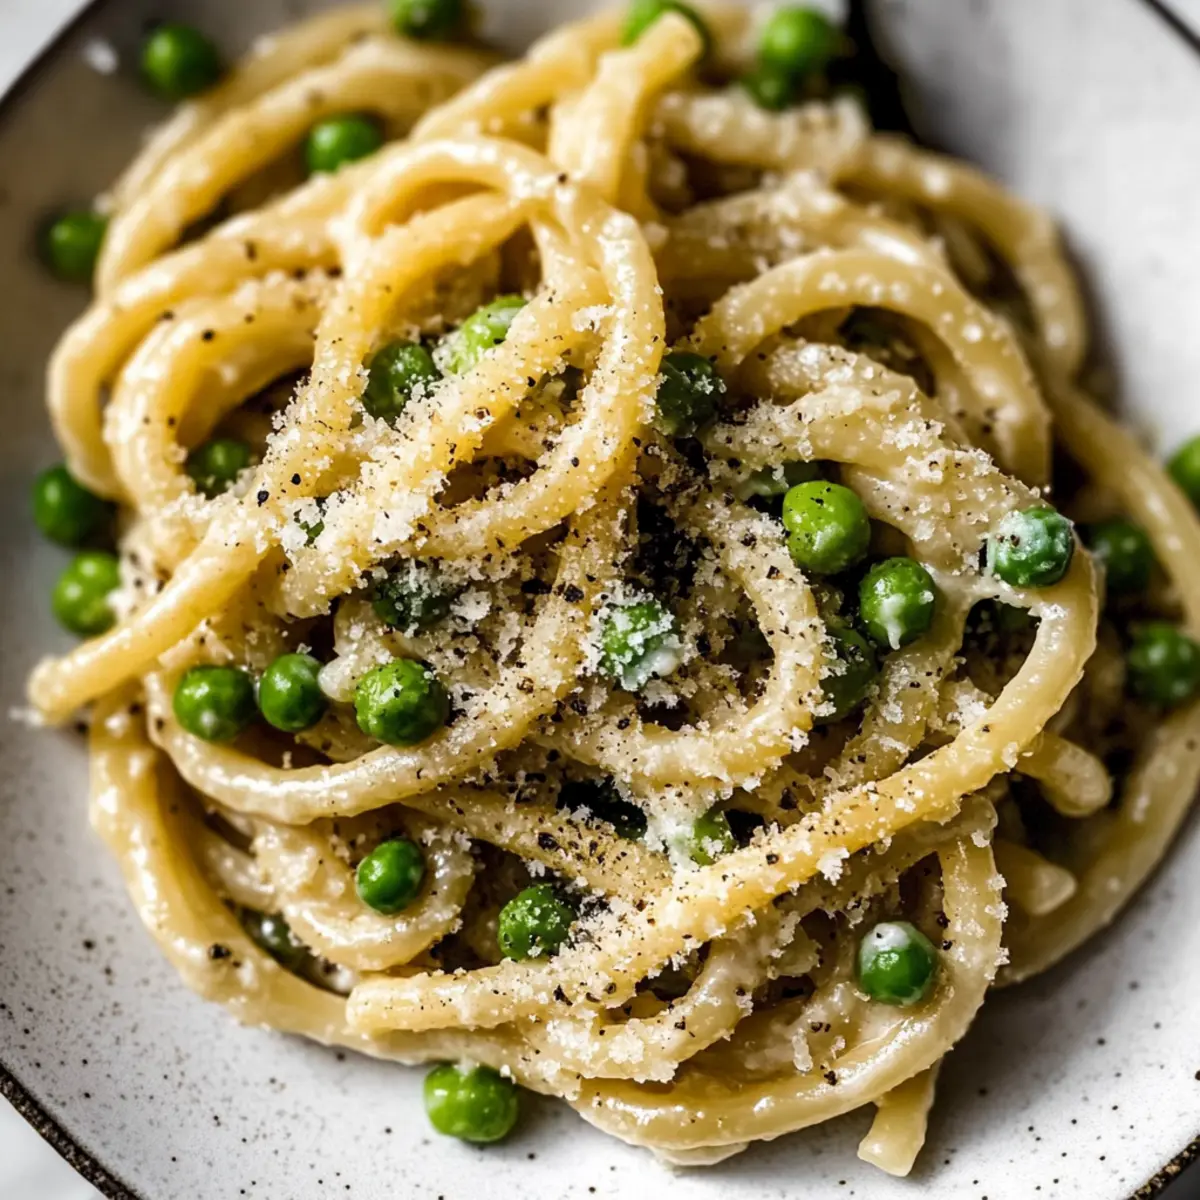
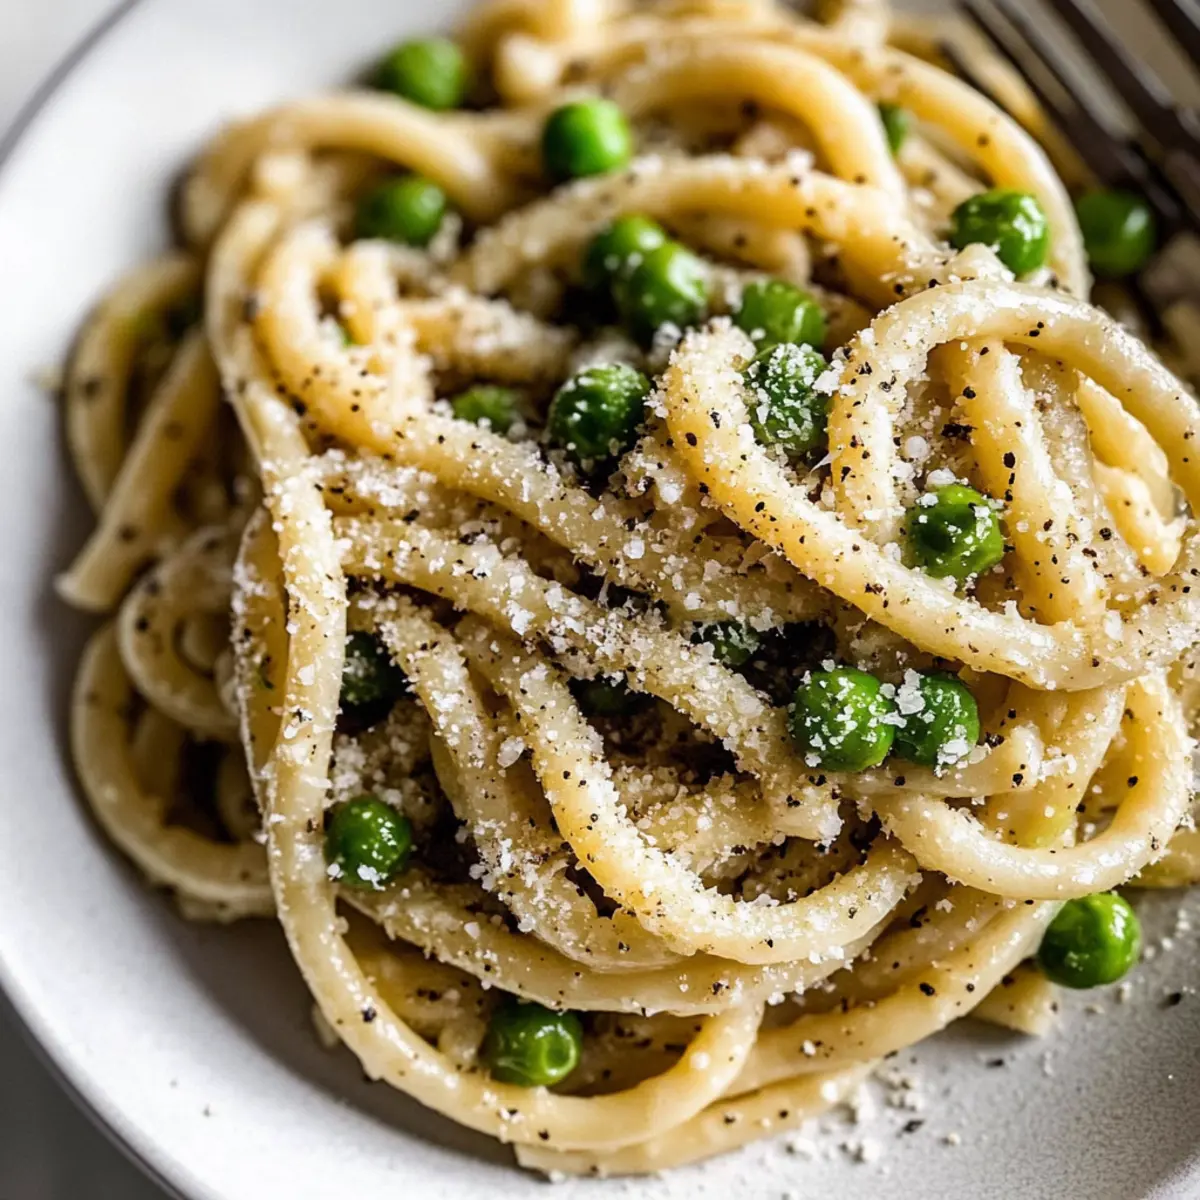
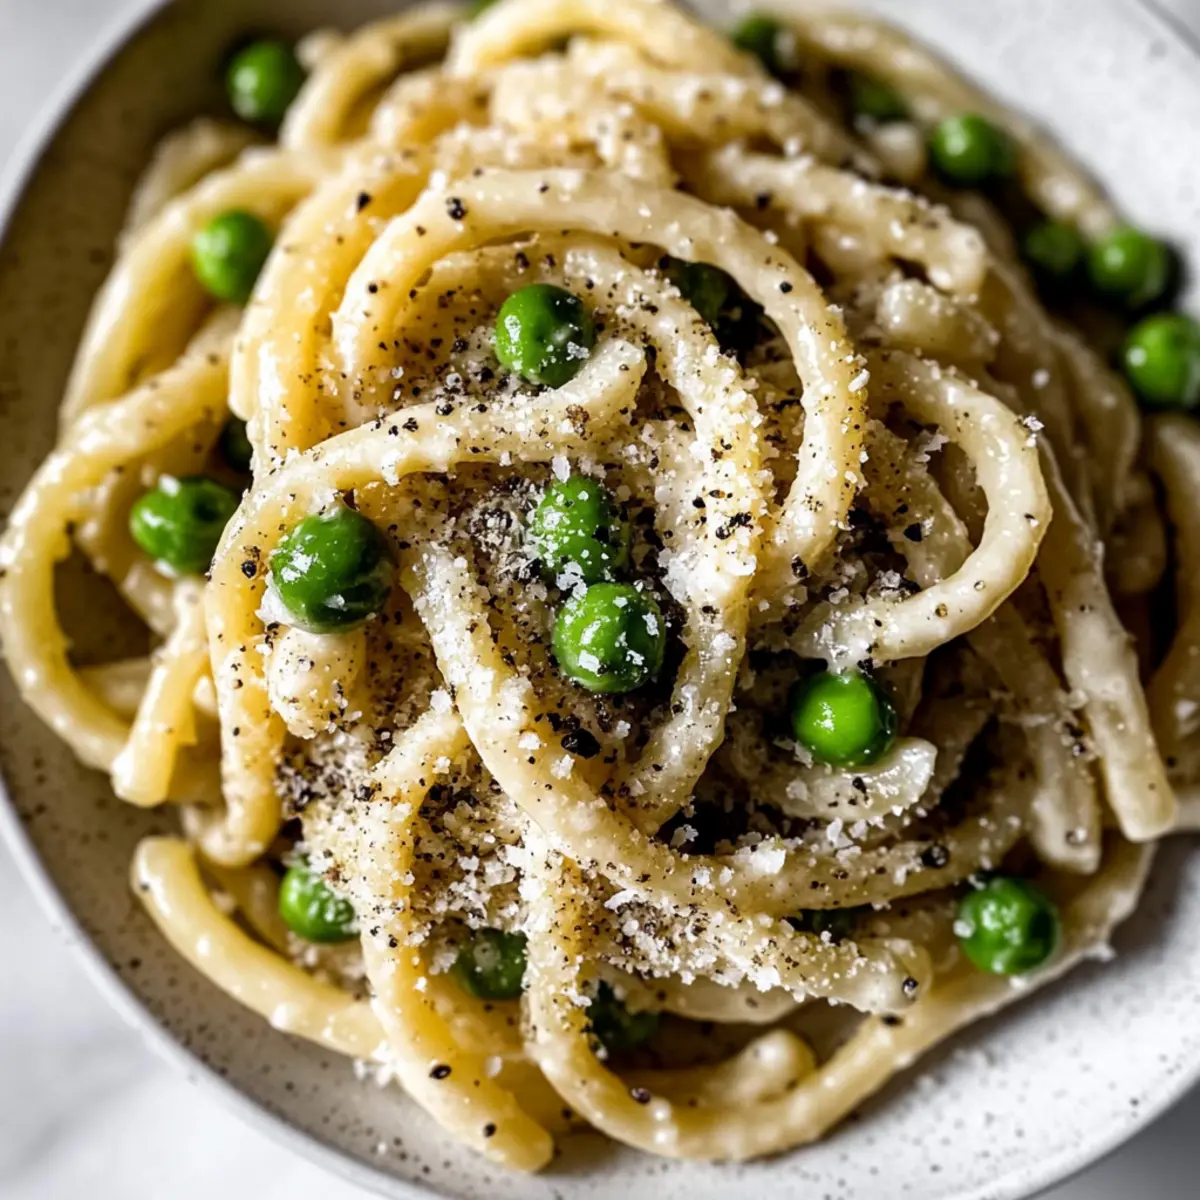
There’s nothing quite like that magical moment when you twirl a forkful of creamy Bucatini Cacio E Pepe, its hearty noodles hugging every bit of cheesy goodness. This delightful twist on a classic makes use of bucatini pasta, bringing an extra layer of texture that’s simply irresistible. With the vibrant addition of peas, this vegetarian dish becomes not only a feast for the eyes but also a healthy choice for your weeknight dinner. Prepare a satisfying meal in just 20 minutes, perfect for those busy evenings when you crave something comforting but don’t want takeout. Imagine gathering loved ones around the table, sharing laughter and forkfuls of this exquisite dish. Ready to turn your kitchen into a culinary haven? Let’s dive into the delicious world of Bucatini Cacio E Pepe!
Why is Bucatini Cacio E Pepe amazing?
Quick and Easy: In just 20 minutes, you can create a comforting dish that feels gourmet without the fuss. Perfect for busy weeknights!
Irresistible Creaminess: The combination of Parmesan and Pecorino Romano offers a creamy texture that coats every bucatini noodle beautifully, making each bite a delight.
Nutrition Boost: With the addition of peas, this dish not only adds a pop of color but also packs in extra nutrients, appealing to both adults and kids alike.
Versatile Base: Feel free to personalize! Try out variations like adding spinach or chickpeas for an added twist—this recipe is your canvas.
Crowd-Pleaser: Whether you’re feeding family or hosting friends, this dish is sure to impress even the pickiest eaters at your table.
Bucatini Cacio E Pepe Ingredients
For the Pasta
• Bucatini Pasta – This thick, tubular pasta adds a unique texture that holds the sauce beautifully.
For the Sauce
• Olive Oil – Infuses richness; you can substitute with melted butter for a different depth of flavor.
• Coarsely Ground Black Pepper – Essential for authenticity and warmth; don’t skip for that classic Cacio E Pepe kick!
• Grated Parmesan Cheese – Offers a creamy, savory flavor; Pecorino Romano can be swapped in for a sharper taste.
• Grated Pecorino Romano Cheese – Adds tanginess; feel free to use more Parmesan if preferred.
• Salt – Balances the flavors in your dish; always adjust to taste for the best experience.
• Pasta Water – This key ingredient introduces creaminess to the sauce; don’t forget to reserve it!
For the Vegetables
• Frozen Peas – Brings a sweet contrast and nutrition; fresh peas can work as a delightful alternative.
Feel the warmth and heart in every bite of this Bucatini Cacio E Pepe recipe, crafted just for you and your loved ones!
Step‑by‑Step Instructions for Bucatini Cacio E Pepe
Step 1: Boil the Pasta
Begin by bringing a large pot of salted water to a rolling boil. Once boiling, add the bucatini pasta and cook according to the package instructions, usually around 9-11 minutes, until al dente. It’s crucial to reserve about 1/3 cup of the starchy pasta water before draining to ensure your sauce will be creamy.
Step 2: Toast the Pepper
While the pasta is cooking, heat a skillet over low heat and add the olive oil. Once warmed, add the coarsely ground black pepper and toast it gently for about 30 seconds, stirring frequently. You’ll know it’s ready when the aroma intensifies; this step infuses the oil with flavor for your Bucatini Cacio E Pepe.
Step 3: Make the Cheese Sauce
With the pepper toasted, immediately add the grated Parmesan and Pecorino Romano cheese to the skillet. Then, pour in the reserved pasta water. Stir the mixture constantly over low heat for about 2-3 minutes until the cheeses have melted and formed a creamy sauce that coats the back of a spoon.
Step 4: Combine Pasta and Sauce
Add the drained bucatini noodles directly into the skillet with the cheese sauce. Toss everything together over low heat for about a minute, ensuring each noodle is fully coated in the luscious cheese mixture. The sauce should cling beautifully to the pasta, creating a comforting dish of Bucatini Cacio E Pepe.
Step 5: Add the Peas
Finally, sprinkle in the frozen peas, stirring them gently into the pasta. Allow everything to cook for an additional 2 minutes, or until the peas are heated through and vibrant. This will add both nutrition and a lovely pop of color to your dish, making it even more enticing. Serve immediately for maximum creaminess.

Expert Tips for Bucatini Cacio E Pepe
-
Pasta Water Magic: Always reserve pasta water before draining; it’s the secret to achieving that creamy sauce consistency everyone loves!
-
Pepper Perfection: Toasting the black pepper is crucial. Keep the heat low to avoid bitterness, allowing the flavor to bloom without burning.
-
Cheese Quality: Use freshly grated cheeses for better melting and flavor infusion. Pre-grated options may not deliver the same creamy richness in your Bucatini Cacio E Pepe.
-
Mix Quickly: Once the cheese sauce is ready, promptly add the bucatini to prevent it from thickening too much. Timing is essential for the perfect creamy texture!
-
Veggie Swap: Feel free to mix in seasonal vegetables like spinach or zucchini. These additions not only enhance nutrition but also keep the dish vibrant and visually appealing.
How to Store and Freeze Bucatini Cacio E Pepe
Fridge: Store leftovers in an airtight container for up to 3-4 days. Make sure to cool the dish to room temperature before sealing to maintain freshness.
Freezer: For longer storage, freeze in a freezer-safe container for up to 2 months. Keep in mind that the creamy texture may change upon thawing, so it’s best enjoyed fresh.
Reheating: Reheat gently on the stove with a splash of reserved pasta water to restore creaminess. Stir frequently to ensure even heating and prevent sticking.
Leftover Tips: Adding a little extra cheese and pepper during reheating can enhance the flavors and mimic the original Bucatini Cacio E Pepe experience.
Make Ahead Options
These Bucatini Cacio E Pepe with Peas are perfect for meal prep, allowing you to enjoy comfort food during your busiest weeknights! You can cook the bucatini and prepare the cheese sauce up to 24 hours in advance. Simply store the cooked pasta and sauce separately in airtight containers in the refrigerator. To maintain the creamy texture, make sure to reserve some pasta water and add a splash when reheating. When it’s time to serve, just warm your sauce in a skillet over low heat, add the cooked bucatini, and stir in the frozen peas, heating until everything is warmed through. Enjoy restaurant-quality results effortlessly!
Bucatini Cacio E Pepe Variations
Unlock the delightful possibilities of Bucatini Cacio E Pepe to suit your mood and pantry!
-
Spaghetti Swap: Replace bucatini with spaghetti for a classic twist that’s equally delicious.
-
Veggie Boost: Add baby spinach or sautéed bell peppers for extra flavor and vibrant color. Just toss them in during the last minute of cooking!
-
Protein Punch: Incorporate grilled shrimp or chickpeas to transform this dish into a filling meal that satisfies meat lovers and vegetarians alike.
-
Creamy Cashew: For a nutty flavor, blend soaked cashews into the sauce instead of cheese. This vegan option offers a lovely creaminess!
-
Extra Kick: Spice things up by adding a pinch of red pepper flakes to the black pepper for a subtle heat that elevates the dish.
-
Lemon Zest: Brighten up your meal with a sprinkle of fresh lemon zest right before serving—it’s a refreshing contrast to the creamy sauce.
-
Different Cheeses: Experiment with different cheese varieties like Gruyère or fontina for a unique flavor profile and delightful creaminess.
-
Garlic Galore: Boost the flavor by sautéing minced garlic in the olive oil before adding the pepper. The aroma will invite everyone to the table!
Feel free to explore these variations in your kitchen! Each twist brings a new layer of warmth and comfort to your table—perfect for cozy gatherings or solo indulgence. Would you like to know more about serving suggestions? Be sure to check out our ideas on what to serve with delicious Bucatini Cacio E Pepe!
What to Serve with Bucatini Cacio E Pepe
Creating the perfect meal is all about balancing flavors and textures, and these delightful pairings will enhance your dining experience.
-
Garlic Bread: The buttery, crusty goodness is perfect for mopping up creamy sauce while adding a crispy contrast.
-
Fresh Arugula Salad: This peppery salad topped with a squeeze of lemon adds brightness and freshness to balance the rich pasta dish. Toss in some cherry tomatoes for an extra pop of color!
-
Roasted Vegetables: Serve a medley of seasonal veggies like zucchini and bell peppers for added nutrients and a satisfying crunch that complements the creaminess of the pasta.
-
Chilled White Wine: A crisp Sauvignon Blanc or Pinot Grigio offers a refreshing contrast, making each bite of Bucatini Cacio E Pepe feel even more indulgent.
-
Lemon Sorbet: As a light, refreshing dessert, lemon sorbet cleanses the palate beautifully after a rich meal, leaving you feeling satisfied yet rejuvenated.
-
Cheesy Polenta: This creamy, comforting side dish harmonizes with the cheese in the pasta while adding a different kind of richness to your plate.
Bringing together these delicious pairings will turn your Bucatini Cacio E Pepe into a complete culinary experience that’s sure to impress!
Bucatini Cacio E Pepe Recipe FAQs
How do I choose the right bucatini pasta?
Look for bucatini that is firm and dry, without any visible cracks or a dull surface. Make sure the packaging is intact and the expiration date is current. A good quality bucatini will hold the sauce beautifully and give you that delightful chew.
How do I store leftover Bucatini Cacio E Pepe?
Store any leftovers in an airtight container in the fridge for up to 3-4 days. Make sure the dish has cooled down to room temperature before sealing the container to maintain its freshness. When you’re ready to enjoy it again, simply reheat gently on the stove with a splash of reserved pasta water to restore some of that creamy texture!
Can I freeze Bucatini Cacio E Pepe?
Absolutely! You can freeze it in a freezer-safe container for up to 2 months. To do this, let the dish cool completely, then portion it out to avoid thawing the entire batch when you’re ready to eat. Keep in mind, the creamy texture may change upon thawing. For best results, reheat on the stove rather than the microwave for a more enjoyable experience.
What if my sauce is too thick?
If you find your sauce is too thick after mixing in the pasta, simply add a bit more reserved pasta water, a tablespoon at a time, until you reach your desired creaminess. The starchy pasta water not only helps thin the sauce but also provides additional flavor, so don’t be shy!
Are there any dietary considerations with this dish?
Yes! While this Bucatini Cacio E Pepe is vegetarian, it’s important to be mindful of the cheeses you choose, as they may contain animal rennet. For a vegetarian-friendly option, look for cheeses labeled as vegetarian. Additionally, if you’re cooking for children or someone with dietary restrictions, consider checking for lactose-free cheese alternatives if needed.
Can I use different types of cheese in Bucatini Cacio E Pepe?
Certainly! While traditionally made with Parmesan and Pecorino Romano, you can experiment with other cheeses. For instance, a mild goat cheese can add a unique flavor, or Gruyère for a nuttier finish. Just be mindful of the melting properties and choose cheeses with similar textures to ensure your sauce remains creamy.
Creamy Bucatini Cacio E Pepe with Peas for a Cozy Dinner
Ingredients
Equipment
Method
- Boil the Pasta: Bring a large pot of salted water to a rolling boil. Add the bucatini pasta and cook until al dente, around 9-11 minutes. Reserve 1/3 cup of pasta water before draining.
- Toast the Pepper: Heat a skillet over low heat, add the olive oil and coarsely ground black pepper. Toast for about 30 seconds until aromatic.
- Make the Cheese Sauce: Add grated Parmesan and Pecorino Romano cheese to the skillet, then stir in reserved pasta water. Cook for 2-3 minutes until melted and creamy.
- Combine Pasta and Sauce: Add drained bucatini to the skillet, tossing to coat the pasta in the sauce for about a minute.
- Add the Peas: Stir in frozen peas and cook for an additional 2 minutes until heated through. Serve immediately.
Leave a Reply