
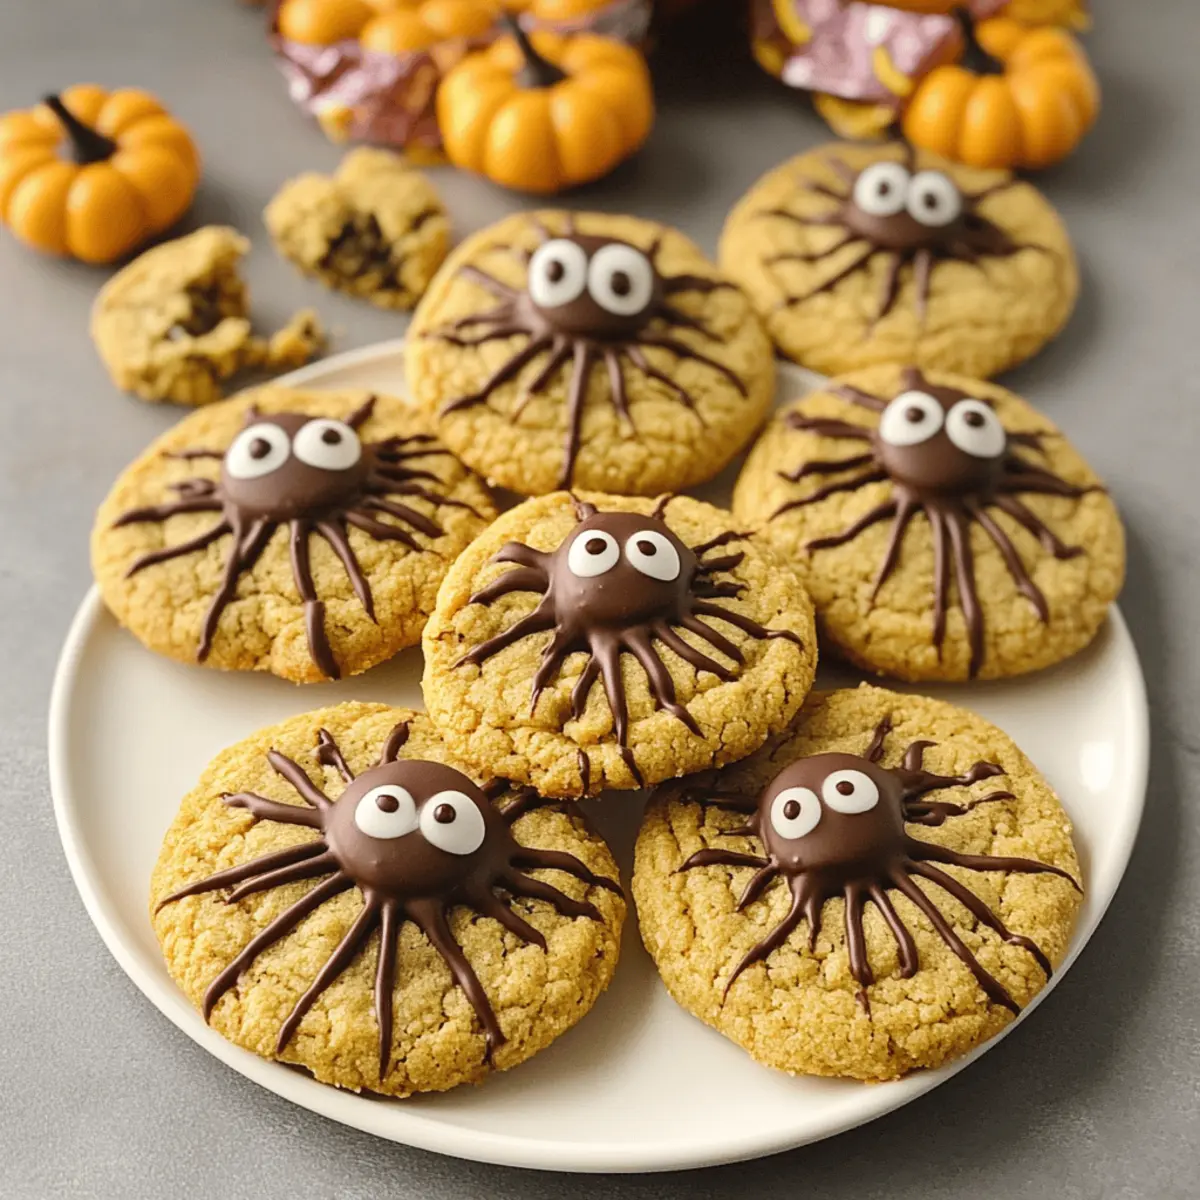
As the leaves turn and spooky decorations fill the air, I can’t help but feel an electric buzz of excitement—Halloween is just around the corner! There’s something magical about creating treats that blend whimsy with flavor, and these Peanut Butter Spider Halloween Cookies capture that spirit perfectly. They’re not just easy to whip up; they’re also a nostalgic nod to childhood delights. With creamy peanut butter, chocolate drizzles, and versatile decorations, these adorable cookies make for a show-stopping dessert that’ll thrill kids and adults alike. Whether you’re hosting a Halloween bash or simply indulging in a cozy evening at home, these delightful cookies are bound to bring smiles all around. Are your taste buds ready for a spooky little adventure?
Why Are These Cookies So Irresistible?
Adorable Appeal: Halloween isn’t complete without a sprinkle of fun, and these cookies bring smiles with their spider-like decorations.
Flavor Fusion: The rich taste of peanut butter pairs delightfully with chocolate, creating a sweet treat that’s hard to resist.
Easy to Customize: Swap in your favorite candies, like M&Ms or even chocolate-covered marshmallows, for personal flair.
Perfect for Gatherings: Whether at parties or family gatherings, these cookies become a centerpiece that everyone will admire and enjoy.
Time-Saving Treat: With a quick prep and bake time, you can have these spooky goodies ready in no time.
Kid-Friendly Fun: Involve the kiddos in decorating, making it a memorable bonding experience! These Peanut Butter Spider Halloween Cookies are sure to become a beloved Halloween tradition in your home.
Peanut Butter Spider Halloween Cookies Ingredients
For the Cookie Base
- All-Purpose Flour – Provides structure; use gluten-free flour for a gluten-free version.
- Baking Soda – Acts as a leavening agent; essential for a soft texture.
- Salt – Enhances flavor; skip if using salted peanut butter.
- Unsalted Butter (room temperature) – Adds richness and tenderness; substitute with coconut oil for a dairy-free option.
- Light Brown Sugar – Adds moisture and a hint of caramel; dark brown sugar can be used for a deeper flavor.
- Granulated Sugar – Adds sweetness; can be reduced for a less sweet cookie.
- Smooth Peanut Butter – Key flavor component providing a creamy texture; do not use crunchy for best results.
- Egg – Binds ingredients together; replace with a flax egg for a vegan alternative.
- Vanilla Extract – Adds warmth; use pure vanilla for the best flavor.
- Whole Milk – Adds moisture; can substitute with dairy-free milk.
For the Spider Decoration
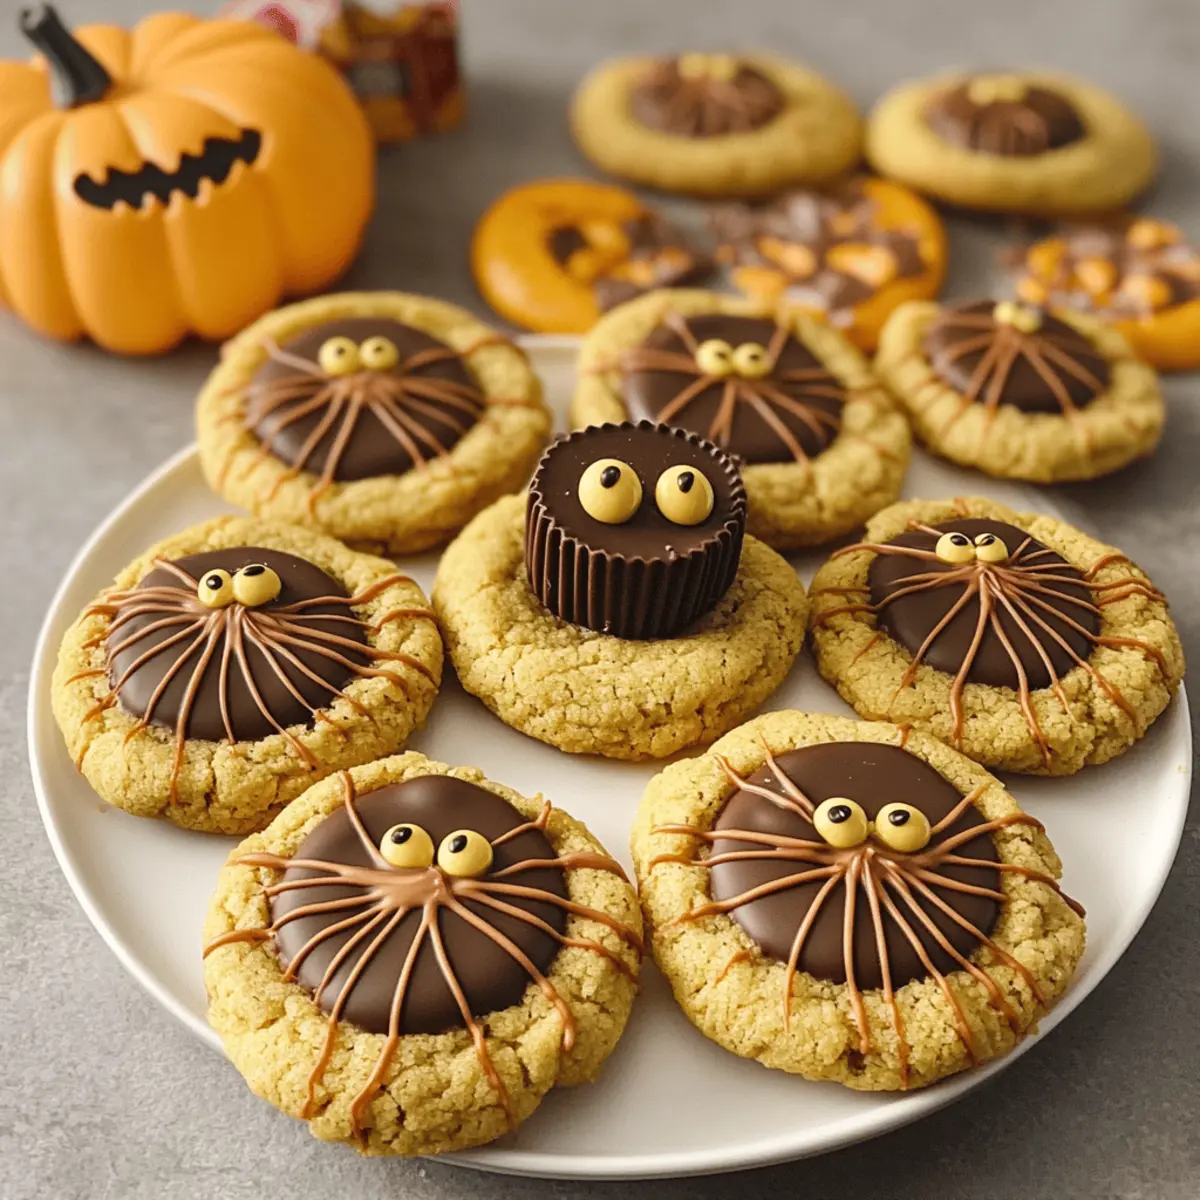
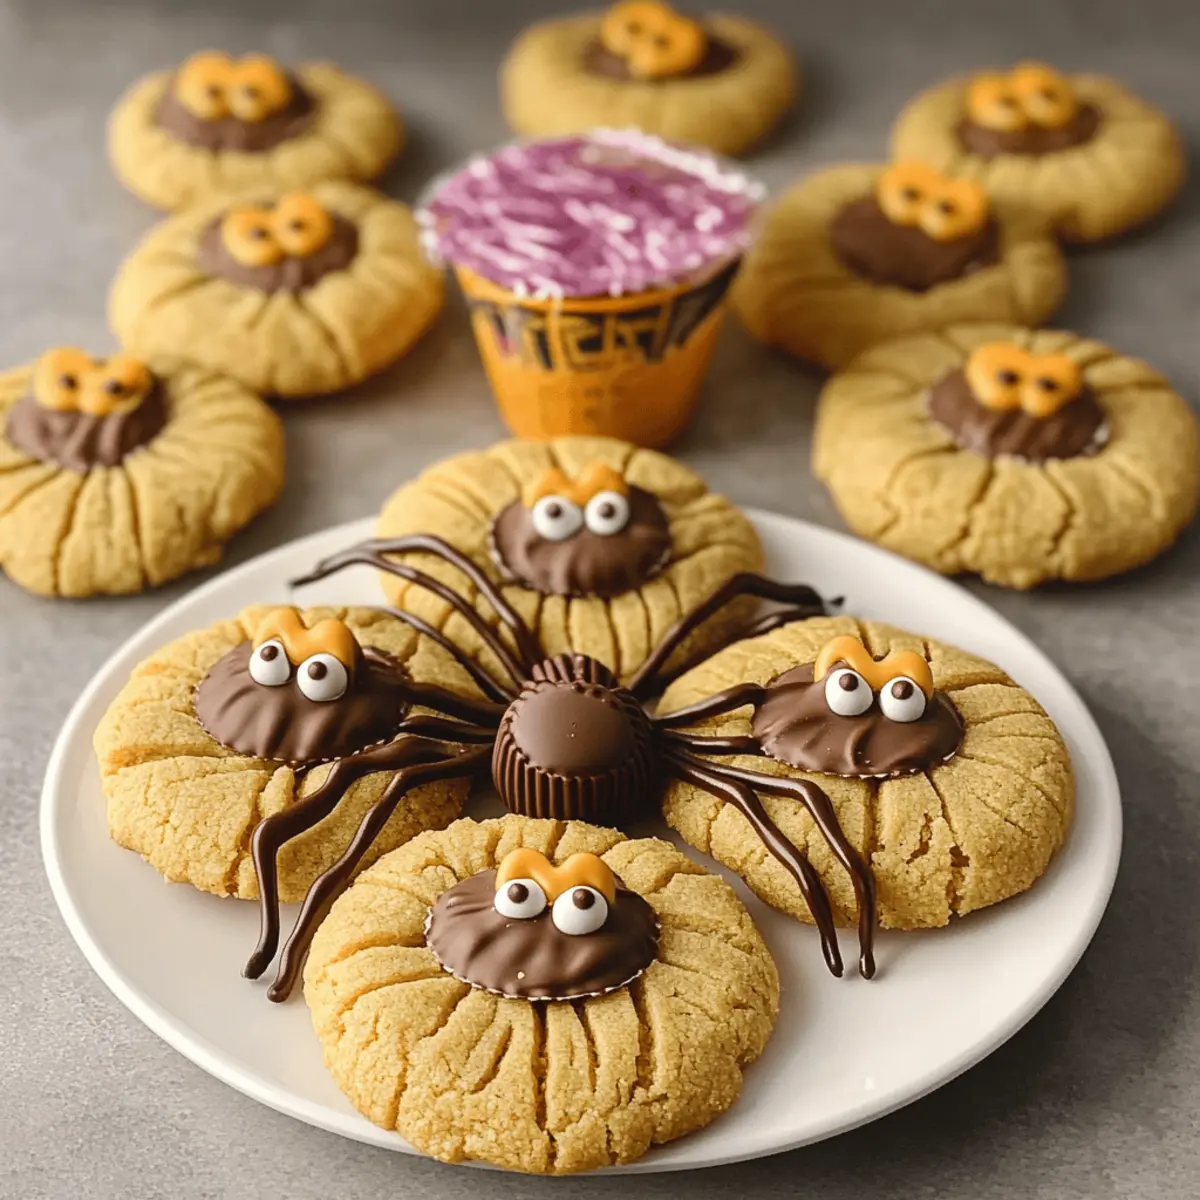
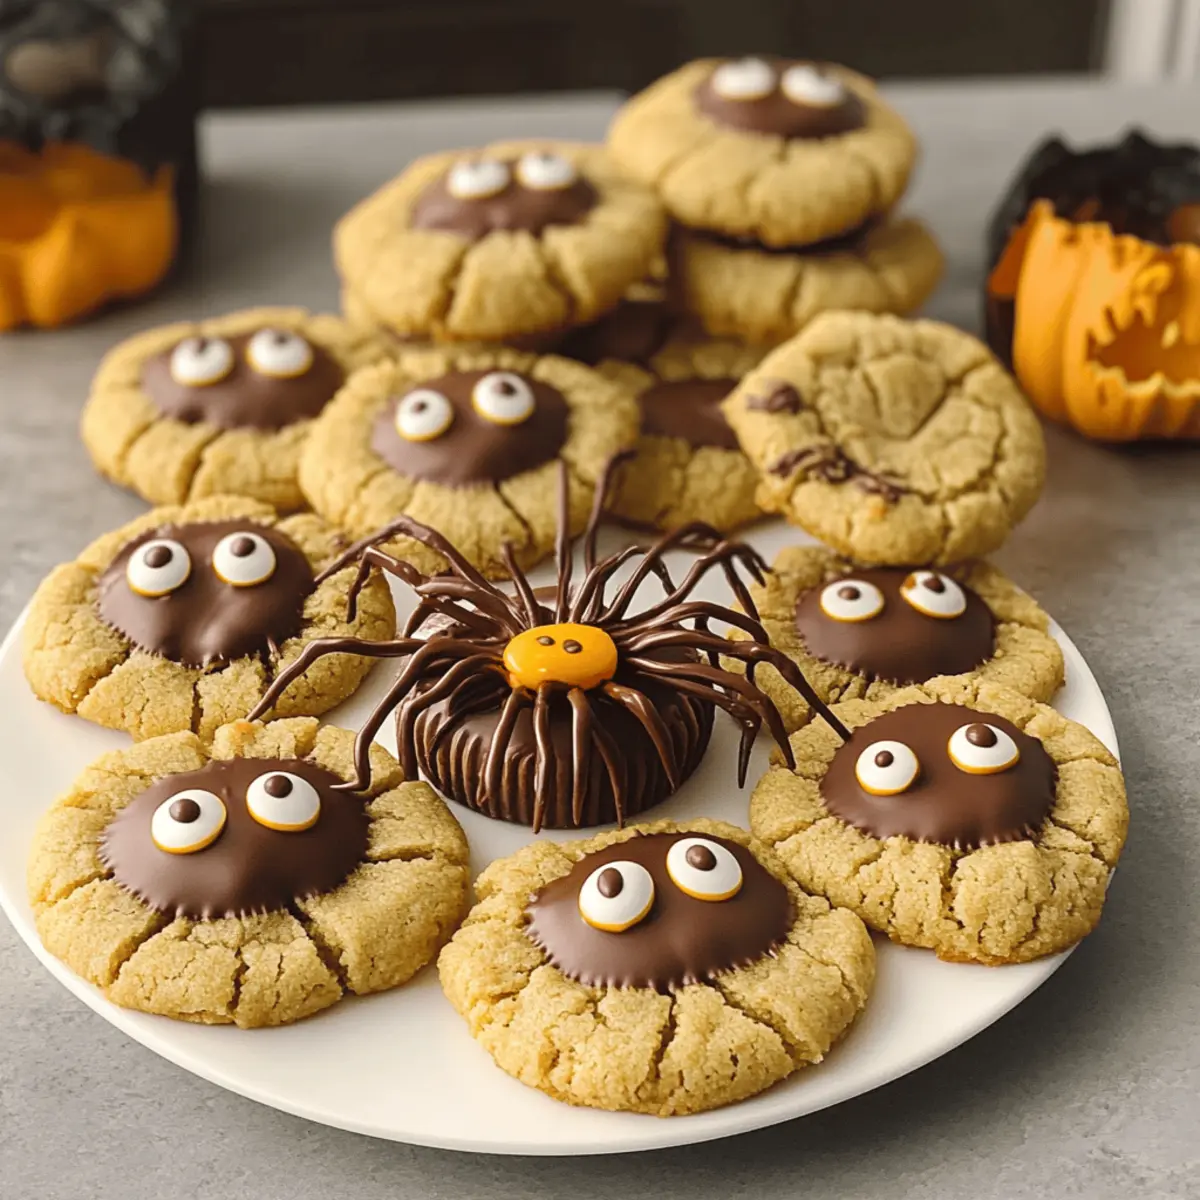
- Miniature Reese’s Peanut Butter Cups – Decorative “spider bodies”; other chocolates like Whoppers can be used as alternatives.
- Semi-Sweet Chocolate – Used for piping spider legs; dark chocolate can give a richer taste.
- Candy Eyes – For fun decoration; optional, can skip or use small chocolate chips instead.
These Peanut Butter Spider Halloween Cookies are everything you need for a delightful Halloween treat!
Step‑by‑Step Instructions for Peanut Butter Spider Halloween Cookies
Step 1: Preheat the Oven
Begin by preheating your oven to 350°F (175°C) and lining two baking sheets with parchment paper. This ensures your Peanut Butter Spider Halloween Cookies will bake evenly and won’t stick. While the oven warms up, take a moment to gather your ingredients to make the process smooth and enjoyable.
Step 2: Mix the Dry Ingredients
In a medium bowl, whisk together 2 cups of all-purpose flour, 1 teaspoon of baking soda, and a pinch of salt. Whisking thoroughly combines these dry ingredients, ensuring the baking soda is evenly distributed for that perfect puff in your cookies. Set this bowl aside, as we will bring the wet and dry ingredients together shortly.
Step 3: Cream Butter and Sugars
In a large mixing bowl, use an electric mixer to beat together ½ cup of room-temperature unsalted butter, ½ cup of light brown sugar, and ½ cup of granulated sugar until fluffy and light—about 2 to 3 minutes. This step creates the cookie’s tender base. You’ll know it’s ready when the mixture appears creamy and pale.
Step 4: Add the Wet Ingredients
Next, mix in 1 cup of smooth peanut butter, 1 large egg, 1 teaspoon of vanilla extract, and ¼ cup of whole milk. Beat on low until everything is thoroughly combined and smooth. The mixture should look cohesive and slightly glossy, forming the rich foundation of your Peanut Butter Spider Halloween Cookies.
Step 5: Combine Mixtures
Gradually add your dry mixture to the wet ingredients, mixing gently on low until just combined. Avoid overmixing; you want the dough to remain thick and slightly sticky. Use a spatula to scrape down the sides of the bowl to ensure everything is integrated, forming a delicious dough that is ready for chilling.
Step 6: Chill the Dough
Cover the cookie dough with plastic wrap and refrigerate for at least 30 minutes. Chilling is crucial for maintaining the shape of your cookies while baking, preventing them from spreading too much. This time helps the flavors meld, resulting in more extraordinary peanut butter cookies.
Step 7: Shape Cookies
Once chilled, scoop out tablespoon-sized portions of dough. Roll each portion into a ball and place them on your prepared baking sheets about 2 inches apart. Gently flatten each ball with your palm to create a thicker base, ensuring that your Peanut Butter Spider Halloween Cookies have a lovely shape.
Step 8: Bake
Bake the cookies in your preheated oven for 10-12 minutes, or until the edges are golden brown and the centers are set but still soft. Keep an eye on them, as every oven is different! They should look slightly puffy and irresistible once done. Allow the cookies to cool on the baking sheets for 5 minutes before transferring them to a wire rack.
Step 9: Assemble Spiders
While the cookies are still warm, gently press a miniature Reese’s Peanut Butter Cup into the center of each cookie to create the “spider body.” Then, melt your semi-sweet chocolate and pipe four legs on each side using a piping bag or a zip-top bag with the corner snipped off. Add candy eyes for that delightful finishing touch!
Step 10: Firm Up
Refrigerate the cookies for about 15-20 minutes to allow the chocolate decoration to set firmly. This final chill will enhance not only the cookie’s appearance but also ensure that the chocolate and candy eyes securely adhere to the cookies. Your Peanut Butter Spider Halloween Cookies are now ready to surprise and delight!
Make Ahead Options
These Peanut Butter Spider Halloween Cookies are perfect for meal prep enthusiasts! You can prepare the cookie dough up to 24 hours in advance by mixing all the ingredients and refrigerating the dough. This chilling not only enhances the flavor but also keeps the cookies from spreading too much during baking. Alternatively, you can freeze the shaped cookie dough balls for up to 1 month; when ready to bake, simply thaw them overnight in the refrigerator before popping them in the oven. For decorating, you can assemble the spiders right after baking, ensuring a delightful treat that’s just as delicious as if made fresh. With these make-ahead tips, your Halloween festivities will be a breeze!
Storage Tips for Peanut Butter Spider Halloween Cookies
Room Temperature: Store your cookies in an airtight container at room temperature for up to 1 week to maintain their chewy texture and delightful flavor.
Fridge: For longer freshness, you can refrigerate the cookies in an airtight container for up to 10 days. Be sure they are covered to prevent them from drying out.
Freezer: Freeze the cookies individually wrapped in plastic wrap and then placed in a resealable bag for up to 1 month. Thaw at room temperature for a yummy treat whenever the craving hits!
Dough: If you plan ahead, make the dough and freeze it for up to 1 month. Just scoop out and bake fresh cookies whenever you like—your Peanut Butter Spider Halloween Cookies are always just a bake away!
Peanut Butter Spider Halloween Cookie Variations
Feel free to customize your cookies and make them uniquely yours—your creativity knows no bounds!
-
Nut-Free: Replace smooth peanut butter with almond or sunbutter for a nut-free treat that still delivers on flavor. A pleasant twist that caters to those with allergies!
-
Vegan Alternative: Swap traditional egg with a flax egg to create a vegan version. Simply mix 1 tablespoon of flaxseed meal with 2.5 tablespoons of water, let it sit, and watch the magic happen!
-
Gluten-Free: Use a 1:1 gluten-free flour blend in place of all-purpose flour for a delightful gluten-free cookie. You won’t miss a beat with this tasty adaptation!
-
Chocolate Swirl: For an extra chocolatey kick, fold in chocolate chips or chunks into the cookie dough. This added texture accentuates the overall theme beautifully.
-
Candy Swap: Instead of Reese’s, try using mini M&Ms or chocolate-covered marshmallows for colorful “spider bodies.” The vibrant colors will make these cookies even more festive!
-
Spicy Twist: Add a pinch of cinnamon or a dash of cayenne pepper to the dough for a surprising warmth. It’s a unique flavor twist that’s just the right amount of daring!
-
Decorate Differently: Get creative with your decorating! Use white chocolate for spider legs or candy corn for a fun Halloween touch that kids will love.
-
Easy Presentation: For a quick dessert, roll the dough into balls, coat them with powdered sugar, and bake for plain but delicious peanut butter cookies. Pair them with your favorite dipping chocolate for a fabulous finish!
With these delightful options, your Peanut Butter Spider Halloween Cookies can become a canvas for your imagination, making them the perfect spooky treat for any occasion. If you’re ever in the mood for more sweet delights, you can check out these irresistible pumpkin maple cookies or perhaps some fun delightful pastel Halloween donuts as well!
Expert Tips for Peanut Butter Spider Cookies
• Chill the Dough: Properly chill your dough for at least 30 minutes to prevent excessive spreading. Skipping this step can lead to flat cookies.
• Smooth Peanut Butter: Use creamy peanut butter like Skippy for the best texture and flavor. Crunchy varieties may alter the cookie’s consistency.
• Cooling Time: Allow cookies to cool slightly before pressing in Reese’s. This helps maintain their shape and prevents melting.
• Decorating Fun: Get creative with toppings! Use M&Ms or chocolate marshmallows instead of Reese’s for a different spin on your peanut butter spider cookies.
• Piping Chocolate: If you don’t have a piping bag, a zip-top bag with a corner snipped off works great to create chocolate spider legs!
• Storage Tips: Store cookies in an airtight container for up to a week. Dough can be frozen for up to one month, making future baking a breeze!
What to Serve with Peanut Butter Spider Halloween Cookies
As you embark on this whimsical Halloween baking adventure, consider these delightful pairings to enhance your cookie experience.
-
Milk: A classic pairing, a cold glass of milk balances the sweetness of the cookies while complementing their creamy peanut butter flavor. It’s the perfect dip for those spooky treats!
-
Pumpkin Spice Latte: Elevate your treat time with a warm pumpkin spice latte, embodying the essence of fall and adding a cozy, spiced kick that harmonizes with the peanut butter cookies.
-
Caramel Apple Slices: The crunchy apples paired with smooth caramel provide a refreshing contrast to the rich cookies, making for a fun and festive snack to enjoy alongside your Halloween festivities.
-
Ghoulish Fruit Salad: Surprise guests with a colorful fruit salad decorated with Halloween-themed cutouts. The refreshing, tart bursts from the fruits balance the richness of the cookies and add a vibrant touch to your table.
-
Chocolate-Covered Pretzels: The salty, sweet crunch of chocolate-covered pretzels is an addicting accompaniment that echoes the cookie theme, offering a delightful textural contrast to those soft, chewy delights.
-
Apple Cider: Serve up warm or cold apple cider for a seasonal drink that ties in beautifully with the autumn ambiance, enhancing the cozy vibes while perfectly accentuating the cookie’s flavor profile.
-
Halloween Snack Board: Create a festive board with mini candies, nuts, and seasonal treats. This interactive dessert option allows friends and family to mix and match, making cookie time even more fun!
-
Ghostly Marshmallow Hot Chocolate: End your evening with a rich hot chocolate topped with ghost-shaped marshmallows. It’s a sweet close to your Halloween festivities that pairs wonderfully with the cookies.
Let these suggestions add an extra dash of joy to your Halloween treats, creating delightful moments for all to enjoy!
Peanut Butter Spider Halloween Cookies Recipe FAQs
How do I select the best peanut butter for my cookies?
Absolutely! For these Peanut Butter Spider Halloween Cookies, I recommend using smooth, creamy peanut butter like Skippy or Jif. This ensures a soft texture and allows the cookies to hold their shape better. Avoid crunchy peanut butter, as it can make the dough crumbly and affect the final result.
What’s the best way to store these cookies?
Very! Store your cookies in an airtight container at room temperature for up to 1 week to keep them fresh and chewy. If you’re looking to extend their shelf life, consider refrigerating them; they can stay fresh in the fridge for up to 10 days. Just make sure they’re well-covered to avoid drying out.
Can I freeze the cookie dough for later use?
Certainly! To freeze your dough for these Peanut Butter Spider Halloween Cookies, scoop out tablespoon-sized portions and roll them into balls. Place them on a baking sheet to freeze solid for about an hour, then transfer the frozen balls into a resealable plastic bag. They can be stored in the freezer for up to 1 month. When you’re ready to bake, simply thaw in the refrigerator overnight and bake as directed.
What should I do if my cookies spread too much during baking?
No worries! If your cookies spread excessively, it likely means the dough wasn’t chilled enough before baking. Next time, refrigerate the dough for at least 30 minutes before scooping and baking. If they still spread, try checking your oven temperature with an oven thermometer to ensure it’s accurate, or consider adding a little more flour next time.
Are these cookies suitable for kids with peanut allergies?
It’s crucial to keep allergies in mind! If you’re making these cookies for kids with peanut allergies, I recommend using a nut-free alternative, like sunflower seed butter or soy nut butter. Just make sure to adjust any toppings, as many candies may also contain peanuts.
How long can I keep these cookies after Halloween?
These enchanting cookies can be stored for up to 1 week at room temperature. You can also keep the festive spirit alive by freezing the extras for up to 1 month. Simply thaw them at room temperature for a delightful treat even after Halloween has passed!
Peanut Butter Spider Halloween Cookies That Kids Will Love
Ingredients
Equipment
Method
- Preheat your oven to 350°F (175°C) and line two baking sheets with parchment paper.
- In a medium bowl, whisk together 2 cups of all-purpose flour, 1 teaspoon of baking soda, and a pinch of salt.
- In a large mixing bowl, cream together ½ cup of room-temperature unsalted butter, ½ cup of light brown sugar, and ½ cup of granulated sugar until fluffy and light.
- Mix in 1 cup of smooth peanut butter, 1 large egg, 1 teaspoon of vanilla extract, and ¼ cup of whole milk until combined.
- Gradually add the dry mixture to the wet ingredients, mixing gently until just combined.
- Cover the cookie dough with plastic wrap and refrigerate for at least 30 minutes.
- Scoop out tablespoon-sized portions of dough, roll into balls and flatten them on baking sheets.
- Bake for 10-12 minutes until golden brown around the edges.
- Gently press a miniature Reese’s Peanut Butter Cup into the center of each cookie while still warm.
- Melt semi-sweet chocolate and pipe four legs on each side. Add candy eyes for decoration.
- Refrigerate the cookies for about 15-20 minutes to set the decoration.
Leave a Reply