
With a swirl of color and a hint of chocolatey goodness, my kitchen transformed into a cozy corner of joy as I whipped up these Fluffy Red Velvet Marble Waffles. They’re not just visually stunning with their captivating marbled design, but they also deliver a delightful combination of fluffiness and sweetness that’s perfect for breakfast or brunch gatherings. What I love most about this recipe is its versatility; you can easily swap flavors to suit your mood while keeping the prep quick and simple. Plus, these waffles are light and airy, making them a guilt-free indulgence that pleases everyone at the table. Curious about how to master this vibrant morning treat? Let’s dive in!
Why Are These Waffles So Special?
Fluffy, each bite of these Red Velvet Marble Waffles offers an airy texture that melts in your mouth. Visual Appeal: The stunning marbled design is not only Instagram-worthy but also gets everyone excited for breakfast. Versatile: Easily swap flavors; consider chocolate or matcha for exciting twists! Quick Prep: With straightforward steps, you’ll have delicious waffles ready in no time. Guilt-Free Indulgence: Light and not overly sweet, they make for the perfect morning treat without the heavy feeling. Serve these beauties with fresh fruit or a drizzle of maple syrup for an unforgettable start to your day!
Red Velvet Marble Waffles Ingredients
For the Classic Waffle Batter
• All-Purpose Flour – Provides structure and body to the batter; feel free to use whole wheat for added fiber.
• Sugar – Sweetens the batter; for a lower glycemic option, try using coconut sugar.
• Baking Powder – A key leavening agent for achieving fluffiness; always double-check freshness for the best results.
• Baking Soda – Essential for rising and browning, particularly in the classic batter.
• Salt – Enhances flavor and balances the sweetness in your waffles.
• Buttermilk – Adds moisture and a slight tang; can be substituted with milk mixed with vinegar or lemon juice.
• Large Eggs – Provide richness and bind the ingredients; use room-temperature eggs for even mixing.
• Melted Butter – Adds richness and flavor; you can replace it with vegetable oil for a dairy-free option.
• Vanilla Extract – Enhances the overall flavor in the batter; always opt for pure vanilla to get the best taste.
For the Red Velvet Batter
• Cocoa Powder – Adds that rich cocoa flavor; Dutch-processed cocoa gives a deeper taste.
• Red Food Coloring – Gives the signature red color to the red velvet; gel coloring is recommended for extra vibrancy.
Feel the excitement of creating these Red Velvet Marble Waffles that are as delicious as they are beautiful!
Step‑by‑Step Instructions for Red Velvet Marble Waffles
Step 1: Prepare Classic Waffle Batter
In a mixing bowl, whisk together 1 ¾ cups of all-purpose flour, 2 tablespoons of sugar, 1 tablespoon of baking powder, ½ teaspoon of baking soda, and ½ teaspoon of salt. In a separate bowl, blend 1 ¾ cups of buttermilk, 2 large eggs, ½ cup of melted butter, and 1 teaspoon of vanilla extract. Gradually pour the wet mixture into the dry ingredients, stirring gently until just combined; avoid overmixing to keep the batter light and fluffy.
Step 2: Prepare Red Velvet Batter
In another bowl, combine 1 ½ cups of all-purpose flour, 1 tablespoon of cocoa powder, 2 tablespoons of sugar, 1 tablespoon of baking powder, ½ teaspoon of baking soda, and ½ teaspoon of salt. In a different container, mix 1 ¾ cups of buttermilk, 1 large egg, ½ cup of melted butter, 1 teaspoon of vanilla extract, and 1 tablespoon of red food coloring until smooth. Fold the wet mixture into the dry ingredients until just combined, keeping the batter slightly lumpy for optimal fluffiness.
Step 3: Preheat Waffle Iron
Before you start cooking, preheat your waffle iron according to the manufacturer’s instructions, typically at medium-high heat. Make sure to lightly grease the surface with cooking spray or a brush of melted butter for easy waffle removal later. This crucial step ensures your Red Velvet Marble Waffles achieve that perfect crispy exterior while remaining fluffy inside.
Step 4: Create Marble Effect
Once your waffle iron is hot, pour about ½ cup of the classic batter onto the center of the iron. Next, add a similar amount of the red velvet batter on top of the classic batter. Using a toothpick or skewer, gently swirl the two batters together to create a beautiful marbled effect, taking care not to over-swish for a distinct design.
Step 5: Cook Waffles
Close the waffle iron and cook until the waffles are golden brown and crisp, which usually takes 5 to 7 minutes, but check your iron’s instructions for precise timing. The steam should subside and the waffles should easily separate when ready. Keep an eye on them to catch that perfect golden hue that makes Red Velvet Marble Waffles so inviting.
Step 6: Serve
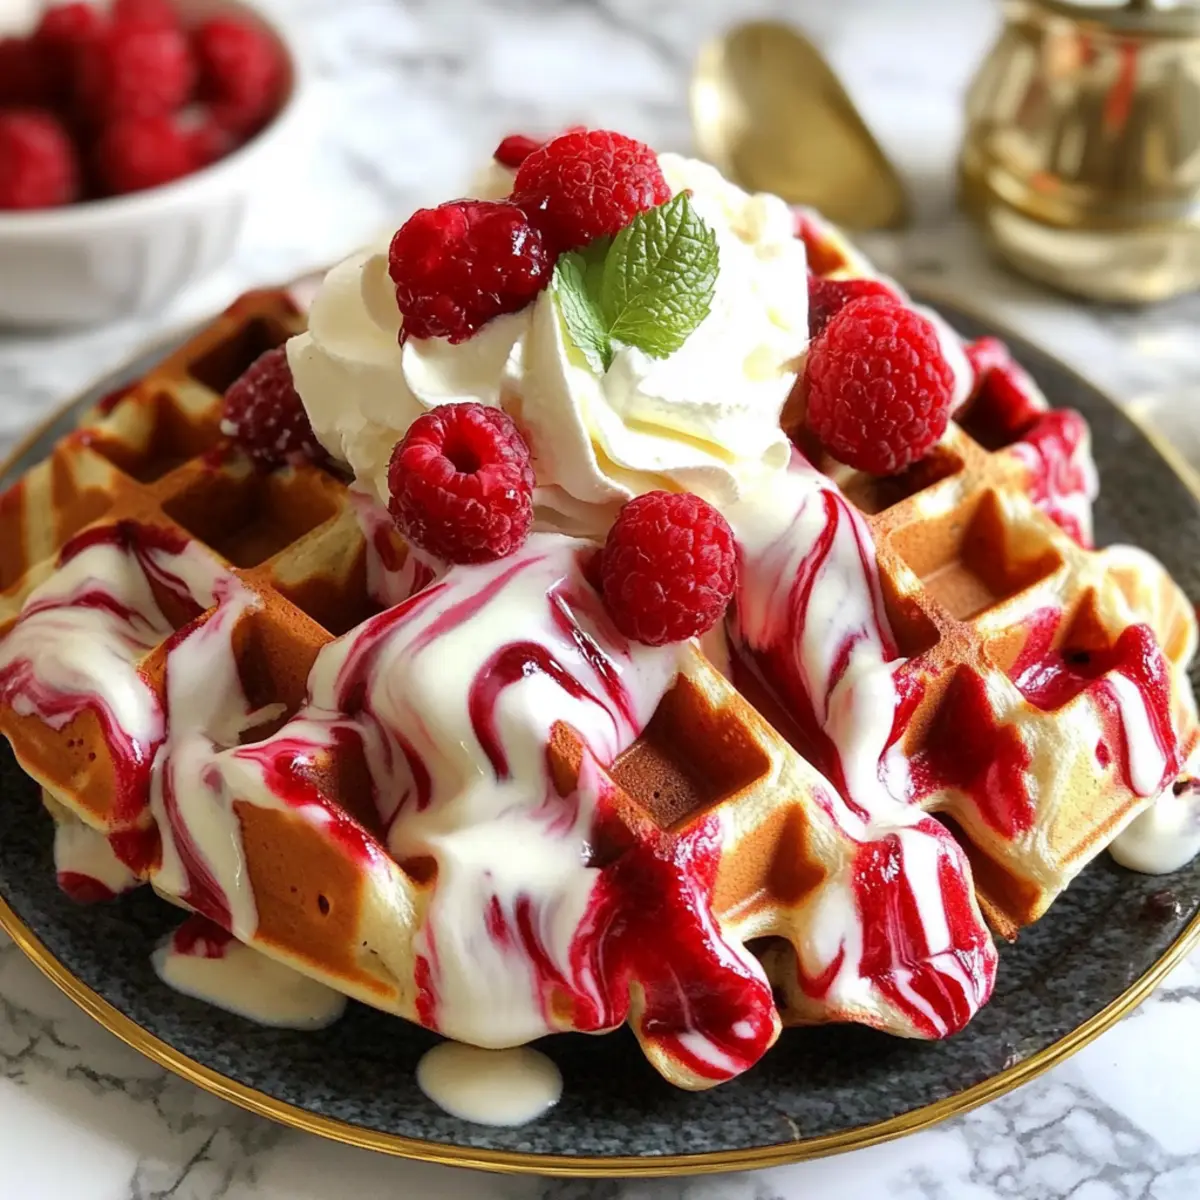
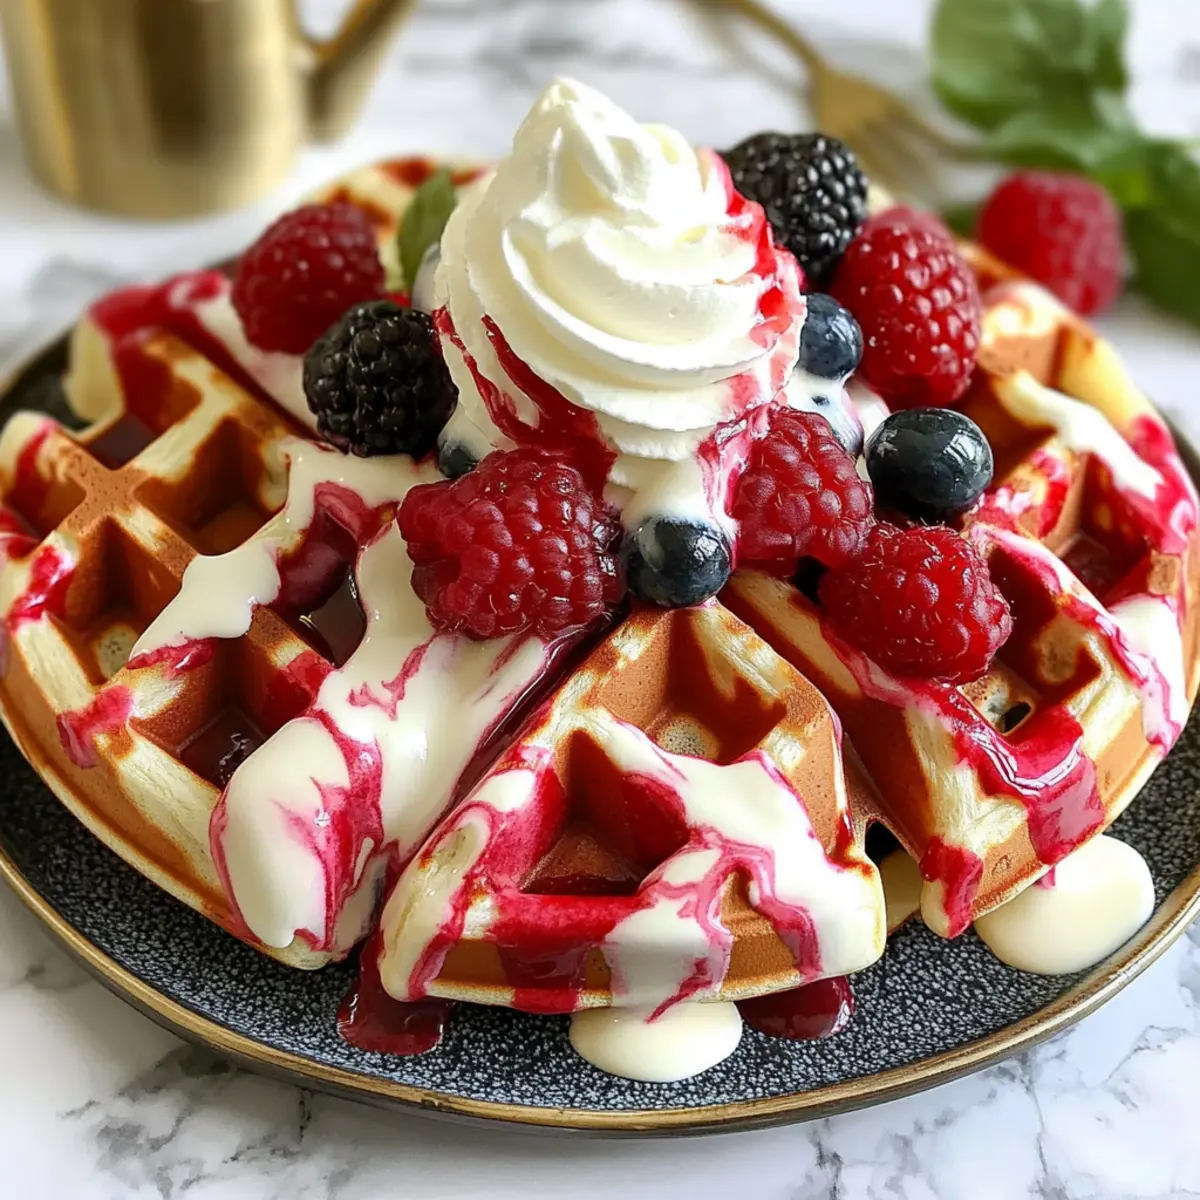
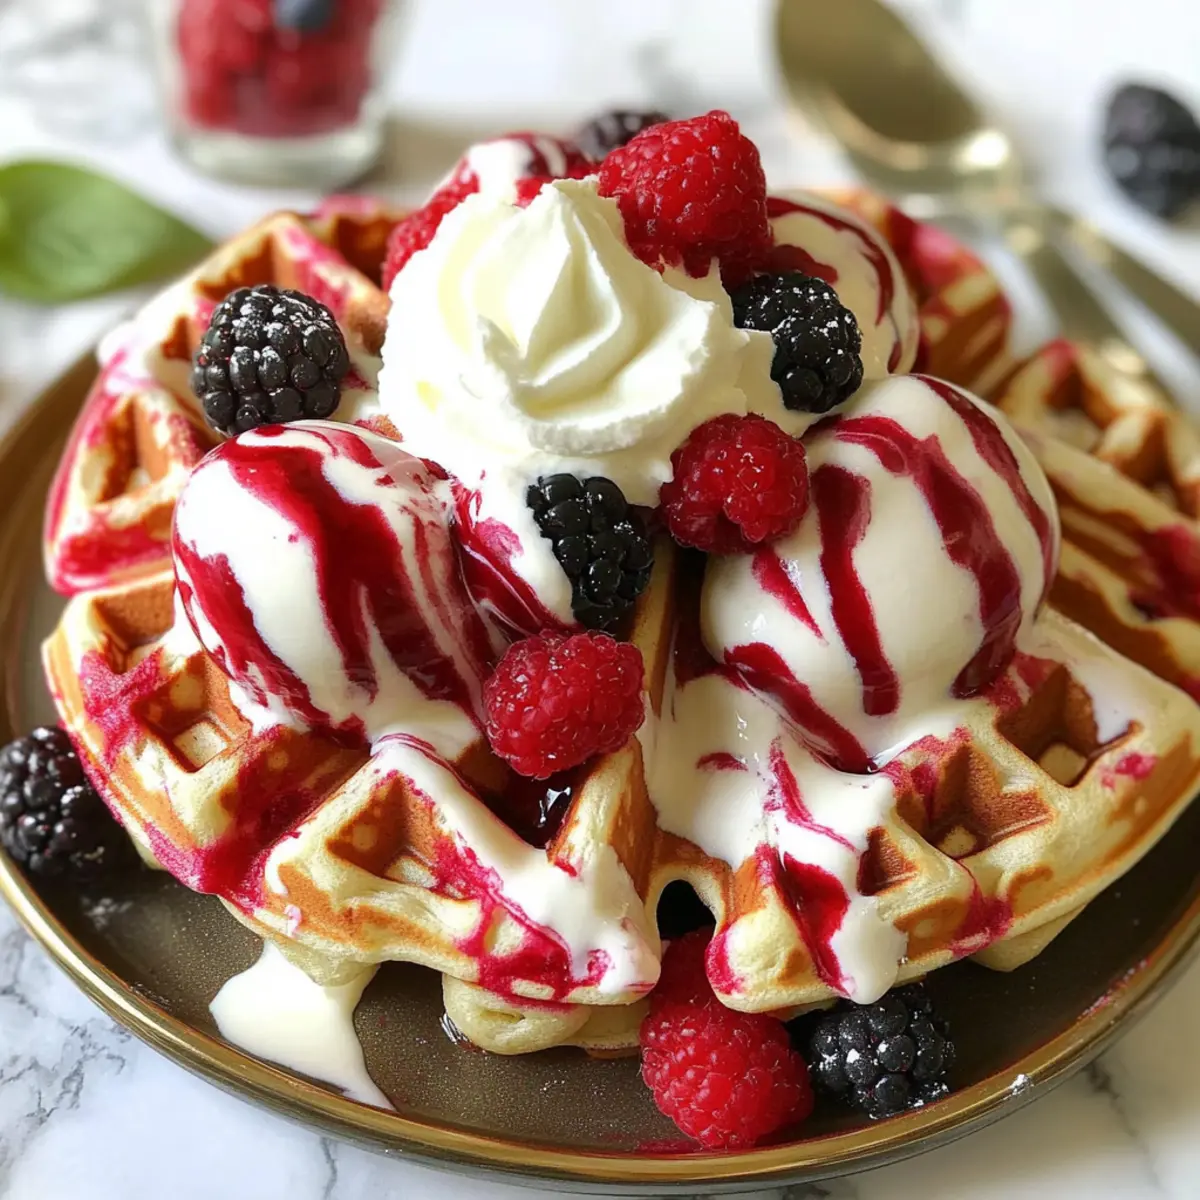
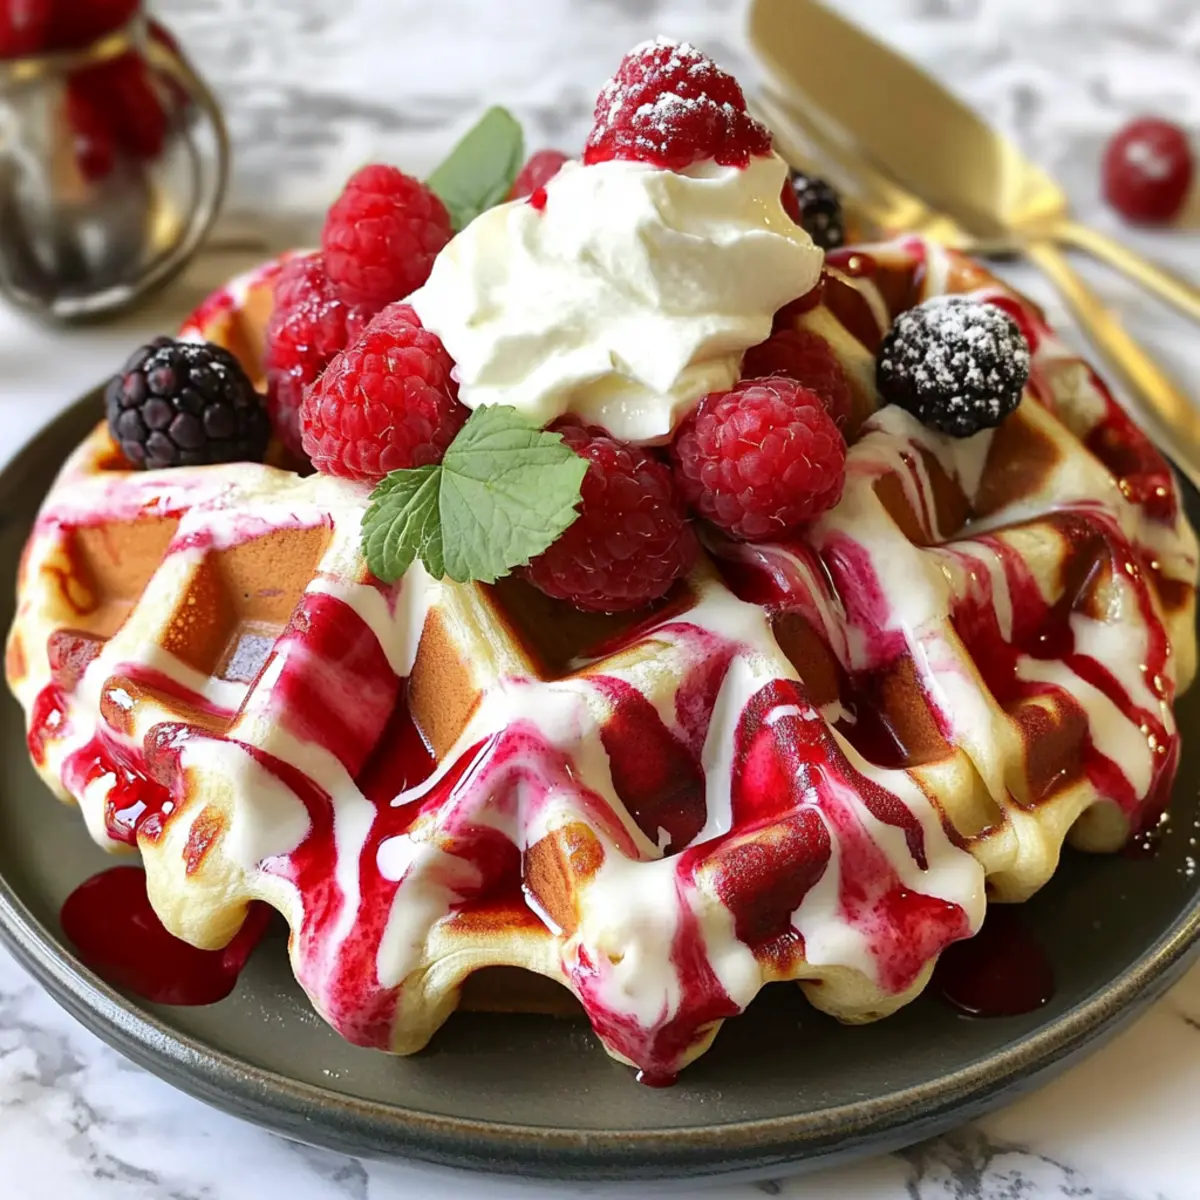
Once your waffles are cooked, carefully remove them from the waffle iron and let them cool slightly on a wire rack. Serve warm, topped with a dollop of whipped cream, fresh berries, or a drizzle of maple syrup. The vibrant colors and fluffy texture will make your breakfast table come alive, inviting everyone to dig in!
Variations & Substitutions for Red Velvet Marble Waffles
Feel free to let your creativity shine as you play with flavors and ingredients in this delightful waffle recipe!
-
Chocolate Swap: Replace red velvet batter with chocolate batter for a decadent twist that chocolate lovers will adore. The rich chocolate flavor creates an indulgent breakfast treat!
-
Vegan Version: Use non-dairy milk and butter, plus replace eggs with flax eggs (1 tablespoon flaxseed meal + 2.5 tablespoons water). This ensures everyone can enjoy the fluffiness!
-
Add Nuts: Fold in chopped walnuts or pecans to the batter for a delightful crunch and a hint of nuttiness. The blend of textures will elevate your waffles to another level!
-
Fruit Infusion: Mix in some fresh or freeze-dried berries into the batter for an added burst of fruity flavor. It pairs beautifully with the rich cocoa notes.
-
Coconut Touch: Incorporate shredded coconut into the classic batter for a tropical twist. It adds a subtle sweetness and chewy texture that complements the overall fluffiness.
-
Spice It Up: Enhance the flavor profile by adding a pinch of cinnamon or nutmeg to the batter. A warm spice complements the sweet elements perfectly!
-
Maple Syrup Variation: Swap regular sugar for pure maple sugar for a unique earthy sweetness. This substitution adds a cozy, warm flavor that pairs well with syrupy toppings.
For further inspiration, check out how adding elements like nuts can enhance your breakfast feel with our Best Parmesan Roasted Red Pepper Chicken recipe, or try different dessert techniques seen in our Velvet Strawberry Cheesecake for a unique take on presentation!
Expert Tips for Red Velvet Marble Waffles
-
Don’t Overmix: Gently combine the batters to keep your Red Velvet Marble Waffles light and airy. Overmixing can lead to dense waffles.
-
Preheat Correctly: Make sure your waffle iron is thoroughly preheated before adding the batter. This ensures crispy exteriors and perfectly cooked interiors.
-
Swirl Wisely: When creating the marble effect, use a gentle hand with your toothpick. Over-swirling can blend the colors too much, losing that beautiful marbled look.
-
Check Freshness: Always use fresh baking powder and baking soda. They are crucial for achieving maximum fluffiness in your waffles.
-
Temperature Matters: Use room temperature eggs and buttermilk for better blending and a smoother batter, enhancing the final texture.
Make Ahead Options
These Red Velvet Marble Waffles are perfect for meal prep, allowing you to enjoy a delightful breakfast with minimal morning hassle. You can mix both batters (classic and red velvet) and refrigerate them in separate airtight containers for up to 24 hours; this helps maintain their fluffy texture. When ready to cook, simply preheat your waffle iron, pour the batters, and swirl them as instructed. For longer storage, you can freeze the fully cooked waffles; they stay fresh for up to 3 months. Just pop them in the toaster or a warm oven before serving to regain that perfect crispness. This way, you’re always just a quick reheat away from a delicious breakfast!
What to Serve with Red Velvet Marble Waffles
Bright mornings call for delightful pairings that enhance your brunch experience and tickle your taste buds.
-
Whipped Cream: A dollop adds creamy sweetness, complementing the lightness of the waffles while bringing a festive touch to your breakfast table.
-
Fresh Berries: Juicy strawberries, raspberries, or blueberries provide a fresh contrast to the rich flavors, adding a pop of freshness and vibrant color.
-
Maple Syrup: Drizzling warm maple syrup over your waffles creates a delightful sweetness that enhances their flavor without overpowering.
-
Chocolate Chips: For extra indulgence, sprinkle semi-sweet or dark chocolate chips on the hot waffles. The melty textures add decadence and sweetness.
-
Coconut Flakes: Toasted coconut incorporates a crunchy texture and a tropical twist, elevating the ordinary breakfast into a dreamy treat.
-
Hot Coffee: A fragrant cup of coffee, with its warmth and rich aroma, pairs perfectly to complement the sweetness and enhance your morning ritual.
-
Mimosa: For a celebratory touch, consider serving a refreshing mimosa. The citrusy sparkle cuts through the richness, making every bite feel like a special occasion.
Storage Tips for Red Velvet Marble Waffles
Fridge: Store leftover Red Velvet Marble Waffles in an airtight container for up to 2 days to maintain freshness and moisture.
Freezer: For longer storage, freeze waffles individually on a baking sheet before placing in a freezer-safe bag. They can be stored for up to 2 months.
Reheating: To reheat, pop the waffles in a toaster or oven until warm and crisp. Avoid microwaving, as it can make them soggy.
Serving Ideas: Enjoy your reheated waffles with a drizzle of maple syrup, fresh fruit, or a dollop of whipped cream to bring back their irresistible charm!
Red Velvet Marble Waffles Recipe FAQs
How do I choose ripe ingredients for this recipe?
Absolutely! For the best results, ensure your buttermilk is fresh and slightly tangy, which guarantees a delicious flavor profile. Also, use room-temperature eggs; this helps in achieving a beautifully mixed batter that combines evenly for fluffy waffles.
What is the best way to store leftover Red Velvet Marble Waffles?
After enjoying your delightful waffles, you can refrigerate them in an airtight container for up to 2 days. This keeps them nice and fresh. Make sure to allow the waffles to cool completely before sealing them to avoid excess moisture, which might make them soggy.
Can I freeze my waffles, and if so, how?
Yes, you can absolutely freeze your Red Velvet Marble Waffles! After cooking, allow them to cool completely, then lay them in a single layer on a baking sheet, ensuring they don’t touch each other. Freeze them for about 1-2 hours until solid, then transfer the waffles into a freezer-safe bag. They can be kept for up to 2 months. When you’re ready to enjoy, pop them in the toaster or oven until warmed through and enjoy!
What should I do if my waffles are coming out dense?
Very! If you’re finding your waffles are dense, there may be a couple of culprits. First, ensure you are not overmixing your batters—light mixing is key for fluffiness! Also, check if your baking powder and baking soda are fresh; if they’re expired, they won’t help your waffles rise properly.
Are there any dietary restrictions I should keep in mind?
Absolutely! For those with allergies, this recipe contains gluten, dairy, and eggs. If you want to make it gluten-free, feel free to substitute all-purpose flour with a 1:1 gluten-free baking blend. For a dairy-free option, you can replace the buttermilk with a non-dairy milk mixed with a teaspoon of vinegar. Furthermore, flax eggs can replace the regular eggs for a vegan version. Enjoy experimenting with your unique dietary needs!
Decadent Red Velvet Marble Waffles for a Fluffy Breakfast Treat
Ingredients
Equipment
Method
- In a mixing bowl, whisk together 1 ¾ cups of all-purpose flour, 2 tablespoons of sugar, 1 tablespoon of baking powder, ½ teaspoon of baking soda, and ½ teaspoon of salt.
- In a separate bowl, blend 1 ¾ cups of buttermilk, 2 large eggs, ½ cup of melted butter, and 1 teaspoon of vanilla extract.
- Gradually pour the wet mixture into the dry ingredients, stirring gently until just combined.
- In another bowl, combine 1 ½ cups of all-purpose flour, 1 tablespoon of cocoa powder, 2 tablespoons of sugar, 1 tablespoon of baking powder, ½ teaspoon of baking soda, and ½ teaspoon of salt.
- In a different container, mix 1 ¾ cups of buttermilk, 1 large egg, ½ cup of melted butter, 1 teaspoon of vanilla extract, and 1 tablespoon of red food coloring until smooth.
- Preheat your waffle iron according to the manufacturer's instructions.
- Pour about ½ cup of the classic batter onto the center of the waffle iron, then add the same amount of the red velvet batter.
- Swirl the two batters together with a toothpick or skewer.
- Close the waffle iron and cook until golden brown and crisp, about 5 to 7 minutes.
- Carefully remove the waffles and let them cool slightly on a wire rack.
- Serve warm topped with whipped cream, fresh berries, or maple syrup.
Leave a Reply