
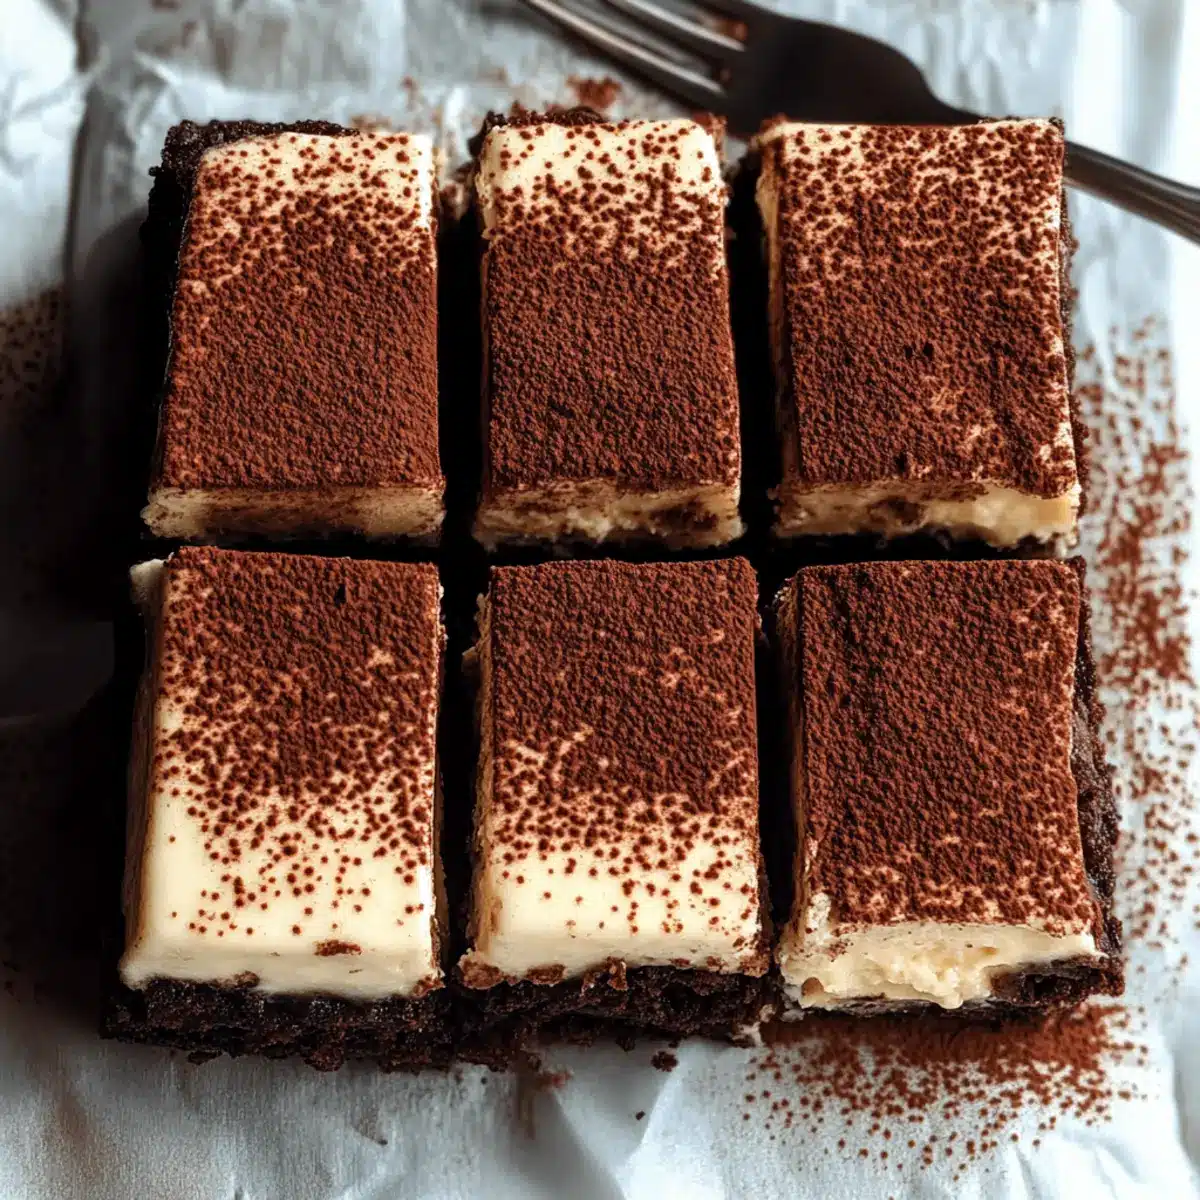
Have you ever found yourself yearning for a dessert that strikes the perfect balance between chocolatey indulgence and coffee-inspired elegance? Enter Gluten Free Tiramisu Brownies—where the rich, fudgy goodness of a classic brownie meets the sophisticated flavors of tiramisu. Not only are these brownies entirely gluten-free, but they also offer the ultimate comfort food experience with a delightful twist, perfect for impressing guests or indulging yourself. With a quick prep time and minimal clean-up, you’ll have these decadent treats ready to satisfy any sweet tooth in no time. Ready to elevate your dessert game with this surprisingly simple recipe? Let’s dive in!
Why Are These Brownies So Special?
Uniqueness: These Gluten Free Tiramisu Brownies blend two classic desserts into one deliciously decadent treat that’s sure to wow your friends and family.
Ease: With straightforward steps and minimal cleanup, you’ll enjoy more time savoring these brownies and less time in the kitchen!
Rich Flavor: The infusion of espresso and creamy mascarpone adds depth to the rich chocolate base, creating a symphony of flavors that’s simply irresistible.
Crowd-Pleaser: Perfect for gatherings or a cozy night in, these brownies are guaranteed to impress every chocoholic and coffee lover alike.
Versatility: Feel free to customize with toppings like crushed nuts or chocolate chips for an added twist! For more delicious ideas, try our Chocolate Chip Cookie Bars or whip up a quick batch of Homemade Ice Cream to serve alongside.
Gluten Free Tiramisu Brownies Ingredients
• For the Brownies
- Gluten Free Flour – Provides the structure of the brownies; substitute with almond flour or oat flour for different textures.
- Butter – Adds richness; coconut oil can be used as a dairy-free alternative.
- Cocoa Powder – Enhances the chocolate flavor; use high-quality unsweetened cocoa for best results.
- Granulated Sugar – Sweetens the brownie base; can be replaced with brown sugar for a deeper flavor.
- Eggs – Acts as a binder and contributes to moisture; no direct substitutes recommended for the best texture.
- Espresso Powder – Provides depth and richness; instant coffee or strong brewed coffee can be used instead.
• For the Tiramisu Layer
- Mascarpone Cheese – Creates a creamy, luxurious topping; cream cheese can be used as a substitute, though flavor may vary.
- Whipping Cream – Lightens the tiramisu layer; use full-fat for the best texture.
- Vanilla Extract – Adds flavor; pure vanilla is recommended for optimal results.
• For Dusting
- Cocoa Powder – Finishes off the dish with a classic touch of bitterness and a nod to traditional tiramisu.
These Gluten Free Tiramisu Brownies will not only satisfy your sweet tooth but also bring a delightful twist to your dessert table!
Step‑by‑Step Instructions for Gluten Free Tiramisu Brownies
Step 1: Prepare the Brownie Base
In a large mixing bowl, combine gluten-free flour, cocoa powder, granulated sugar, and espresso powder. Stir well to evenly distribute the dry ingredients. Then, add melted butter and eggs into the dry mixture, and whisk together until the batter is smooth and glossy, approximately 3-4 minutes. This rich chocolate brownie base is the foundation for your Gluten Free Tiramisu Brownies.
Step 2: Bake the Brownies
Preheat your oven to 350°F (175°C). Grease a 9×9-inch baking pan with butter or cooking spray, then pour the batter into the pan, spreading it evenly. Bake for 25 minutes, or until a toothpick inserted in the center comes out with a few moist crumbs. Allow them to cool in the pan for at least 10 minutes before transferring to a wire rack to cool completely.
Step 3: Make the Tiramisu Layer
While the brownies are cooling, prepare the tiramisu layer. In a medium bowl, combine mascarpone cheese, whipping cream, sugar, and vanilla extract. Using an electric mixer, whip the mixture on medium speed until it becomes smooth and creamy, about 3-5 minutes. This luxurious layer will elevate your Gluten Free Tiramisu Brownies to a new level of indulgence.
Step 4: Assemble the Dessert
Once the brownies have completely cooled, gently spread the mascarpone mixture evenly over the top of the brownie base using a spatula. Be sure to cover the brownies completely, creating a seamless layer of creamy goodness. This will give your Gluten Free Tiramisu Brownies that signature tiramisu touch that everyone will adore.
Step 5: Chill
Cover the assembled brownies with plastic wrap and refrigerate for at least 2 hours. This chilling step allows the flavors to meld and the layers to set, ensuring a beautiful presentation when you’re ready to serve. The anticipation will make the eventual indulgence even sweeter!
Step 6: Serve
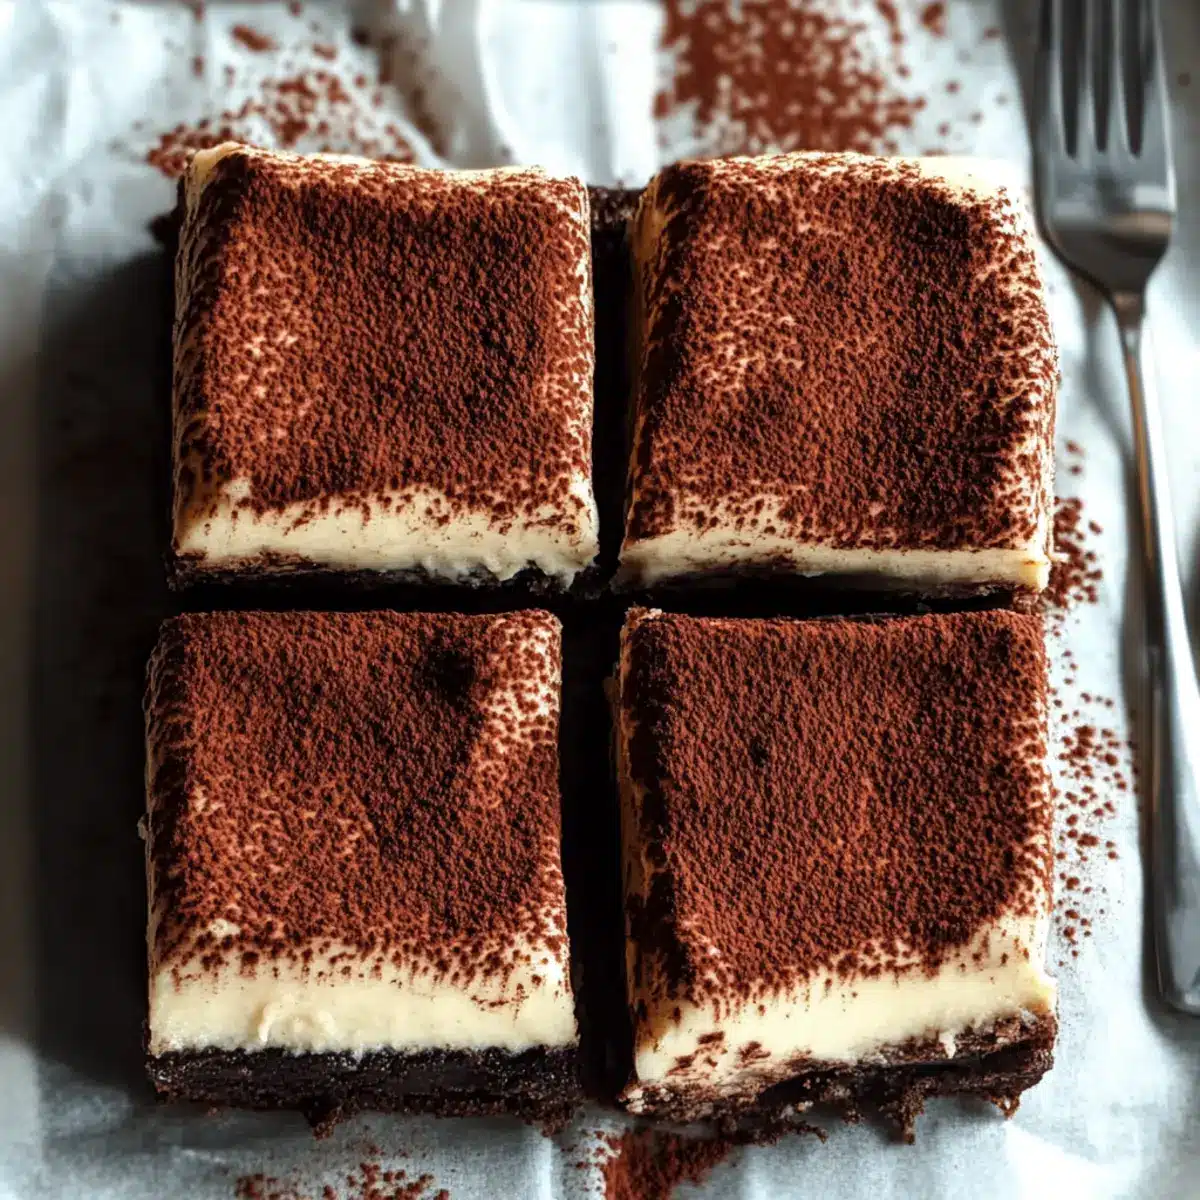
Before serving your delicious Gluten Free Tiramisu Brownies, dust the top generously with cocoa powder using a fine sieve for a classic finish. Slice the brownies into squares with a hot knife for clean edges. Enjoy them chilled alongside a cup of coffee or a scoop of vanilla ice cream for an extra-special treat!
What to Serve with Gluten Free Tiramisu Brownies?
Treat your taste buds to an unforgettable experience by pairing these indulgent brownies with delightful accompaniments that enhance their rich flavors.
-
Fresh Berries: The bright acidity of strawberries or raspberries cuts through the richness, adding a refreshing burst of flavor with each bite. Perfect for enhancing the overall dessert experience!
-
Vanilla Ice Cream: A scoop of creamy vanilla ice cream provides a delightful temperature contrast while melting into the warm brownie for a dreamy, decadent treat.
-
Espresso or Coffee: Elevate your dessert moment with a steaming cup of espresso or a delicious latte. The coffee notes will beautifully complement the tiramisu layer and enhance the chocolate flavor.
-
Whipped Cream: Light and airy whipped cream adds a fluffy texture that tempers the density of the brownies, creating a heavenly mouthfeel that pairs well with the tiramisu topping.
-
Chocolate Sauce: A drizzle of rich chocolate sauce on top adds an extra layer of indulgence. The lusciousness will intensify the brownie experience, inviting every chocoholic to savor each bite.
-
Mint Leaves: A garnish of fresh mint provides a lovely pop of color and contrasting flavor. Its refreshing taste brightens up the overall sweetness, making each bite feel balanced and vibrant.
-
Hazelnut Praline: The crunchy texture of hazelnut praline gives an unexpected twist, introducing a delightful crunch that beautifully contrasts the soft brownie and creamy tiramisu layers.
-
Chilled Sweet Wine: A glass of Moscato or Port offers a sweet, fruity balance to the dessert, enhancing the rich flavors while providing a sophisticated touch to your meal.
These pairings promise to elevate your Gluten Free Tiramisu Brownies from a simple dessert to an extraordinary culinary experience, perfect for sharing with loved ones or simply enjoying on your own.
Gluten Free Tiramisu Brownies Variations
Feel free to put your own spin on these delightful brownies, adding your favorite flavors and textures!
-
Dairy-Free: Substitute mascarpone and whipping cream with coconut cream for a vegan-friendly version without sacrificing creaminess.
-
Nutty Addition: Fold in a cup of chopped walnuts or almonds to the brownie batter for a crunchy surprise in each bite. This added texture pairs wonderfully with the soft tiramisu layer.
-
Rich Chocolate: Mix in mini chocolate chips or chunks right into the brownie batter for an extra chocolate explosion. Each mouthful will be decadently delicious!
-
Coffee Lovers: For a bolder coffee hit, consider adding a shot of espresso directly to the mascarpone layer. This will amplify the coffee flavor and make your brownies irresistible.
-
Sugar Alternatives: For a healthier twist, swap granulated sugar with coconut sugar or a sugar substitute like erythritol to lower the glycemic index while still satisfying your sweet tooth.
-
Flavor Infusion: Add a splash of Irish cream or amaretto into the whipping cream for a delightful added flavor that complements the tiramisu experience beautifully.
-
Spiced Delight: Sprinkle in a dash of cinnamon or nutmeg into the brownie mix for warming spices that add a comforting warmth to the dessert.
-
Decadent Toppings: Top with a drizzle of chocolate ganache to elevate the presentation and flavor of your Gluten Free Tiramisu Brownies. A touch of dark chocolate will create an elegant finish.
No matter how you decide to tweak these brownies, they’re sure to bring joy and satisfaction to your dessert table. And if you’re hungry for more variations, be sure to check out our delightful Chocolate Chip Cookie Bars or treat yourself to the creaminess of Homemade Ice Cream that pairs perfectly with these brownies!
How to Store and Freeze Gluten Free Tiramisu Brownies
Fridge: Store the brownies in an airtight container in the refrigerator for up to 4 days to maintain their freshness and flavor.
Freezer: For longer storage, freeze individual slices wrapped tightly in plastic wrap and placed in a freezer-safe bag. They can be kept for up to 2 months.
Thawing: When ready to enjoy, thaw the frozen slices in the refrigerator overnight. This allows the Gluten Free Tiramisu Brownies to retain their creamy texture and rich flavors.
Reheating: If you prefer them slightly warm, reheat in the microwave for about 15-20 seconds—just enough to take the chill off!
Make Ahead Options
These Gluten Free Tiramisu Brownies are perfect for meal prep, making them an excellent choice for busy weeknights or entertaining! You can prepare the brownie base up to 24 hours in advance; simply bake and allow them to cool completely. The tiramisu layer can be whipped together and spread on top up to 2 days in advance, then cover tightly with plastic wrap to keep it fresh and prevent drying out. When ready to serve, just dust with cocoa powder, slice, and enjoy! This way, you’ll have a stunning dessert ready to impress without the last-minute rush, and they taste just as delicious after sitting in the fridge!
Expert Tips for Gluten Free Tiramisu Brownies
-
Cool Completely: Allow the brownies to cool completely before adding the tiramisu layer. This prevents melting and ensures a clean, beautiful presentation.
-
Smooth Tiramisu Layer: When whipping the mascarpone, make sure it’s fully smooth to avoid any lumps. A smooth layer elevates your Gluten Free Tiramisu Brownies.
-
Hot Knife Slicing: Use a hot knife to slice the brownies, wiping the blade between cuts. This keeps the edges neat and enhances presentation.
-
Make Ahead: Consider making these brownies a day ahead. They become even more flavorful as they set overnight in the fridge.
-
Experiment with Flavors: Don’t hesitate to customize! Adding mini chocolate chips or nuts to the brownie base can add extra texture and flavor to your Gluten Free Tiramisu Brownies.

Gluten Free Tiramisu Brownies Recipe FAQs
How can I tell if my espresso powder is fresh?
Espresso powder should have a robust coffee aroma and a dark, rich color. If it has lost its scent or appears clumpy, it’s time to replace it! Fresh espresso powder enhances the flavor of your brownies, making a noticeable difference.
What’s the best way to store leftover brownies?
To keep your Gluten Free Tiramisu Brownies fresh, store them in an airtight container in the refrigerator. They can last up to 4 days. If you find yourself with leftover brownies, I recommend placing parchment paper between layers to prevent sticking.
Can I freeze these brownies?
Absolutely! For freezing, wrap individual slices of the brownies tightly in plastic wrap and place them in a freezer-safe bag. They can safely be frozen for up to 2 months. When you’re ready to enjoy them, just thaw overnight in the refrigerator!
What should I do if my brownies turn out too dry?
If your brownies come out dry, it could be due to overbaking. Make sure to check for doneness at 25 minutes; they should have a few moist crumbs on the toothpick. If they do come out dry, serve them with a scoop of ice cream or drizzle with chocolate sauce for added moisture.
Is there a dairy-free option for the mascarpone?
Yes! While traditional tiramisu uses mascarpone cheese, you can substitute it with a vegan cream cheese or a rich coconut cream whipped until smooth. Just remember that this will alter the flavor slightly, but it will still be delicious!
What are some allergy considerations for this recipe?
This Gluten Free Tiramisu Brownies recipe contains eggs and dairy (butter and mascarpone cheese). For those with dairy allergies, consider using coconut oil in place of butter and a dairy-free cream cheese for the tiramisu layer. Always check for cross-contamination with gluten-free flour if that’s a concern!
Gluten Free Tiramisu Brownies for the Ultimate Dessert Delight
Ingredients
Equipment
Method
- In a large mixing bowl, combine gluten-free flour, cocoa powder, granulated sugar, and espresso powder. Stir well to evenly distribute the dry ingredients. Then, add melted butter and eggs into the dry mixture, and whisk together until the batter is smooth and glossy, approximately 3-4 minutes.
- Preheat your oven to 350°F (175°C). Grease a 9x9-inch baking pan with butter or cooking spray, then pour the batter into the pan, spreading it evenly. Bake for 25 minutes, or until a toothpick inserted in the center comes out with a few moist crumbs. Allow them to cool in the pan for at least 10 minutes before transferring to a wire rack to cool completely.
- While the brownies are cooling, prepare the tiramisu layer. In a medium bowl, combine mascarpone cheese, whipping cream, sugar, and vanilla extract. Using an electric mixer, whip the mixture on medium speed until it becomes smooth and creamy, about 3-5 minutes.
- Once the brownies have completely cooled, gently spread the mascarpone mixture evenly over the top of the brownie base using a spatula.
- Cover the assembled brownies with plastic wrap and refrigerate for at least 2 hours.
- Before serving your delicious Gluten Free Tiramisu Brownies, dust the top generously with cocoa powder using a fine sieve for a classic finish. Slice the brownies into squares with a hot knife for clean edges.
Leave a Reply