
The comforting aroma of freshly fried potatoes fills the air, reminiscent of bustling diners. But what if I told you that you could enjoy that casual pleasure at home anytime, hassle-free? Enter the world of canning French fries, where we turn the dinnertime favorite into a vibrant jarred delight. This recipe not only simplifies meal prep but also delivers a crispy snack packed with homemade goodness, ensuring you never have to settle for bland, frozen alternatives again. Imagine popping open a jar of golden fries ready for a quick fry-up or bake, transforming your weeknight dinners into moments of crispy joy. Curious about how to make this delicious refrigerator staple? Let’s dive into the art of pressure canning French fries!
Why Pressure Can It?
Crispy Convenience: These canned French fries mean you can have homemade crunch anytime without the fuss of daily prep.
Flavor Packed: Each fry preserves that amazing home-cooked flavor that you crave, ensuring each bite is just as delightful as a fresh portion.
Healthy Alternative: With less oil than store-bought frozen alternatives, you can indulge with the knowledge that you’re making a healthier snacking choice.
Endless Versatility: Use these fries as a side dish, a topping for your favorite poutine, or simply as a comforting snack! For more unique ideas, check out this French Onion Beef recipe for a mouthwatering pairing.
Time-Saving Magic: In just minutes, you can enjoy crispy French fries, making this method a total game-changer for busy weeknights!
Delight for Everyone: Whether it’s a cozy family dinner or a surprise guest, everyone loves the rich texture and golden color of these perfect fries!
Canning French Fries Ingredients
For the Fries
- Potatoes – Choose large baking russets for the best texture; peel and cut into uniform strips (½ to ¾ inch wide).
- Water – Soak the fry-shaped potatoes to remove excess starch, ensuring they crisp up perfectly during cooking.
- Salt – Add 1 tsp per quart jar or ½ tsp per pint jar to enhance flavor and maintain texture during canning.
For Packing
- Boiling Water – Fill jars with boiling water over the packed fries, ensuring they stay fully submerged while maintaining 1-inch headspace.
Step‑by‑Step Instructions for Canning French Fries
Step 1: Prepare the Potatoes
Start by peeling your large baking russet potatoes and cutting them into uniform fry-shaped strips, about ½ to ¾ inch wide. This consistency is crucial for even cooking and texture. Once cut, soak the fries in cold water to remove excess starch, allowing them to crisp beautifully during subsequent cooking.
Step 2: Soak the Potatoes
After cutting, place the potato strips in a large bowl, covering them with water. Change the water every 20 minutes for a total soaking time of at least one hour; for best results, soak overnight. This will ensure your fries stay crisp after pressure canning.
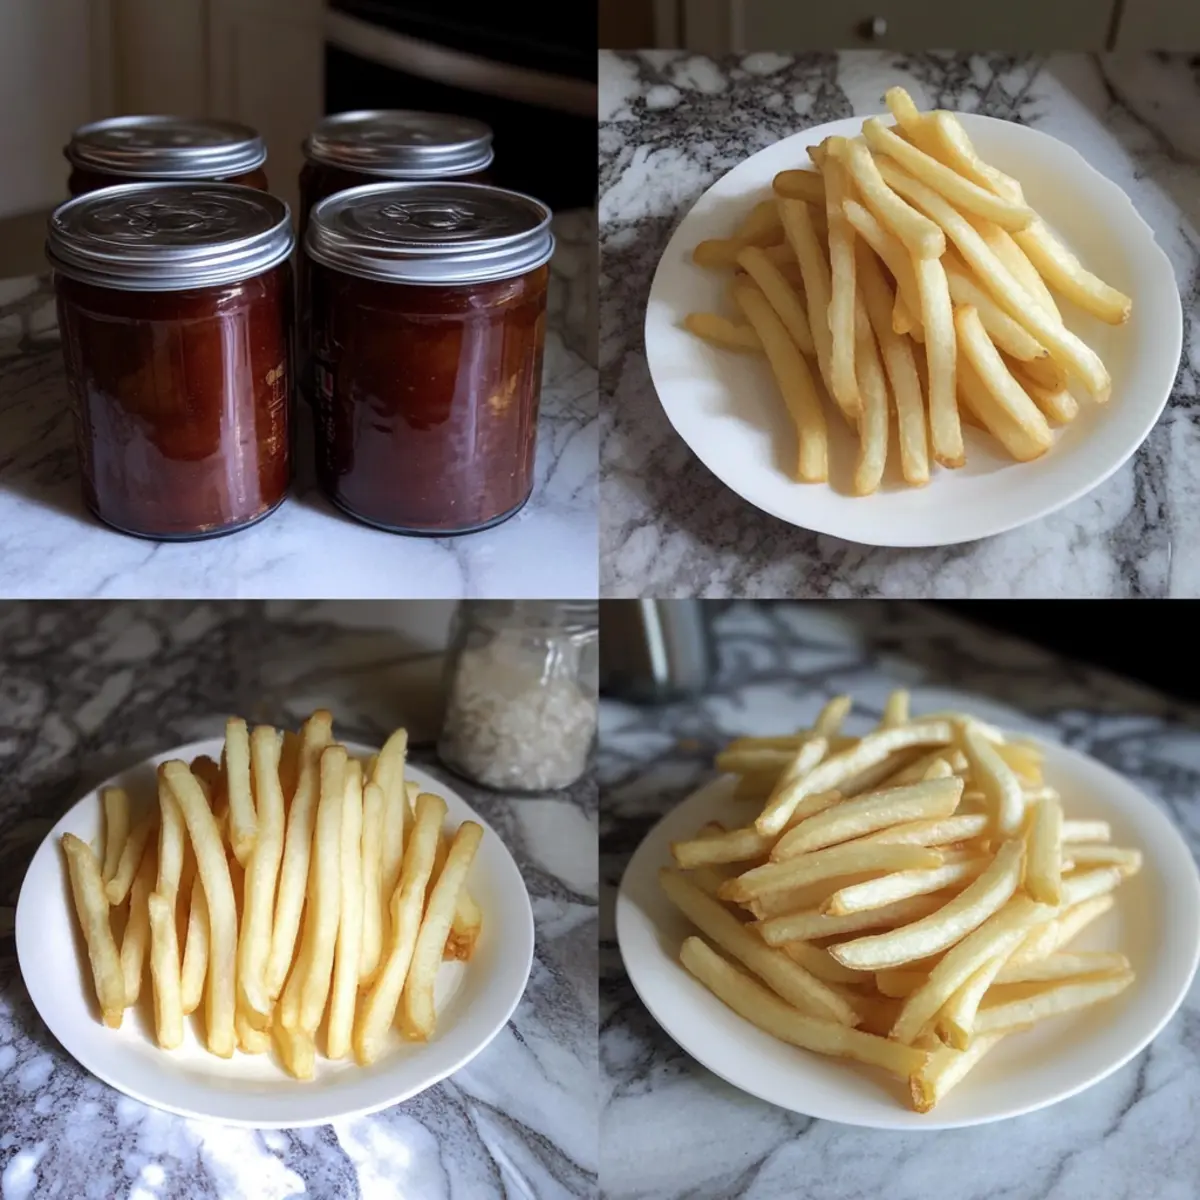
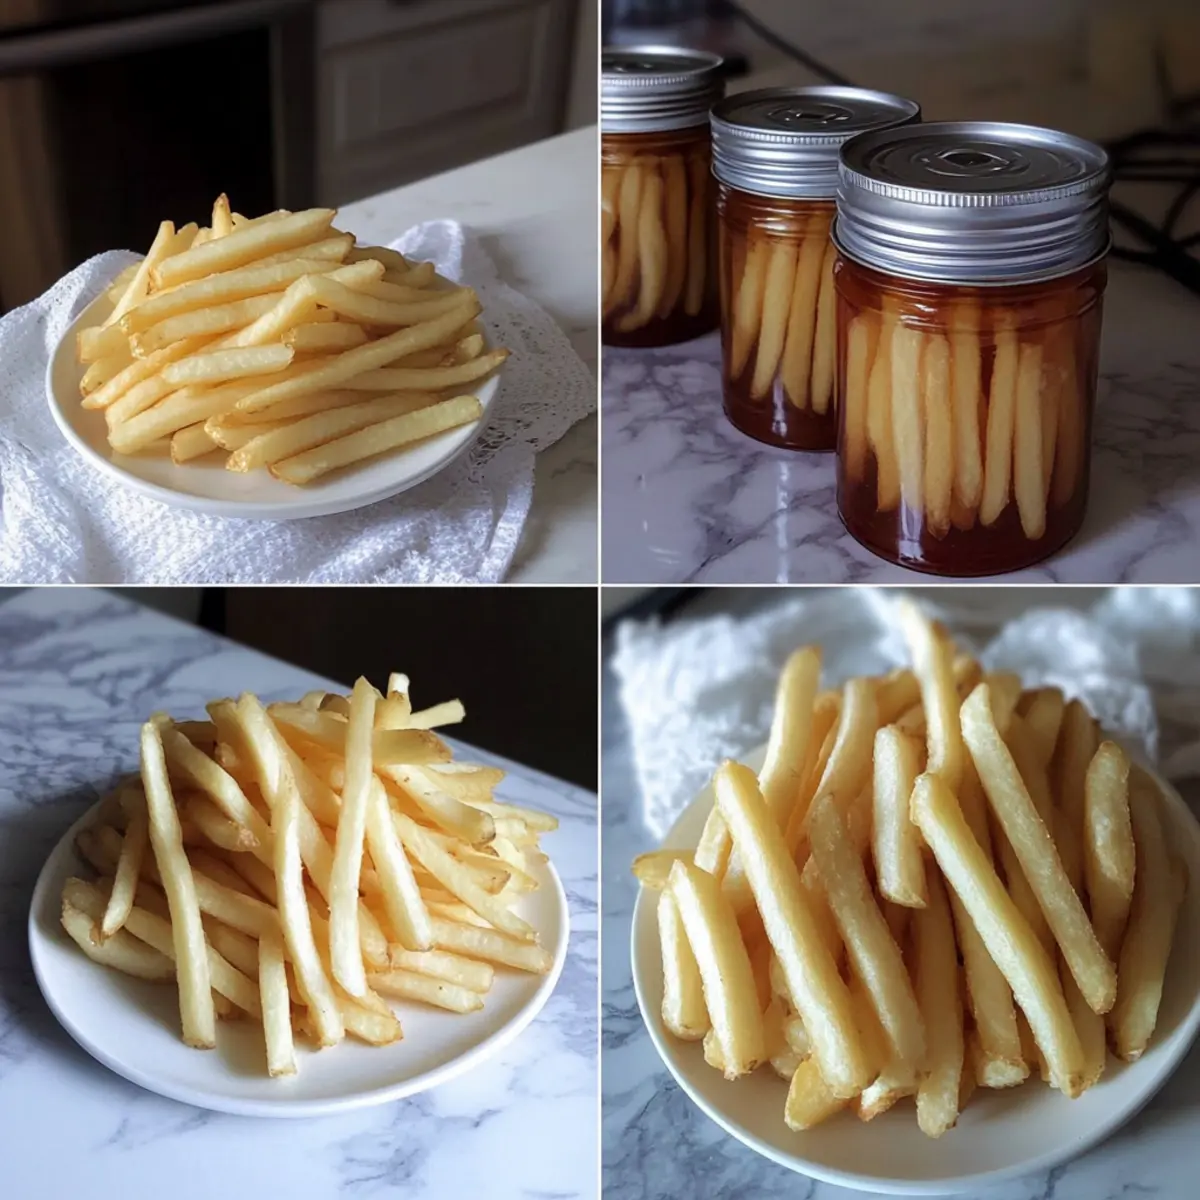
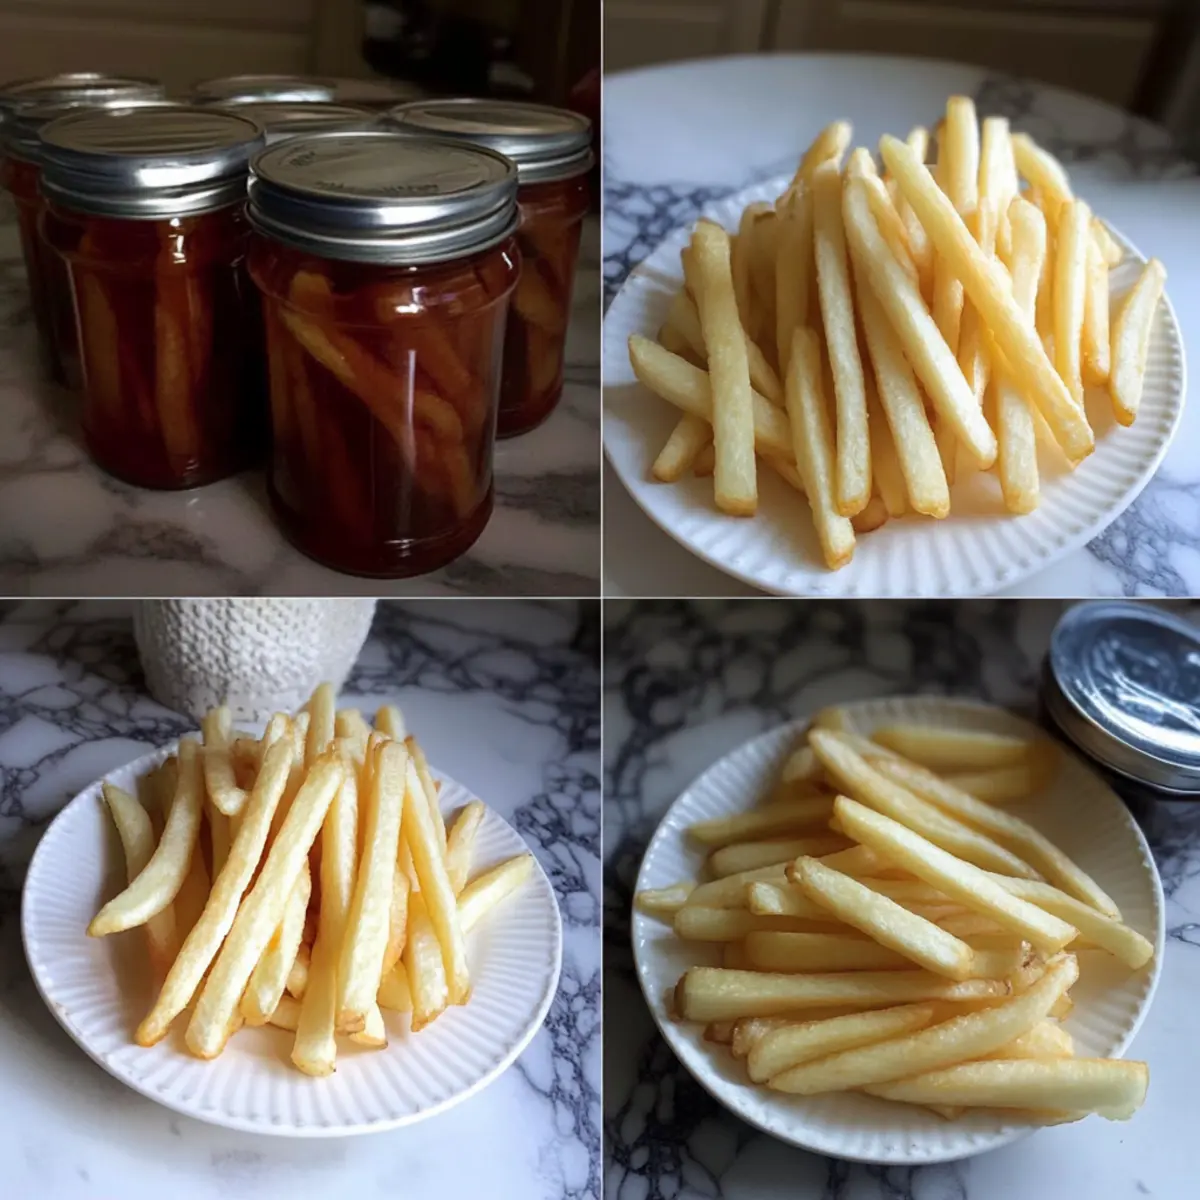
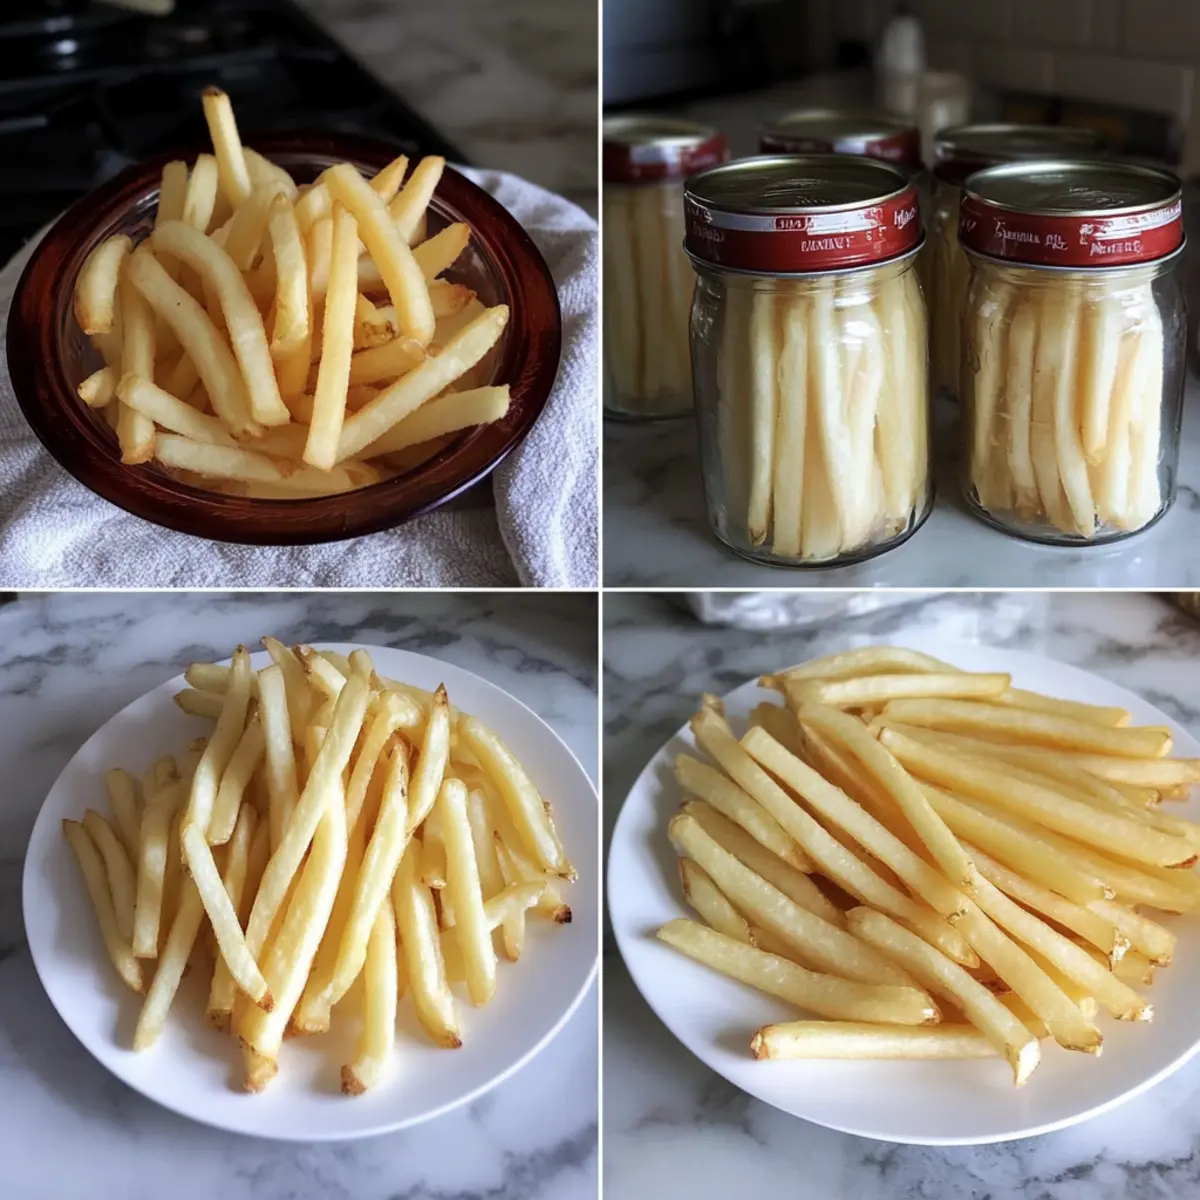
Step 3: Pack the Jars
Once soaked, drain and rinse the potatoes thoroughly. Using wide-mouth jars, start packing the fries tightly, leaving about 1-inch of headspace for expansion. For flavor enhancement, add 1 tsp of salt per quart jar or ½ tsp per pint jar.
Step 4: Add Boiling Water
Next, bring a kettle of water to a rolling boil. Once boiling, carefully pour it over the packed fries in the jars, ensuring they are fully submerged while still maintaining that crucial 1-inch headspace at the top. This step is vital for proper canning.
Step 5: Release Air Bubbles
Using a non-metal utensil or a bubble remover, gently press the fries to release any trapped air bubbles within the jars. Afterward, wipe the rims of each jar clean with a damp cloth to ensure a proper seal. Secure the jars with lids and rings, tightening just to fingertip snug.
Step 6: Process in Canner
Place the jars in your pressure canner and process according to your canner’s instructions. You will need to process at 10 pounds of pressure—35 minutes for pint jars and 40 minutes for quart jars—to achieve the ideal preservation for your canned French fries.
Step 7: Cool and Store
Once the time is up, let the pressure release naturally. Afterward, carefully remove the jars from the canner and place them on a towel-lined surface to cool completely. Check that the seals are tight before labeling your jars and storing them in a cool, dark place for future crispy snack enjoyment.
Make Ahead Options
Preparing these delightful canned French fries ahead of time is a smart choice for busy weeknights! You can soak and pack the fries in jars up to 24 hours in advance, ensuring they are chilled and ready to go. To maintain their crispy texture, soak the fries in water overnight (changing the water a few times) before packing them tightly into wide-mouth jars with the appropriate amount of salt. When you’re ready to enjoy your fries, simply add boiling water, seal the jars, and process in the pressure canner according to the instructions. This way, you’ll have perfectly preserved fries that taste just as delicious as freshly made, saving you time and effort during your meal preparations!
Canning French Fries Variations
Feel free to get creative and customize your canned French fries to suit your taste buds and pantry staples!
-
Sweet Potato Swap: Substitute regular potatoes with sweet potatoes for a pop of color and natural sweetness. Sweet potato fries will lend a unique flavor profile to your snacks.
-
Herb-Infused: Toss in some dried herbs like rosemary or thyme when packing the jars to elevate the flavor of your fries. These aromatic additions can turn your fries into a heavenly dish bursting with savory notes.
-
Spicy Kick: Mix in a teaspoon of cayenne pepper or smoked paprika for those who crave a little heat. This twist gives your fries a fiery flavor that’s sure to please heat seekers at your table.
-
Garlic Powder Boost: Add a sprinkle of garlic powder while packing the jars. The gentle garlic flavor will infuse your fries, creating a deliciously aromatic side that pairs perfectly with any main dish.
-
Vegan Fun: For a fully plant-based version, stick with vegetable broth instead of water when filling the jars. The broth will impart rich flavors and adhere beautifully to the fries once cooked.
-
Cheesy Fries: Crumble some nutritional yeast or sprinkle cheese powder in the jars for a cheesy twist! It’ll add an irresistible savory depth that cheese lovers will appreciate.
-
Smoky Flavor: Incorporate a touch of liquid smoke for indulgent smoky fries. This addition gives your snack a reminiscent flavor of outdoor grilling that will evoke cozy thoughts of summer barbecues.
-
Crispy Baked Cheese Fries Idea: Try adding your favorite cheese shreds on top of the fries before the final cooking step. It yields an extra crispy, cheesy layer that’s delightful. For inspiration on complementary dishes, try this French Onion Beef for a meal that pairs well with your crispy fries!
Explore these variations to make each jar of canned French fries truly your own, and enjoy the process of creating something special for your family!
Expert Tips for Canning French Fries
-
Soaking is Key: Don’t skip the soaking step! It helps remove excess starch, ensuring your fries remain crispy and delightful after canning.
-
Uniform Cuts Matter: Make sure your potato strips are of even size (½ to ¾ inch wide) for uniform cooking and texture in your canned French fries.
-
Use Wide-Mouth Jars: These jars make packing easier and allow for more straightforward unjarring later by providing better access to the fries.
-
Check Seals Properly: It’s crucial to confirm that all jars have sealed correctly after processing; any unsealed jars must be refrigerated and enjoyed within a few days.
-
Altitude Adjustments: If you live at a higher altitude, always remember to adjust the pressure according to your canner’s guidelines for safe canning.
Storage Tips for Canning French Fries
Room Temperature: Store unopened jars in a cool, dark place away from sunlight to maintain quality for up to 12 months.
Fridge: Once opened, refrigerate any unused fries and consume within 3 to 5 days for the best taste and texture.
Freezer: For long-term storage, freeze fries in an airtight container for up to 6 months; just remember to dry them well before freezing to retain crunch.
Reheating: To enjoy your canned French fries, heat in a hot oven or air fryer for a crispy finish, ensuring they regain their delightful crunch.
What to Serve with Perfectly Canned French Fries
Imagine your dinner table transformed into a cozy diner experience with these crispy, golden fries complementing a variety of delicious dishes.
-
Classic Cheeseburger: Juicy, melted cheese atop a grilled patty makes for an unbeatable pairing with fries—don’t forget the pickles!
-
Homemade Chicken Tenders: Golden, crunchy tenders paired with your fries create the ultimate comfort meal for family nights.
-
Zesty Coleslaw: This refreshing side adds a crisp, tangy balance to the rich flavors of fried potatoes, brightening every bite.
-
Savory Chili: Ladle up hearty chili onto your French fries for a comforting and filling meal that’s perfect for chilly evenings.
-
Garlic Aioli: Serve with a dish of this creamy dip for an elegant twist; the garlic flavor enhances the fries wonderfully.
-
Vibrant Green Salad: A simple mixed salad with fresh greens and a light vinaigrette provides a crunchy, nutritious contrast to the fries’ texture.
-
Herb-Infused Olive Oil: Drizzle this aromatic oil over your fries instead of traditional ketchup for a gourmet upgrade.
-
Icy Lemonade: Quench your thirst with a glass of zesty lemonade that perfectly complements the salty goodness of these canned treats.
-
Rich Brownies: For dessert, indulge in fudgy brownies; their sweetness contrasts beautifully with the savory fries, ending the meal on a delightful note.
Canning French Fries Recipe FAQs
What type of potatoes should I use for canning French fries?
Absolutely! For the best results, choose large baking russet potatoes, as they provide the ideal texture for canning and frying. Avoid waxy varieties, like Yukon Golds, which can caramelize and yield less desirable textures.
How do I store my canned French fries properly?
To keep your jars fresh, store them in a cool, dark place away from sunlight. Unopened jars maintain quality for up to 12 months. Once opened, refrigerate the fries and consume them within 3 to 5 days for the best taste and texture.
Can I freeze canned French fries?
Yes, you can! If you’d like to store your fries for even longer, freeze the fries in an airtight container or freezer bag. Make sure they are thoroughly dried before freezing to retain their crunch, and use them within 6 months for optimal quality.
What should I do if my canned fries don’t seal properly?
Very! If you find that any jars haven’t sealed after processing, don’t worry! Simply refrigerate those jars and consume the contents within a few days. Make sure to check the rim for any debris, and always ensure a proper seal by tightening the lids just to fingertip snug before processing.
Can canned French fries be a good option for my kids’ snacks?
Absolutely! These canned French fries are a healthier alternative to many store-bought options packed with preservatives. They can be easily reheated, allowing for quick snack solutions that satisfy even the pickiest of eaters!
Should I adjust processing times for higher altitudes?
Yes, very! If you’re canning at high altitudes, you’ll need to increase the pressure based on your canner’s instructions. Make sure to consult the guidelines as this adjustment is key to ensuring safe preservation and eliminating any potential food safety issues.
Canning French Fries: Crispy Crunch Anytime at Home
Ingredients
Equipment
Method
- Prepare the potatoes by peeling and cutting them into uniform fry-shaped strips, about ½ to ¾ inch wide. Soak in cold water to remove excess starch.
- Soak the potato strips in water for at least one hour, changing the water every 20 minutes; overnight soaking is best.
- Drain and rinse the potatoes, then pack them tightly in wide-mouth jars, leaving about 1-inch headspace. Add salt for flavor.
- Pour boiling water over the packed fries in the jars, ensuring they remain submerged with 1-inch headspace.
- Release air bubbles by pressing gently with a non-metal utensil; wipe jar rims clean and secure with lids.
- Process jars in the pressure canner at 10 pounds of pressure for 35 minutes for pint jars and 40 minutes for quart jars.
- Cool the jars after processing and check the seals before labeling and storing them in a cool place.
Leave a Reply