
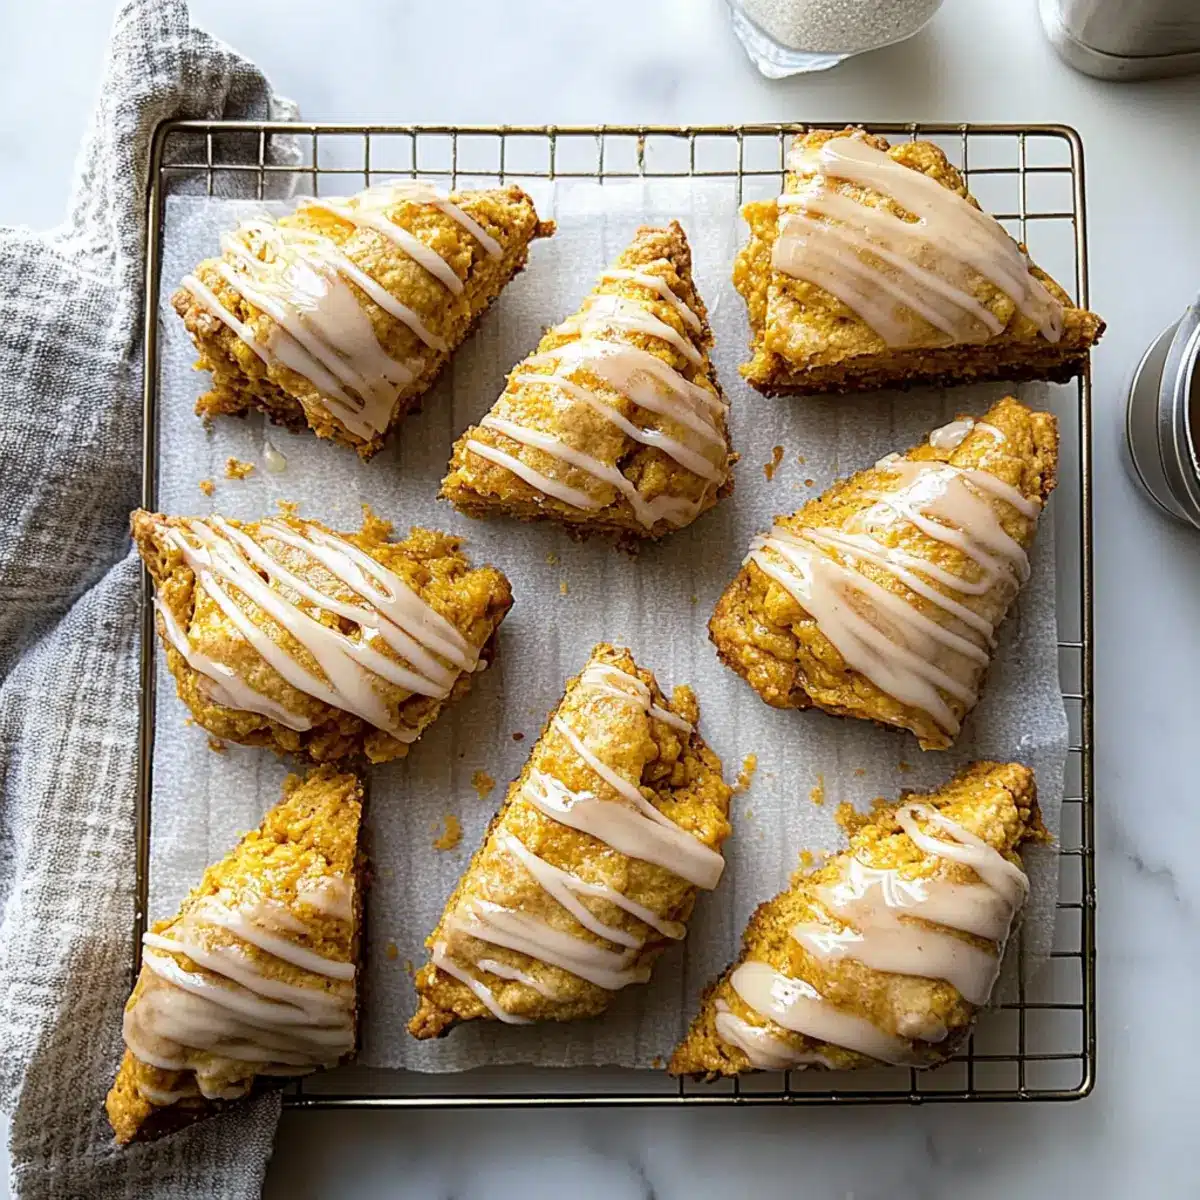
The warm scent of autumn spices fills my kitchen, transporting me to my favorite cozy café, where oversized mugs of pumpkin-flavored delights seem to promise comfort in every sip. Today, I’m bringing that same inviting vibe home with these Better Than Starbucks Pumpkin Scones—flaky, tall, and drizzled with a creamy maple glaze, they’re the perfect treat to celebrate the season. Not only are they a quick and satisfying option for breakfast or an afternoon snack, but they impress with a texture so tender you’ll forget they didn’t come from your local coffee shop. Simple to make, they elevate your fall baking game and ensure that your mornings can be delectably delicious. Are you ready to turn your home into a bakery?
What makes these scones so special?
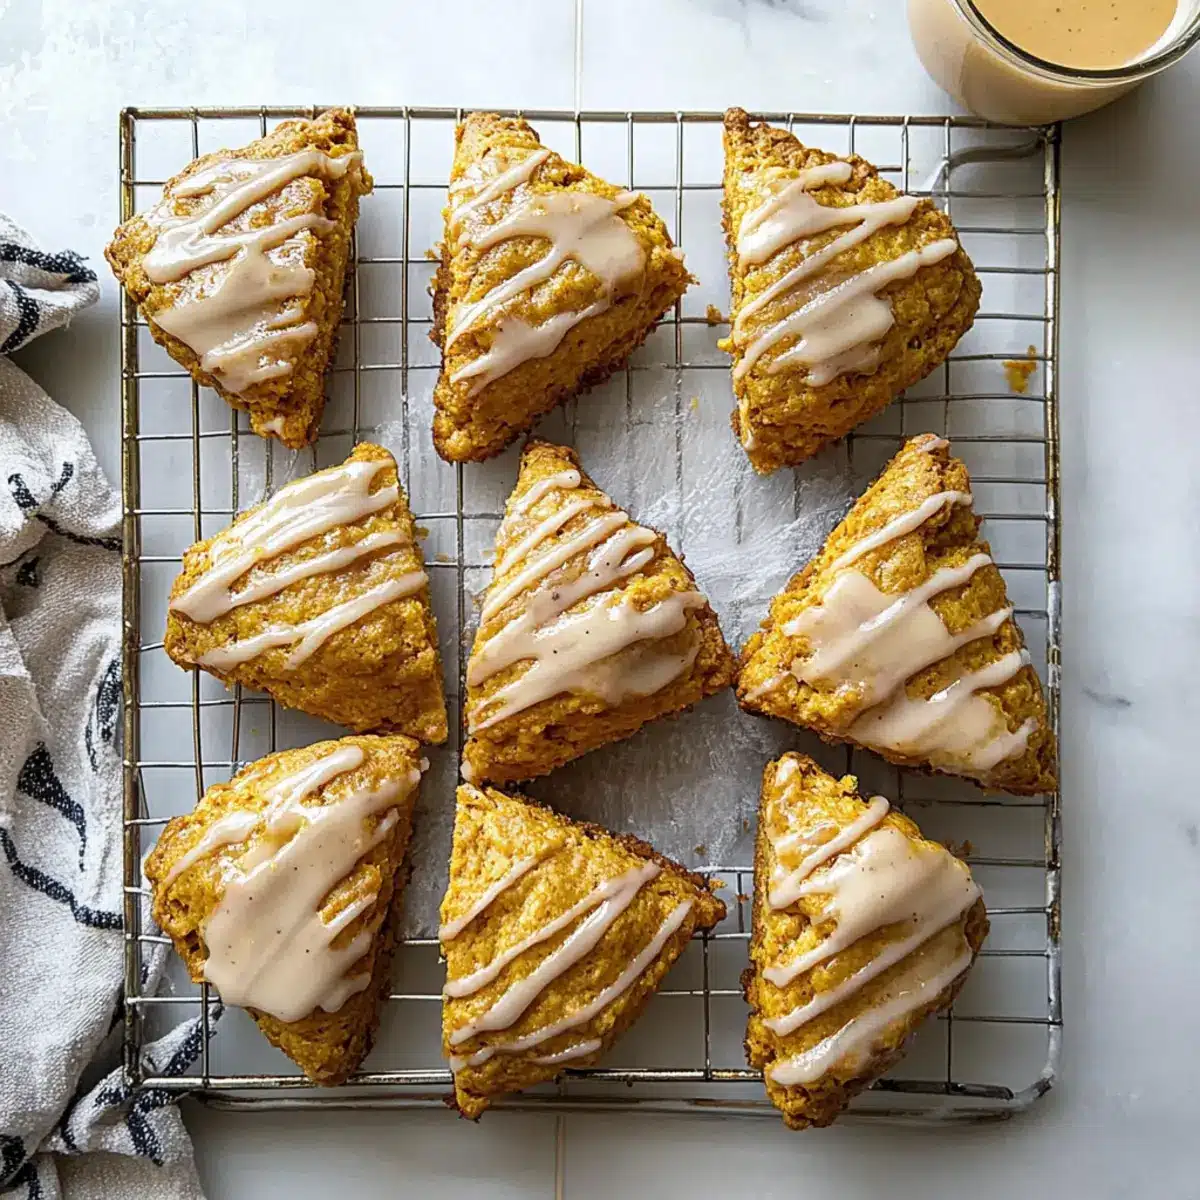
Flaky, These Better Than Starbucks Pumpkin Scones boast a tender and flaky texture that rivals your favorite café treat, making them a true indulgence. Effortless preparation means you can whip them up in no time, bringing homemade warmth to your mornings. Delightful flavors come from the rich pumpkin spice blend, harmonizing beautifully with a creamy maple glaze that adds a touch of sweetness. Versatile options let you customize with chocolate chips or nuts for a unique twist. Perfect with your morning coffee or as a delightful afternoon snack, these scones are a seasonal must-try that will have friends and family clamoring for the recipe!
Better Than Starbucks Pumpkin Scones Ingredients
• The secret to your delicious fall treats!
For the Scone Dough
- All-Purpose Flour – Provides the perfect structure for those flaky, tender scones.
- Baking Powder – Ensure it’s fresh for the best rise and texture in your scones.
- Cane Sugar – Adds sweetness; feel free to use regular granulated sugar if preferred.
- Brown Sugar – Enhances moisture and flavor depth; can substitute with more cane sugar if needed.
- Pumpkin Pie Spice – Infuses warm, cozy flavors; mix your own with cinnamon, nutmeg, and ginger if preferred.
- Cinnamon – Use freshly ground for a more robust and aromatic flavor boost.
- Salt – Elevates flavor; regular table salt works perfectly.
- Cold Butter – Maintains flakiness and richness; keep it cold for best results.
- Egg – Acts as a binding agent; consider a flax egg for a vegan option.
- Vanilla Extract – Enhances the overall flavor; included for depth but can be omitted.
- Milk & Heavy Cream – Adds moisture and tenderness; substitute with nondairy milk for a dairy-free version.
- Canned Pumpkin Purée – The star ingredient for moisture and flavor; fresh pumpkin is a great alternative if well-pureed.
For the Maple Glaze
- Powdered Sugar – Essential for a sweet drizzle; substitute regular sugar if blended finely.
- Maple Syrup – Brings in sweetness and a lovely flavor profile; honey can be used as an alternative but will change the glaze’s essence.
- Water – Use sparingly to adjust the glaze’s consistency as needed.
Indulge in these Better Than Starbucks Pumpkin Scones that boast flavor and texture beyond compare!
Step‑by‑Step Instructions for Better Than Starbucks Pumpkin Scones
Step 1: Preheat the Oven
Begin by preheating your oven to 375°F (190°C). This ensures that the oven is hot and ready for baking your scones. While the oven heats, gather your baking sheet and line it with parchment paper to prevent sticking and facilitate a clean transfer once your Better Than Starbucks Pumpkin Scones are ready.
Step 2: Mix the Dry Ingredients
In a large mixing bowl, sift together the all-purpose flour, baking powder, cane sugar, brown sugar, pumpkin pie spice, cinnamon, and salt. Whisk these dry ingredients thoroughly for about 1-2 minutes until they’re well combined and create a uniform mixture. This step is crucial for ensuring your scones have that perfect blend of flavors and texture.
Step 3: Incorporate the Butter
Cut the cold butter into small cubes and add it to the flour mixture. Using a pastry cutter or your fingertips, mix the butter into the dry ingredients until it resembles coarse crumbs, which should take about 3-5 minutes. The cold butter creates those delightful flaky layers that make these scones special, so don’t rush this step!
Step 4: Combine Wet Ingredients
In a separate bowl, whisk together the egg, vanilla extract, milk, heavy cream, and canned pumpkin purée until fully combined. Pour this wet mixture into your dry ingredients, and gently stir until just combined—about 30 seconds. Be careful not to overmix; a shaggy dough is perfectly fine, as it will yield tender Better Than Starbucks Pumpkin Scones.
Step 5: Form the Dough
Turn the dough out onto a lightly floured surface. With floured hands, gently knead and fold the dough about 4-5 times to create layers without overworking it. This procedure is crucial for achieving the scone’s flaky texture. The dough might look uneven, but that’s okay—it’ll turn out beautifully once baked!
Step 6: Shape and Cut the Scones
Pat the dough into a disk that is approximately 1 to 1.25 inches thick. Using a sharp floured knife, cut the disk into 8 equal triangles. This method helps ensure that the edges stay open, allowing your Better Than Starbucks Pumpkin Scones to rise beautifully in the oven.
Step 7: Bake the Scones
Place the scone triangles onto the prepared baking sheet, spacing them a bit apart. To add a golden touch, brush the tops with a little milk. Bake in the preheated oven for 20-25 minutes until they are firm, have risen nicely, and are golden brown on top. Your kitchen will soon be filled with a warm, inviting aroma!
Step 8: Cool and Glaze
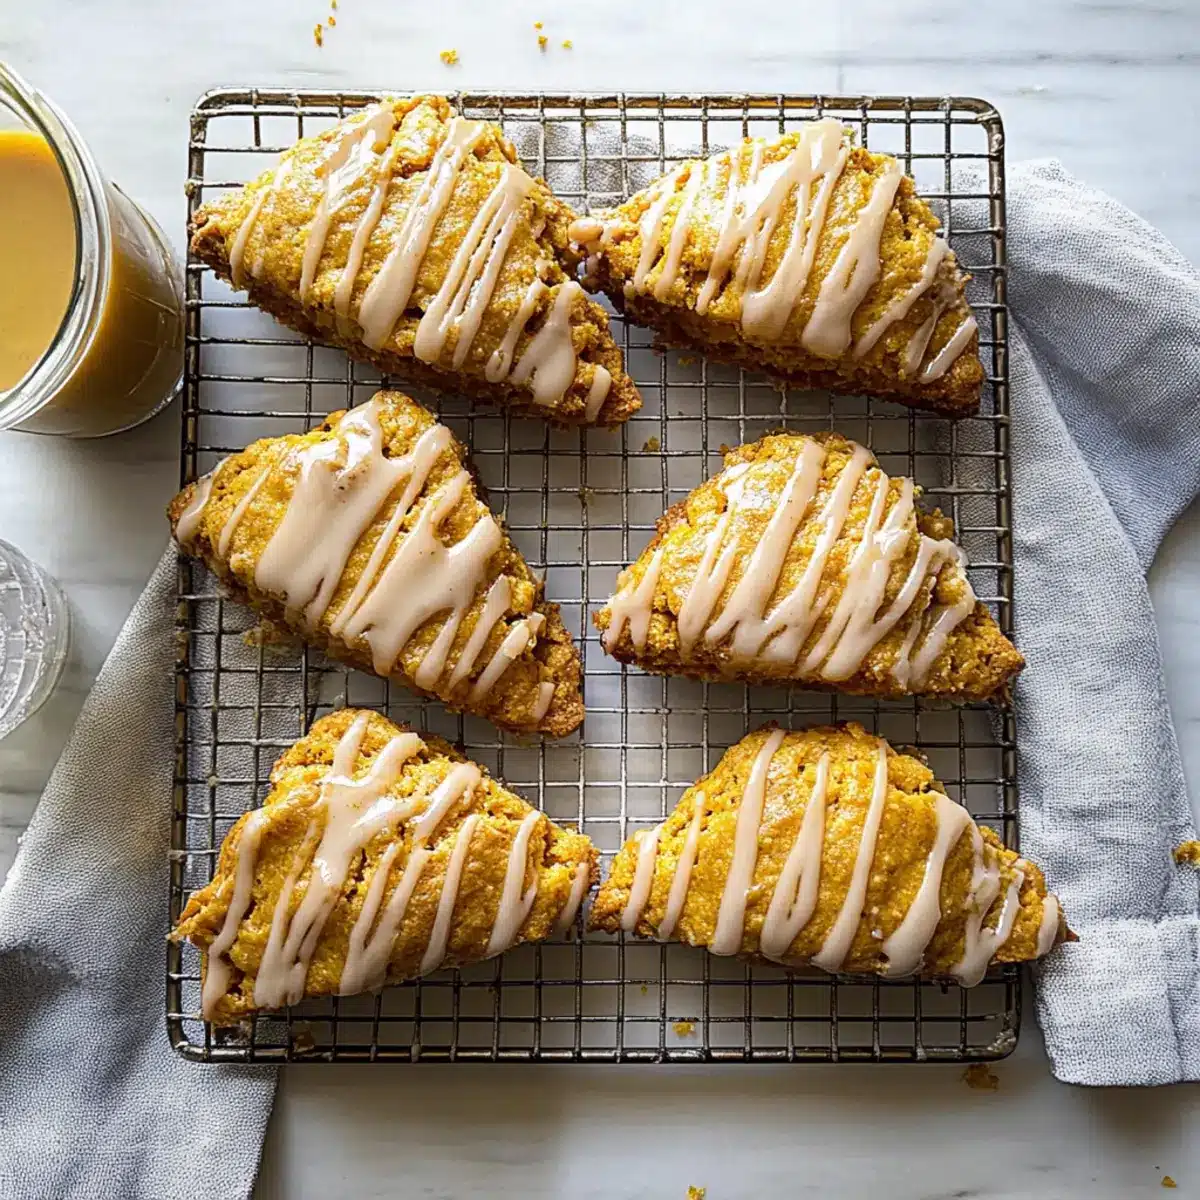
Once baked, remove the scones from the oven and let them cool completely on a wire rack. In the meantime, prepare your glaze by whisking together powdered sugar, maple syrup, and a splash of water until you reach your desired consistency. Drizzle this sweet glaze over the cooled scones, finishing them off with a decadent touch that perfectly complements the pumpkin flavor.

Better Than Starbucks Pumpkin Scones: Creative Twists
Embrace creativity in your kitchen by personalizing these scones to suit your taste and mood. The flavors and textures you can explore are virtually limitless!
-
Add Chocolate Chips: Stir in a handful of chocolate chips for a decadent touch; the combo of pumpkin spice and rich chocolate is simply irresistible.
-
Nutty Crunch: Incorporate chopped walnuts or pecans into the dough for an added crunch that complements the tender scone perfectly.
-
Sweet Potato Twist: Substitute pumpkin purée with sweet potato purée for a delightful, subtly different flavor that still captures the essence of fall.
-
Dried Fruit Delight: Toss in dried cranberries or raisins to bring a burst of sweetness and chewiness that pairs beautifully with the soft scones.
-
Spice It Up: For a fiery kick, add a pinch of cayenne or black pepper to your pumpkin pie spice, giving your scones an unexpected heat that intrigues the palate.
-
Maple Options: Swap maple syrup in the glaze for a fruity jam or honey; this small change offers a delightful variation that can brighten the scone experience.
-
Whipped Cream Topping: Serve warm scones with a dollop of whipped cream for that café-style feel; it transforms your breakfast into a delightful dessert!
-
For the Adventurous: Try a drizzle of hazelnut spread instead of a glaze for a luxurious treat that’s perfect for special occasions.
Incorporate these variations into your baking, and don’t forget to explore other fall flavors by pairing these scones with Homemade Pumpkin Milk or enjoy them alongside a slice of delicious Pumpkin Cake Cozy for a truly festive spread! The possibilities are endless!
How to Store and Freeze Better Than Starbucks Pumpkin Scones
Airtight Container: Store scones at room temperature for up to 3 days in an airtight container to keep them fresh and flaky.
Freezer: For longer storage, freeze scones before baking. Place them on a baking sheet, freeze until solid, then transfer to a freezer-safe bag for up to 3 months.
Reheating: Bake from frozen, adding a few extra minutes to the cooking time for perfectly fresh Better Than Starbucks Pumpkin Scones.
Thawing: To enjoy, you can thaw scones overnight in the fridge before reheating or simply bake them directly from the freezer.
Make Ahead Options
These Better Than Starbucks Pumpkin Scones are an excellent choice for meal prep enthusiasts looking to save time during busy mornings! You can prepare the scone dough up to 24 hours in advance and refrigerate it, tightly wrapped in plastic wrap, to maintain its freshness and flaky texture. Alternatively, shape the scones and place them on a baking sheet up to 3 days ahead. Cover and refrigerate before baking to prevent browning and ensure they rise beautifully. When you’re ready to bake, simply preheat your oven and bake directly from the fridge for about 5 extra minutes. Enjoy the delicious aroma of freshly baked scones with minimal fuss!
What to Serve with Better Than Starbucks Pumpkin Scones
These delightful pumpkin scones create a cozy autumn atmosphere, perfect for a heartwarming meal or afternoon treat.
- Rich Coffee: The bold flavor of freshly brewed coffee complements the sweet maple glaze beautifully, enhancing your pumpkin scones experience.
- Spiced Tea: A cup of warm chai or spiced herbal tea adds a comforting and fragrant element, echoing the scone’s warm spices.
- Creamy Yogurt: Serve with a dollop of Greek yogurt for a tangy contrast that balances the sweetness of the scone and adds creaminess.
- Fruit Salad: Bright, fresh fruit like apples and pears brings a crisp texture and refreshing taste, rounding out your pumpkin treat.
- Whipped Cream: A light and airy topping provides a touch of indulgence and pairs perfectly with the sweet maple glaze on the scones.
- Maple Pecan Muffins: For a delightful brunch spread, add these complementary muffins that echo the flavors found in your pumpkin scones.
- Savory Sausage Links: The hearty, savory flavor of sausage balances the sweet scones, creating a satisfying breakfast or brunch plate.
- Caramel Sauce: Drizzling a bit of caramel on the scones can give them an extra punch of sweetness, making them even more decadent and delightful.
- Hot Apple Cider: This warm and spiced drink captures the essence of fall, making it a perfect companion for your pumpkin scones.
Tips for the Best Pumpkin Scones
Chill the Ingredients: Keep your butter and cream cold before mixing to maintain a flaky texture in your Better Than Starbucks Pumpkin Scones.
Mix Gently: Avoid overmixing the dough; a shaggy consistency is ideal for tender scones. Overworking the dough can lead to a tough texture.
Measure Accurately: Use a kitchen scale for precise ingredient measurements, ensuring consistency in your scones every time.
Cut with Care: When cutting the scones, use a sharp knife and keep it floured. This prevents sealing the edges, allowing for maximum rise.
Bake Promptly: Once shaped, bake the scones immediately for optimal freshness and to prevent them from losing their rise.
Better Than Starbucks Pumpkin Scones Recipe FAQs
What’s the best way to select pumpkins for the purée?
Absolutely! Look for small, firm pumpkins with a smooth exterior and a vibrant color. The best ones are typically called “sugar pumpkins” or “pie pumpkins,” as they have a sweeter flavor and a denser texture than larger carving pumpkins. Avoid those with soft spots or dark blemishes, as these can indicate spoilage.
How can I store leftover pumpkin scones?
Very simply! Store leftover Better Than Starbucks Pumpkin Scones in an airtight container at room temperature for up to 3 days. If you want to keep them for a longer period, wrap them tightly in plastic wrap and place them in the refrigerator, where they will stay fresh for about a week. Just remember to bring them back to room temperature by warming them slightly in the oven for a few minutes!
Can I freeze these scones? If so, what’s the best method?
Definitely! Freezing your Better Than Starbucks Pumpkin Scones is a great way to enjoy them later. Here’s how:
- Shape the scones and place them on a parchment-lined baking sheet.
- Freeze them until solid (about 1 to 2 hours).
- Once frozen, transfer the scones to a freezer-safe bag or container. They can be stored in the freezer for up to 3 months.
When you’re ready to enjoy, bake them from frozen, adding an extra 5-7 minutes to the cooking time.
What if my scone dough is too sticky?
No worries! If your dough feels too sticky, light flouring on your hands and work surface can help. Gently sprinkle just a bit of flour onto the sticky areas and fold or knead with care. Avoid adding too much flour at once, as this can lead to dry scones. Remember, it’s better for the scone dough to be slightly goopy than too dry!
Are there any allergy considerations for these pumpkin scones?
Yes, absolutely! If you’re making these Better Than Starbucks Pumpkin Scones for someone with allergies, pay attention to the ingredients. The scones contain gluten from the all-purpose flour and dairy from the butter, milk, and heavy cream. You can make them gluten-free by using a gluten-free flour blend and opt for dairy-free alternatives like almond milk and coconut cream. Always check labels and choose allergen-friendly options for the safest results.
How do I adjust the glaze consistency if it’s too thick?
Very easy! If your maple glaze is too thick, simply add a teaspoon of water at a time, whisking until you achieve your desired pourable consistency. Start with just a little; it’s much easier to thin it out than to fix an overly runny glaze!
Better Than Starbucks Pumpkin Scones: Flaky Fall Delights
Ingredients
Equipment
Method
- Preheat your oven to 375°F (190°C) and prepare a baking sheet with parchment paper.
- In a large bowl, sift together flour, baking powder, cane sugar, brown sugar, pumpkin pie spice, cinnamon, and salt.
- Cut the cold butter into small cubes and mix into the dry ingredients until it resembles coarse crumbs.
- In another bowl, whisk together egg, vanilla extract, milk, heavy cream, and pumpkin purée, then combine with the dry mixture.
- Turn the dough out onto a floured surface, kneading gently about 4-5 times.
- Pat the dough into a disk about 1 to 1.25 inches thick and cut into 8 triangles.
- Place the scones on the baking sheet and brush with milk before baking for 20-25 minutes.
- Let the scones cool on a wire rack and prepare the glaze by mixing powdered sugar, maple syrup, and water.
- Drizzle the glaze over the cooled scones.
Leave a Reply