
The twinkling lights and cheerful laughter of the holidays call for a sweet, easy-to-make treat that everyone can enjoy. Enter these Quick Christmas Peppermint Creams—a delightful no-bake dessert that perfectly combines creamy textures with a festive peppermint crunch. Not only are they nut-free, making them a safe option for holiday gatherings, but they also require just a few simple ingredients and minimal prep time. Imagine presenting these charming little bites at your holiday party or wrapping them up as gifts for friends and family. Can you already feel that holiday spirit in the air? Let’s get started on creating these joyous treasures together!
Why Make Quick Christmas Peppermint Creams?
Effortless Preparation: With just a handful of ingredients and minimal fuss, these treats come together in no time, making holiday baking a breeze.
Festive Flavor: The perfect blend of creamy filling and crunchy peppermint coating delivers a burst of refreshing taste that captures the spirit of the season.
Nut-Free Delight: Ideal for gatherings, these no-bake desserts are safe for everyone, ensuring your treats can be enjoyed by all.
Gifting Made Easy: They make for thoughtful homemade gifts that add a personal touch, perfect for sharing with loved ones during the holidays.
Versatile Twist: Feel free to experiment! Drizzle with dark chocolate or sprinkle with festive colors for an extra pop that will impress your guests.
Don’t miss out on other easy recipes like our delicious Chicken Burrito Bowl or Sticky Beef Noodles for your holiday entertaining!
Quick Christmas Peppermint Creams Ingredients
Here’s everything you’ll need to whip up these delightful no-bake treats!
For the Cream Filling
- Cream Cheese – Provides a creamy texture and base for the filling; swap with vegan cream cheese for a dairy-free option.
- Powdered Sugar – Adds sweetness and smoothness to the filling; if unavailable, make your own by blending granulated sugar into a fine powder.
- Peppermint Extract – Infuses the filling with refreshing peppermint flavor; consider mint extract as an alternative, adjusting to taste.
- Red Food Coloring – Optional for a festive touch; can be omitted or replaced with natural colorants like beet juice.
For the Coating
- White Chocolate Chips/Wafers – Creates a sweet outer shell for the peppermint creams; use dark chocolate for a richer twist.
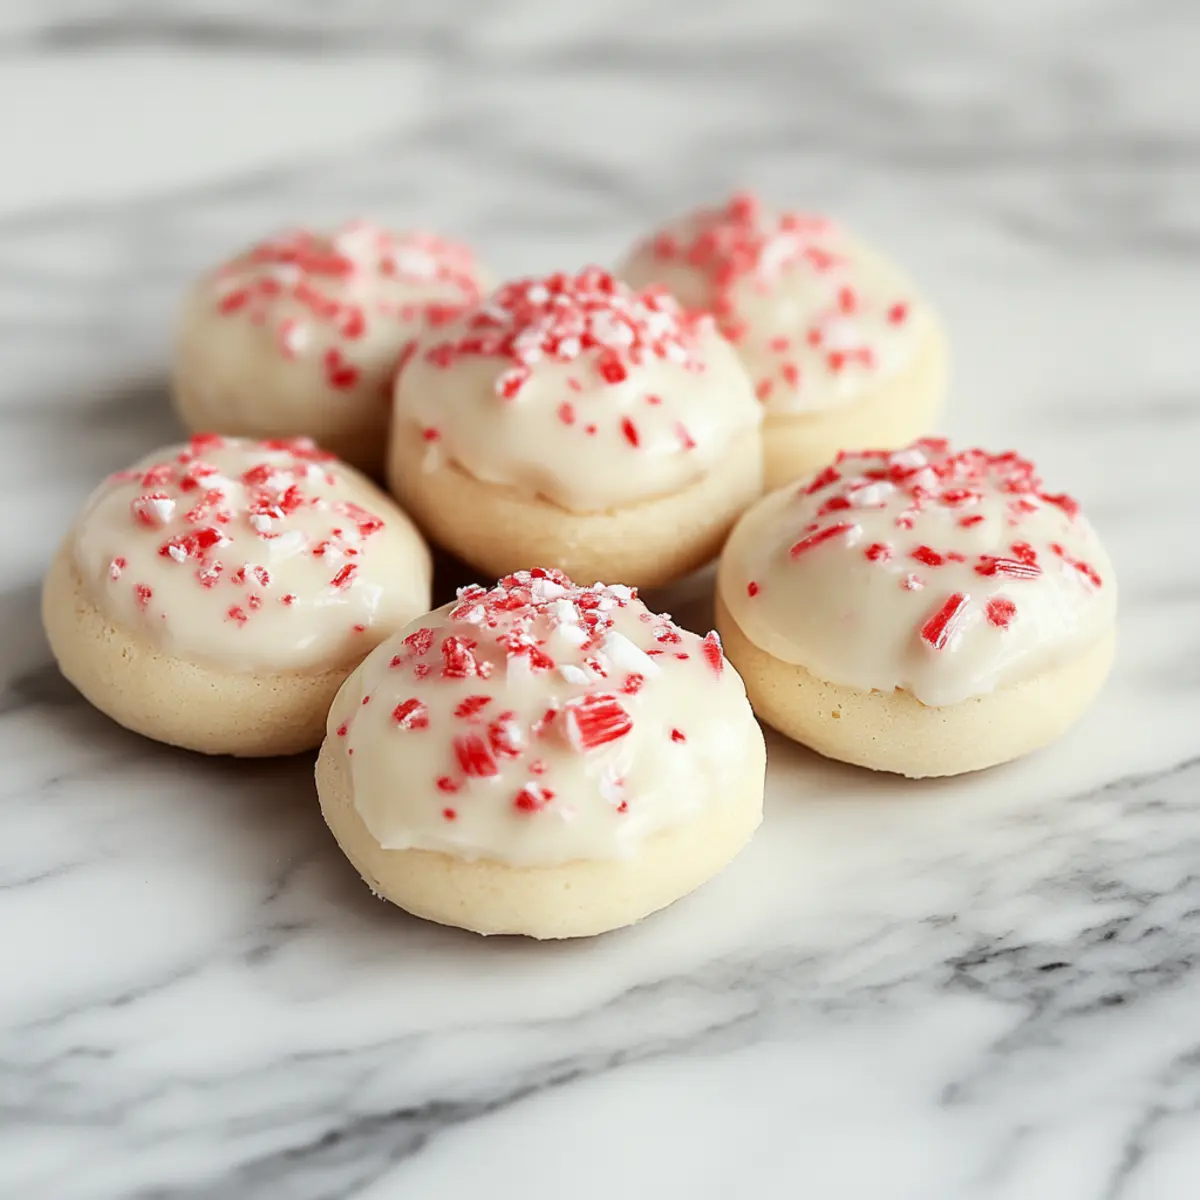
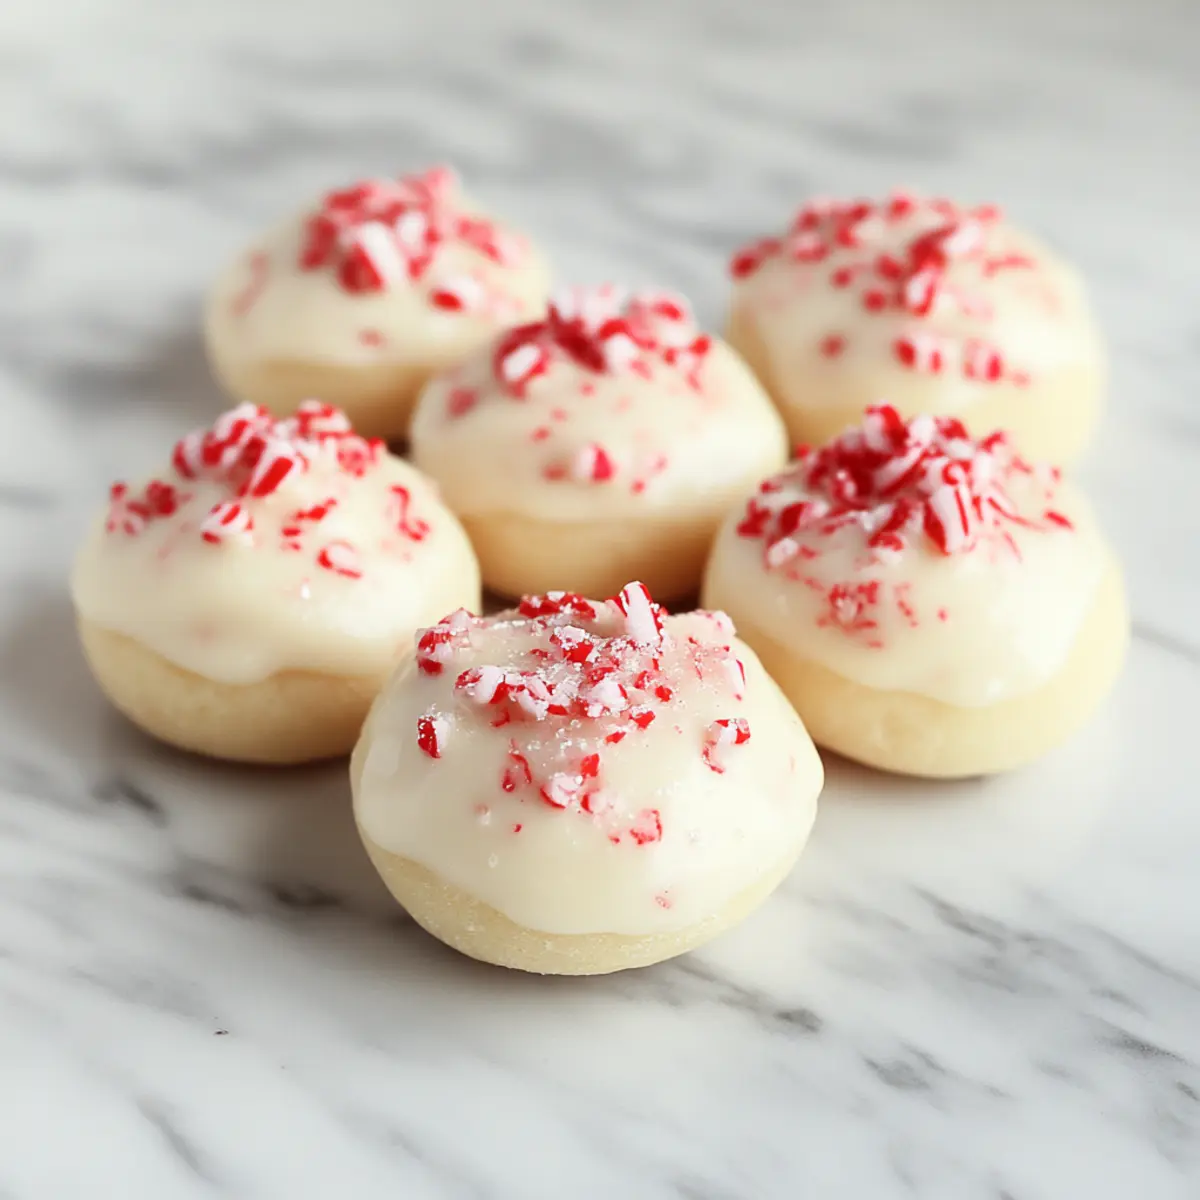
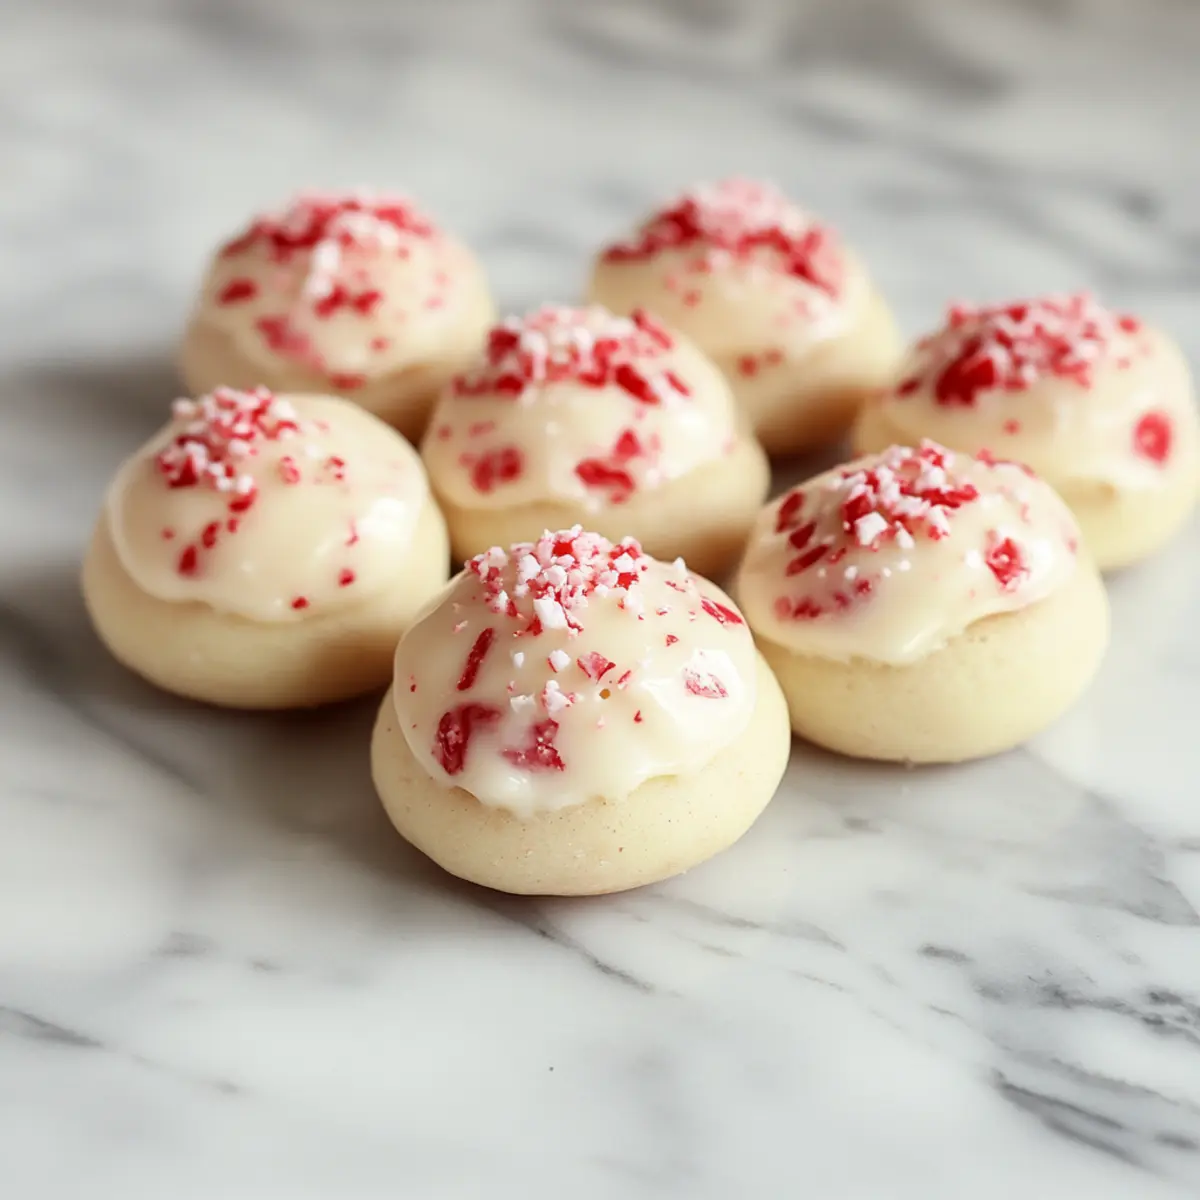
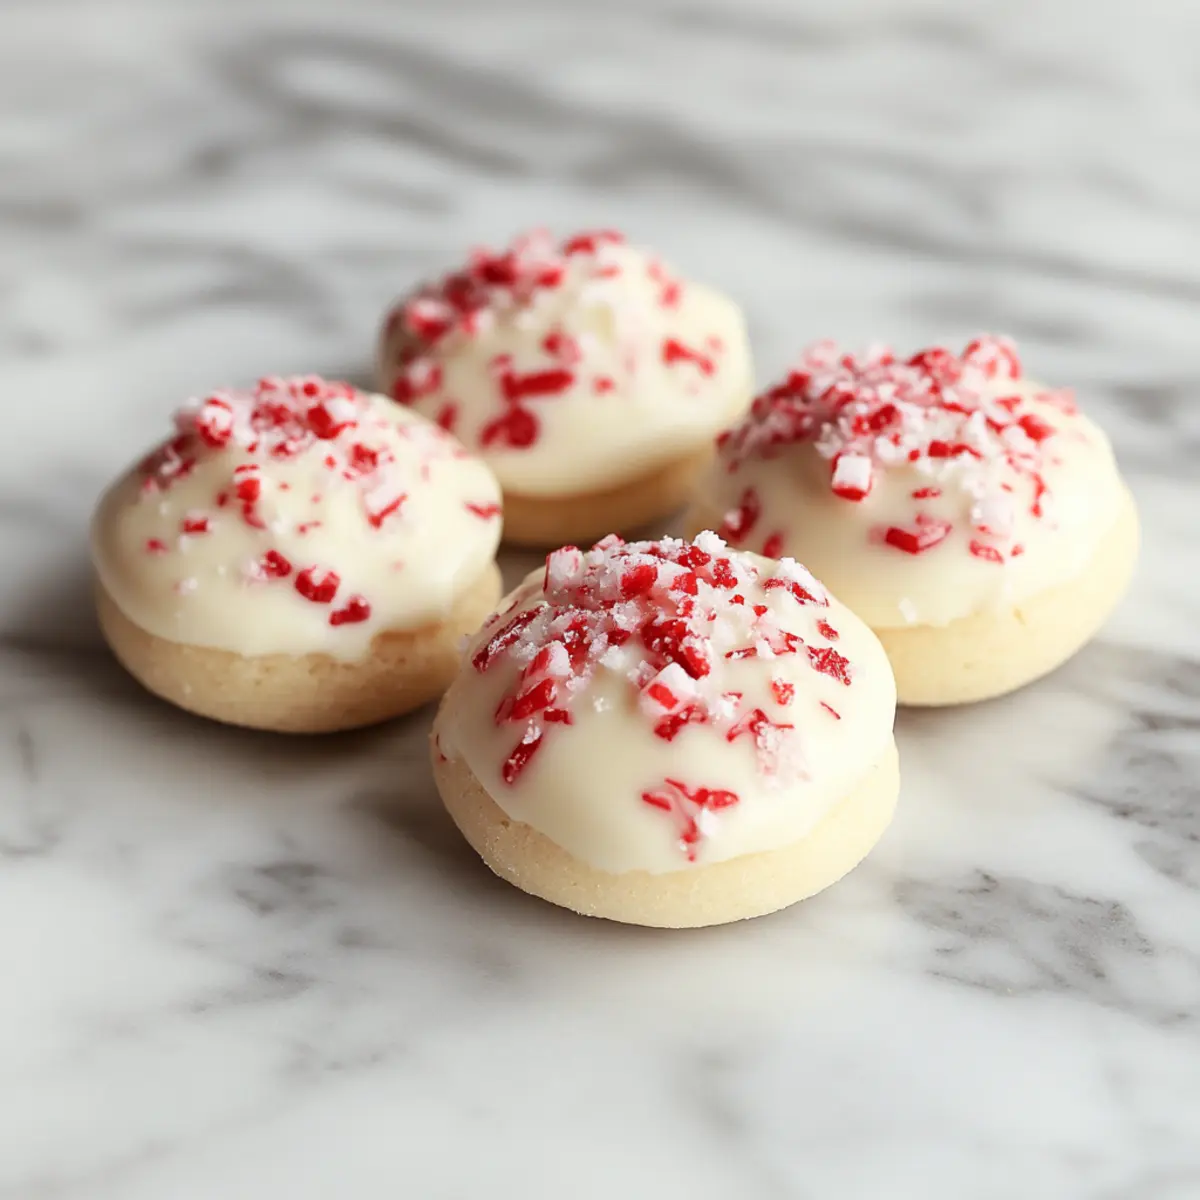
- Crushed Peppermint Candies – Adds a delightful crunch and festive flair; substitute with crushed candy canes or themed sprinkles if desired.
Get ready to dazzle your friends and family with these delicious Quick Christmas Peppermint Creams!
Step‑by‑Step Instructions for Quick Christmas Peppermint Creams
Step 1: Combine Ingredients
In a mixing bowl, combine 8 ounces of softened cream cheese, 2 cups of powdered sugar, and 1 teaspoon of peppermint extract. Use a hand mixer on medium speed until the mixture is smooth and creamy, about 3 minutes. The filling should be well blended and free of lumps, ensuring a delightful texture for your Quick Christmas Peppermint Creams.
Step 2: Add Color
If desired, add a few drops of red food coloring to the creamy filling for a festive look. Using a spatula, gently swirl the color through the mixture to create a marbled effect—don’t overmix, as you want to maintain that lovely creaminess. This step enhances the visual appeal of your treats without compromising the flavor.
Step 3: Shape the Filling
Using a tablespoon or a cookie scoop, portion out the creamy mixture and roll it into small balls, about 1 inch in diameter. Arrange the balls on a parchment-lined baking sheet, leaving space between them to allow for easy handling. This step should yield about 24 peppermint creams that will be both visually appealing and tasty!
Step 4: Chill for Firmness
Once your peppermint balls are formed, cover the baking sheet with plastic wrap and place it in the refrigerator for 30 minutes. Chilling allows the filling to firm up, making it easier to coat them later. The cream should feel firmer to the touch, ensuring a perfect bite for your Quick Christmas Peppermint Creams.
Step 5: Melt the Chocolate
While the peppermint filling chills, melt 1 cup of white chocolate chips in a microwave-safe bowl. Heat in 30-second intervals, stirring in between until smooth and completely melted. Be cautious not to overheat, as burnt chocolate can spoil the flavor and coating—silky and glossy is what you aim for in this step.
Step 6: Coat Each Ball
Once the peppermint balls are chilled, remove them from the refrigerator. Dip each ball into the melted white chocolate, ensuring every surface is coated. Allow any excess chocolate to drip off before placing them back on the lined baking sheet. This creates a delicious chocolate layer that perfectly complements the peppermint cream within.
Step 7: Add Peppermint Crunch
While the chocolate is still wet, immediately sprinkle crushed peppermint candies over each coated peppermint ball. This will create a festive crunch and enhance the overall flavor profile. Ensure the candies stick to the melted chocolate—this adds a delightful touch to your Quick Christmas Peppermint Creams.
Step 8: Set the Coating
Refrigerate the coated peppermint creams for an additional 15 to 20 minutes, or until the chocolate has set completely. After this time, the exterior should be firm and ready to hold its shape. Your treats will now be perfect for sharing, gifting, or indulging during the holiday season!
How to Store and Freeze Quick Christmas Peppermint Creams
Fridge: Store these delightful peppermint creams in an airtight container for up to one week. This keeps them fresh and ready for indulgence during the holiday celebrations.
Freezer: You can freeze the Quick Christmas Peppermint Creams for up to a month. Just place them in a single layer on a baking sheet until firm, then transfer to an airtight container or freezer bag.
Defrosting: When you’re ready to enjoy, simply move the creams to the fridge for a few hours or at room temperature for about 30 minutes before serving.
Reheating: No reheating is necessary, as these treats are best enjoyed chilled or at room temperature.
Make Ahead Options
These Quick Christmas Peppermint Creams are perfect for busy home cooks looking to save time during the holiday rush! You can prepare the cream filling (steps 1-4)** up to 24 hours in advance, just be sure to cover the baking sheet with plastic wrap and refrigerate until it’s time to coat them in chocolate. The formed peppermint balls can be kept chilled and are ready to be dipped whenever you need them. Simply melt the chocolate (step 5) and proceed with coating and decorating (steps 6-8) before serving. This way, your treats will be just as delightful and fresh for any holiday occasion while keeping your prep stress-free!
What to Serve with Quick Christmas Peppermint Creams?
The holidays are the perfect time to create a vibrant feast that delights all senses, starting with these scrumptious treats.
- Creamy Mashed Potatoes: Their smooth texture and buttery flavor create a comforting complement to the refreshing sweets, balancing richness with a holiday touch.
- Gingerbread Cookies: The warm spices of gingerbread harmonize beautifully with the peppermint, making for a nostalgic holiday experience.
- Chocolate Truffles: Their rich, decadent nature enhances the lightness of the creams, creating a delightful contrast that will keep guests reaching for more.
- Festive Fruit Salad: A colorful medley of seasonal fruits brightens up the dessert table, offering a refreshing and healthy option alongside rich treats.
- Eggnog or Hot Chocolate: Sipping these cozy beverages while indulging in peppermint creams evokes cherished holiday memories, making them the perfect pairing.
- Nutty Biscotti: The crunchy texture provides a satisfying contrast to the smooth peppermint centers while adding a surprising flavor dimension.
- Spiced Tea or Warm Cider: Both drinks offer warmth and a hint of spice, enhancing the holiday spirit and complementing the peppermint flavors beautifully.
- Shortbread Cookies: Their buttery, crumbly texture pairs nicely with the creamy desserts, bringing together a delightful mix of flavors and textures for your guests to enjoy.
Expert Tips for Quick Christmas Peppermint Creams
- Chocolate Melting: Ensure smooth chocolate by melting in short bursts, stirring frequently to avoid overheating, preserving that lovely drizzle.
- Creamy Texture: Avoid overmixing the cream filling to keep it smooth and velvety; lumpy filling can detract from the delightful experience.
- Chilling Time: Don’t skip chilling! It’s crucial for firming up the peppermint balls, making them easier to work with during the coating process.
- Artistic Swirls: Gently swirl the red food coloring for a marbled effect, but stop before it fully blends to maintain visual interest in your Quick Christmas Peppermint Creams.
- Flavor Balance: Adjust peppermint extract to your preference; too much can overpower the delicious chocolate and creamy filling, so start small!
Quick Christmas Peppermint Creams Variations
Feel free to get creative and customize these delightful peppermint creams to match your taste buds and holiday spirit!
-
Dairy-Free: Swap cream cheese for vegan cream cheese and use dairy-free chocolate for a festive treat everyone can enjoy.
-
Chocolate Twist: Drizzle dark chocolate over the cooled peppermint creams. This adds a rich flavor that balances the sweetness beautifully. Think of it as a gourmet touch to your holiday desserts!
-
Citrus Zest: Add a teaspoon of orange or lemon zest to the cream filling. The zingy flavor pairs beautifully with peppermint, offering a refreshing twist that will surprise and delight.
-
Minty Meltdown: Instead of using peppermint extract, try using crushed fresh mint for an earthy note; this can give your creams a delightful, natural aroma. Just remember to adjust the amount to avoid overpowering the cream!
-
Fun Sprinkles: Use festive nonpareils or colorful sprinkles on top of your chocolate-coated creams for a fun and festive look. Imagine how cheerful they’ll look on your holiday table!
-
Spicy Addition: For those who like a bit of heat, add a pinch of cayenne pepper to the cream filling. The warm kick will give an unexpected and exciting twist to your sweet treat.
-
Nutty Crunch: Incorporate finely chopped nuts into the cream filling (if not nut-sensitive). They add texture that contrasts wonderfully with the creamy filling and sugary coating.
If you’re eager for even more flavorful adventures, check out our delightful Peanut Noodle Salad or indulge in our savory Sticky Beef Noodles for your holiday feasting!
Quick Christmas Peppermint Creams Recipe FAQs
How do I choose the right cream cheese for my Quick Christmas Peppermint Creams?
Absolutely! For the best results, opt for full-fat cream cheese as it provides a rich and creamy texture that complements the peppermint flavor beautifully. If you’re looking for a dairy-free option, vegan cream cheese works wonderfully too—just check the consistency to ensure it will blend well with the other ingredients.
How should I store my peppermint creams after making them?
To keep your Quick Christmas Peppermint Creams fresh, store them in an airtight container in the refrigerator for up to one week. If you’re making them ahead of time or want to save some for later, they freeze quite well. Just ensure they are arranged in a single layer on a baking sheet in the freezer until firm and then transfer them into a freezer bag or airtight container to enjoy later.
Can I freeze Quick Christmas Peppermint Creams, and how?
Yes, you can freeze these delightful treats for up to a month! First, place the peppermint balls on a parchment-lined baking sheet and freeze them until solid. Then, transfer them to an airtight container or a freezer bag, separating layers with parchment paper to prevent sticking. When ready to enjoy, just thaw in the refrigerator for a few hours or at room temperature for about 30 minutes before serving.
What can I do if my chocolate coating is too thick?
If your chocolate coating seems too thick, it can easily be smoothed out! Try adding a teaspoon of vegetable oil or coconut oil to the melted chocolate and stir until well combined. This will help thin it out, making it easier to dip your peppermint balls. Also, be cautious not to overheat your chocolate when melting—it should be silky smooth and glossy, perfect for a delightful topping.
Can I make Quick Christmas Peppermint Creams dairy-free?
Very much so! To make these treats dairy-free, simply substitute the cream cheese with a quality vegan cream cheese. For the white chocolate melt, look for dairy-free chocolate options widely available in stores. Just ensure you read labels to cater to any other dietary restrictions! These adjustments keep the essence of the treat while accommodating those with dietary needs.
Quick Christmas Peppermint Creams: Festive No-Bake Treats
Ingredients
Equipment
Method
- In a mixing bowl, combine cream cheese, powdered sugar, and peppermint extract. Use a hand mixer on medium speed until smooth, about 3 minutes.
- If desired, add red food coloring to the mixture and swirl gently to create a marbled effect.
- Roll the creamy mixture into small balls, about 1 inch in diameter, and arrange on a parchment-lined baking sheet.
- Cover the baking sheet with plastic wrap and refrigerate for 30 minutes.
- Melt the white chocolate chips in a microwave-safe bowl in 30-second intervals, stirring until smooth.
- Dip each chilled peppermint ball into the melted chocolate, ensuring every surface is coated.
- Sprinkle crushed peppermint candies over each coated ball while the chocolate is still wet.
- Refrigerate the coated balls for an additional 15 to 20 minutes until the chocolate sets.
Leave a Reply