
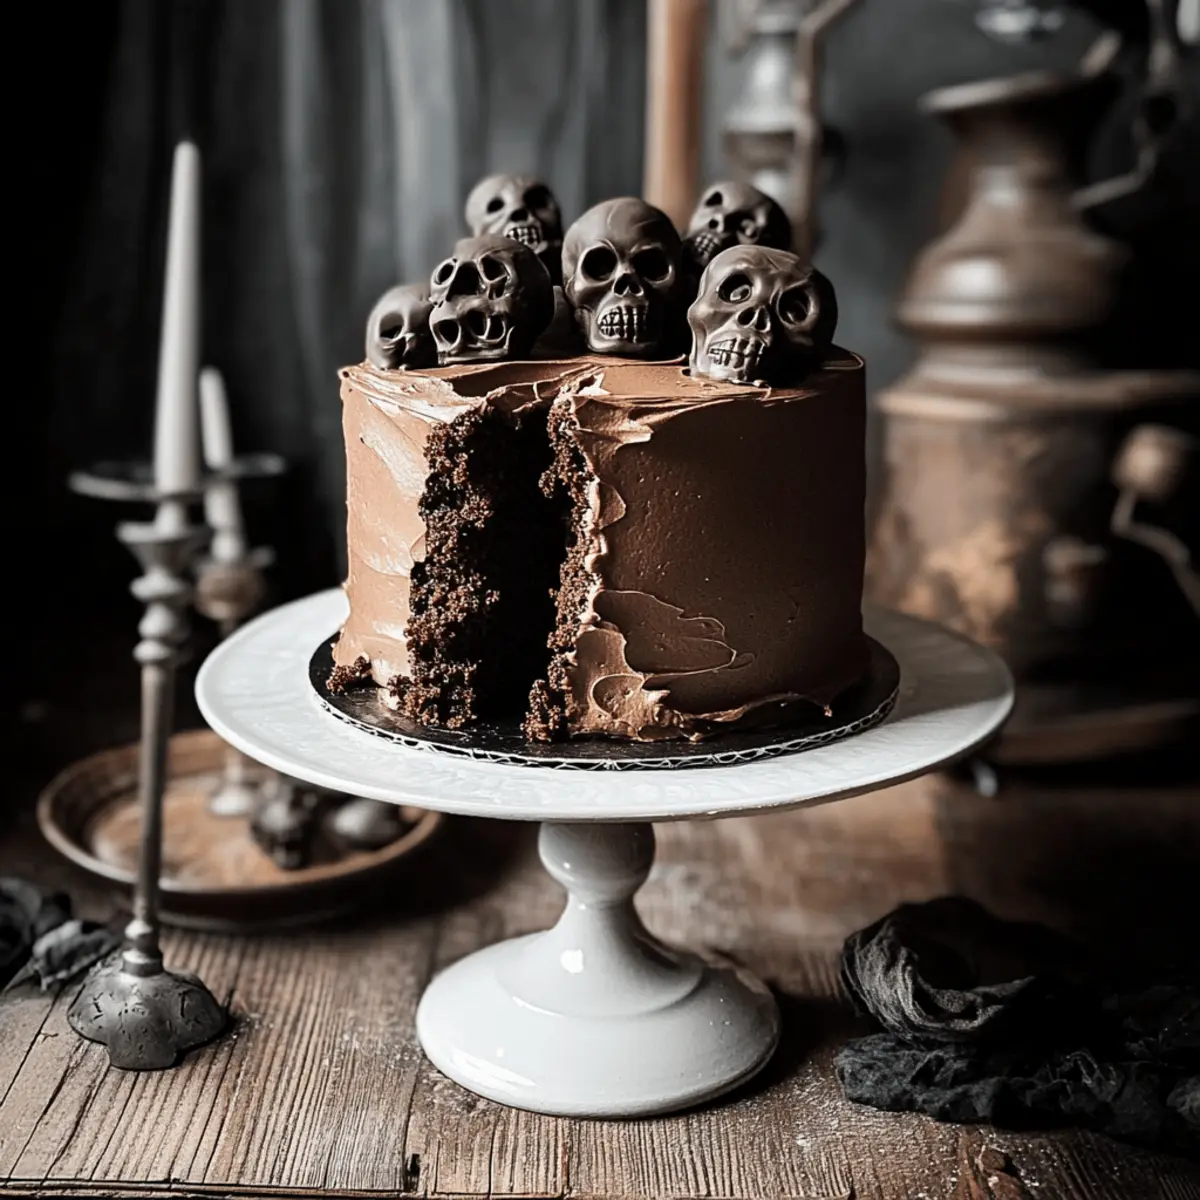
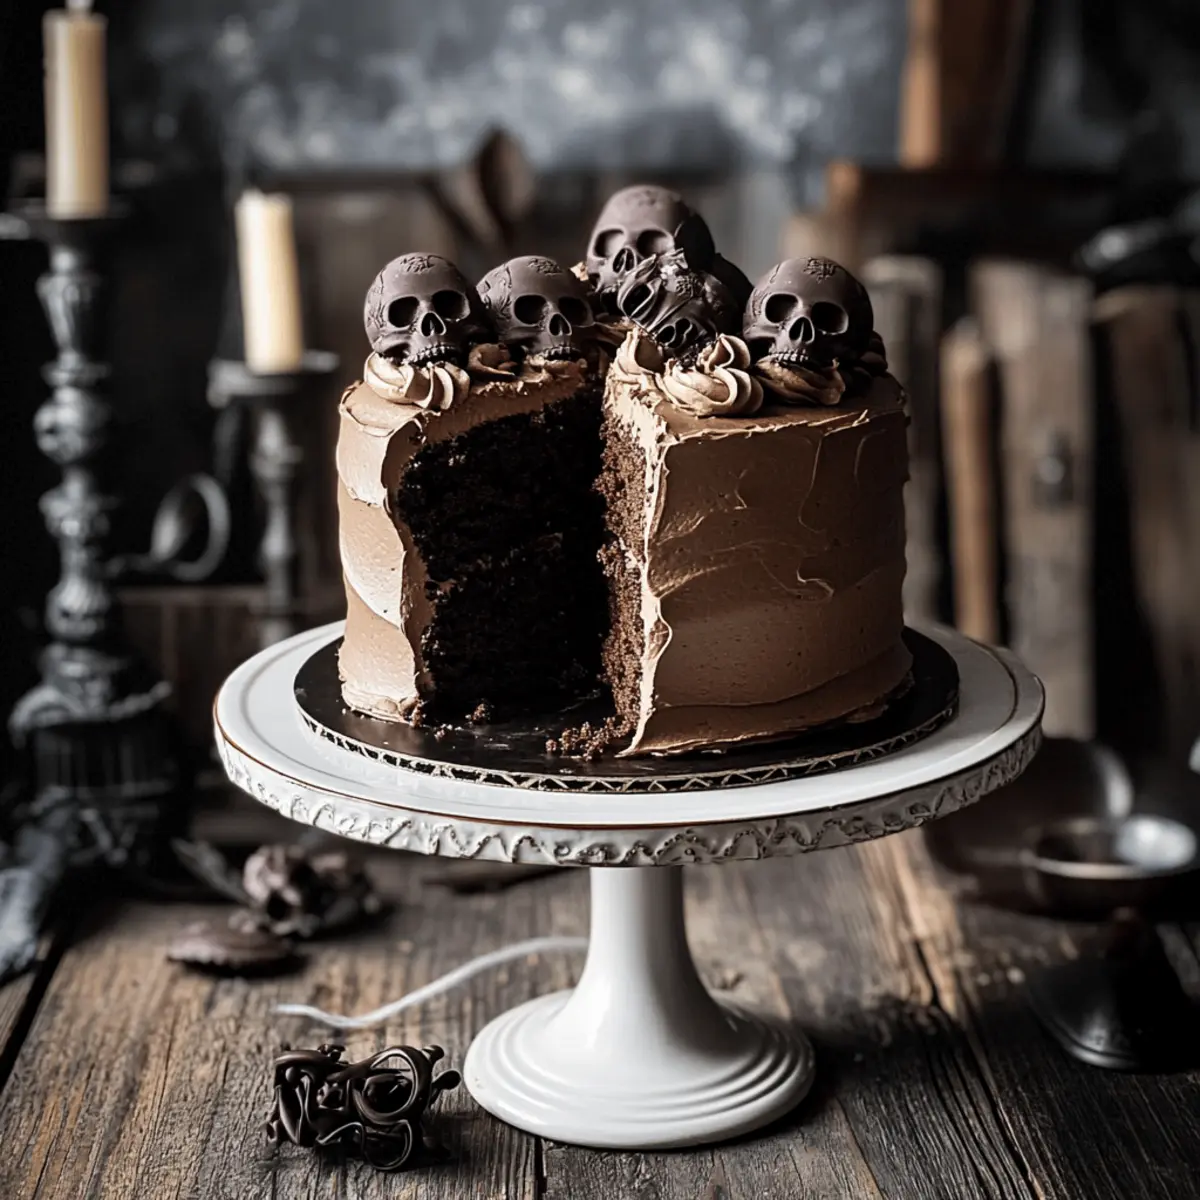
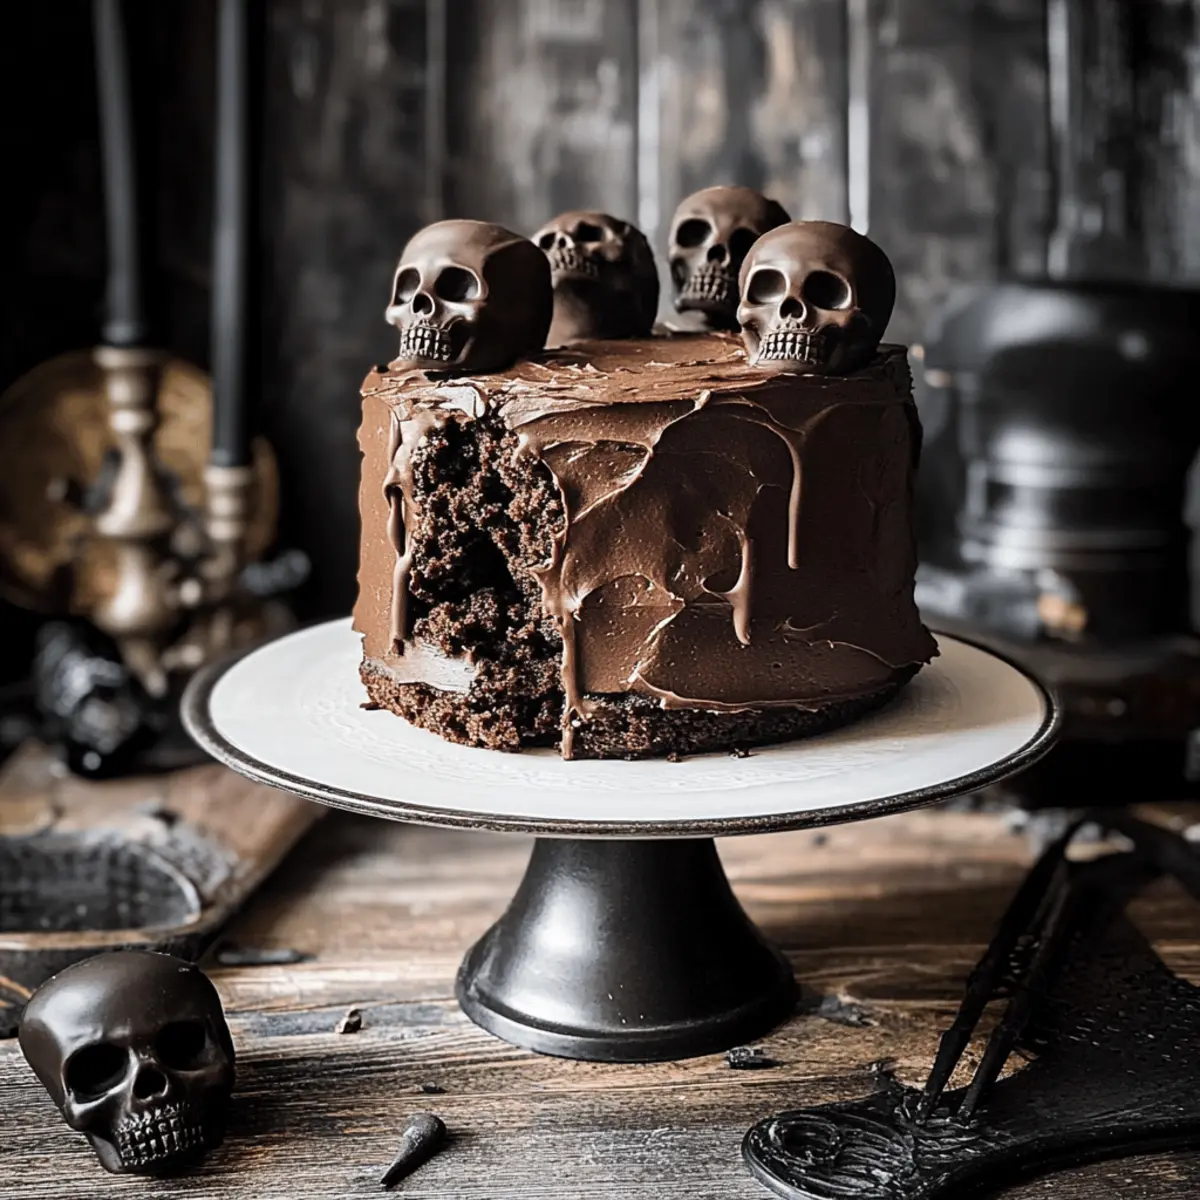
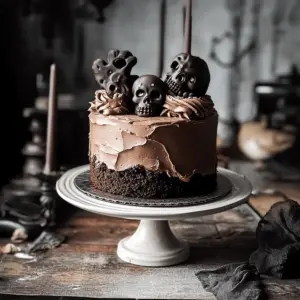
As I sifted through my pantry, I stumbled across a bag of aromatic ground ginger, and suddenly, inspiration struck! This High Altitude Ginger Cake with Chocolate Buttercream and Creepy Chocolate Skulls embodies the perfect blend of warm spices and rich sweetness, making it an ideal choice for your upcoming Halloween festivities. Not only is this cake a visual treat, but it’s also quick to whip up and a delightful crowd-pleaser that will leave everyone wanting more. The soft, fluffy texture and playful chocolate decorations elevate the experience, transforming any gathering into a spooky celebration. Ready to dazzle your guests with a delicious twist this Halloween? Let’s dive in and create some magic together!
Why is this Chocolate Skull Cake special?
Indulgent Layers: This extraordinary cake features a soft and fluffy ginger cake that’s not just delicious but also seasonally perfect for Halloween gatherings.
Charming Decor: The creepy chocolate skulls bring a playful yet sophisticated elegance to your dessert table, making it a conversation starter.
Customizable to Fit: With options for different pan sizes or even a gluten-free version, this cake can adapt to suit any occasion or dietary need.
Effortless Preparation: Quick and easy steps ensure even novice bakers can impress guests with a stunning cake, just like my Milk Chocolate Stuffed recipe!
Crowd Pleaser: The delightful combination of spiced ginger and rich chocolate ensures this treat is universally loved, leaving everyone wanting seconds!
Chocolate Skull Cake Ingredients
For the Cake
- Cake Flour – Provides structure and lightness; substitute with all-purpose flour if needed.
- Granulated Sugar – Sweetness for the cake; no direct substitutions.
- Baking Powder – Acts as a leavening agent; make sure it’s fresh for best results.
- Coarse Kosher Salt – Enhances flavors; use half as much if using table salt.
- Ground Ginger – Adds a sweet and spicy flavor; fresh grated ginger can substitute for a bolder taste.
- Eggs and Egg Whites – Essential for moisture and structure; ensure they are at room temperature.
- Whole Milk – Adds richness; buttermilk is a tangy substitute.
- Apple Cider Vinegar – Reacts with baking soda for leavening; no direct substitutes.
- Light Brown Sugar – Contributes moisture and caramel flavor; granulated sugar can replace it but alters texture.
- Unsalted Butter (melted) – Richness and flavor; margarine can be used but changes the taste.
- Vegetable Oil – Ensures a moist cake; alternatives include sunflower or canola oil.
- Vanilla Extract – Enhances flavor; use vanilla bean paste for a more intense flavor.
For the Buttercream
- Unsalted Butter (softened) – Provides richness and creaminess in frosting; must be at room temperature.
- Powdered Sugar – Adds sweetness and texture; no alternatives recommended.
- Unsweetened Dutch Processed Cocoa Powder – Delivers chocolate flavor; natural cocoa powder can be used but will differ in bitterness.
- Meringue Powder – Optional stabilizer; omit if unavailable, though it will affect texture.
For the Decorations
- Chocolate Candy Melts – Perfect for creating spooky chocolate skulls; use tempered chocolate for a higher quality finish as a substitute.
- Coconut Oil – Thins melted chocolate if needed; shortening can be a substitute, but taste will differ.
Step‑by‑Step Instructions for Chocolate Skull Cake
Step 1: Preheat the Oven
Begin by preheating your oven to 350°F (175°C). While the oven heats, prepare three 8-inch round cake pans by spraying them generously with non-stick cooking spray. This will ensure your high altitude ginger cake releases easily once baked. Set the pans aside while you mix the dry ingredients.
Step 2: Mix Dry Ingredients
In a large mixing bowl, whisk together the cake flour, granulated sugar, baking powder, coarse kosher salt, and ground ginger until well combined. Take a moment to appreciate the aromatic fragrance of the ginger as it wafts up. This blend creates the foundation for your Chocolate Skull Cake, giving it structure and flavor.
Step 3: Combine Wet Ingredients
In a separate bowl, whisk together the eggs, egg whites, whole milk, apple cider vinegar, light brown sugar, melted unsalted butter, vegetable oil, and vanilla extract until smooth. The mixture should be cohesive and slightly frothy, indicating that the ingredients are well combined and ready to mingle with the dry mix for your cake.
Step 4: Combine Wet and Dry Mixtures
Gently fold the wet ingredients into the dry ingredients, mixing until just combined. Be careful not to overmix; a few lumps are perfectly acceptable. The batter for your high altitude ginger cake should appear slightly thick yet smooth when done. This tender texture is key to achieving that soft, fluffy cake you desire.
Step 5: Divide and Prepare the Batter
Pour the batter evenly into the prepared cake pans. To remove any air bubbles, tap each pan gently against the counter. Visualize the batter settling in each pan as you prepare it for the oven. This step ensures an even rise, creating the perfect structure for your Chocolate Skull Cake.
Step 6: Bake the Cakes
Place the pans in the oven and bake for 21-25 minutes, or until a toothpick inserted into the center comes out clean. Keep a close eye on them; the cakes should rise beautifully and start to turn a light golden color. Once done, remove them from the oven and let them cool in the pans for a few minutes before transferring them to a wire rack.
Step 7: Prepare the Chocolate Buttercream
In a mixing bowl, beat the softened unsalted butter until creamy and light. Gradually add the powdered sugar, unsweetened cocoa powder, meringue powder, and a pinch of salt, mixing until fluffy. Adjust the consistency by adding a splash of milk if necessary. This rich chocolate buttercream will perfectly complement your ginger cake.
Step 8: Frost the Cooled Cakes
Once the cakes are completely cooled, take your chocolate buttercream and generously frost the top of one layer. Carefully stack another layer on top, repeating the process until all layers are frosted. The rich buttercream will enhance the flavor of your high altitude ginger cake while providing a beautiful finish.
Step 9: Create the Chocolate Skulls
To make the spooky chocolate skulls, melt the chocolate candy melts in a microwave-safe bowl according to the package instructions. Fill the skull molds halfway with the melted chocolate, then place them in the freezer until firm. This step adds a playful decoration to your Chocolate Skull Cake that’s sure to impress.
Step 10: Decorate the Cake
Once the chocolate skulls are set, remove them from the molds and place them on top of the frosted cake. Feel free to get creative with the arrangement! You can refrigerate any leftover skulls for later use. The finished creation should be visually stunning, making it the perfect centerpiece for your spooky celebrations.
Make Ahead Options
These High Altitude Ginger Cakes are perfect for busy schedules and can save you precious time! You can bake the cake layers up to 3 days in advance, wrapping them tightly in plastic wrap and storing them in the refrigerator to maintain their moisture and freshness. The chocolate buttercream can also be prepared ahead of time—just refrigerate it in an airtight container for up to 5 days. When you’re ready to serve your Chocolate Skull Cake, simply allow the frozen cake layers to come to room temperature, frost them with the buttercream, and top with the chocolate skulls you can freeze a few days ahead of time. This way, you enjoy the delicious, charming result without the last-minute stress!
What to Serve with High Altitude Ginger Cake with Chocolate Buttercream and Mini Chocolate Skulls
As the scents of spicy ginger and rich chocolate waft through your kitchen, it’s time to think of playful yet delectable pairings.
- Vanilla Ice Cream: A scoop of creamy vanilla ice cream balances the warmth of ginger, enhancing each heavenly bite of cake.
- Spiced Whipped Cream: Lightly whipped cream infused with cinnamon or nutmeg brings a festive touch that complements the cake’s flavors beautifully.
- Toasted Nuts: The crunch of toasted pecans or walnuts provides a delightful contrast to the cake’s soft, moist texture, adding depth to your dessert experience.
- Apple Cider: Serve warm apple cider alongside for a cozy, autumnal vibe that harmonizes perfectly with the ginger’s bold spice.
- Hot Cocoa: Rich hot cocoa brings a warm, chocolaty embrace that transforms each slice into a comforting indulgence, perfect for chilly nights.
- Pumpkin Spice Latte: This seasonal favorite brings a creamy, spiced richness, aligning beautifully with both the cake and the spooky theme of Halloween.
- Meringue Cookies: Light, airy meringues offer a sweet, crunchy contrast that pairs wonderfully with the cake’s dense richness, creating a delightful mouthfeel.
- Chocolate-Covered Strawberries: Juicy strawberries dipped in chocolate add a refreshing fruity note that balances the deep flavors of the cake, presenting a visually appealing treat.
- Coffee: A warm cup of coffee complements the sweet, spicy notes of the ginger cake, making it the perfect afternoon or evening companion.
- Haunted Cupcakes: For a fun twist, serve mini cupcakes adorned with Halloween-themed decorations for guests to enjoy while mingling.
Chocolate Skull Cake Variations
Feel free to get creative and personalize your chocolate skull cake with these delightful variations!
-
Gluten-Free: Substitute a gluten-free cake flour mix for the regular flour, ensuring all ingredients are gluten-free for a deliciously safe treat.
-
Pumpkin Spice: For a seasonal twist, swap in pumpkin puree for some of the liquid, adding in a touch of pumpkin pie spice for extra warmth. This will give your cake a lovely autumn flavor that pairs perfectly with the chocolate.
-
Dairy-Free: Use almond milk or coconut milk in place of whole milk and substitute dairy-free butter for the frosting. Your guests will never suspect it’s dairy-free!
-
Chocolate Variation: For a richer cake, replace 1/2 cup of cake flour with cocoa powder to create a chocolate ginger cake that’s a true chocolate lover’s dream.
-
Spicy Kick: Add a pinch of cayenne pepper or chili powder to the cake batter for a surprising, warm finish that complements the chocolate beautifully. Spice and sweetness together elevate the whole experience!
-
Fruit Infusion: Stir in a cup of finely chopped pears or apples into the batter. The fruit not only adds sweetness but also moisture, creating an exquisite flavor complexity.
-
Swirl it Up: Create a marbled cake by dividing the batter in half, mixing cocoa powder into one half, and then swirling them together in the pan. This visually appealing design makes each slice truly special!
-
Flavored Buttercream: Experiment with your buttercream by adding flavored extracts like almond, peppermint, or even orange zest. A hint of flavor can elevate your frosting to something extraordinarily memorable.
No matter the choice, your beautifully decorated chocolate skulls, like in my Milk Chocolate Stuffed recipe, will add that spooky touch and delight to your guests!
How to Store and Freeze Chocolate Skull Cake
Airtight Container: Store leftover Chocolate Skull Cake in an airtight container at room temperature for up to 3 days. This keeps it fresh and prevents it from drying out.
Refrigeration: If you prefer, you can refrigerate the cake for up to a week, but be sure to cover it well to avoid absorbing odors from the fridge.
Freezer Friendly: You can freeze the frosted cake without the chocolate skulls for up to 2 weeks. Wrap it tightly in plastic wrap and aluminum foil for protection against freezer burn.
Thawing: To enjoy your frozen Chocolate Skull Cake, transfer it to the fridge for several hours or overnight before serving, allowing it to come to a perfect serving temperature.
Expert Tips for Chocolate Skull Cake
Butter Temperature Matters: Ensure your butter is at room temperature before making the buttercream; cold butter can result in a lumpy frosting.
Gentle Mixing: When combining wet and dry ingredients, avoid overmixing to keep your cake light and fluffy—some lumps are totally okay!
Even Baking: Check your cake for doneness at the lower end of the baking time to prevent dryness; if needed, adjust baking time for high altitude.
Cooling Time: Allow cakes to cool completely before frosting; frosting a warm cake can cause the buttercream to melt and slide.
Creative Decorating: Get inventive with your chocolate skulls—experiment with different mold patterns or colors to make your cake uniquely spooky!
Storage Solution: To keep your chocolate skull cake fresh, store it in an airtight container at room temperature for up to three days—if there’s any left!
High Altitude Ginger Cake with Chocolate Buttercream and Mini Chocolate Skulls Recipe FAQs
What type of flour should I use for the best results?
Absolutely, cake flour is best for achieving a light and fluffy texture in your High Altitude Ginger Cake. It has a lower protein content compared to all-purpose flour, which helps to prevent the cake from becoming dense. If you don’t have cake flour on hand, you can substitute with all-purpose flour, but keep in mind that it may alter the final texture slightly.
How should I store the leftover Chocolate Skull Cake?
To maintain the flavor and moisture of your Chocolate Skull Cake, store any leftovers in an airtight container at room temperature for up to 3 days. If you’d like it to last longer, refrigeration is an option, but remember to wrap it neatly to prevent it from absorbing fridge odors.
Can I freeze the Chocolate Skull Cake, and how?
Yes, you can freeze your frosted Chocolate Skull Cake! To do this, wrap it tightly in plastic wrap followed by aluminum foil, ensuring it’s airtight to avoid freezer burn. It will remain delicious in the freezer for up to 2 weeks. When you’re ready to enjoy it, simply transfer the cake to the fridge for several hours or overnight to thaw gently for the best texture.
What should I do if my cake rises unevenly?
If your cakes dome while baking, it’s not the end of the world! Allow them to cool, then use a serrated knife to trim the tops for even stacking. This step ensures a gorgeous presentation when you frost and serve your Chocolate Skull Cake, so don’t worry—everyone has quirks in baking!
Are there any dietary considerations I should keep in mind?
Certainly! If you’re baking for someone with allergies, be aware that this recipe includes eggs, dairy, and gluten. To make a gluten-free version, substitute the cake flour with a gluten-free blend ensuring measurements are adjusted for optimal results in texture. You might also want to avoid using chocolate candy melts for the skulls if someone is allergic to common additives in candies.
How do I know when my cake is done baking?
For best results, check your cakes at the lower end of the baking time, which is about 21 minutes. Insert a toothpick in the center; if it comes out clean or with a few moist crumbs, your cake is done! Take care not to overbake, as high altitude can sometimes lead to quicker baking times.

Decadent Chocolate Skull Cake for a Spooky Sweet Treat
Ingredients
Equipment
Method
- Preheat the oven to 350°F (175°C) and spray three 8-inch round cake pans with non-stick cooking spray.
- In a large mixing bowl, whisk together cake flour, granulated sugar, baking powder, coarse kosher salt, and ground ginger.
- In a separate bowl, whisk together eggs, egg whites, whole milk, apple cider vinegar, light brown sugar, melted unsalted butter, vegetable oil, and vanilla extract until smooth.
- Gently fold the wet ingredients into the dry ingredients until just combined; avoid overmixing.
- Divide the batter evenly into the prepared cake pans and tap gently to remove air bubbles.
- Bake for 21-25 minutes or until a toothpick comes out clean; cool in pans for a few minutes before transferring to a wire rack.
- Beat the softened unsalted butter until creamy, then gradually add powdered sugar, cocoa powder, meringue powder, and salt until fluffy.
- Once completely cooled, frost the top of one layer, stack and repeat until all layers are frosted.
- Melt chocolate candy melts in a microwave-safe bowl, fill skull molds with melted chocolate, and freeze until firm.
- Remove chocolate skulls from molds and place on top of the frosted cake.
Leave a Reply