
As I stood in my kitchen, the delightful aroma of roasted garlic and herbs wafted through the air, instantly transporting me to sunny Mediterranean markets. Today, I’m excited to share my recipe for Garlic Herb Roasted Potatoes and Veggies, a dish that captures simplicity and flavor in every bite. This recipe is a total gem for anyone looking for an easy, healthy side that complements any meal with minimal effort. With just a handful of ingredients and a quick roasting time, you’ll enjoy crispy potatoes and vibrant veggies bursting with flavor. Plus, it’s naturally gluten-free, making it a fantastic option for diverse dietary needs. Are you ready to elevate your mealtime with a touch of culinary magic? Let’s dive in!
Why Are These Cookies So Irresistible?
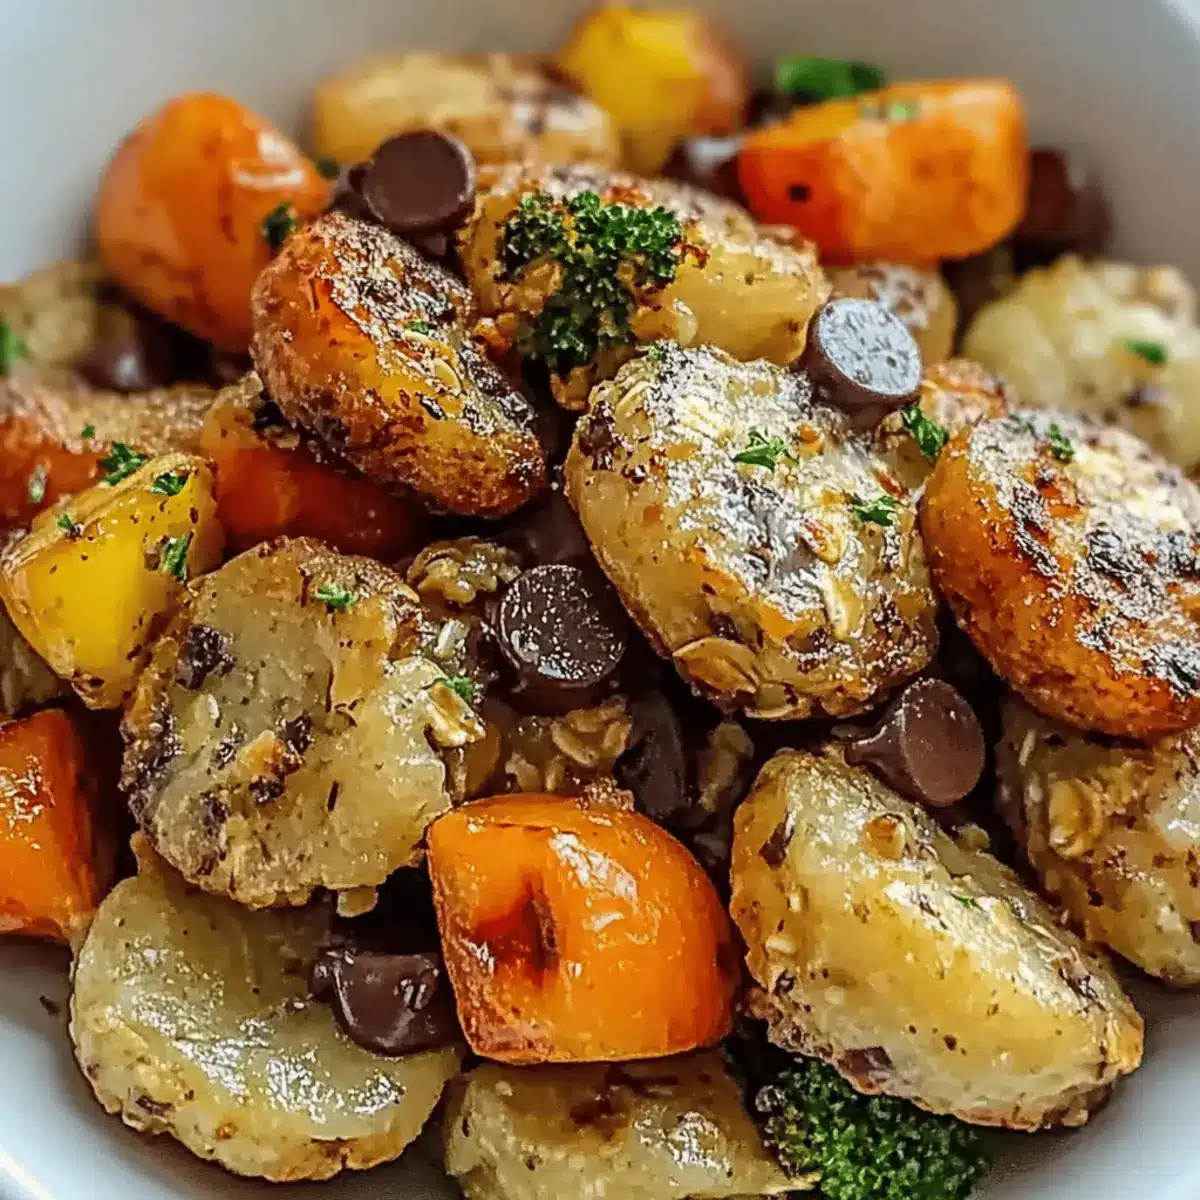
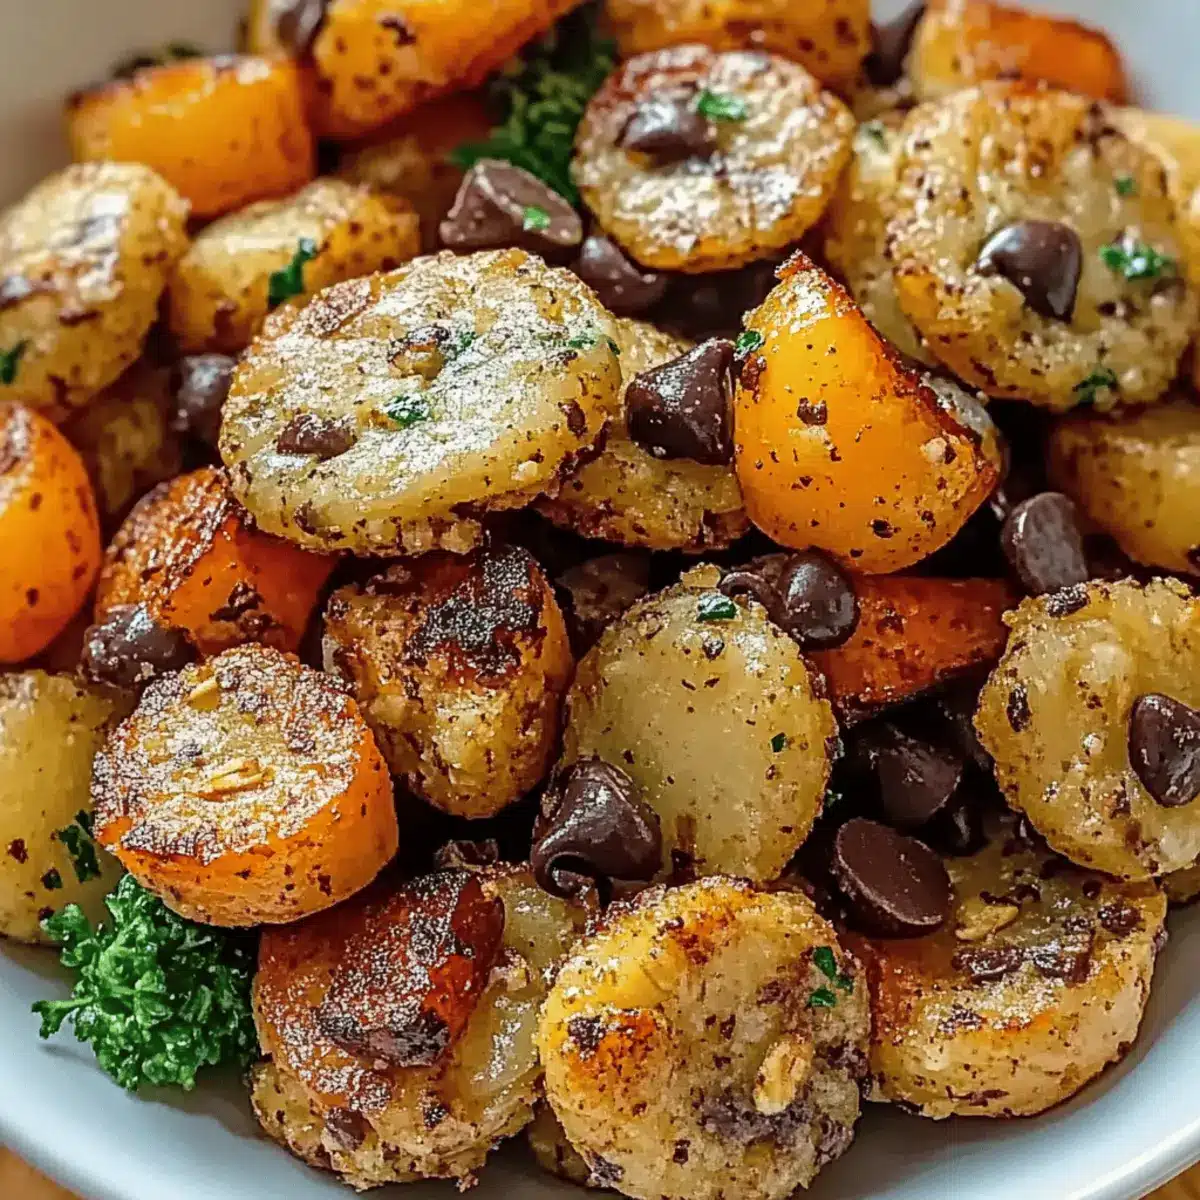
Crispy deliciousness is at your fingertips! These 4-ingredient crispy chocolate oat cookies are not only gluten-free but also incredibly easy to whip up, making them perfect for busy bakers. Quick to prepare, they go from mixing bowl to oven in just minutes. Rich chocolate flavor bursts through each bite, satisfying your sweet cravings. Versatile variations allow you to customize with different nut butters or add-ins like nuts or dried fruits. Serve them alongside a glass of milk or a dollop of yogurt for a complete snack! If you’re looking for more delicious ideas, don’t miss my recipe for Gooey Cheesy Garlic wraps or check out the savory Garlic Roasted Vegetables.
Crispy Chocolate Oat Cookies Ingredients
For the Cookies
• Oats – Use rolled oats for the best chewy texture that holds everything together.
• Peanut Butter – This rich and creamy ingredient acts as a binding agent; almond butter is a tasty nut-free substitute.
• Maple Syrup – Adds the perfect touch of natural sweetness; feel free to swap in honey if you prefer.
• Dark Chocolate Chips – They bring that rich sweetness and chocolatey goodness; you can use semi-sweet or dairy-free options for a different flavor.
For Variations
• Nut or Seed Butter – Feel free to experiment with any nut or seed butter to change up the taste!
• Dried Fruits or Nuts – Add a handful for an extra crunch and flavor boost in your cookies.
• Chocolate Chip Mix – A delightful mix of dark and white chocolate chips creates a fun flavor contrast.
With these simple yet versatile ingredients, you’re well on your way to creating your new favorite cookie! Enjoy the gluten-free goodness of crispy chocolate oat cookies while delighting your friends and family.
Step‑by‑Step Instructions for Garlic Herb Roasted Potatoes and Veggies
Step 1: Preheat the Oven
Begin by preheating your oven to 425°F (220°C). This high temperature will help achieve that perfect crispy texture on your Garlic Herb Roasted Potatoes and Veggies. While your oven warms up, prepare a large baking sheet by lining it with parchment paper for easy cleanup.
Step 2: Prepare the Vegetables
Rinse and chop your favorite vegetables, such as bell peppers, zucchini, and red onions, into bite-sized pieces. In a large mixing bowl, combine these veggies with cubed potatoes, ensuring they are roughly the same size for even roasting. The vibrant colors will fill your kitchen with excitement!
Step 3: Make the Herb Mixture
In a separate small bowl, whisk together olive oil, minced garlic, and your choice of fresh herbs like rosemary and thyme. Drizzle this delicious herb mixture over the chopped veggies and potatoes, ensuring everything is evenly coated. This step is key for flavor in your Garlic Herb Roasted Potatoes and Veggies.
Step 4: Season and Toss
Sprinkle salt and pepper over the mixture, then toss everything together using your hands or a spatula. Make sure each piece of vegetable and potato gets a good coating of the herb mixture and seasoning. This ensures every bite of your dish is bursting with flavor.
Step 5: Arrange on Baking Sheet
Spread the seasoned vegetables and potatoes in a single layer on the prepared baking sheet. Ensure there’s space between the pieces to promote even roasting and prevent steaming. You’ll want to see those lovely pieces glistening with olive oil, ready to get golden brown in the oven.
Step 6: Roast to Perfection
Place the baking sheet in the preheated oven and roast for 25–30 minutes. Halfway through, toss the veggies and potatoes to guarantee even cooking. Keep an eye on them; you’ll know they’re done when they have a rich golden hue and are fork-tender—cooked to perfection!
Step 7: Cool and Serve
Once your Garlic Herb Roasted Potatoes and Veggies are out of the oven, let them cool for a few minutes before serving. This short resting time allows the flavors to marry beautifully. Serve alongside your favorite protein or as a delightful main dish, and enjoy the burst of flavors!

Make Ahead Options
These 4-ingredient crispy chocolate oat cookies are ideal for meal prep, allowing you to enjoy homemade goodness with minimal effort! You can mix the cookie dough and refrigerate it for up to 24 hours. Just ensure the dough is tightly wrapped to prevent drying out. When ready to bake, scoop the dough onto a baking tray and pop them in the oven as per the original instructions. Alternatively, you can bake the cookies in advance and store them in an airtight container for up to 5 days at room temperature. For the best quality, freeze baked cookies for up to 3 months and thaw them overnight before serving—doing this guarantees they’re just as delicious and ready for snacking anytime!
Storage Tips for Crispy Chocolate Oat Cookies
Room Temperature: Store your cookies in an airtight container for up to 5 days to keep them fresh and delicious.
Fridge: If you prefer a firmer texture, you can refrigerate the cookies for up to 1 week in an airtight container.
Freezer: For longer storage, freeze your cookies for up to 3 months. Place them in a freezer-safe bag or container, layering parchment paper between them to prevent sticking.
Reheating: When ready to enjoy, reheat them in the oven at 350°F (175°C) for about 5 minutes to restore their crispiness. Perfect alongside a warm cup of tea or coffee!
Helpful Tricks for Crispy Chocolate Oat Cookies
• Oat Quality Matters: Use rolled oats for the best texture; quick oats may turn mushy and affect the crispiness.
• Peanut Butter Consistency: Ensure your peanut butter is creamy and well-mixed to prevent dry cookies; natural brands work best.
• Avoid Over-Baking: Watch closely during the last few minutes; cookies firm up as they cool, so under-bake slightly for a chewy finish.
• Cookie Size Consistency: Use a cookie scoop for even sizes; this helps them bake uniformly and ensures everyone gets the perfect bite!
• Chill Before Baking: Chilling the dough for 30 minutes can enhance flavor and texture, creating a delightful crispness in your cookies.
Enjoy your baking journey with these expert tips for making the best crispy chocolate oat cookies!
What to Serve with Crispy Chocolate Oat Cookies?
There’s nothing like the comforting combination of flavors and textures to create a delightful treat experience.
- Milk Shake: A creamy chocolate or vanilla milkshake perfectly balances the cookies’ crunch and sweetness, making for a nostalgic snack.
- Fresh Berries: The tartness of fresh berries like raspberries or strawberries cuts through the richness, providing a light contrast with every bite.
- Yogurt Parfait: Layer up with yogurt, granola, and fruit for a refreshing, crunchy dessert that pairs beautifully with the cookies. The creaminess of the yogurt enhances their texture.
- Ice Cream Sundae: Top vanilla ice cream with crumbled cookies and a drizzle of chocolate sauce for a decadent treat that will have everyone reaching for more.
- Peanut Butter Dip: A velvety peanut butter dip brings extra richness to the table, inviting scoops of cookie goodness into a creamy embrace.
- Decaf Coffee: A warm cup of decaf coffee complements the sweetness of the cookies, adding a comforting touch to your snack time.
- Chocolate-Dipped Banana Bites: The chocolatey burst of banana bites adds a playful element, creating a delightful harmony with your crispy cookies.
- Dark Chocolate-Covered Almonds: The crunchiness and deep flavor of these almonds mirror the cookies, making them a satisfying option.
Variations & Substitutions for Crispy Chocolate Oat Cookies
Feel free to unleash your creativity and customize these delightful cookies to suit your taste buds!
- Nut-Free Delight: Substitute peanut butter with sunflower seed butter for a deliciously nut-free version.
- Sweet Swap: Replace maple syrup with honey or agave syrup if you prefer a different natural sweetness.
- Chocolate Mix: Use a combination of dark and white chocolate chips for a delightful twist in flavor and color.
- Add Some Crunch: Toss in chopped nuts or seeds, like walnuts or pumpkin seeds, for an added crunchy texture.
- Dried Fruits Galore: Mix in raisins or dried cranberries for a burst of fruity flavor and extra chewiness.
- Spiced Up: Add a pinch of cinnamon or nutmeg to the mix for a warm, cozy autumn flavor profile.
- Flavorful Infusion: Swirl in a bit of vanilla extract for an extra layer of sweetness that enhances the overall taste.
Experimenting with these variations is part of the fun! Want to keep the flavors flowing? Pair your cookies with a glass of milk and, if you’re feeling adventurous, check out my Cheesy Cajun Garlic for a delightful dinner idea afterward!

Crispy Chocolate Oat Cookies Recipe FAQs
What type of oats should I use for the cookies?
Absolutely! For the best chewy texture and structural integrity, I recommend using rolled oats. They provide the perfect balance of crunch and softness. Quick oats can get mushy and might affect the overall crispiness of your cookies.
How should I store my cookies?
I often keep my cookies in an airtight container at room temperature for up to 5 days. If you enjoy a firmer texture, refrigerating them can extend their freshness to about a week. Don’t forget, for longer storage, you can freeze them for up to 3 months! Just layer parchment paper between cookies in a freezer-safe bag or container to keep them from sticking together.
Can I freeze these cookies? If so, how?
Yes, you can definitely freeze these delicious treats! After baking and cooling, place your cookies in a single layer in a freezer-safe bag or airtight container. Be sure to layer parchment paper if you’re stacking them to avoid sticking. They can be stored this way for up to 3 months. For a quick treat, just pop them in the oven at 350°F (175°C) for about 5 minutes when you’re ready to enjoy!
What if my cookies are too crumbly?
If your cookies turn out crumbly, it’s likely due to too much dry ingredient or not enough binding. To fix this, you can add a touch more peanut butter or maple syrup, mixing until the dough comes together. Make sure your peanut butter is creamy and well-mixed, as this plays a crucial role in binding your cookies properly.
Are these cookies suitable for those with nut allergies?
Yes! If you’re cooking for someone with nut allergies, you can easily substitute the peanut butter with sunflower seed butter or another nut-free alternative. Just ensure that all your other ingredients are also free from cross-contamination!
Can I customize these cookies with other ingredients?
The more the merrier! Feel free to add in your favorite mix-ins like dried fruits, nuts, or even different types of chocolate chips. If you’re feeling adventurous, try mixing in some spices like cinnamon or a pinch of sea salt on top before baking for a unique flavor twist!
Delicious Garlic Herb Roasted Potatoes and Veggies Bliss
Ingredients
Equipment
Method
- Preheat your oven to 425°F (220°C) and prepare a baking sheet lined with parchment paper.
- Rinse and chop the bell peppers, zucchini, and red onions into bite-sized pieces. In a large bowl, combine the veggies with cubed potatoes.
- In a separate small bowl, whisk together olive oil, minced garlic, and fresh herbs. Drizzle over the veggie and potato mix.
- Sprinkle salt and pepper, then toss everything to ensure even coating.
- Spread the mixture in a single layer on the baking sheet, ensuring there is space between pieces.
- Roast in the oven for 25–30 minutes, tossing midway for even cooking until golden brown and fork-tender.
- Let cool for a few minutes before serving alongside your favorite protein or as a main dish.
Leave a Reply